
To see if this custom-fit item will work for you please tell us what vehicle you'll use it with.
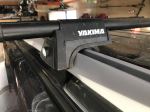
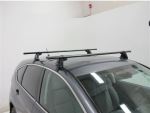
These multipurpose, galvanized steel crossbars supply the backbone for your aftermarket roof rack system. Works with accessories that clamp around the bars. Pair with Yakima towers, fit kit, and RoundBar SL Adapter to create a complete roof rack.
Features:
Yakima RoundBars - 48" Long - Black - Qty 2:Videos are provided as a guide only. Refer to manufacturer installation instructions and specs for complete information.
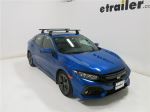
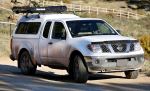
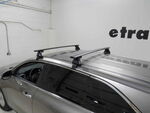
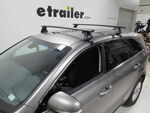
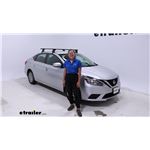
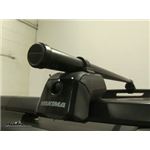
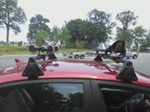
Hey everyone, it's Evangeline here at etrailer and today we have a Yakima roof rack system that we are going to take a look at on our 2019 Nissan Sentra. If you're planning on carrying around some fun accessories like a rooftop box or a basket or maybe some kayaks, what you first need is a roof rack system, and for your Nissan Sentra, yes, there are options for you. Now, this Yakima system is unique in that it does have a little bit more of an involved process. It does take longer to install, but the results are that it gives you more crossbar spread, meaning more space or more surface area for your cargo. If you're carrying around kayaks, ladders, even a Christmas tree, that extra long cargo would appreciate this wider crossbar spread. That crossbar spread is measured from the center of one crossbar to the other.
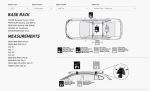
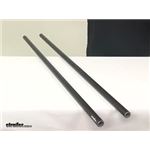
In our case here, it's going to be 31 1/2 inches. When you have a naked roof like this, meaning there's no roof rails, then you are fixed to the point where your brand tells you to put your towers. So here we have towers and crossbars that compensate for the curve of your roof and that allows you to put it further apart. You still have that stable surface, but you have more distance. I have the 50-inch long core bars here because that's the recommended length for your Nissan Sentra.
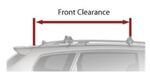
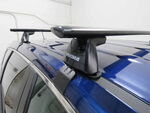
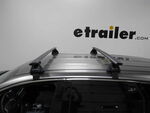
You have a slightly different length for the front and the back. So with the overhang, there's one inch for the front. For the back, you have 2 1/2 inches from the tower to right before the endcap. More overhang means more space for your cargo. If you need to carry a kayak here, you usually want it closer to the end, but in the case of the Nissan Sentra, since it's a lower sedan, you don't really need the overhang as much because it's easier to reach your crossbars.
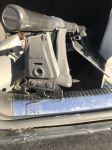
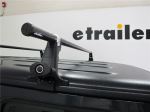
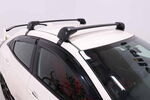
Plus, too much overhang means you're hitting your head against those bars getting into the car. So this actually is a really good fit. Another important measurement is roof clearance. There's actually two measurements here. One is gonna be the distance from the bottom of the crossbar to the top of the roof.
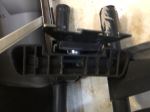
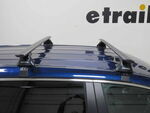
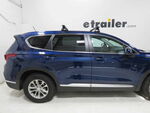
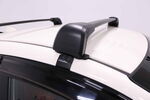
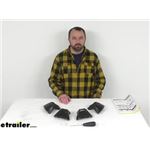
Here at the center where it's the closest, I have it at 2 1/4 inches. That's pretty low profile, but still a good amount of space for clamps that go around your crossbars. If you have things that have U-bolts and wingnuts, though, just double check those to make sure they'll fit. Another measurement is, how high does this sit up above your roof So here it's about 3 1/4 inches. So that's gonna be where your cargo sits. If you're carrying around skis with extra tall bindings, you need to make sure that it has clearance on your roof so it doesn't scratch it up, and if it does not have enough clearance, that's when you start taking a look at accessories that give you more height. Holding the system up, you do have these baseline towers. I do enjoy how you just pinch on the edge or the ends of these towers and then you can flip them backwards and off and now you have access to your mounting system. It is a little bit involved. We'll talk about the install process a bit later in this video. Notice that there is a hole on this tower for your keys. Those are not included, but if you wanna purchase them separately, you can get a multi-pack. So a roof rack requires mainly three parts. You need your crossbars. In our case, we have the Yakima core bar, which is 50 inches long. It's arrow-shaped, but it does not have a T-track system. Some people like it, some people don't. It's up to you. You also have your baseline towers and you have your custom fit kit. In our case here, that's four parts, a different fit kit for the front and the back. That's why it's very important to use our fit guide here at etrailer. Put your year, make, model, and then get the correct fit for your Sentra. If you are interested in T-track accessories where you can mount your accessory only on the very top of the crossbar, you can fully utilize the bar even to the edge, then I do recommend taking a look at the Yakima JetStream crossbars that are 50 inches long. For the core bars, some people think it's easier to install and less rubber strips to think about or wear down. So while both of them are great for aerodynamics, when it comes to functionality, it's more of are you using T-track accessories or not Installing this crossbar can be a little bit confusing because there's different adjustment points. You can pivot those bars actually up and down, which allows us to have a longer crossbar spread. In our case here, though, even though we pivoted them, there's still a little bit of an angle. So it is up to you if this is flat enough of a surface. So I'm going to guide you through that process. Once you understand it, though, it's pretty easy to take on and off. Let's go. You're gonna have a bunch of different boxes. You have hooks that have different numbers, pads with different numbers, tower pieces, crossbar pieces. So where we are going to start is with the crossbar. I already installed the rear crossbar on the vehicle, so we're going to install the front crossbar together. The crossbar is going to have this collar. This collar is going to go onto this tower. To access the tower, you have some doors. So when you flip it over, there's this door which is for the hooks, that will be for later, and then there's this door, which you pull out until it clicks, and that way it gives you an opening underneath to tighten down. When you feed the collar through the crossbar, of course the end cap has to be off, you can then just put this on wherever and get your tower and just line it up over that collar. If you followed all the instructions for opening the door, you'll then have access to that bolt underneath where you can start lightly threading onto that collar. You need to make sure it's in the right spot as well as has the right hitch. So the key thing here is to find the arrow on your crossbar. That will help you figure out how far out the towers need to go. Make sure that arrow is facing away from you. So you've found the arrow and you're going to take your tape measure. You're going to measure for distance apart for the towers. Since these are core bars, you are gonna have to have the measurement. So our measurement here is M1 for front crossbar, 39 inches. Half of 39 is 19 1/2 inches. So we're gonna put that where the arrow is and then figure out where to slide that tower. You're going to line up the front edge of your crossbar with your measurement. So for 39, sits there. By tilting the tower back and forth, you can adjust the pitch. Remember, the arrow is facing away from you. We're setting it to letter A, which is the notch furthest away from you too. Once you've held your tower in that position, you're then going to tighten down with your included tool. Every time you tighten something down with your included tool, there's actually a torque setting. So you're going to keep tightening down until your tool clicks and that will prevent you from overtightening all of those different bolts. So we're almost there. (tower clicks) Right there. That's the click. (tower clicks) Your fit kit includes the plates and the pads. So that's gonna fit onto your tower. Make sure it clicks into place and also make sure that the arrow on the pad is facing out. Now, holding that pad, you can then adjust for the toe of your tower. You can go from one, two, three. We are going to go to one, which is furthest away from you with the arrow facing away. Tighten that bolt down as well. Double check the bolt for the pitch. Everything is torqued down. Do that exact same process on the other side. You have your crossbars all set up, but where do you put them on your roof Well, you do have a measurement that Yakima provides and that's going to be the distance from your front windshield to the front or the leading edge of the crossbar. In our case, it's going to be eight inches. Some people like to put a sticker there so that marks your spot. Double check that those rubber pads are on the bottom of your towers and then gently place your crossbar onto your roof. Line it up with the eight-inch measurement you took earlier. Do that for both sides. We're then going to insert the clip. So these are the 84s and that's gonna be for your front clip. Notice how this is set up, where the hook is underneath. That way when you push the clip in from underneath, it automatically catches onto the hook and now it sits by itself. So what we're gonna do is we're going to get our tool and we're going to tighten down two bolts. The first bolt is up here, which is our sway bolt. It adjusts our up and down movement. That gets tightened down a good amount. And then we go down to our bottom bolt, which adjusts the tension. So we're going to do it about halfway. And I say 50% because you want to evenly tighten down these towers. So halfway there, go about 75% here, continue over there, just go back and forth so you're not pulling the whole system one way to the other. And that applies for both of those bolts. So just like the others, continue to tighten down until your torque tool clicks. Do that for both towers and both bolts. When that's done, you can close the door on that. With all four towers installed, just double check, make sure that everything is secure. If you purchased the Yakima same key system lock cores, now's the time to switch out your covers on your towers for those. If you don't have those keys, it's perfectly fine. Definitely still usable. We're gonna put those covers onto the towers. They just fit in from the bottom, click in on top, and they're all nice and secure. And once all of those are installed, then that's it for the install. You're now ready to load up your roof rack and hit the road. So personally, it really depends on what are you carrying around If you want that extra crossbar spread for longer kayaks, for boats, for ladders, then this is gonna be good for you. While it does look like it's not completely level, which it isn't, once you do have that longer cargo on there, you won't notice the difference. But mainly, it's more about: Do you want T-track mounted accessories Do you need longer bars Are you okay with this length here where it's a good balance of not hitting your head, but also still easily accessible because your Sentra is lower to the ground The other options I mentioned were either 60-inch long bars. There's also the Yakima JetStream bars. If you want a roof rack that's honestly easier to install and uninstall, you may want to consider the Rhino-Rack offering for the Nissan Sentra. All that matters, though, is knowing what you're carrying around and how you wanna carry it. That right there was a look at our Yakima roof rack system with the 50-inch long core bars, the baseline towers, as well as the custom fit kit for your 2019 Nissan Sentra.
Average Customer Rating: 4.8 out of 5 stars (303 Customer Reviews)
These multipurpose, galvanized steel crossbars supply the backbone for your aftermarket roof rack system. Works with accessories that clamp around the bars. Pair with Yakima towers, fit kit, and RoundBar SL Adapter to create a complete roof rack.Kimberly has shown that great customer service is not dead! etrailer and Kimberly are great to work with and have earned my business and will always be the 1st and last place I look for my rack+ needs!
As for the application, I needed more space to fit my cargo box on top of my 4Runner TRD Pro’s rack. I came up this this… Thank you!

Everything from etrailer is timely and of good quality! The Yakima crossbars are no exception - they are indestructible.
Works perfectly. I am always impressed that Yakima continues to make parts for the "old roundbars" since they have since moved on to the superior JetStream bars.
Love my Yakima roof rack!! It exceeds my expectations.great product. Also thank etrailer for the tec support! great staff always there to help thanks again!!
Excellent selection of rack parts. Very useful installation videos help when choosing between products. Easy ordering process. Quick delivery.
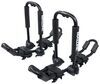
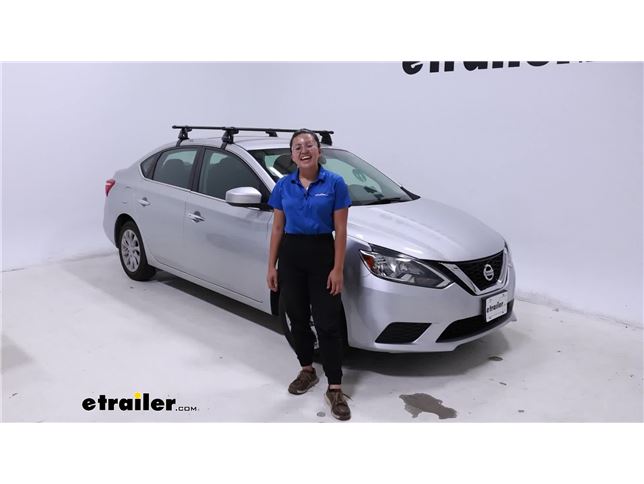
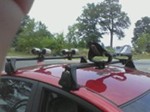
I ordered the Yakima roof rack, with the Hullyrollers for the back crossbar and the Mako saddles for the front crossbar to use with my kayak. It arrived just like they told me and I put them on my car the eveningit arrived. Got to finlly use the roof rack on June 22 to go out kayaking and it worked great. Only thing is I did not know about the air reflector piece for the front crossbar. Now I will be ordering it to help with the wind noise.
Great rack, go on fast, easy to install and work well on my VW TDI wagon. Care has to be given and follow the instructions for the install to what type of rails you have. Works great carrying the VW luggage carrier and plan on using it to carry kayaks as well. Just have not decided what kayak rack type to get yet.
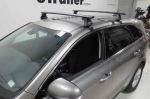
I've attachec a few pictures of the Yakima rack on my Audi Q7. It took a few attempts to find the right combination of attachments, but in the end, the pin attachments work best with the access points on the factory flush-mount rails. Great product!!!!!
necessary for using the widest cross bar option (78"). East to install
roof racks showed up in great condition, and showed up as one package.... I should have ordered the J racks from here but I found them cheaper locally so Thule J racks compliment the whole setup and i am just about ready to hit the water :)
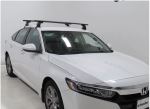
The installation of this rack system went very well, all of the instructions were easy to read and use. I have attached some pictures of our installation. The vehicle is a 1994 Honda Accord EX four door sedan
Roof Rack 2008 Saturn Astra The roof rack arrived one day early...The packaging was excellent and the quality of the product more than met my expectations. The instructions made the insulation very easy. It took less than 45 minutes to install the unit complete.
The rack has been so useful since I purchased it. Staff at etrailer.com were exceptionally helpful in getting the best option for my car and answering questions. I recommend this company, for its 110% customer service, excellent prices and timely delivery.
Really easy to install & work as specified. So happy with the customer support/service at etrailer.
Great products though, again, written instructions would have been nice.
One quick phone call and Gwendolyn figured out exactly what I needed for our new car to use my old Yakima rack.
Great product and very easy to install! I called in to put my order in due to not trusting myself in getting one that fits my car. Jessica W. Was beyond professional and helpful in the process. She went also well above her position and tracked my order and sent additional information. Couldn’t be happier with the product and customer service!
etrailer's selection process, delivery ann installation help both online and on the phone was excellent
Everything arrived as promised and earlier than expected just installed. Looks like it will do everything I need it to which is haul around paddleboards. So far so good!
Great fit, holds tight to roof.
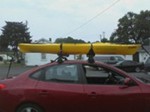
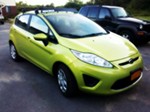
We got a Yakima Roof Rack system with locks and fairing for a "lime squeeze metallic" (Green...) 2011 Ford Fiesta 5dr Hatchback. Received the package yesterday and set it up within about an hour.
Ackage came 2 days early the install was somewhat easy (did it by myself)
Did not get to mount anything to it but seems really sturdy. One thing I can say is mark out your mounting points with provided stickers then put up and make adjustments to the roof rack.
I have been using Yakima racks for around 40 years and have never had any problems. However, I am amazed at the price increases over the years. Etrailer prices were by far lower than most. Overall, a very excellent purchase.
Have been rocking my Yakima rack from etrailer.com for a year now. I am using rack in conjunction with a Tepui tent. Once I added the air deflector, I would say it's the perfect setup. The Yakima gives more clearance over the factory rack, so I was able to get my hands under it to secure the tent hardware. If you're thinking of upgrading your factory rack, I would not hesitate to use etrailer.com
Kit worked perfectly on my 2021 Subaru Forester. The whole install took 30 minutes. Never been disappointed with etrailer.


Do you have a question about this Roof Rack?
Info for this part was:
At etrailer.com we provide the best information available about the products we sell. We take the quality of our information seriously so that you can get the right part the first time. Let us know if anything is missing or if you have any questions.


Thank you! Your comment has been submitted successfully. You should be able to view your question/comment here within a few days.
Error submitting comment. Please try again momentarily.