
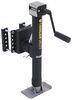
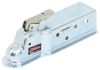
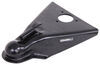
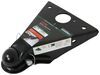
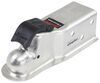
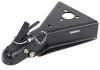
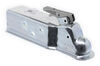
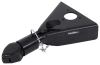
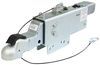
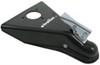
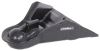
Repair the metal eZ-Latch on your Demco 10,000-lb trailer coupler for 2" balls (DM12563, DM12717, or DM12925).
Features:
California residents: click here
Videos are provided as a guide only. Refer to manufacturer installation instructions and specs for complete information.
Hi everyone, Aidan here with etrailer. Today we're gonna be taking a look at and showing you how to replace the latch assembly on your Demco Metal eZ-Latch couplers for two inch balls. These are gonna have a variety of different fits for different couplers and they make different ones for the two and five sixteenths inch ball and they make different ones for the composite lever. So be sure to check the page and see the compatible part numbers and find the right one that's gonna work for you. But if you've got one that matches up with this latch then we're gonna show you how to replace it. So your kit's gonna come with everything you need to get the latch replaced.
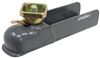
All you need to provide is the half inch socket. And to do this, we're gonna show the whole removal process on the coupler as well as the reinstallation. If yours is completely broken then yours might already be gone so you don't need this part. But we're gonna start by just removing the nut on the underside of that latch with the half inch socket. And once that is off we get that to pop out the latch assembly.
We'll pull out from the top and there's a spring inside that will push the block and this black plastic piece out. And then of course the spring and you can kind of see how this longer threaded pin and the latch are joined together right here using this smaller pin right here. And that fits in just with a friction fit. So when you get the new pieces from your kit you'll need to get them lined up and drive this piece in with something like a hammer. Once it's in, it's probably not coming out at least not easily.
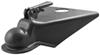
And since we're not permanently replacing this today we're just showing you the process. I'm gonna set this to the side and work with the assembled one and to make everything a little easier to see I've laid out the pieces in the approximate order that they're going to attach. The latch will slide through the top of your coupler and have the spring compressed over it. This black plastic piece is going to be used for either the two inch coupler or the two and five sixteenths inch coupler, for us using the two inch coupler. It'll slide through here with that spring in place.
I'm just removing it to make it a little easier to show you. And you want this with the lip facing the top and then the large metal block that will wrap around the ball. That's going to go in with the curve part facing in and the large opening towards the bottom for our nut to fit in place and tighten down. Let's get go ahead and take this to the coupler and get this assembled. We'll start by sliding the latch through the hole at the top and rotating this around where we're gonna have this threads poking through. Our spring will slide around. Then we can take the black plastic piece, making sure to align it with the proper hole for the two inch coupler size. This part is where things might get a little tricky trying to compress that spring. Just do your best to get it to stay in place. Push it through. So this part's probably the trickiest getting that spring to compress while still being loose. But if you can press down on that black plastic piece with your thumb and get this threaded portion to poke through the metal block, everything else can push into place rest of the way fairly easily. We just need enough of that to pop back up through and make sure that we can attach the nut. And after some trial and error, I actually removed the latch because it seemed like it was getting in the way. So we've got the spring back there with the black plastic piece in the large block. Compress it in and get this to push down about level right there. Hold it in place with your pointer finger and get this threaded piece to pass through. And on the other side, there it is. We've got it popping out where it should be. All I've gotta do now is add the nut and tighten it down with the half inch socket. And as we tighten this down, we'll reach a point where it's snug and we can test for our final fit. And the latch opens. We feel a good amount of tension like that spring is working properly it secures back down, and on the inside there we can see that block opening and closing. And that's all there really is to it. The process overall is pretty straightforward. Really it's just getting that spring in place because just doing it by hand there's not really a great trick to it. You just kind of have to work with it until you feel it slot in. And then making sure that you get the right replacement kit for the right coupler. Again, you can check the list of compatible part numbers and you can find the right one for you here at etrailer.com. But this has been our look at and replacement of the easy latch for your metal latches on your Demco couplers with two inch balls. Thanks for watching.
Average Customer Rating: 5.0 out of 5 stars (2 Customer Reviews)
Repair the metal eZ-Latch on your Demco 10,000-lb trailer coupler for 2" balls (DM12563, DM12717, or DM12925).Great communication. They offered a replacement part that could have been sent earlier as well as communicating on thenprogress of my order.
Info for this part was:
At etrailer.com we provide the best information available about the products we sell. We take the quality of our information seriously so that you can get the right part the first time. Let us know if anything is missing or if you have any questions.


Thank you! Your comment has been submitted successfully. You should be able to view your question/comment here within a few days.
Error submitting comment. Please try again momentarily.