
Summer Starts Here - Save up to 70%
To see if this custom-fit item will work for you please tell us what vehicle you'll use it with.
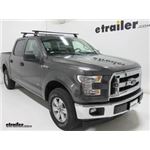
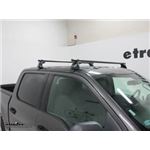
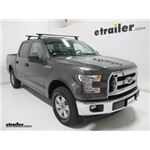
These multipurpose, galvanized steel crossbars supply the backbone for your aftermarket roof rack system. Works with accessories that clamp around the bars. Pair with Yakima towers, fit kit, and RoundBar SL Adapter to create a complete roof rack.
Features:
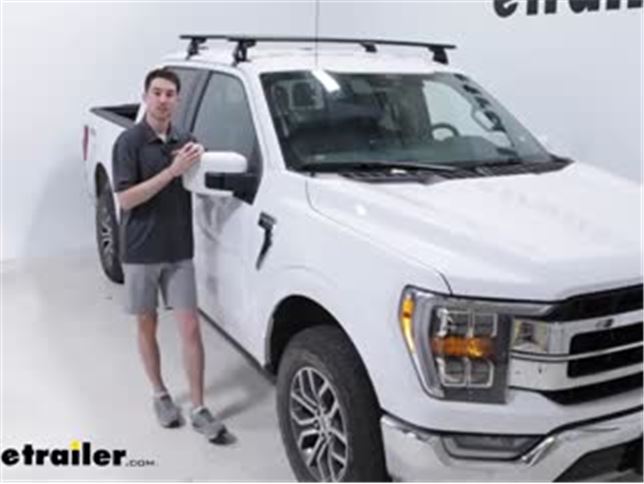
Yakima 58" RoundBar MD:Videos are provided as a guide only. Refer to manufacturer installation instructions and specs for complete information.
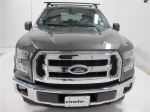
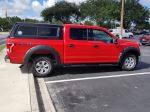
How's it going everyone Today we are going to be taking a look at the Yakima JetStream roof rack system, installing it and explaining how it works on our 2021 Ford F-150. So, with the F-150 we have a good amount of bed storage, but if you want to get some longer or larger items, like say a kayak, or maybe you want to use this in conjunction with like a ladder rack system to get some longer loads up on top of your roof, this is gonna be a great option to do so. So, let's take a closer look at how it works. As far as the weight capacity goes of our roof rack system, it is really robust, but you want to keep a couple things in mind, that being the fact that the system itself has a weight, the accessories that you're gonna put on 'em. Also we're going to add to that, and your roof is going to be rated for a specific weight as well. Make sure you check the owner's manual in your case, find out what that weight rating is and make sure that all of the components, including the roof rack and the accessories don't exceed that limit.
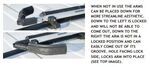
They get the name JetStream because of this aerodynamic shape on our cross bars here. So you can see we do have this rounded portion in the front, and then it tapers towards the back. That is gonna help cut down on some of the wind noise and drag you get from putting something up on your roof, but you're still gonna hear it. This weather strip on the top is gonna help cut down on some of that as well. And this channel is also gonna be able to be used for your T Track accessories if your rooftop accessories do have that as an option, and the rubber strip will help keep them in place.
Underneath you will typically have another rubber strip that'll cut down on some of the wind noise. In our case, this is just for demonstration and we don't actually want to have to trim that up, according to where we're putting our towers every time. So, we don't have it on, but in your case you would. And again, that would help cut down on some of that sound and noise while you're driving. The system we're using today uses 60" cross bars, which I think is a really nice size for our F-150.
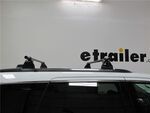
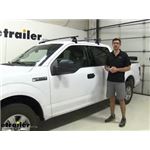
The overhang is enough that we could maybe get a clamp-on accessory around here if we wanna have easier access to one side, especially considering it is a pretty tall vehicle. but it's not so much that I'm gonna be worried about hitting my head or extending past the overall width of the vehicle. If we want to, I'll measure now just to figure out how much height we're adding total. So, from the middle here to the total height of the system, it's going to be coming in just under 4", that's how much height you're gonna be adding. So, if you have accessories, add that overall height to your cross bars to find out if there might be some clearance issues wherever you're going, or that number is just something you wanna keep in mind as far as, "Can I store these in my garage" Another measurement to get is how much space we have underneath, so that's gonna be about 2 3/4, that's how much room you're gonna have for your clamp-on accessories.
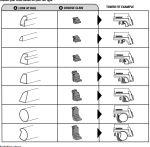
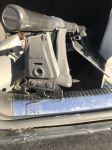
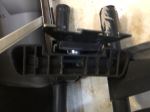
If you want to use those, you have tons of room for them to make clearance before they're gonna hit the top of your roof. Or if you have something like skis or snowboard bindings that you're worried about making contact there. Taking a look at our end caps, we have a nice glossy finish. Right here is where you would upgrade to metal lock cores if you chose to do so, which I would definitely recommend. And if I just pinch the top, I can pull this off and get this out of the way so we can see what this is protecting. It's going to be our fit kit hardware. All that we would need to do to get this on or off is store it in here. So, that's the job of the end cap is to protect that, keep that in place, and we'll take a closer look at all of that in the install portion. Talking about the fit overall of the bases. You can see how the extension on the pads here fit right into the ridges of our F-150. So as long as you take the time to get those measurements right, which we'll explain a lot in the install portion, it's gonna be a really nice solid fit. Something that's also unique to the JetStream system is how adjustable it is. It's got adjustable pitch and toe settings, so if you have different roof shapes, you can accommodate your cross bars to fit that really well, and it can definitely be a little bit daunting and a little bit tricky, especially when you see all those measurements. But we'll walk you through that process right now. First thing we like to do is just to lay everything out so that we know what and where it is. So, we have our cross bars set up here. We have the bases for the towers, we have our end caps here and here, the towers themselves. We have our fit kits for our faces, and we have the tool that we need to tighten everything down. But our first step is going to be preparing our towers. To get our towers on, first thing we'll need to do is get our end caps off. So I just like to use the tool they provide to get that initial tab loosened up, pop that off, and now we'll see on our towers, we have this metal plate here at the top. All we need to do is line that up and slide that into the channel underneath. And we'll do this on the other side as well. When getting your towers on there's a chance they might be too tight. If that is the case, release this security door here, that'll expose this bolt in the back and we can loosen that up with the tool if we need to, to help it slide up and down our towers. And now we're gonna find our M3 measurement, since this is gonna be our rear cross bars, and for that the number that we get is 47 3/4. So we can look at this ruler right here on the cross bar, find that number 47 and about 3/4 right there. Then we'll find that on the other side, and then we can go ahead and tighten this bolt down. In addition to this bolt tightening up our towers, this is also the pitch setting. So in the case of the rear crossbar, it's going to be B, which is going to be the one in the middle, so we're good to go. This front bolt is going to be the toe setting. In the case of our rear cross bars, that is going to be B as well, which is the middle. But it's important to know the orientation of your bars. So we drew a little arrow in the middle of ours. We want to know that the back is going to be C, towards the front is going to be A, same. The back is going to be three, towards the front is going to be one. So B and two are in the middle like we have them here. Now it's time to put our bases onto our towers. So we see this arrow pointing outward, we wanna make sure that lines up, if they're not already put together, it's just a matter of fitting this rubber piece onto this plastic piece and making sure that that's securely in place. Again, arrow out, fits right there onto our tower. Just snap it down in place and we'll repeat that process on the other side. With our pads and our towers both in place and in the right position, we're going to get our bar up on top of our roof. We wanna make sure that we have the rounded side towards the front and the taper towards the end. And we're just going to guide it slowly, using those pads to take a lot of that weight for us, get it roughly into place, but its measurement is going to depend on where the front crossbar ends up, so let's move on to setting that one up. Up until this point on our front cross bars, the whole process has been the same. We put the pads on our towers, put the towers into this channel underneath our cross bars and we even have the same measurement, as far as the strip goes underneath. So, the first difference that we're going to run into is our pitch setting. In this case, we want the pitch setting to be A, which is going to be the direction closest towards me. So I need to push this down, or maybe loosen this up just a little bit so that we can get that over there. Now you see we're at there, but I actually slid mine a little bit down this track so I wanna make sure I find that 47 3/4 mark again before I tighten everything down. So right there is good. We're at A here on a pitch setting, so we're gonna take the provided tool and tighten everything down until it clicks, just like we did on the other steps. As you can see here, on our toe setting, we have shifted forward. We actually want that to be two, which is the one in the middle. So I'm gonna loosen that up just a little bit and I like to use the tool just to push that down. So just like that. Now our toe setting is back in two, and our pitch setting is in A, and we're going to repeat this process for the other side. Keeping in mind if you don't have access to that bolt, all you need to do is open the security door with our bases, our towers in place and the measurements and pitch and toe settings correct. We're going to get our front crossbar on and roughly in place, same process as the back, making sure that we have that rounded part facing forward and the taper towards the end. And now we'll get our first real measurement. This first measurement is going to be from the corner of this painted roof here right until the leading edge of our cross bars. So I'm going to look for the number, in our case, of 8". So I'll set that up. Again, we're just using the fabric tape measure. You can use the one provided. We're using our own, so we need to slide this up just a little bit and then I'll go to the other side and adjust it accordingly. After we get our front crossbar on and in place, and in the correct measurement on both sides, we'll get our M4 measurement. In this case, from leading edge of the rear crossbar to leading edge of our front crossbar. We want that to be 32". So I'm back to using the regular tape measure, and we need to move this back about an inch or so, maybe just a little bit forward. Right there looks pretty good at 32. And then we're going to get that same measurement on the other side. With both of our cross bars and towers in place, it's time to move on to our fit kit for our clamps. So we'll open up that security door first. We need to slide this clamp up underneath this bolt here. And now we have a couple of different settings that we can change. First is going to be up and down, and we just want to rotate this until we see that this is lined up to be flush on our roof. And now we will insert the tool into the bolt itself and start tightening that up. In this case, I'm only gonna go to about 50% on this side, and then I'm going to go back to the other side, get that to about 75% and then come back and finish them both, just so I don't pull too much one way or the other. I went back to the other side and now I'm back on the side that we started at to finish up. So I'm gonna tighten it down the rest of the way. Again, waiting until I hear that click sound so I know that it's torqued properly. I'll close the security door up and then we're gonna repeat this process for the rear cross bars, it's gonna be the exact same. The clamps are the same as the front, so you don't need to worry about which ones belong to which. With all our clamps in place we're going to put our end caps on, starting with the bottom, and then we'll click the top into place. And if you opted for the metal lock cores, now you would lock those up. In our case, I'm just going to put our end caps on for now. Once we have all our end caps on and locked up, if you've chosen to do so, I like to finish things out just by doing a shake test to make sure that everything is sturdy and secure. You can see I'm moving the whole vehicle and nothing is moving on here at all. So everything is in place, it's secure, and we're ready to hit the road. Overall, if you're looking for a really rugged, robust and adjustable roof rack system, the Yakima JetStream is going to be a really solid option. I do like that we have those adjustments able to be made to accommodate different roof shapes. In our case, it helped get that front crossbar tapered backwards to make a really flat surface, and I think that overall it matches the aesthetic of the F-150 really well. That being said, all those adjustments might not be for everybody. So if that's the case for you, you can check out the Rhino-Rack Vortex Arrow system. We have videos and a page explaining how that works on this vehicle as well. So feel free to check that out if you want to. A little bit easier to install but less adjustable. So it's kind of either way, whichever way you decide to go though, again, I do think the Yakima JetStream is a really nice option. This, again, was just a quick look at how it fits and how to install it on our 2021 Ford F-150.
Average Customer Rating: 4.7 out of 5 stars (293 Customer Reviews)
These multipurpose, galvanized steel crossbars supply the backbone for your aftermarket roof rack system. Works with accessories that clamp around the bars. Pair with Yakima towers, fit kit, and RoundBar SL Adapter to create a complete roof rack.Free delivery that showed up in 3 days!!! Can't beat it. The crossbars with the Control Towers and LandingPad 9 fit perfectly on my Honda Element. Had them installed in about 30 mins. Don't have my cargo box yet and wanted to test strength, so I had my 110lb wife standing on them with no issues (yes, the car was parked). Plan to take a long camping trip next week with a cargo box on top...wife will be in the vehicle:-)
Works perfectly. I am always impressed that Yakima continues to make parts for the "old roundbars" since they have since moved on to the superior JetStream bars.
Kimberly has shown that great customer service is not dead! etrailer and Kimberly are great to work with and have earned my business and will always be the 1st and last place I look for my rack+ needs!
As for the application, I needed more space to fit my cargo box on top of my 4Runner TRD Pro’s rack. I came up this this… Thank you!
A great company to do business with, and lots of merchandise in stock. I orderd a roof rack for my truck on Tuesday morning and it was on the porch when I returned from work on Thursday. I will deffinitely order more from etrailer.com
Excellent selection of rack parts. Very useful installation videos help when choosing between products. Easy ordering process. Quick delivery.
Really easy to install & work as specified. So happy with the customer support/service at etrailer.
One quick phone call and Gwendolyn figured out exactly what I needed for our new car to use my old Yakima rack.
necessary for using the widest cross bar option (78"). East to install

Love my Yakima roof rack!! It exceeds my expectations.great product. Also thank etrailer for the tec support! great staff always there to help thanks again!!
Ackage came 2 days early the install was somewhat easy (did it by myself)
Did not get to mount anything to it but seems really sturdy. One thing I can say is mark out your mounting points with provided stickers then put up and make adjustments to the roof rack.
Great first experience dealing with you guys! Shipped fast, and was a faster install. You gave me the right parts and it went together in a flash.
Will definitely be doing business with you all again.
I have been using Yakima racks for around 40 years and have never had any problems. However, I am amazed at the price increases over the years. Etrailer prices were by far lower than most. Overall, a very excellent purchase.
The rack has been so useful since I purchased it. Staff at etrailer.com were exceptionally helpful in getting the best option for my car and answering questions. I recommend this company, for its 110% customer service, excellent prices and timely delivery.
Haven’t used them yet but they should work as expected
So far so good. Purchased these towers to use on a 2022 GMC Canyon with HD bars that I already had, primarily to carry my canoe. Yakima's fitting instructions worked perfectly and the whole system seems really solid.
The Yakima products are doing great. Just got home yesterday from a 18 day trip using them in Michigan's upper peninsula. Love them. Great products. Thanks again.
Kit worked perfectly on my 2021 Subaru Forester. The whole install took 30 minutes. Never been disappointed with etrailer.
Great service - great price
Great service - great price
Yakima Crossbars were as you would expect - steel bars coated in a soft black coating (be mindful when you are utilizing these with the top mounts as the clamp will eat through the soft coating when you tighten them down). I had issues with my yakima round bar setup as the brackets and tower system were allowing water to leak in. This is in no way reflective of what youll experience but Yakima has superb support. I spoke with them twice on my issue and out of their kindness they shipped me an entire setup to replace my existing one for free.
Product works as advertised thus far. When you buy the yakima towers, you are required to purchase these as well to fit the rounder bars (I feel sure there are other adapters for other bar shapes). These should have come with the towers in my opinion, and I resented having to shell out more $$ to purchase these "must have" adapters to mount my bars. 3 star overall rating based on function, price. Delivery and packaging was top-notch through etrailer.
I ordered a Yakima Roof Rack for my Toyota Prius from eTrailer.com. Part of the reason for purchasing from eTrailer.com was the promise that the racks were made specifically for the car and would not dent the roof.
I received the rack on July 31, and installed the racks on my Prius according to instructions included with the racks. Our tandem kayak is 65 lbs . The towers were placed on the outer most part of the roof as indicated by the instructions. Yakima saddles were attached to the crossbars to hold the kayak. Nothing was close or touching the top of the roof. We transported the kayak to a nearby lake, 6 miles, and back. The next day we removed the racks from the roof and noticed 4 dents on the top of the roof. It was obvious that transporting the kayak on the rack caused the dents.
We had to pay $100 to have the dents removed from the Prius roof.
I cannot continue to use this rack that puts dents in the car's roof. I was extremely disappointed in the racks. In reading the Toyota manual and contacting them by phone, there is no mention of using or not using roof racks.
I was shocked to learn from Rachel at eTrailer.com that your company takes absolutely no responsibility for this Yakima product they sell. The best they can do is to pass the buck and refer us to Yakima.
Very disappointed, and out a lot of money for a product that damages your car. Will not recommend or buy here again. eTrailer.com does not even deserve one star in this review.
Great product fast shipping
Great! Easy to install!
Typical Yakima cross bars. Coating is a little too easy to cut or gouge, but probably needs to be that way to get the grip it provides. Good enough solution for me, and allows me to continue to use all the attachments I've accumulated over the years that require a round bar

Do you have a question about this Roof Rack?
Info for this part was:
At etrailer.com we provide the best information available about the products we sell. We take the quality of our information seriously so that you can get the right part the first time. Let us know if anything is missing or if you have any questions.


Thank you! Your comment has been submitted successfully. You should be able to view your question/comment here within a few days.
Error submitting comment. Please try again momentarily.