
Summer Starts Here - Save up to 70%
Thank you! Your comment has been submitted successfully. You should be able to view your question/comment here within a few days.
Error submitting comment. Please try again momentarily.


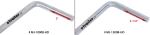
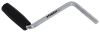
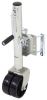
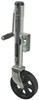
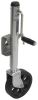
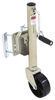
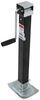
Replaces the sidewind handle from your etrailer or Ram swivel marine jack with a 1,500-lb capacity. Handle allows you to manually crank the jack. Handle arm has a corrosion-resistant, zinc finish. Designed for MJ-1500 Series jacks.
Features:
Videos are provided as a guide only. Refer to manufacturer installation instructions and specs for complete information.
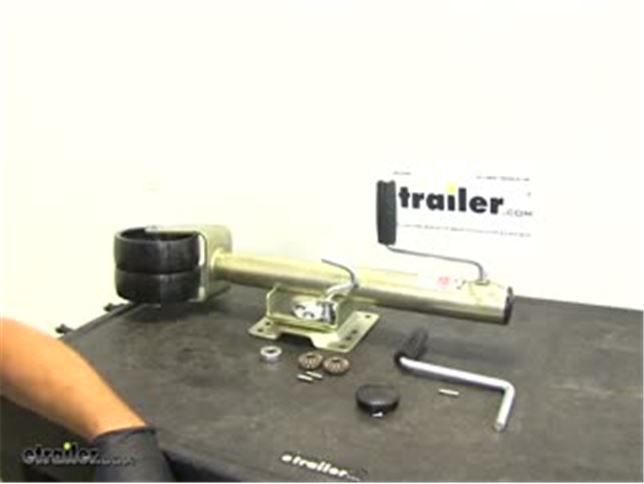
Hi. Today we are going to be taking a look at how to repair and rebuild the Etrailer style or Ram style Marine Jack. Whether it has the dual wheel the single wheel, it doesn't matter too much there. We just want to be sure we're looking at the fifteen-hundred pound capacity model. Basically there is only four little kits that will go into the jack that you might need if your jack fails you. The first is going to be our bearing. Now, that is going to sit right underneath the steel plate inside of the jack.
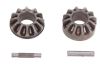
As you can see, this portion spins free to the outside. That is going to reduce the friction as we're cranking that handle and our gears turning. This reduces the friction in our jack. So, if it starts getting tougher to turn, that might be our culprit there. Just above that plate, we've got our gear set. Now, the gear set that has the full pass through there, that's the one that rides on our handle and it rotates that lower gear; turning the screw that causes our jack to raise and lower.
These are both going to come with the pins that we need. Lower gear is pretty easy to tell. You see, it is going to capture the pin so it won't slide out. The side gear- that will allow the pin to actually pass all the way through. There is a small, spring style keeper on there, we will show you how to get that removed here in just a minute. Now another point of failure is this little pin that goes through the jack handle.
If you try cranking on your jack too much or if it's raised up too high, you don't realize it and you keep cranking on it, you might sheer that pin off. See, it fits right through the hole here. This pin goes through both our gear and our handle on the jack. As we turn the jack handle, the gear spins, rotating our other gear. We've also got a cap. A lot of times these are going to break.
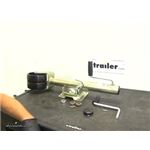
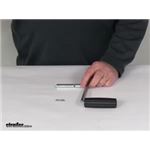
Somebody set something down on them or maybe it gets hit with a tool, something like that. Gets a crack in it, moisture, dirt, debris starts getting in there. That's where we start getting our jack failure. So, we've got a replacement cap here. That's going to come with the small screw that you need to attach it. Now, as far as part numbers go, this is going to be MJ-1500B-CP, it's for the cap and screw. For the handle and pins, part number MJ-1500B-HD. For the gear kits, which will have two pins and two gears, part number is TJA-2000S-GR. And the bearing is going to be TJA-2000S-BR. Just going to set these aside for a second . bring our jack over. First thing we need to do is take out that small screw on the top. A few of the tools we're going to need is a regular Phillips screwdriver, a hammer . Needle-Nose pliers come in pretty handy. A small pick or a screwdriver is a good idea for that spring clip that is on one of our gears. And then a five thirty-second punch with a flat tip on it is typically what we use to drive out our pins. Let's start with our Phillips screwdriver to get the screws removed from our cap here. Pull that old one off. Now if all you're replacing is the cap, put a new one in, put the screw back in, and your job is done. There's going to be some grease in there so it's a good idea to grab a towel and kind of clean out whatever you've got in there. It probably isn't going to be this clean looking. If your jack has failed you, there's dirt, moisture, stuff like that in there so, let's get that all kind of cleaned out. We'll have another opportunity later to do it after we have those parts out of the way. As you can kind of see on the upper gears as we rotate it . see a small little indention in it. It's going to be that small indention there, that's where we want our pin to slide out. We just want to reach in with our pick, find the end of that spring, and then kind of pull outward and upward at the same time. Then we will just release it so it will go along . along that backside it will pop off for us just like that. We're going to place it right on the end of that pin and start driving it through. Now at that point, our handle should turn free of the gear. So, let's lift our handle up and out. At this point, if you're only doing the handle replacement, put your handle in, new pin in, bring your spring clip back down and you'll be set there. But, we're going to keep going here. There's going to be a small spacer that's in there; we'll pull that out. The handle gear, you can see here there's that spring clip. We'll set these aside . We've got spacers that are going to be in the top and the bottom. That just helps to keep our handle centered, and keeps it from wearing on the outside of the jack. So, let's just get both of those taken out of the way for now. These typically aren't going to be a source of failure, they never really round out you can see they're nice and thick so these we will typically be re-using. Now if we grab the Needle-Nose there we can grab that larger gear, that base gear, just like the other ones we got that captured. Set it aside and then rotate a foot of our jack just slightly there. And that pin we'll pull out just like that. Now, if the gears are your concern, if your gears are the issue, we're just going to reverse that process for putting the gears back in. But, there is one other component and it is that bearing that we talked about. We'll stand our jack upright. We're going to lift the outer tube off of our inner tube. You'll see right there is where that thresh bearing is going to fit. That one will come off. We'll grab our new bearing, slide that right back on. You'll see our screw mechanism there . as we turn that, that pushes that foot further away from the top of the jack or brings it closer to the top of the jack. That is how our jack essentially operates. What we're going to do, as you can see that nice clear shot through our jack there, we're going to bring this back down on. We've got that plate right there that needs to drop back through. One side of the jack has a larger opening, the other side is a smaller opening. That small tab that sticks off should be in that smaller opening, and we're going to bring that up until our screw passes through that plate, just like that. Now, we can take our pin. You want to put it through the hole that's in our jack. We might need to rotate our wheels just slightly to get it to fit. There will be a little gap right there above that plate we can stick it in. Grab it with our Needle-Nose, slide it back up, and then rotate it so it's sitting kind of flat with the ground. If it is up and down it might just drop down and fall out of there. Now, we're going to place that right down on. We just want to make sure that the pin sits down in the area that it is meant to. Remember those spacers that we talked about One goes on the bottom there, one goes on the top. Now, gravity is going to try to fight you on that deal so if that won't stay, then just rotate your jack. Now we need to slide our handle in just a little ways there onto that.we'll slide our spring clip, slide on our bearing. Now, we also want to slide on that spacer. Let's rotate that so we can see the opening. You see, if we rotate it we can see where that pin hole lines up with the handle. Let's grab our pin and get that stuck back in there. Grab our punch again and start tapping that in. And we'll tap that in far enough so that both sides are sitting inside of that small notch where that keeper-spring fits. That looks good. This can be a little tricky getting that spring back in place, but it is not something that is impossible. What we want to do is just kind of rotate it until we find the end. Now with our spring clip, we just kind of want to bring that up and start getting it to fit into that groove. Kind of work all the way around that outside. We want to get it fully seated into that notch it came out of before. Once that is back in place, you just want to be sure that your jack is operating very nice, very smoothly, and we'll fill it up with some grease. Make sure we're using a good quality grease. It doesn't have to be high temp or anything, we just want to make sure we get everything fully coated. Now our cap is going to fit right back on. A couple of hole in it, you can see one right there. We just want to make sure you get one of those lined up with the hole that is in the outer tube of the jack there . and thread it in. Now with everything back together and working properly, that's going to be the re-build of our Etrailer Marine Style 1500 Jack. With just a few tools and a few components we're able to save ourselves quite a bit of money.
Average Customer Rating: 4.8 out of 5 stars (20 Customer Reviews)
Replaces the sidewind handle from your etrailer or Ram swivel marine jack with a 1,500-lb capacity. Handle allows you to manually crank the jack. Handle arm has a corrosion-resistant, zinc finish. Designed for MJ-1500 Series jacks.I broke my old handle in the process of moving my boat trailer. I was glad to find that I could just replace the handle, instead of the whole jack. The video on the website on how to replace the handle was great, even though I had more trouble than I expected. However, this was probably due to some parts getting bent when the original handle broke. The new handle was exactly like the old one. Great product.

Exactly what I needed and it functions exactly the way it should. Good pricing and prompt attention to my inquiry.
The handle fit as it should. Did not have roll pin when received but Customer service took care of it and got it to me quickly. Price was very reasonable.
I put this handle on a harbor freight jack. It was a little large but with a modification it works perfectly. Thank you
The handle should work fine.I didn’t see the pin though.
IT WORKED FOR WHAT WE NEED IT TO DO. WOULD BUY FROM AGAIN IF NEEDING ANOTHER ONE
It's what I ordered and it came fast. Looks like the right piece - will know tomorrow when I try to install it...
great!
AOK thanks
Good products, fast shipping.
Just what I needed
Works great
Do you have a question about this Accessories and Part?
Info for this part was:
At etrailer.com we provide the best information available about the products we sell. We take the quality of our information seriously so that you can get the right part the first time. Let us know if anything is missing or if you have any questions.


Darryl
6/22/2019
Still working fine.