
Summer Starts Here - Save up to 70%
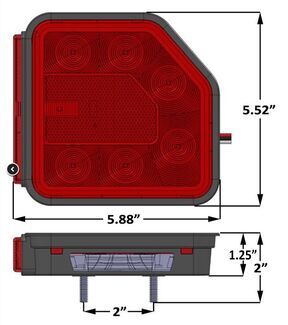
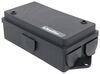
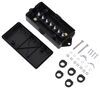
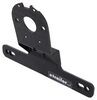
Low profile LED trailer light with 11 diodes serves 8 functions: stop, turn, tail, rear clearance, rear reflex, side marker, side reflex and license plate light. Durable plastic housing. Stud mount on 2" centers. 3-Wire design.
Features:
Specs:
The waterproof construction of this light makes it ideal for use on trailers that may be submerged, like a boat trailer. The circuit board is sealed, which means that water will not damage the diodes or circuit board.
Videos are provided as a guide only. Refer to manufacturer installation instructions and specs for complete information.
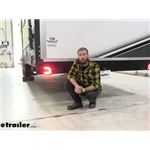
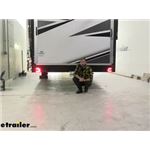
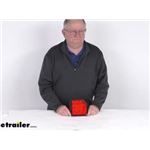
Hey guys, Kevin here with etrailer and today I'm gonna be showing you how to install the Optronics low profile LED combination taillight for the driver's side here on our 2021 Keystone Raptor fifth wheel toy hauler. So, both your driver's side and your passenger side are gonna come with a multitude of functions. As you can see in the center here, it's gonna have a reflector as well as on the side. So it's gonna have these side reflectors as well, that way you don't have to purchase additional reflective tape or other reflectors and try and screw those into your trailer. There's also gonna be a side marker light and it's going to have your stop or brake signal as well as just your running lights and then also your left and right turn signal. On the driver's side, it's actually also going to come with a little light on the bottom and that's for your license plate.
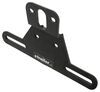
So if you wanted to, you could hook a license plate holder up. The two bolts that mount to our trailer actually two inches apart so you can get the correct license plate holder and match that up on there and have it properly display your license plate so that you're street legal. Switching over from incandescent to LEDs is gonna end up giving you a much longer lifespan because LED bulbs are gonna last about 50 times longer than an incandescent and they're gonna consume less energy. Along with that, our housing here is going to be a surface mount, so it's gonna help distribute heat a little bit better and more efficiently than any of your mounts that are gonna actually have to sit inside of the trailer wall itself. And then along with our housing here it's actually going to be completely encased so that it is actually submersible, so if you we're putting this on a boat trailer, you wouldn't have to worry about any of your electronics getting damaged, but along with that you would wanna make sure that you use heat shrink butt connectors for the wiring just so that there's no chance that any corrosion getting into that wiring.
So I just wanted to mention that these two lights are not kitted together, they are separate. So when you're purchasing either the passenger or the driver's side, you're gonna wanna make sure that you get both, that way you have a nice uniform look. Along with that, the installation is gonna be super simple. You can easily do this at home in probably about 15 minutes. You're just gonna wanna make sure that you get the correct parts.
So heat shrink butt connectors, some crimp tools and a heat gun just so that you can shrink down those butt connectors. But let me go ahead and show you how we did that. As you can see on our left side, we still have our factory taillights there. And as you can see, some of the LEDs in there have already kind of burnt out, so it looks like we're missing about five of 'em. Obviously, that's not good.
People aren't gonna be able to see our Raptor on the road, even though it is a monstrosity. If you're in the dark, you're not gonna see those taillights. You can probably come up on this a little bit too quick. Whereas with our new light, you can see it's a big old square shape. It's gonna give you that great visibility and it's gonna be bright enough so that people can see you and that you're going to be legal while you're driving down the road. To begin our installation we're gonna have to first remove our factory light. Lucky for us it's just a couple of Phillips head screws. I think they're self tappers, so they're gonna give a little bit of resistance trying to come out fully. And on the under side here, we can kinda get to our wiring. So looking at our connectors here, you can see just how much dirt and grime kind of gets kicked up onto here. So instead of using these, I'm gonna go ahead and use some heat shrink butt connectors so that we don't have to worry about our wiring getting damaged over time. But we're gonna go ahead and I'm gonna un-crimp these. And here you can see a great example. There's all that dirt and corrosion getting on the wires here. Those wires will start to get real brittle and then they're not gonna wanna work. And then you're gonna end up having to cut it off and you're gonna lose some of that wiring. All right, so we're gonna test the functions of our wires right now. I've got my tester hooked up to our white wire, which is our ground, and then we have it set on left turn. So, as you can see, our red wire's gonna be our left turn wire, and if we cross reference that with our light on here, we have the yellow wire, which is our stop and our turn. So, yellow is gonna go to our red, that means our brown is gonna go to our white and green wire right here for our tail light and side marker. All right, so now I wanna line this up so that my wiring can pass through that same hole that we had for our previous light and I want to get my bolt holes kind of in place. Then I'm gonna take a paint marker, just so I can kind of mark exactly where those are gonna come out to. Just make a little mark right above 'em and then we can kind of make sure that they're both even by just taking our tape measure. So, probably gonna be right at like 2 3/4. Cool. Dot. And we'll do the same right here, just to make sure that we're keeping this both right on. Next we can go ahead and take our drill and we can go ahead and pass our wiring through. Line up our bolts. And we're gonna get on the backside here and tighten down our nuts. So I'm gonna go ahead and just hand tighten these on to start. And once we have 'em hand tightened, we can take a 7/16 socket and fully tighten it down. So, now we can begin the process of crimping our wires together. Start with the ground here, get that outta the way. And then we can crimp in on that. We have our red going to our yellow. And then our brown to our green and white. Now we have all that crimped down, we can go ahead and take our heat gun and just shrink all that down. All right, so we've gone ahead and put power, we know our light is functioning properly. So now I'm gonna go ahead and do the same process over on the other side with our passenger. All right, so now that we have both lights installed, we're gonna just run through the functions really quick. So right now I have it just on our running lights. We can check out our left turn. Our brake lights. And then our right turn. Well, I think about a does for today's installation of the Optronics low profile LED combination taillights here on our 2021 Keystone Raptor fifth wheel toy hauler. My name's Kevin. Thanks for watching..
Info for this part was:
At etrailer.com we provide the best information available about the products we sell. We take the quality of our information seriously so that you can get the right part the first time. Let us know if anything is missing or if you have any questions.


Thank you! Your comment has been submitted successfully. You should be able to view your question/comment here within a few days.
Error submitting comment. Please try again momentarily.