


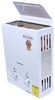
When winterizing your RV, don't waste antifreeze by letting it fill up your water heater tank. Instead, use this bypass kit and keep the antifreeze in your RV's water lines. Set up this seasonal kit in the fall and remove it in the spring.
Features:
Specs:
When winterizing your RV, the antifreeze you pump through your RV's water lines might not be going where it needs to go. Without a bypass, up to 6 gallons of antifreeze can be wasted by collecting in your RV's water heater tank instead of moving throughout your pipes. Use this bypass kit to keep antifreeze out of your tank and inside your water lines.
This seasonal kit connects to your RV's water lines each fall during winterization. When you're ready to put your RV into storage for the winter, disconnect the water lines from your heater tank and secure them to this hose with the included connectors. Then you can pump antifreeze through your RV's lines without having to worry about it collecting in the water heater tank.
When spring rolls around and you're ready to take your RV out of storage, disconnect the bypass kit and reconnect the RV water lines to your RV's water heater.
Videos are provided as a guide only. Refer to manufacturer installation instructions and specs for complete information.
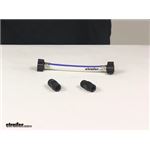
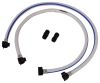
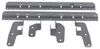
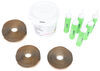
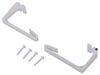
Today we're going to be taking a look at the Valterra seasonal RV water heater bypass kit. This kit is designed to provide seasonal bypass of the RV water heater. It's a completely lead-free design. What this does is it simply reduces the amount of non-toxic antifreeze needed to winterize your RV by six gallons or more each year. Installation is pretty straightforward, it's very simple, but it does require good access to the rear of the water heater. It's going to come with two brand-new plastic nipples. These can be used if your system previously uses them.
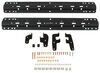
Sometimes those old ones are hard to get out, so what you can do is you can use these instead of removing the old ones from the water heater. This is going to fit six-gallon water heaters. Simply to begin your installation you'll need to disconnect the two water lines from the water heater. If the nipples we're previously used to connect the lines to the tank, you'll need to go ahead and wrap some Teflon tape around the threads just on one end of each nipple and screw the wrapped end of each nipple into the water lines. Leave the old nipples connected to the water heater if they don't break. Sometimes those are pretty fragile depending on the age that they are. Again, the kit does come with two brand-new ones.
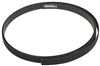
Once you have that done, you would simply connect the bypass hose from the kit directly to the unwrapped male threads of the nipples here that you just connected to the water line. Really nice design, very easy to use, and again, it's a completely lead-free design. It's pretty easy to get installed as long as you have easy access to the rear of your water heater. That's going to do it for today's look at the Valterra seasonal RV water heater bypass kit.
Average Customer Rating: 5.0 out of 5 stars (1 Customer Reviews)
When winterizing your RV, don't waste antifreeze by letting it fill up your water heater tank. Instead, use this bypass kit and keep the antifreeze in your RV's water lines. Set up this seasonal kit in the fall and remove it in the spring.My product was exactly what I wanted-didn't take too long to get it to me! Very satisfied.
Info for this part was:
At etrailer.com we provide the best information available about the products we sell. We take the quality of our information seriously so that you can get the right part the first time. Let us know if anything is missing or if you have any questions.


Thank you! Your comment has been submitted successfully. You should be able to view your question/comment here within a few days.
Error submitting comment. Please try again momentarily.