
Summer Starts Here - Save up to 70%


Thank you! Your comment has been submitted successfully. You should be able to view your question/comment here within a few days.
Error submitting comment. Please try again momentarily.
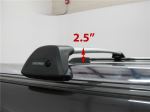
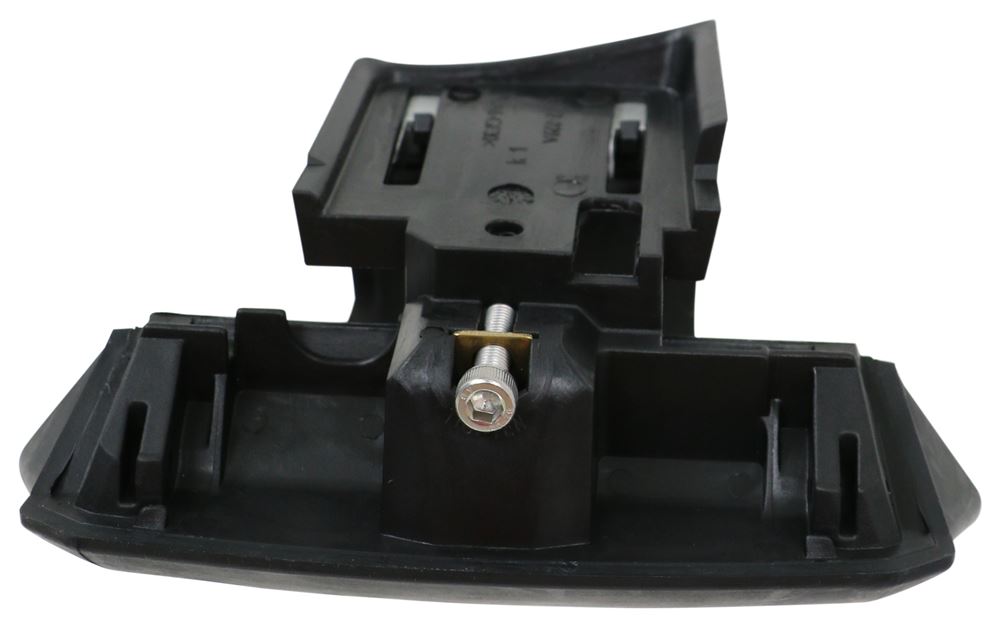
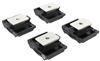
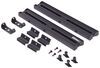
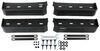
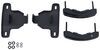
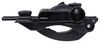
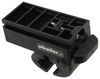
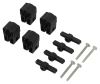
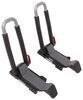
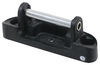
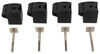
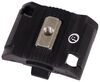
Adjustable clamps let you mount Yakima FlushBar crossbars to your vehicle's raised, factory side rails to create a roof-rack system. Clamps mount to SmartFoot towers with screws. Kit includes 4 clamps and all installation hardware.
Features:
Videos are provided as a guide only. Refer to manufacturer installation instructions and specs for complete information.
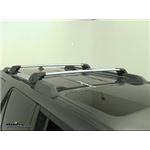
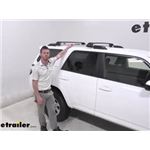
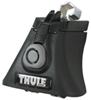
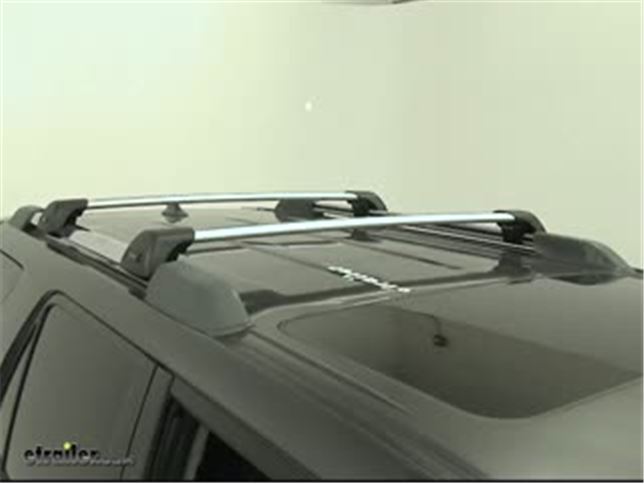
Speaker 1: Today on our 2012 Toyota 4Runner we'll be taking a look at the Yakima Roof Rack System. This is going to consist of the Yakima FlushBar Crossbars, part number: Y00442-2. And the Yakima Fit Kit, part number: Y00158. These Yakima bars are going to be universal carriers that let you carry bike racks, cargo baskets, ski and snowboard carriers, or kayak carriers. The Yakima FlushBars have an aerodynamic tapered wing shape that helps reduce wind noise and vibration when driving down the road. The SmartFoot towers are going to make for a quick and easy installation.
You'll just need a Fit Kit to match your vehicle. We do have the option to remove this plastic lock core here and put in the same key system lock core. That's going to help to prevent theft and tampering of your roof rack system. The aluminum bars are lightweight and corrosion resistant, and the towers are strong and UV resistant. These crossbars have a maximum weight capacity of 165 pounds, so you do want to double check your vehicle's owner's manual to make sure it can withstand that much weight.
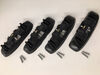
And they also come with a limited lifetime warranty.We're going to have our end caps for our crossbar, the two portions of our Fit Kit. We'll have all the hardware. We're going to get our two tools to tighten everything down. Now we're gonna come to the center bolt here. We're gonna take the smaller of the two tools and we're going to remove our bolt.
We'll remove the bolt and the plastic piece, and we can set those off to the side. Now we'll take the two pieces of our Fit Kit and we're just going to fit them together. You may have to push a little just to get our clamp into place. Then we can take our Fit Kit and we're going to secure it onto our crossbar. We're gonna start by taking the round-headed screw, with a washer.
I'm just going to drop that down into this hole here, and we're gonna start to tighten it down. You want to tighten it down completely. This is going to hold our Fit Kit in place onto our crossbar. Now we can flip our bar over.We're going to take the other two bolts that are included and we're just going to place them in on either side on the inside of our crossbar. And again, we'll take our included tool to tighten that down. Now we'll take the longest bolt, and we're going to place it through this hole here, making sure that it sits behind the plastic piece here. Now we'll make sure our bolt is lined up with the back portion of our clamp. We'll take the bigger of our included tools. We're going to tighten that bolt down just a couple turns so that it catches on our clamp. Next we'll flip our crossbar over and we want to loosen up this bolt here at the top. We'll use the smaller of the two tools, with the larger handle, to do so. Now we're ready to place our crossbar onto our vehicle.Now we can take our rear bar, we're going to place it on, making sure that it sits around our raised rails. Now, you'll notice that our crossbar hangs over the edge of our raised rail. We can easily fix this by pushing in on the bolt that we loosened up at the top. Now that we have it in the right position, we can measure out our crossbar spread. Now, our crossbar spread needs to be a minimum of 27". My suggestion is that you go by whatever accessory you're going to put on your roof. So we're going to measure from the center of the front to the center of the back. It looks like we're at about 27-1/2" so we're gonna leave it there and just double check the other side to make sure it's in the same place.Now we can tighten everything down. We're gonna start by tightening our bolts here at the top using the longer handled tool. We'll tighten that down completely. That's going to prevent our end of our crossbar from moving in and out. Then we'll take the other tool, we'll tighten down this bolt here in the center. It's going to tighten up our clamps around our raised rails. Now we'll take our end cap. We want to make sure that this piece fits into our channel here. We're going to push that down and slide it into place. Then we can grab our flat-bladed screwdriver. We're going to lock down our plastic core, and we're ready to load up our gear and hit the road.And that's going to be our completed look at the Yakima Roof Rack System on our 2012 Toyota 4Runner.
Average Customer Rating: 4.9 out of 5 stars (9 Customer Reviews)
Adjustable clamps let you mount Yakima FlushBar crossbars to your vehicle's raised, factory side rails to create a roof-rack system. Clamps mount to SmartFoot towers with screws. Kit includes 4 clamps and all installation hardware.Highly recommend etrailer.com. This is the second time I have used them for a product either for towing or roof racks and there service is excellent. Also they are always on the mark with regards to fit for the vehicle. The staff is very knowledgable and friendly. Would highly recommend them.
I like the Yakima product I ordered and I think it looks great on the 4Runner. It was easy to install with the exception of one confusing piece of the instruction. It was not clear in the fit kit instruction manual what was being referred to adjust the spacing of the foot piece now attached to the bar (in Step 2 of installation). In addition to this etrailer video, https://www.youtube.com/watch?v=wQhsOY7zvuE this etrailer video shows it better at about minute 1:50 https://www.youtube.com/watch?v=-IZFFJnUWc4 That screw needs to be loosened and THEN the foot will slide easily in and out when it is pushed upon. I am pointing to it with a pen in the picture in my review. Hope that helps others avoid some frustration I had.
I would definitely recommend.
After doing some research decided to go with the Yakima roof rack setup for our VW Atlas. Love the look and functionality of it all. Got the SUPDawg paddle board carrier to go with it. Love the locking capability for piece of mind when leaving boards unattended. We are VERY happy with our choice. Drove on highway with two paddle boards and it all went smoothly with zero wind noise whatsoever. Definitely worth every penny. Will recommend.

These roof racks fit nicely to my Audi Allroad station wagon. I am quite pleased with the appearance--now I can easily find my car in crowded parking lots!
I should caution anyone who chooses to install this set themselves: There are many parts needing careful assembly. Even though a mechanical engineer I found the process confusing and difficult.
Great kit that fit my 2014 Audi Allroad factory raised roof rails perfectly. These brackets feel super secure. I feel confident I don't have anything to worry about with these brackets.
We use this roof rack for our roof top tent. Works as it should.
Sturdy secure attachment, well made, easy to install
The wait on the phone for a personal order was well worth it. I received my order the next day which I could not believe. Greg's advice was worth the wait.
Do you have a question about this Roof Rack?
Info for this part was:
At etrailer.com we provide the best information available about the products we sell. We take the quality of our information seriously so that you can get the right part the first time. Let us know if anything is missing or if you have any questions.


Patrick
2/21/2022
Perfect