
Summer Starts Here - Save up to 70%
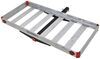
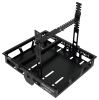
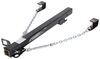
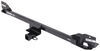
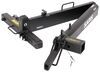
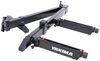
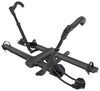
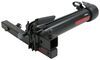
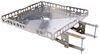
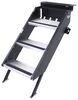
Connector bar serves as an attachment point between your Expanse hitch cargo carrier (S68FR - sold separately) and select Swagman bike racks to let you haul a bike while using the tray. Works with Swagman Dispatch, Quad 2+2, and Semi 4.0 bike racks.
Features:
Fits:
Note: Can only be used in 2-bike plus cargo basket configuration.
Videos are provided as a guide only. Refer to manufacturer installation instructions and specs for complete information.
Hi, everyone. It's Evangeline here at etrailer. And today, we'll be taking a look at our Swagman Connector Bar for your Swagman bike rack and cargo carrier right here at etrailer. Now, this is not gonna work with all of the bike racks. So, it has to be a compatible bike rack that can be added onto. And you shouldn't be using this with the four-bike racks either.
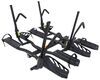
So, for example, we have the Swagman SEMI 4.0. Now, you have the option to add on two extra racks to here. That way, we can carry on four bikes or you can get the cargo carrier. So, that doesn't mean four bikes plus the cargo carrier. It's one or the other.
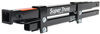
And then you'll know it's compatible by checking out our page. It uses the current hardware you have on your accessory and it adds some bolts to connect it to your original accessory. So, you're gonna have to have the base first. And you're also going to have the accessory you want, which is the Swagman Expanse in order to use the Connector Bar. Our Swagman SEMI 4.0 is a gray color, while our Swagman Expanse is a black.
Your Connector Bar is also going to be a black bar, so just keep that in mind. Some other brands when they have add-ons, they also have the option to pick and choose the color to match their current base. If you have a base that's black too, it will all blend together. Otherwise, you're gonna have this kind of look on there. And when you use this connector draw bar, you also lose a little bit of capacity here.
So, the Swagman Expanse has a 400 pound weight capacity, but when you have it as an add-on accessory, it decreases to 100 pounds. That's because your weight's gonna be further away from your vehicle, so you don't have as much capacity further out. Now, the install process is actually very simple. Let's take a quick look at that. You're first gonna have to set up your accessories. So, this is gonna be the Swagman Expanse cargo carrier. We're gonna add that onto our bike rack. Now, I already have this installed on its own as a cargo carrier, so you're gonna have to uninstall the bolts there. If you do not have this already installed, you can go ahead and skip this part. If you've already installed your base bike rack, just pop that end cap off and then you're gonna get your Connector Bar and pop that right in. Just gonna line up the holes on this side and underneath. And you're gonna have the hardware included, which is a split washer for both bolts. And then you're gonna use a six and a 10 Allen wrench to tighten it down. I do like how they're textured where you can get them pretty much tightened down with just your hand. Now, the tools to tighten them down are not included, so that is the downside. You can then slide your accessory onto the bar, line up the holes, tighten it down. Once those bolts are fully tightened down. you now have your accessories fully installed. So, just double check that your bike is compatible with this rack and this accessory and then you'll be good to go. Very simple process. And that was a look at our Swagman Connector Bar for your Swagman compatible bike racks right here at etrailer. My name is Evangeline and I hope you enjoyed the journey..
Info for this part was:
At etrailer.com we provide the best information available about the products we sell. We take the quality of our information seriously so that you can get the right part the first time. Let us know if anything is missing or if you have any questions.


Thank you! Your comment has been submitted successfully. You should be able to view your question/comment here within a few days.
Error submitting comment. Please try again momentarily.