How to Wire a 7-Way Trailer Connector on a Toyota Highlander Hybrid
Question:
with the 4 pin to 7 pin connector everything works, ie lights. But since it is only 4 pins coming from the HH, it does not charge the camper batteries. How do I do this?
asked by: Judy
Expert Reply:
In order to provide a maintenance charge through the 4 Pole to 7 Pole Adapter, # 30717, you will need to connect the black wire on the adapter to the vehicle positive battery terminal via a 40 amp circuit breaker, # PK54540. You will also need to make sure the white ground wire on the adapter is connected to the vehicle frame. The wiring from a 7-Way will provide a maintenance charge to a trailer battery but will not fully charge it.
You will also need about 20 feet of wire # 10-1-1. What you will do is connect one end of this wire to the black wire from the back of the adapter. You will then route the wire under the vehicle, avoiding any areas that may pinch or burn the wire, up through the engine compartment.
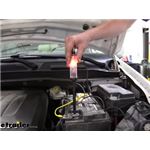
Under the hood, mount the circuit breaker near the vehicle battery. Take the wire you route and move it over to the circuit breaker, clip off an excess wire and save it for later steps. Crimp on a ring terminal to the end of the wire and attach it to the AUX side of the circuit breaker.
Using the remaining wire clipped off earlier, attach a ring terminal to one end and attach it to the BAT side of the circuit breaker. Round the other end to the positive battery terminal, clipping off any excess wire. Attach another ring terminal to this end and attach it to the positive battery terminal.
The other wires on the back of the adapter are for the reverse lights (yellow wire) and output from a brake controller (blue wire). If you do not need the reverse light circuit, you can tape up that wire and stow it out of the way. If you do need it, it will just need to be attached to a reverse light wire behind one of the reverse lights.
If the trailer has electric brakes, I do recommend going ahead and using a brake controller. What you will need is wire # 10-2-1, about 20 feet, instead of the 10-1-1 wire mentioned above. Attach the black wire to the black wire on the adapter and the white wire to the blue wire on the adapter. You will route the wire like explained above under the vehicle.
The black wire will be installed as I explained above. For the white wire, you will need to route it from the engine compartment, through the firewall, and into the vehicle cab to where you will mount a brake controller. Save any excess wire as it will be needed.
You will then need to attach a length of wire long enough to reach from the brake controller to the vehicle battery on both the white and black wires on the back of a brake controller. The white wire from the brake controller will attach to the negative battery terminal. The other wire will attach to the positive battery terminal via a 20 or 30 amp circuit breaker (# PK54520 or # PK54530) as explained above. Consult the brake controller instructions for which size to use.
The last connection for the brake controller is the red wire. It will get attached to the cold side of the brake switch located above the brake pedal. Use a circuit tester like # PTW2993 to find the wire on the brake switch that shows a signal ONLY when the brake pedal is pressed. If that wire shows a signal any other time, like when the head lights are on, it is not the correct wire.
For a brake controller, I recommend the Tekonsha P2, # 90885. This is one of our most popular brake controllers because it is easy to set up and use. I have included some helpful links that should help you with this project.


Products Referenced in This Question

Deka Jacketed 2 Wire, 10 Gauge, Brake Wire - per Foot

- Wiring
- Wire
- Jacketed Wire
- 2 Wire
- 10 Gauge
- Deka
more information >
Tekonsha Prodigy P2 Trailer Brake Controller - 1 to 4 Axles - Proportional

- Trailer Brake Controller
- Proportional Controller
- Electric
- Electric over Hydraulic
- Automatic Leveling
- Under-Dash Box
- Dash Mount
- Up to 4 Axles
- LED Display
- Up to 360 Degrees
- Tekonsha
more information >
Pollak Circuit Breaker - Cycling/Automatic Reset - 20 Amp - Straight Mount Bracket

- Accessories and Parts
- Wiring
- Circuit Breaker
- 20 Amp
- Pollak
more information >
Pollak Circuit Breaker - Cycling/Automatic Reset - 30 Amp - Straight Mount Bracket

- Accessories and Parts
- Wiring
- Circuit Breaker
- 30 Amp
- Pollak
more information >
Pollak Circuit Breaker - Cycling/Automatic Reset - 40 Amp - Straight Mount Bracket

- Accessories and Parts
- Wiring
- Circuit Breaker
- 40 Amp
- Pollak
more information >

Product Page this Question was Asked From
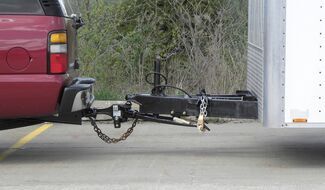
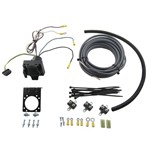
Adapter 4 Pole to 7 Pole Vehicle End Trailer Connector

- Trailer Wiring
- Wiring Adapters
- Single-Function Adapter
- 0 - 5 Feet Long
- 4 Flat
- Plug and Lead
- 7 Round - Blade
- Tow Ready
more information >
Featured Help Information
Instructions
Miscellaneous Media

Continue Researching
- Shop: Roof Rack
- Video: etrailer Trailer Brake Controller 7-Way RV Upgrade Kit Installation - 2023 Toyota Highlander
- Shop: Curt Echo Wireless Brake Controller - 7-Way Plug Mount w/ Bluetooth App - 1 to 2 Axle - Proportional
- Shop: 7-Way RV Upgrade Kit for Trailer Brake Controller Installation - 12 Gauge Wires
- Shop: Brake Controller
- Q&A: Brake Controller and 7-Way Trailer Connector Installation for 2021 Toyota Highlander
- Q&A: Does Vehicle 12V Circuit Pass Through Curt Echo Trailer Brake Controller
- Q&A: Does Curt Echo Mobile Brake Controller Allow 12 Volt Charge Circuit to Pass Through to Trailer
- Article: Brake Controller 7- and 4-Way Installation Kit (ETBC7)
- Article: Trailer Wiring Diagrams
- Article: Brake Controller Installation: Starting from Scratch
- Article: How to Choose the Right Trailer Hitch Class
- Q&A: What is Required to Use Curt Echo Trailer Brake Controller
- Article: My Trailer Hitch Doesn't Fit
- Article: Towing a Trailer? Let's Talk About Brake Controllers
- Article: Wiring Trailer Lights with a 7-Way Plug (It's Easier Than You Think)
- Q&A: 2024 Ford Maverick Wiring Needed for Flat Towing Behind a Motorhome
- Q&A: Could Buyers Products Hitch Plate part # 3371809061A Fit 1999 International
- Q&A: My Vehicle has a 4-Pin Trailer Plug, but Trailer has 7-Pin Trailer Plug

on Trailer Wiring