Preferred Shock Angle and Compression for Lippert Trailer Shock Kit LC281255
Question:
Can you tell what the best angle is from perpendicular. I know not more than 45 degrees, but is 20 better than 30 or 35. Also when the shock is installed how much should it be compressed 1/2, 1/3, 1/4?
asked by: Ken
Expert Reply:
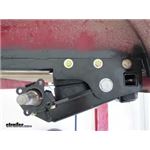
There isn't really a suggested angle at which to mount the Lippert shock kit # LC281255 as long as it does not exceed a 45 degree angle. I would say a 30 or 35 degree angle would be good but it would really be different on every application so its hard to put a definite number on it.
The amount of compression once installed has to allow for the full travel of the suspension so as not to damage the shocks or where they are attached to the trailer. So basically this means that the compression is also not a definite amount; it is application specific. You can get a pretty good idea of what it will be like on your trailer by going over the install instructions reproduced below but to figure it out definitively it would require actually having the shock kit there to test fit it.
1. Raise trailer and jack up the axle to release pressure on the springs.
2. Remove old u-bolts and tie plate.
3. Install new tie plate with the longer side facing outward and torque the u-bolts to the specs in the instructions. NOTE: Do NOT reuse old components.
4. Compress the shock and make a mark on the inner shock where the outer shock stops.
5. Release compression. Measure the stroke and make a mark on the inner shock that is one half of the stroke length.
6. Measure the shock length when the shock is compressed to the halfway mark made in Step 5.
7. Lower the trailer back down onto tires and level so the equalizer(s), if equipped, are parallel to the frame and there is a full load on the springs.
8. Make a measurement perpendicular to the shock mounting lip on the tie plate that is the same distance measured in Step 6 + 2” and make a mark on the I-beam parallel to the shock mounting lip on the tie plate. NOTE: Mount shocks pointing outwards (away from the shackle kit, equalizer and/or center point) to get the best performance from the shocks. NOTE: Dry fit the shock to be sure it does not exceed a 45 degree angle or it will not function.
9. Align the bottom of the extended portion of the upper shock mounting bracket to the mark made on the I-beam in Step 8 and drill 11/32” pilot holes.
10. Use the 3/8” self-tapping bolts to secure the upper shock mounting bracket to the I-beam.
11. Remove nut, washer and rubber grommet from both sides of the shock.
12. Place the shock into the shock mounting lip on the tie plate and compress it to fit into the upper mounting bracket.
13. Apply the rubber grommet, washer, and nut (in that order) and tighten to secure the shock.
NOTE: Do NOT over-tighten. Tighten until the rubber grommet increases diameter equal to the washer.


Product Page this Question was Asked From
Lippert Bolt-On Shock Kit w/ Heavy Duty Gas Shocks - 3,500-lb (2-3/8") Axle
 Axle")
- Trailer Leaf Spring Suspension
- Leaf Spring Enhancement System
- Boat Trailer
- Camper
- Car Hauler
- Snowmobile Trailer
- Utility Trailer
- Shocks
- Round Axle - 2-3/8 Inch
- Single Axle
- Lippert
more information >

Continue Researching
- Video: Tuson Electronic Sway Control System Review
- Video: Review of Gen-Y Hitch Hitch Pins and Clips - 5/8" Diameter HItch Pin - GY39FR
- Q&A: How to Position the Lippert Shocks on a Single Axle Trailer
- Q&A: Recommended Suspension Enhancement for 2017 Grand Design Momentum 376th Toy Hauler
- Q&A: Can Weight Distribution Help Sway on Aluminum Frame Trailer
- Q&A: Weight Distribution Recommendation for a 7,000 Pound Aluminum Car Hauler Trailer
- Q&A: Will the roadmaster Comfort Ride Shock Absorbers Fit a 2019 Grand Design Reflection 28BH
- Shop: Lippert Bolt-On Shock Kit w/ Heavy Duty Gas Shocks - 3,500-lb (2-3/8") Axle
- Shop: Roadmaster Comfort Ride Shock Absorbers for Tandem Axle Trailers - 3,500-lb Axle
- Shop: Roadmaster Comfort Ride Add-On Kit for Triple Axle Trailers - 3,500-lb Axles
- Shop: Lippert Bolt-On Shock Kit w/ Heavy Duty Gas Shocks - 5,200-lb to 7,000-lb (3") Overslung Axle
- Shop: Curt True Course Advanced Bluetooth Trailer Sway Control - 1 to 4 Axles
- Shop: Curt TruTrack 2P Weight Distribution System w/ Sway Control - 7-Hole Shank - 10K GTW, 1K TW
- Shop: Lippert Center Point by Trailair Air-Ride Suspension Upgrade - Tandem Axle
- Q&A: Does Lippert Shock Kit Fit Enclosed Trailer with Boxed Frame
- Q&A: Which Direction Should Shock of Lippert Trailer Suspension System Face
- Video: Review of Lippert Trailer Leaf Spring Suspension - Bolt-On Shock Mount Kit - LC281255
- Video: Dexter E-Z Flex Suspension Kit Review and Installation
- Search Results: trailer shock absorbers
- Search Results: center caps
- Search Results: hubcap
- Search Results: shock kit
- Search Results: 36 leaf spring
- Search Results: 36 inch leaf spring
- Search Results: center wheel caps
- Video: Review of etrailer 3 Leaf Slipper Spring - e49SR
- Video: Timbren Axle-Less Trailer Suspension System Installation
- Video: Timbren Axle-Less Trailer Suspension System Test Course
- Shop: Wheel Cover

on Trailer Leaf Spring Suspension