
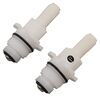
Plastic RV kitchen faucet has a durable, washerless stems that reduce daily wear and tear to extend the life of your faucet. Low-flow aerator helps conserve your water while you're soaping up your hands.
Features:
Specs:
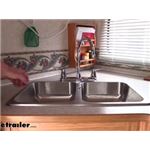
This faucet lets you upgrade the kitchen faucet in your RV or camper. Using the inlet shanks, drop the new faucet and deck plate in place through the mounting holes of your existing faucet. Then tighten the included mounting hardware. Finally, connect the hot and cold water lines. The use of tub and tile caulk (not included) is required.
Videos are provided as a guide only. Refer to manufacturer installation instructions and specs for complete information.
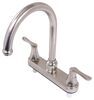
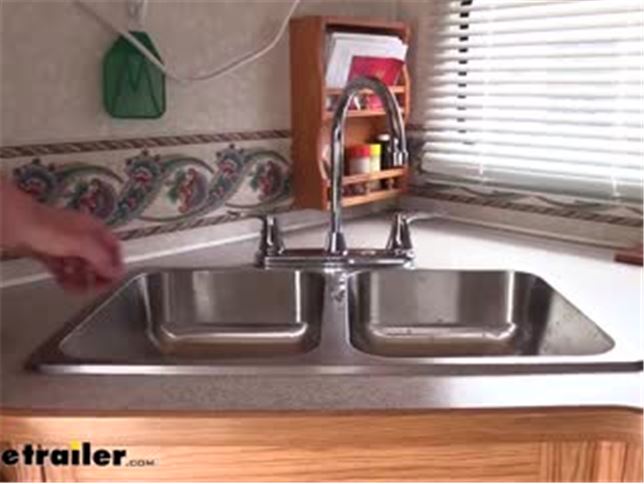
Hi there, RV and camper owners. Today, we're going to be taking a look at Phoenix Faucets line of Catalina double lever kitchen faucets. They're available in chrome, white or nickel. Now we just installed a new faucet here today due to the old one that was leaking around the grout and stuff. And our sink that was in here was also leaking. So we had replaced that.
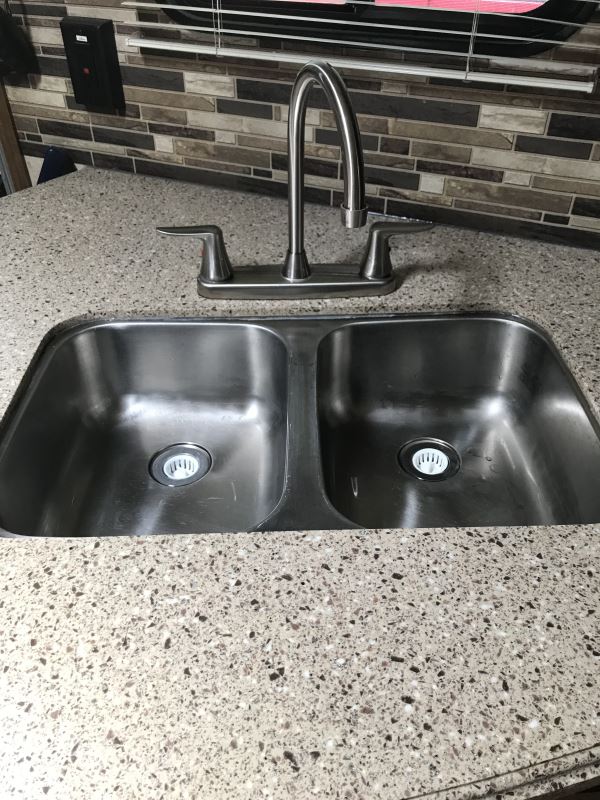
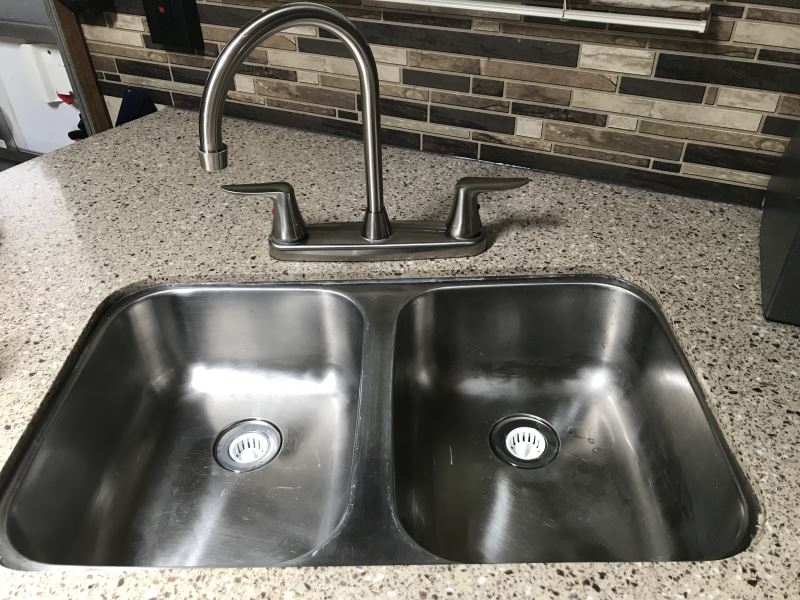
And since we went with a stainless steel sink here, we wanted to have something that was a nice metal finish to match it.You can see our old one here this really just wouldn't have gone great with our stainless steel sink and you could see how nasty it was in there. Our new one installed now, we've got nice, good seals all the way around and everything is very modernized. So whether you're making some repairs or you're just looking to modernize your camper RV, this is going to make a great option to really give everything a nice clean new look.We've got both hot and cold with labels on each. And both of them will twist towards you, which compared to the old sink, which had really odd levers to them, they twisted both in kind of a strange motion. This faucet feels much more natural, just like when you would have at home.
The long neck on our spicket here is also great for large pots and pans, especially tall ones if you're going to boil some noodles or anything like that. You have one that just kind of comes straight out. It can be hard to really get those pans up underneath it there.But with this big arch, you can easily get the faucet down inside those really deep pans. It features a low flow aerator inside to help reduce the flow of water, so that way you can conserve some of your water supplies. But even with that in there, it still puts out 1.8 gallons per minute.
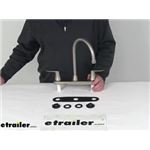
Our faucet's constructed of an ABS plastic, so you don't have to worry about any corrosion. It's also a washerless design, which can help reduce friction to extend the life of all of your components.And we know it can be tight in some of the RVs out there. So in case you're worried about any clearances, if you've got any low-hanging shelves or appliances just above your sink, from the countertop to the top of our spicket here it's going to be about 11 and a half inches. The shanks coming down through the bottom of our faucet are standard MPSM fittings. So they should mount right up to your existing plumbing in your RV or camper.This faucet is a two-hole design.
Each of the handles will drop down through your counter, but it is also designed to work with a three-hole setup. So if you've got one here in the middle, this is still going to seal up around it and everything's going to install just fine. And it's going to cover up that hole. So you don't have to worry about that if you've got the three-hole at home.If you follow along with us, we installed the new sink, drains, as well as the faucet here. So you can follow along and have the same confidence to do it yourself at home. Today, we're going to be replacing our faucet with a chrome one and to make everything match, we're also going to be replacing our sink and our drains.So you can see why we're replacing our components here. The silicone that's around our sink is starting to deteriorate. It really doesn't look very pleasing to the eye. And once it starts to deteriorate like this, moisture can get down behind the sink and leak down behind your cabinets and you won't even know it. If you have moisture around up here, when you're washing dishes or anything and you get some splashes. That can all lead to mold and mildew behind your cabinets there.Down inside, we also have our seals here around our drains that really look pretty cruddy and you can get some leakage around these as well. And that also leads to that mildew and damage from water intrusion back behind our sink. Our faucet's also old and outdated. So we're going to go ahead and modernize that while we take care of these sealing issues that we've got.We're going to be modernizing everything by replacing the sink drains and the faucet. We're going to go ahead and need to get our sink disconnected. Our sink doesn't have anything attached to it except for our drains here. You're going to need to access the bottom of your sink. Oftentimes, you can just pull out a drawer or open a cabinet in order to get here. And these just unscrew. And now that we've got those bolts loose, it'll come down just a little bit. We don't need to pull on it or do anything like that since we don't have any faucets or anything else that attaches to our sink, that's really all we need to take loose there.Underneath your sink, you'll have attachment points. These can either be a screw head or a nut. Ours has a wing nut on it that we're going to be twisting to remove it. But you may have just a nut that you can just use a screwdriver or a socket on. Now that we've got all of our little wing nuts off everything underneath, there was one in each corner. So there was total of four in ours. Just make sure you check and get all of them all the way around.We now need to break the silicone all the way around and we're just going to run our razor blade right around the edge. Just carefully and gently just bringing that along, right along the seam there. This would just make it a little bit easier to separate our sink from our countertop. Now that we've got it trimmed all the way around, we're just going to come underneath and we're just going to kind of give some pressure on it, looking to see if we have any spots to kind of want to lift up.And this corner right here, we've got wanting to lift up some when we push on it. So we're just going to take our putty knife now and just kind of run that underneath of it. Keeping some pressure on it as we push up to help break the rest of the seal and get the sink separated. Once you've got it worked all the way around and it'll just pop off of there. We can pull it up. We're going to go ahead and set this aside and get everything cleaned up here on top. We can go ahead and use our putty knife, razor blade to clean that up. And you can use any chemicals. Just be careful not to scratch the countertop.Now our new sink is going to be hanging over just like our old sink was. So if you get a little scratch or something there, it's likely going to be covered up. Just try to be careful here around the outside edges. So now that we get everything cleaned up around our sink, at this point, you could be ready to put your sink back in. We're going to remove our faucet because we're going to be replacing that as well.So if you're just doing the sink, you can follow along with us right after we get this out here. To remove our faucet, the first thing you want to do is make sure that you've got all your water turned off. We checked that before we took our sink out. See here if we turn it, we've got nothing. Down below, you'll have two lines go into it. You have your hot and your cold line. These just unscrew. And it's never a bad idea, especially if you've used it recently, just to have a rag around because there's maybe a little bit of water in there.We're going to undo the other one. And then once you get your hoses out of the way, we can remove the plastic nuts that secure the faucet in place. There's going to be one on your hot and one on your cold side. Now in those cases, it's going to lift up, you may have some silicone that you may need to run a knife around to break the seal or not. Ours is just going to lift out of there. The bottom plate here is siliconed onto it, so we will have to remove that. But as far as the sink mechanism here, it just comes right off.And then just check this piece, you may or may not need to remove the silicone from it to get it off. Ours didn't have a whole lot going on there. So it came off pretty easily. We're going to go ahead and clean this up now and get all this ready for our new faucet. Now that I got it all cleaned up, we want to check to make sure everything fits. Our new faucet does drop down in there. Make sure you're putting down the correct sides on there, blue on the right for our cold and hot on the left. That's how ours was set up. So make sure you're just matching those lines back up.So everything looks like it fits. We want to seal this bottom piece up to the top of our surface, so that way moisture can't get down underneath of it. You can see on this one here, this one wasn't properly sealed. So that's why this wood is bulging in different areas here due to the moisture that already got down in there. So we're going to make sure we seal that up to prevent it from getting any more saturation. So the bottom piece here that we just went ahead and slid it off, just because it'll be a little bit easier.We're just going to run a bead of 100% Clear Silicone all the way around here. You can pick that up at your local hardware store if you need some. And we just need a light bead around the inside. Don't worry if you get a little on the outside, we can clean that up afterwards. So now that we've got that bead on there, we're just going to slide it back on to our faucet and then we can drop it down into place. I did clean up the surface with some alcohol after I scraped everything off of it to help ensure we get good adhesion.Once you slide it through on the bottom, we're going to take the rubber washers that come in your kit, slide it over, and then use the nuts that come in your kit to tighten those down. We're going to do the same thing over on the other side. And you just want to tighten it down until it's snug. You don't want to overdo it. It is just plastic. And then we can reattach our hoses. Our new drain here, we're going to have to remove the nut here off the backside. There's also a steel there. Make sure you keep those together. And below that, you're going to have another nut. We're going to also unthread this one.We're going to set that aside. You'll have a paper as well as a rubber gasket there. Save both of those. You're going to need those as well. Now that we're down to just the top part here, we're going to need to use some plumbers putty. It's kind of like a Play-Doh-y substance, and we're going to use this to make a seal. So I just gone ahead and kind of rolled it out there, so I can make a gasket that's going to wrap around this here.And that's really just what we need to do is just kind of wrap it around there and try to make it even if you can going around. And this way, when we go to tighten this down, this is going to squish out and give us a good seal. We can peel off the excess once we've got it tightened down. So I'm going to take this now and it's going to go from the bottom up, slide it through, kind of just give it a little push and pull there just to make sure it's in there. And then we can take our gaskets, put those back how we removed them. So rubber first followed by paper, then our nut.And we're just going to tighten this down on there. It is a large nut. You may want to use a pair of Channellocks when tightening it to make sure you get it all the way secure. We can now tighten it down to squish the seal as well as the plumber's putty that we've put on there. We went ahead and replaced both of them. So we got those snugged down. We're just going to flip it over here so you can see the other side. I'm just going to temporarily set it into place. And the excess that we've got here, we can just peel this right off.Now that we've got it all cleaned up up top if you we're just replacing the drains, you can go ahead and hook those back up. I'd recommend using the new seal and the new nut if you can. Depends on your line, whether or not you can slide this over it or not. If you can take it off, the pipe off and slide this on. In our case, we're not going to be able to slide this over our pipe due to the way the pipe is designed. It won't fit over it, but we will be using our seal. But we're replacing our sink, so we're going to go ahead and get the sink prepared and set it back down before we attach ours.Our new sink does come with some new studs, so we're going to grab those and we're just going to thread those into the attachment points. There's six of them, three in the front and three in the back. So just thread these guys in there. Before we drop our sink in, the entire way around, we're going to be putting a bead of 100% Silicone. We're going to be using the clear color because we have a stainless sink. It's going to help it blend in and look a lot nicer.If you had a porcelain or a white one, then you might want to go with a white instead of a clear. You could pick this up at your local hardware store. And we're just going to give ourselves a generous bead around the outside, because we want this to seal up against our countertop. So we don't want moisture getting underneath that's going to damage our countertop and can leak moisture into cabinets down below causing water damage there as well.If you we're replacing your faucet, this is the same silicone that we used when we put that in place. Now that we've got that in place, real quick before we drop it down in there, we're going to just pull the old gaskets out from our pipe down there. And make sure that we set our new gaskets in place, so we don't forget those. We'll now gently set it down into place and then we'll head underneath, so we can get our attachments made. You want to make sure your drains are facing towards the rear of the sink. That's where it's going to line up best with our pipe as well.We can now take the wing nuts that come in your kit as well as the L brackets, slide those over the studs to make sure that this portion here is going to catch onto the counter. Kind of similar to what it would be like there. So it snugs our sink down. Thread those wing nuts on there and then just snug them down. I like to kind of get this one touch in, put just a little bit of twist on it and then go to the next one and then make sure you tighten these down evenly all the way around to ensure that it pulls it down flat up against the countertop so that silicone can seal.There's a total of six, so we're just going to go ahead and snug down the remaining five. After you come up top if it's still wet, you can run your finger along the edge to smooth it out. Depending on the set time of the silicone you got, it may become tacky. And in that case, when you try to do it, just going to kind of turn into little boogers. And that's kind of what happened to ours here, got a little tacky. It's okay if it does just get that stuff cleaned off out of the way if it does get all tacky on you, and then you can just put some fresh on the outside and then use your finger to smear that down.So we're just going to give it just a real, just real light bead right along the outside there. We're going to do this all the way around to make sure it seals up. And then I'm just using my finger to smooth this out. We can clean up the excess. We're trying to push it kind of down in that groove where the two surfaces meet to make sure we're sealing it up. We're just cleaning up any excess around the outside that we had. So now we've got it all sealed up, we're going to give it 20 or 30 minutes to dry.It's starting to get a little tacky and when we're wiping it off, our paper towels kind of ripping off here. You can see on the front on some of it. So if we let it stick up a little bit longer, you can actually just take your thumb and just kind of rub it across it like that. And that'll all these little bit here will just start to peel right off of there. Once we've got it set up though, then we'll test out and make sure that we have no leaks. So while let's set it up and drying up top, we're going to come back down here below and we're going to thread our pipes back on.Kind of got to get them both started at the same time here. Because we don't want one putting pressure on the other and you want it to feel nice and even when your pipes are gone back up. Because the positioning of a new sink, the drain holes might be slightly further forward or backward or off to one side just a little bit. So your pipe, just want to be careful when going back up that you don't overstretch it or damage it. So we've gone ahead and finish cleaning everything up and we tested it out to make sure we didn't have any leaks. The plugs here, if you look, it's got these little raised sections. If you set it down in there with the raised sections resting on the cross, that holds it up and allows water to pass through. So it's not going to hold water kind of like you see now.You give it a little twist, it'll drop down in there further, and that will seal against the bottom and that'll fill it up. So we can turn it on, let our sink fill up and then we can check down below to make sure we don't have any leaks coming around our pipe around any of our seals. So you want to let sit in there, I would recommend to let it sit for about 15 minutes just to make sure you don't have any seepage or anything. Just check around here for any wetness that you might have. If you have any wetness down here, then you may have a leak and you may need to tighten up your nut a little bit more if you don't have it all the way tightened.Same with any of your fittings, check all of your connections to make sure everything's nice and snug. If you still continue to have a leak, then you may need to disassemble and reapply the plumber's putty and re-tighten it back down. We don't have any leaks over here. So we're just going to go ahead and fill out the other side and then make sure there's nothing on this side. As long as we don't have any leaks over here, then we're good to go, And that completes our look at Phoenix Faucets line of Catalina double lever kitchen faucets.
Average Customer Rating: 4.6 out of 5 stars (230 Customer Reviews)
Plastic RV kitchen faucet has a durable, washerless stems that reduce daily wear and tear to extend the life of your faucet. Low-flow aerator helps conserve your water while you're soaping up your hands.Shipped on time zero damage on delivery box.
From start to finish on installation it took 30 minutes. Looks great and works as advertised.
I took two pics of old faucet and picks of the new one I installed
Shipping and service from e trailer excellent as usual. I've ordered several items for my trailer and camper and y'all have had exactly everything I've needed. This faucet installed in our class C with no problems. A good upgrade. Thanks e trailer!
The product is new and looks great. It is very light and was reasonably priced. Easy to install.
When we ordered it we were advised it was back ordered. etrailer kept us well advised of the expected arrival date, the actual arrival date (a bit earlier than expected), and the delivery date. Excellent communication and customer service!
Looks and works great! The only issue I have is that the little blue plastic temperature indicator came off and got lost in the first weeks of use. I would still purchase it again. Much nicer than the original that came with my 99 Bounder.

This was a replacement faucet for the OEM that broke in our RV after 10 years.
It got 4 stars as it has a lot of plastic, so not as sturdy as what is in the RV we just purchased. It was easy to install. I would get it again.
This is the first time. I've used e-trailer. The product was excellent, check out and delivery was easy and on time.Will be using them again.
fit good, works well, connects well, no leaks
The description was accurate.
Thank you for your good service Greg s
Finally, someone created a top side diverted valve for an rv shower! All these years, everyone just looped the hose from bottom side connection; never was right! With this one, that problem just ended! Five-Star all the way around on this-one! Cheers, from one happy camper! ??
Faucet looks nice but, the valves go from horizontal off position to vertical down on position & this is backwards from old faucet.The faucet is all plastic & my old Phoenix faucet was metal & had inner & outer threads that let me extend the 1 1/2" pipe threw wall that is one inch thick.when I used the supplied plastic pipe nuts I had no room to install 1/2"FIP hose.so the faucet is held on by two washers,an o-ring & the 1/2" FIP hose for now until I end up buying a real faucet.
Exact replacement for original shower enclosure. Good product.
I wish I could give this faucet 5 stars, but it's the usual chromed plastic type for RV's and not metal (preferably stainless steel) like residential faucets; unfortunately, the way my sink cabinet was built prevents using residential faucets. That being said, it's fairly well-made, very easy to install and reasonably priced. Of course, there's absolutely no reason why it couldn't have been made from stainless steel to last longer, except that they'll sell more because the plastic ones wear out.
Good fit for replacement of broken original faucet and very easy to install
shipped fast, item as described and a great price
Just what I was hoping for.
Perfect fit replacement for my leaking outdoor mounted RV shower. Speedy delivery, fair price.
I have just installed this faucet and it is a nice improvement from the factory faucet. Fairly simple to install but I had to remove my sink to reach the connections. Fortunately, all of the plumbing was plastic and easily removed and reinstalled. Also the sink fasteners were brackets with wing nuts.Time will tell if the new faucet holds up to a season of camping.
This shower faucet is fine and works as it should
Info for this part was:
At etrailer.com we provide the best information available about the products we sell. We take the quality of our information seriously so that you can get the right part the first time. Let us know if anything is missing or if you have any questions.


Thank you! Your comment has been submitted successfully. You should be able to view your question/comment here within a few days.
Error submitting comment. Please try again momentarily.