
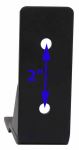
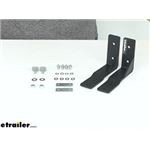
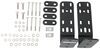
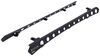
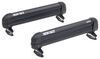
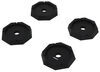
These brackets let you attach a Sunseeker awning in the top channels of your Rhino-Rack RSP, RS 2500, or SG crossbars. Angled up brackets mount awning above your roof rack. 2 Brackets and mounting hardware included.
Features:
Specs:

Videos are provided as a guide only. Refer to manufacturer installation instructions and specs for complete information.
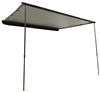
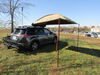
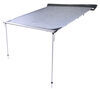
Hey everyone, it's Evangeline here at etrailer. And today we have the angled bracket designed to be used with your Rhino-Rack awnings. So this is for when you have a flush crossbar system, meaning there's no overhang. And because it's flush, it sits a little too close for comfort to your car. So these angled brackets bring your awning out and into a better position, so that you can still enjoy all that shade as well as having your awning. We have the Rhino-Rack Sunseeker awning.
These are the brackets designed for it because they are sleek, but also still have that stability for the weight of the Sunseeker. Technically, they'll also work with like the Batwing or the dome awnings. It's just may be a difference, especially for the Batwing in terms of that weight capacity. Either way, this is available as an angled up or an angled down bracket. So let's talk about how we install it so that we can see the differences between the brackets, and then figure out which one is better for you.
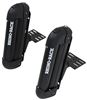
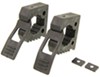
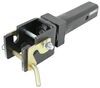
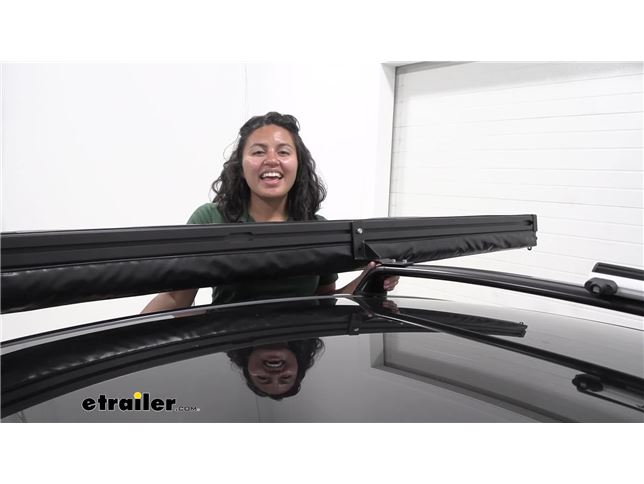
Here we have our two brackets. One is angled upwards, the other is angled downwards. And you might wonder, "How are they different" "They look exactly the same." "How do I know which one is correct for me" Well, first you have to look at where it sits on your crossbars. Notice how this fits into the crossbar T-track, and then the angle goes up but then we have the bracket go down. So here on our Tesla is a good example of why this may not work for all vehicles.
Notice how this sits too close to the side of the car If you had it seen flush, there would not be any space for your awning without making impact with your door. So in this case, you would definitely need the angled upwards bracket instead. To see if this fits your vehicle, measure from the edge of your T-track because that's where the last hole will be lined up, and that will be the furthest out to the edge of your crossbar you can get this bracket. Now the distance from there to the bracket is going to be 4 1/2 inches. And whichever bracket you do pick for your crossbar, the install process is gonna be pretty much the same.
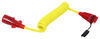
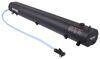
So we're gonna have these plates and then we're gonna install them into the T-track. If you do have a HD bar or a larger crossbar with a larger channel, you may need to use the included adapter plate in your awning. The easiest method I've found is to install the crossbar part first and not the awning plate, and I'll explain that later once we have this on there. So first we're just gonna thread our two bolts onto the plate. We have a split washer and then a flat washer. I put on those bolts. Just slightly thread them for now so they're still loose. That plate's gonna fit into your T-track channel. If this was a Rhino-Rack roof rack we could take off the wind strips. It's a lot easier. Here we have the factory roof rack for Tesla so it has a rubber strip you have to push down first. So it is a little bit more of a effort to make it in there, but it's in there now. Once the bracket is through, don't forget to put end caps or caps back onto your crossbar if they had one. Using a 10 millimeter wrench, you're then going to tighten down those bolts. You can use either a socket wrench or an open ratchet wrench like I am. Tighten down until those split washers flatten out. And now your brackets are set up on your vehicle. And here these are designed for Sunseeker awnings, but they can also be used with the other Rhino-Rack awnings because the track system is the same, which is why I like to do brackets first. So here we have our Sunseeker awning. We have our square nut that's gonna slide through the tracks. Put each one since you get two in the general location that you want to mount this to the bracket. I have a friend here helping out with showing how this fits onto the bracket. So get this lined up with the holes on the bracket and fit it through. Since this can slide back and forth on the awning that helps out with getting it to line up, but once it's through the hole and you can pick whichever the tool holes you prefer you then get your split washer, and then your nuts, and that secures the awning. Do both before tightening down fully. There may be a difference between the bolt you get with the bracket as well as the bolt you have with your awning. Now it does still thread, but if you feel more comfortable with the longer bolt from your awning, then I do recommend using that instead. Either way, once you do have it on there you use that flat washer and then the nut to secure the awning in place, and tighten those down with a 13 millimeter wrench. And just like that, you're able to install your bracket. You can see it's very similar to how the bracket on your current awning works, but because you have a flush crossbar this gives you a little extra clearance and now you can extend your awning or carry your awning without worrying about it interfering with your vehicle. So all in all, there are different types of brackets, different types of crossbars, and different types of awnings, and it can get a little overwhelming when you see all of the different options. So if you do have a flush rail or flush crossbar that looks like what we have here, and maybe you're in a situation where you need that extra space like what we have here, hopefully this video helped you out with seeing how those angled brackets can help you and whether you should get the angled up or the angled down. On another note as well, if you have a different awning a lot of the parts are pretty universal, but the weight capacity is not. So the Batwing awnings will usually use a larger bracket for that extra stability and that extra weight. So those are also things you can check out here at etrailer with our pictures, and descriptions, and videos to help you out. And that right there was a look at our angled brackets, whether it's the angled up or the angled down bracket for your Rhino-Rack Sunseeker awnings.
Average Customer Rating: 5.0 out of 5 stars (2 Customer Reviews)
These brackets let you attach a Sunseeker awning in the top channels of your Rhino-Rack RSP, RS 2500, or SG crossbars. Angled up brackets mount awning above your roof rack. 2 Brackets and mounting hardware included.This is an excellent product. It only took about 30 minutes to mount.
Do you have a question about this Accessories and Part?
Info for this part was:
At etrailer.com we provide the best information available about the products we sell. We take the quality of our information seriously so that you can get the right part the first time. Let us know if anything is missing or if you have any questions.


Thank you! Your comment has been submitted successfully. You should be able to view your question/comment here within a few days.
Error submitting comment. Please try again momentarily.