
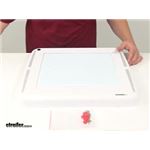
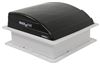
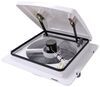
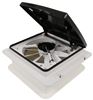
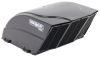
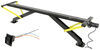
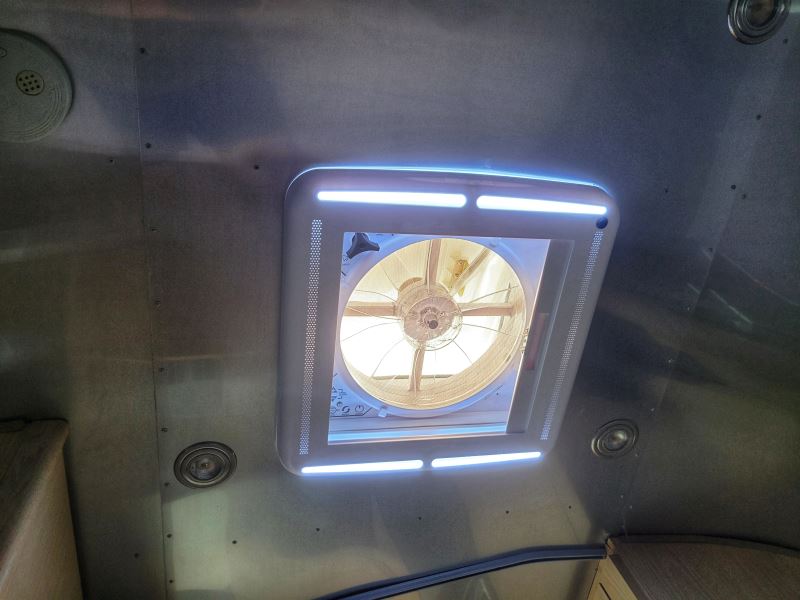
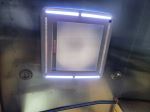
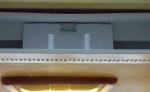
Retractable vent shade with LEDs snaps flush into place over any RV roof vent with a garnish ring to give you a streamlined look. Reflective surface blocks heat and UV rays to keep your RV cooler in warm weather and protect your interior from fading.
Features:
Specs:
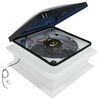
Note: If installed on a roof less than 2" thick, the control knob on the fan may obstruct the movement of the shade.
This spring-loaded, retractable vent shade extends over your roof vent and fan. Its reflective surface allows you to run your AC less by deflecting that unbearable heat, keeping your RV cooler in the dog days of summer, and keeps your flooring and furniture from fading by blocking harmful UV rays.
Its snap-lock design secures in seconds to prevent the shade from retracting while driving on bumpy roads. While extended, you can still use your fan, but a low speed is recommended as a high speed setting can pull it out of position. Having the shade extended can also hinder the amount of air being pulled in or exhausted out. The shade will stay fully extended and locked into place until you manually disconnect it to let in some natural light and a cool breeze on those mild Spring and Fall days.
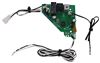
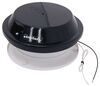
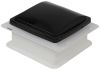
Not too bright and not too dim, these sleek LED light strips make an excellent night light inside your RV or camper. The soft white LEDs give you the perfect amount of light to navigate through your living space in the middle of the night.
Your retractable vent shade with LEDs installs in no time with minimal drilling. Remove the existing garnish ring from your roof vent and carefully drill a 1/4" diameter hole in any corner of the garnish ring. The hole will allow you to feed the LED wires from the vent shade through to connect to your fan's existing 12V power. Re-install your garnish ring once power is established.
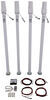
The detachable adapter bracket from your vent shade mounts on top of the existing garnish ring from your roof vent. Based on the width of your garnish ring, you can choose the inner or outer holes to mount the adapter bracket using the included hardware. To complete your installation, simply snap your vent shade frame into the adapter bracket and off you go.
Videos are provided as a guide only. Refer to manufacturer installation instructions and specs for complete information.
Jake: Hey guys, it's Jake here with etrailer. Today we're going to be taking a look at and I'm going to show you how to install the Maxxair MaxxShade. What this shade is designed to do is it's designed to go in a preexisting vent opening that you have. What it does is it's both going to give you lights, additional lighting if you have chosen the option with the LED strips in it, which I highly recommend, and it's also going to be able to block out any of that unnecessary heat or light from the sun by closing the shade. You can close the shade, keep some of that hot air out and get some fresh air in through the vents on the side, and it's going to help to get rid of the stagnant air on the inside of your camper. With the LEDs on the bottom of our MaxxShade, they are going to be needing 12-volt power, which this is designed to work with a Maxxair fan that already has 12-volt power going to it.It's also designed to work with the fan when it's in use, so if you close your vent, you can still have your fan running.
Show you a quick example. It's going to help to get rid of some of that stagnant air on the inside of your camper. You can close that off. The opposite side of this shade is going to have a reflective backing to it so it's going to help to eliminate some of that heat, and you can feel the air being pulled up through these two side vents. The shade itself is going to be retractable, so it's going to be spring loaded so when not in use it's going to stay in the open position, but when it is in use, it's going to have these two prongs so when you go to close it, it is designed to slam shut.
I would recommend lifting up a little bit on it in order to make it a little bit easier to open. Put a little pressure on it, and it'll hold right in place. You simply pop it loose to open it up.The MaxxShade itself is going to be white in color. It's going to be a durable plastic so it's going to hold up well over time. Now, one of my favorite things about this shade, and I did not realize this until I had actually flipped the lights on and off.
I love the accent lighting that this is going to give your camper, so if you're getting ready to go to bed but you still like to have a little bit of light out in your living room or in your dining room like we are in here, this is going to be the perfect amount of light to get around, to be able to see, but not too much to where you can't sleep.Now that we've gone over some of those cool features about the MaxxShade, let's go ahead and show you how to get it installed. Now to start your installation, you're going to start by removing your garnish ring on the inside of your vent. Now, your directions are going to say to remove the four screws and to discard them. I'm going to do it a little bit different. What they're planning on is they're planning on the new garnish to hold this old one up.
We're going to go ahead and replace these screws after we drill a hole so that the new ring doesn't have to hold up the old one. Now we can go ahead and pull our ring down. Be very careful, especially if you're doing this on an older camper, not to break the ring. Now we need to drill a small hole towards the corner of one of the corners on your garnish ring, and this is going to be for our wires to go through, to power our LED light.Now because we're going to be reusing the screws that came out of our garnish ring, what we're going to do is we're going to take our new garnish ring that comes with our MaxxShade. Going to set it on top, make sure it's nice and even, and you're going to have two different options of holes on the outside or on the inside of your ring to help keep this garnish ring in place. We're going to be using the inside four holes to keep our shade up and in place, so we'll just take a marker, mark our holes so we can pre-drill some holes for our screws to go through.Now that we've got all of our holes drilled in our garnish ring, what you're going to do next is you're going to take this hole that you drilled in the side of your garnish ring, and then what we're going to do is we're going to take the new garnish ring and put it on the bottom of it, and then we can take our actual shade itself, feed the two wires through this hole, and then wire it up to our power and our ground that's already in place for our fan. So we'll go ahead and do that. It's a good idea to get an extra set of hands. We'll do that, and then we'll come back and I'll show you how we wired it up.Now, if you don't have an extra set of hands, you can always grab a ladder, put a small piece of wood on the top, and then you have a elevated workstation. So what we did was he ran our wires through our old garnish ring. You want to make sure the wires are going through your new garnish ring, so you see they're on the inside, and then they're coming. Obviously they're going to be coming from your shade. So you'll take this, and now we're going to splice our positive and our negative wire into our positive and negative for our fan. Now, you want to make sure you shut the power off before you do any of this.Now your new wiring is going to be marked on the positive wire, which is going to be your black wire for your shade. Your wiring on the inside of your vent, you're going to have to determine what is positive and what's negative. We are fortunate. Ours are marked still from the manufacturer. Our red one here is going to be the positive, and our white one's going to be our negative. They do include these quick connect connectors so what you do, they do come pre-stripped on the end so you want to make sure you cut that off if you are choosing to use the quick connects. Bite it in and then crimp it down. Then we'll take our little safety cap and snap it in place.Now once you've made your connections, we can go ahead and tuck our wires back up into our cavity up here. Sure they're not going to fall down. This might be a little difficult. Just take your time. You need to push our wires up and lift our garnish ring back up in at the same time. We'll go ahead and replace our screws. We did have a few of our corners get busted out, because this plenum here or this garnish is a little older, so you do want to be gentle with any brittle or older garnish rings.Now with our old garnish in place, we can go ahead and take our new one and it's going to sit right on top of it. They are going to include four screws for you to screw this in. Our frame is going to have an aluminum frame, so we're going to be using some self-tappers. If you have a wooden frame, the screws provided should be good enough. Go ahead and line up our holes. You want to be careful not to over-tighten any of your hardware. You don't want to risk cracking the new garnish that we're putting in.Now, before we attach our new shade to our attachment points here, we're going to take the wire, our ground and our power wire, and feed it up through as we are putting our shade up into place. Now we take our shade, line it up with all of the brackets, and then simply push it up into place until it snaps into place.Now that we've got our MaxxShade in place, we can go ahead and turn the power back on our camper and test out our lights. Now that we see that everything's working, want to make sure your shade is sliding properly. Make sure it hooks okay. You see everything's working great. That's going to do it for our look and installation of the Maxxair MaxxShade.
Average Customer Rating: 4.4 out of 5 stars (36 Customer Reviews)
Retractable vent shade with LEDs snaps flush into place over any RV roof vent with a garnish ring to give you a streamlined look. Reflective surface blocks heat and UV rays to keep your RV cooler in warm weather and protect your interior from fading.Good price and quick delivery from etrailer. AirExcel could do a little bit better in their explanation of where and how to drill the hole for the light wires (maybe even have the hole pre-drilled). Other than multiple checks for the hole location, installation was straightforward. Actual shade seems a little flimsy (probably so that it can roll into a small space), so know that we have to be careful in order for it to last. Will use for the 1st time next week, so will have a better idea on how well it does in keeping the light out after this trip.

I installed 3 Maxxfan Deluxe fans into our RV. After a year of using them (8 months full time) we still love our Maxxfans. They are reasonably quiet, move a lot of air and we especially like not having to worry about rain. The Maxxfan light cover works well too and lends a classier look as well as darkening the room if needed. I installed all three fans myself without any unexpected issues, no leaks so far!
After owning this shade/light I'm very pleased with this product. Is working perfectly no issues at all. It helps with the light and the outside noise. Etrailer excelent company
Product was as expected, easy to install and works great, etrailer is a great dealer and provides excellent shipping, service and great products.
Absolutely perfect addition to the maxf an
Came on time.
Everything is good . I will order from them again . Next is installation.
prices are reasonable. shipping was prompt. i like seeing a face/name attached to each portion of the process after ordering. the personal touch was appreciated. only negative i can comment on was this item was shipped in simple manufacturer/display box, no additional protection, and the box was significantly damaged. luckily, the contents were not. just lucky the point of impact/hole in the box did not impact the piece inside. could just be poor handling by UPS to explain this situation
Product sounds great but is less quality than what I exspected
This is the second maxxshade that I have installed in my RV. I installed the first one over the master bed and liked it so much I installed this one on my other maxxair fan. They don’t eliminate all light only allowing a minor bit of ambient light when closed. You really notice the difference when they are open though. If you own maxxair fans this is the perfect addition for them.
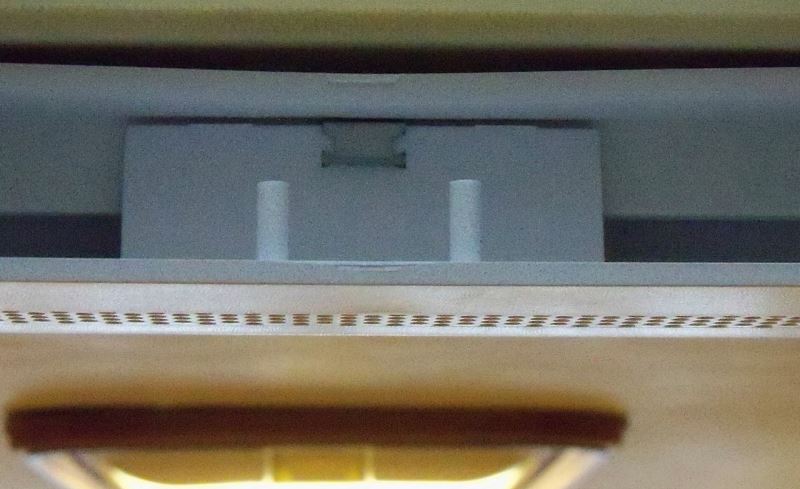
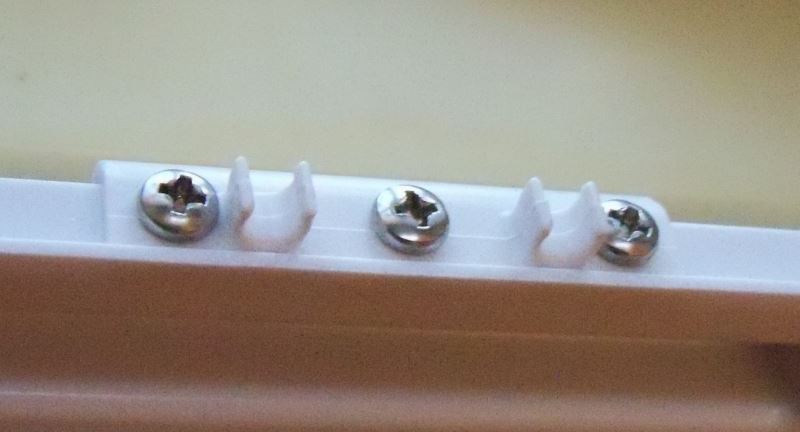
The vent shade was easy to install and adjusted to the existing vent easily making a close seal with the ceiling (without removing the existing vents collar/garnish ring). It is the only unit that allows minimal light to pass thru. Two issues prevent me from giving a higher rating. 1) The barbed clips (see photos) on the "adapter" (the piece that is screwed to the ceiling) make it impossible to remove the shroud (that is pushed onto the adapter) without damaging the shroud and breaking the barbed clips. 2) The design of the mechanism that holds the retractable shade closed is "flimsy" at best consisting of small crescent shaped plastic fingers that slide around a 1/4" plastic post (see photos). It is not a positive latching design and will wear our and/or fatique with repeated opening/closing.
Got this for my motorhome. Fit was perfect and worked as advertised, looks nice also. Love etrailer!
The fan, cover and shade were very easy to install. The only surprise was there was no butyl included with the fan unit. I have used it all camping season and am very happy with the fan and shade.
Doesn’t work without modification for MaxxAir fans having a light ring already installed. Also will not fit locations where the fan is installed near a side wall or with close side clearance. Nothing noted in instructions or online to these issues. If using in a Teardrop Trailer think twice before ordering
It does not completely block the outdoor light, it leaks light all around and through the “foil” shade. There’s so much tension on the shade it’s rips out of your hand whenever you release it. The shade is held closed with molded plastic clips, very cheaply made; I anticipate the clips breaking soon.
Well made product, excellent service, arrived ahead of schedule. I always have great experiences dealing with E-Trailer. Thank you.
Once I figured out to properly install after it falling a couple of times it has worked well.
Easy install. Looks and works great!
Fast shipping and fantastic package tracking.
Installed shade, easy install and works great.
Do you have a question about this Accessories and Part?
Info for this part was:
At etrailer.com we provide the best information available about the products we sell. We take the quality of our information seriously so that you can get the right part the first time. Let us know if anything is missing or if you have any questions.


Thank you! Your comment has been submitted successfully. You should be able to view your question/comment here within a few days.
Error submitting comment. Please try again momentarily.