
THIS ITEM IS NOT A FIT FOR
2005 Chevrolet Silverado
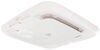
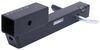
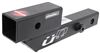
Roadmaster Crossbar-Style Base Plate Kit - Removable Arms
Item # RM-522203-4
Retail:$550.00
Our Price: $485.00
You Save: $65.00
2005 Chevrolet Silverado
Will this fit?
To see if this custom-fit item will work for you please tell us what vehicle you'll use it with.
In Stock
Thank you! Your comment has been submitted successfully. You should be able to view your question/comment here within a few days.
Error submitting comment. Please try again momentarily.


Need help with installation?
Locate installers near me- All Info
- Reviews (882)
- Q & A (0)
- Videos (1)
- Photos
Roadmaster Base Plates - RM-522203-4
- Removable Drawbars
- Roadmaster
- Twist Lock Attachment
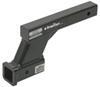
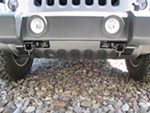
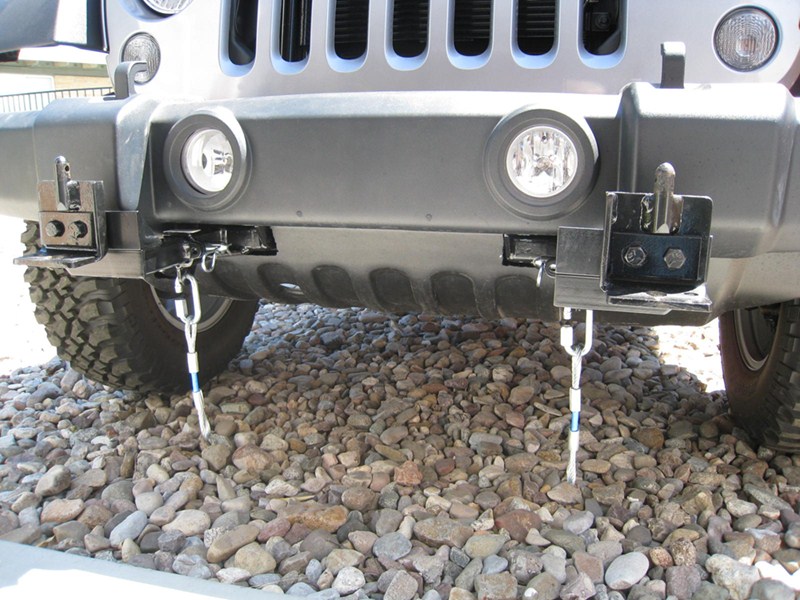
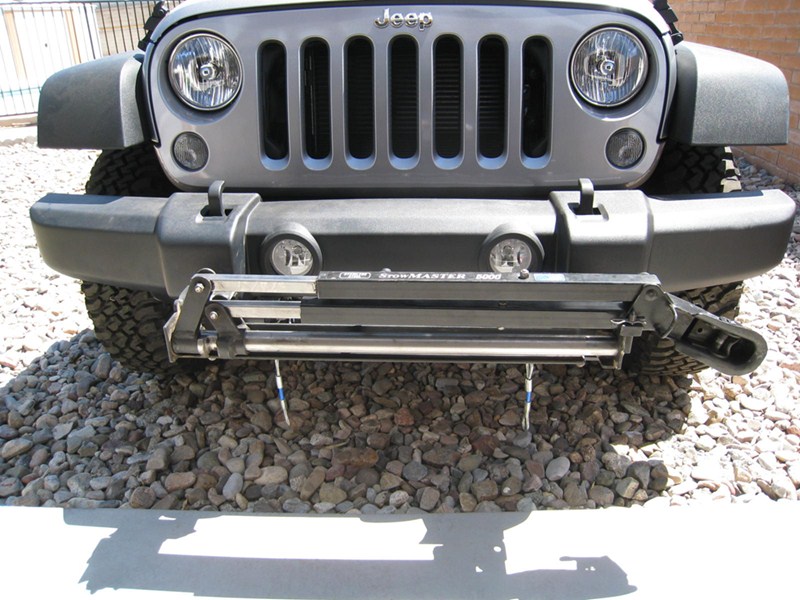
Roadmaster's crossbar-style brackets have such a low profile that they are virtually invisible. Each arm is easy to mount and simple to remove. Brackets install on your vehicle's frame to provide attachment points for your tow bar.
Features:
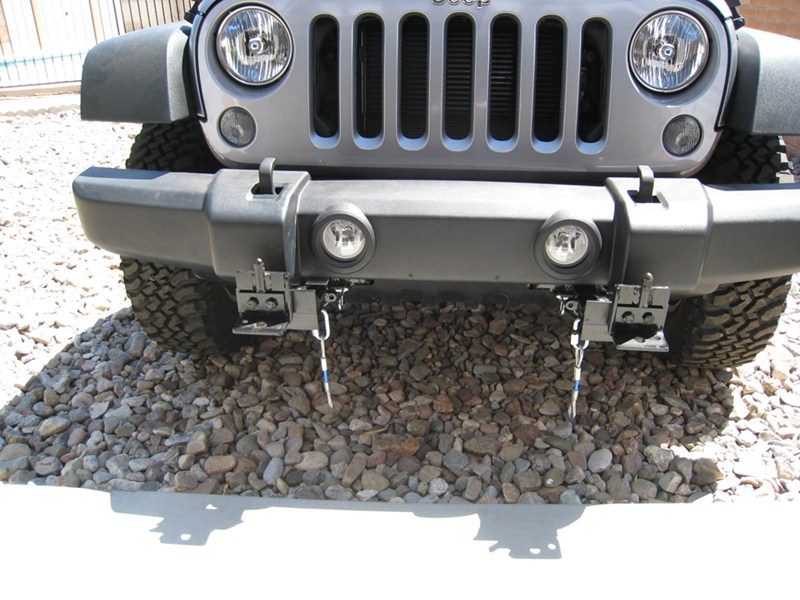
- Hidden bracket design provides improved aesthetics compared with standard brackets
- Crossbar-style brackets sit far back for a supremely clean look
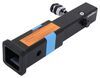
- Drawbars attach and remove quickly and easily
- Arms click to lock in place in brackets
- Built-in pull rings let you unlock arms so you can twist and remove them
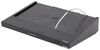
- Computer-cut, all-steel construction provides exceptional strength
- Black powder coat finish is durable and corrosion resistant
- Simple installation - no welding required
- Custom base plates ensure a perfect fit for your vehicle
- Compatible with Roadmaster tow bars with use of quick-disconnect crossbar (910021-00 - sold separately)
- Instructions and mounting hardware included
- Made in the USA
- Limited Lifetime Warranty
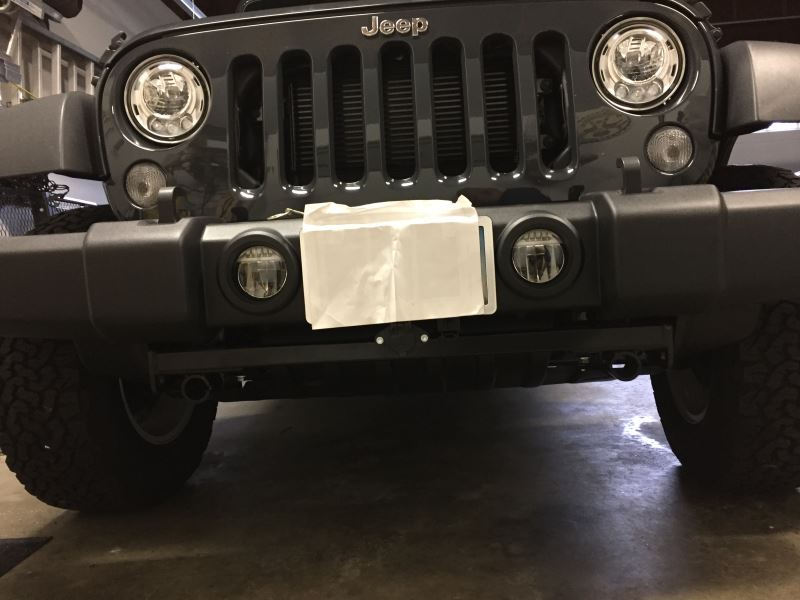
The drawbars, or front arms, on the crossbar-style series base plate kit are supremely easy to mount and remove. Just insert them into the brackets and twist to lock them in place. To remove each arm, simply tug the built-in pull pin to disengage the lock, twist the arm back and pull it out of the bracket. Once the drawbars have been removed, the remaining brackets are virtually invisible. On most automobiles, the brackets are mounted within the grille, where they remain not only unseen, but protected from scrapes and scuffs as well.
522203-4 Road Master EZ-4 Base Plate Kit
Installation Details
This Product Fits The Following Vehicles
- 2020 - 2024 Ram 1500 EcoDiesel models
- 2020 - 2020 Ram 1500 excluding EcoDiesel and Rebel
- 2021 - 2024 Ram 1500 excluding EcoDiesel, Rebel and TRX
- 2019 - 2019 Ram 1500 excluding Rebel


Video of Roadmaster Crossbar-Style Base Plate Kit - Removable Arms


Videos are provided as a guide only. Refer to manufacturer installation instructions and specs for complete information.

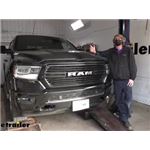
Video Transcript for Roadmaster Crossbar-Style Base Plate Kit Installation - 2019 Ram 1500
Hi there, Ram owners. Today, on your 2019 Ram 1500, we're gonna be taking a look at and showing you how to install Roadmaster's crossbar-style base plate. And this is what our base plate looks like when it's installed. It is two separate pieces that will pass through your bumper where the safety hooks used to be on your truck. If you don't have safety hooks on your truck, it'll still go in the same location and poke out in that area. This is your traditional Roadmaster-style base plate, so it has the round pegs that can insert and click into place when you're ready to attach your tow bar.
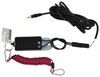
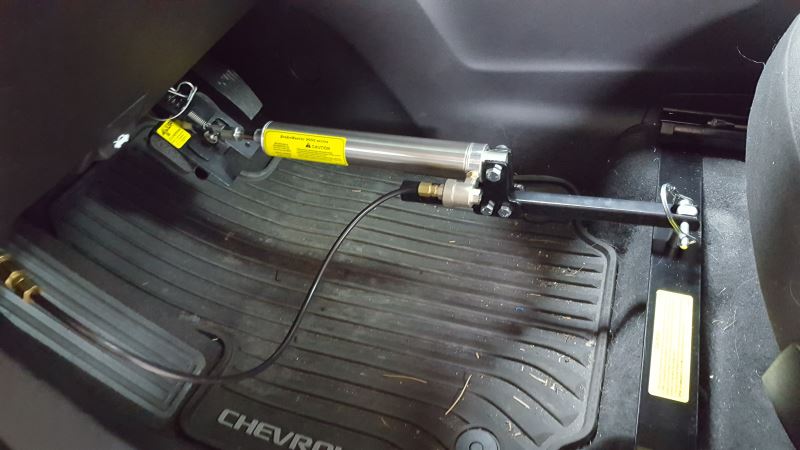
But we've got it in the mode here where if you're just gonna be driving it around town, we've got those arms removed to minimize the distance that sticks out here at the front. Just to be outside of that, we've got our safety cable attachment point for hooking up our safety cables when we hook up to the motorhome. And on the driver's side here, Roadmaster provided two pegs that gives you a location to mount your wiring for your electrical connector. We also utilize this same mounting location here for our breakaway switch, and for the connection point for our supplemental braking system, we're using the Air Force One. In most flat tow applications, you have a breakaway switch in this connector, this here is just exclusive to that particular breaking system we're using.
Now, when you're ready to attach your arms, they simply slide into place, and you just give it a little twist until it clicks in. And at that point, we've now got our attachment for our crossbar. If you're using a Roadmaster-style crossbar, when you have attached to both arms here, the crossbar is removable. But if you're using another manufacturer's crossbar, you may or may not be able to remove it. We're gonna be installing one from etrailer here onto our base plate.
And with that one, you're not gonna be able to remove these arms. Once it's installed, the only way to remove it at that point would be to take the bolts out. So, I highly recommend sticking with all Roadmaster products rather than mixing and matching. And here, you can get a better look at it with both of our arms inserted here. The entire base plate is gonna have a black powder coat finish on to protect it from rust and corrosion.
And this is a pretty easy base plate to install. It does get more complicated if you have a diesel, turbo-diesel model, there's gonna be a few extra things you're gonna have to remove. This one here is not a turbo-diesel, it's just a regular gas engine. And with those, there's actually a lot of steps that we don't have to perform, 'cause the intercooler and stuff that's on the diesel is not gonna be here on the regular gas engine. So, if you have a regular gas engine, I would say that this is something that you could probably install in your garage. It's actually really easy, so I'd say, probably about three to four hours. And that's pretty good for getting the base plate installed 'cause we don't have to take the whole fascia off. Now, if you do have the diesel engine, you've got a little bit more trimming and a little more components you'll need to remove. I would say, probably add on maybe an hour to an hour and a half of extra time for those models. So, now that we've covered some of the features of our base plate, why don't you follow along with us and we'll show you how to get it installed. We'll begin our installation underneath the vehicle. We'll need to remove our tow hooks if they're in place, or if you don't have tow hooks like us, we'll just need to get this cover out of the way. And here, we're looking at the backside of our plastic cover here where our tow hook would be. This would be one of the bolts that connects to your tow hook, going straight up here. We are gonna have to still remove this even though we don't have a tow hook, but this is the cover that we're talking about that we need to get out of the way. There's two nuts on top. One here and one over there. We're gonna remove these nuts with an eight-millimeter socket or a wrench, whatever you've got that you can fit up in here. And a lot of times, after you get these kinda started, you can take them out by hand from there. So, we'll just remove these nuts from that one. We'll remove it from the other side there over here. Okay. After you remove the nuts, the studs there will actually come out from the place that they're located here. So, we're just gonna kinda twist them and pull them towards the rear. The other one actually came out of there when I took the nut off, right here. Sometimes, they can be a little finicky, though, getting them out of there, sometimes you got to pry a little bit from behind. There we go, we just use our screwdriver to give a little bit of a bump from behind to take that out of there. Now, we can take the whole panel out. It does still have a couple of clips here on the bottom if you look, they're just like little metal speed clips. Those really aren't that important. You can use your screwdriver if you think you need to. But in a lot of cases, when we just pull our, push this out of here, it does just pull off. We're gonna try to save as much of the plastic as possible, though, so we're gonna use the screwdriver there. Just pop those little rings off of there, and then this whole piece should come out of here now. Now that we get those removed, we're gonna come back around to the outside and take our trim panel tool here. We're gonna kinda pull down just a little bit on this and stick it in here, and that's gonna release the clips. We can then just kinda pull the top out and then pull it up like this to get those two bottom ones come out of there. So, you do have two options, you could just leave this out completely, or you could trim it out and reinstall it. And we're gonna do that 'cause the outer ring here is gonna look a lot nicer being in place. But all of this area here in the middle of the flat back, we're gonna get rid of them. We're gonna try to trim along the inside edge of this here. So, I'm gonna take a drill to start, and we're just gonna drill a hole to get a pass-through here. We're gonna put a couple of them in there. Usually, I try to do kinda like in the corners. All right, so now that we've got some access holes drilled into there, we can take a small reciprocating blade and cut this out. You could also use a cut-off wheel. Probably, the backside's the easier way to do that with a cut-off wheel. But you can't really see what you're doing while you're cutting if you're cutting from the backside, so I like this method better than with a cut-off wheel. And now, we're just gonna trim this out. And a couple of spots, looks like we might need to clean up a little bit there just to get through. There we go. And then we can take a file now and just go along the inside edge here and clean up any rough edges, like these little straggly things we've got left behind, we can knock that off to make it all smooth. We can now reinsert the piece that we had removed. It just pops back into place. Double-check on the inside to make sure that your tabs lined up with the holes. And it looks like we had one that we missed here. So, if you have one that misses, you can just pull it back out and just start again. It might help to maybe look on the backside there to get those started. And then the rest just pops into place. And then we're gonna reinstall the same fasteners that we had removed to get it out of there the first time. For these lower ones, when you go to push them on, it's a lot easier if you do it with it in certain direction. So, you can see, it's kinda beveled on it there. We want the smoother side to be the top, and the jaggedy teeth side to be the bottom. There we go. And then for your other fasteners, these will just slide right back into place in the little slots. And you'll secure it with a nut on top. And now that we've got that reinstalled, we're gonna come back to the backside here, we're gonna remove this bolt here. We'll use an 18-millimeter socket to do so. And now, it's not uncommon for moisture to build up inside of there and be quite rusted and corroded and making it difficult to remove the bolt. Once you have it zipped out and it seems like it's loose but it won't come all the way out there, you just gonna have drive it out the rest of the way due to the corrosion that's occurred. So, I'd like to use a wrench to set it on there, it just gives you a little bit larger area of a strike on with your hand. And there we go. So actually, we got that out of there. We can see, there was some rust and corrosion on it, but that wasn't what was holding it up in there. This is just a little speed nut. They put these on there during assembly, it kinda holds the bolt up in there, it just makes assembly easier, it's not necessary at all, it's really just for, when the vehicle's being assembled. So, we're just gonna grab it with a pair of pliers here and just thread it right off there. You could also cut it off of there. If you're having a real hard time, you can take like a pair of side cutters and just kinda snip it off of there. But a lot of times, you can just hold it and thread it out like that. If we followed the bolt that we just removed, go straight forward and then to be outside a little bit, you'll see, there's a nut here, we're gonna remove that from this bolt. And we can just set that aside. And then we're gonna head over across from there. You'll see, there's this vertical bracket here, we wanna remove the lower bolt down there. And you'll use a 13-millimeter socket for this one. After we get that bolt removed, we're now gonna trim off all of this excess here. And we're gonna just basically trim it flush with the bottom of this beam here going across. We don't need this section here anymore. It's in the way of our base plate. All right, next, we're gonna be cutting this off. Now, a reciprocating blade can work, but you are kinda limited by your space. And there's quite a bit of movement out of the bumper here and it wants to kinda flex a lot, so I found that a cut-off wheel is probably gonna be a little bit easier. So, we're just gonna get in here and just zip this off right across the bottom. All right, now that we've got that cut off of there, we can take our trim panel tool here and just pop our wire right off of there. We'll just get behind that, and you can just give that kind of a twist and that'll pop right out of there. And then we'll head down the wire here towards the front and the bottom, we're gonna unclip it from here as well. Try and get underneath of it there. There you go. And that way, we can push that out of the way for our base plate installation. We can now take our base plate and put it into position. We're starting here on the driver's side, so this is the one that has the two little bars out of here for your electrical mounting. We're gonna come in from the back side here. Slide it up through our hole. We wanna make sure that that outer hole on our base plate slides over the stud there. We'll then take nut and just loosely install it to keep that kinda where we need it. We can also take the long body bolt that ran up through the bottom, push it back up and get it loosely installed as well. We don't want anything to be real tight just yet, just kinda hand tight, just to hold it into their rough position we want it in, but we are gonna need to be able to move it back and forth a little bit, just to make sure everything lines up the way it needs to. We can now take the largest bolt that comes in our kit. This is the thickest diameter. We're gonna place a lock washer on it. We're gonna put some red Loctite on it. And all the bolts that come in our kit here, the ones that we're gonna be using to attach the base plate, we're gonna put that red Loctite on. I'm gonna probably take this nut that we had here. It's just loose for now, so we're gonna probably back that off and put a little bit of Loctite on there as well. This is gonna slide up through this hole in the bottom of your base plate here, just forward of the body mount bolt. There's a space there, though, that needs to go between the frame and your base plate. So, we're just gonna take this around the side there, and we're just sliding it in between the two, lining it up with the hole, and then we can go up through the base plate and the spacer and thread into the weld nut into the bottom, located into the bottom of the frame. And again, it's just gonna be hand tight. That's good enough for now. So, that sets us up for the next two fasteners. These are gonna be the slightly smaller diameter ones that come in your kit. These ones, of course, we're gonna get the Loctite as well. We're gonna start with a large flat washer on it. You do get large and small ones. Here's the small one for comparison. Large one first. We're then gonna come from the front of the bumper beam, there's a hole in the bumper beam there, and that'll line up with the hole in your base plate there, so that'll just poke right on through. On the other side, we're gonna follow this up with the smaller flat washer, a lock washer, and a nut. And there's another hole, just about maybe two or three inches, about three inches down from the one that we just put in. We're gonna use the exact same hardware combination through that hole. Finding where you're arm can fit in there can be the trickiest part. And following all that up with the exact same hardware as that top bolt. These are also just hand tight for now. We can then head back straight down to the bolt we've removed here, where we cut off that bracket, we're gonna put a little bit of Loctite on that factory bolt and reinsert that one into there as well. At this point now, we've got all of our hardware loosely installed, so we can go back and start tightening everything down. We'll then switch from our 18-millimeter socket over to a 22-millimeter socket, and that's gonna be for the other bolt that's going straight up here that we installed. All right, and then we can switch to 19-millimeter socket and wrench for the upper two bolts that we had installed. And you are gonna probably need a wrench to hold the other side. And now, we can tighten down that last little 13-millimeter bolt down here. And now, we can go back and torque our hardware to the specifications outlined in our instructions. And now, the wiring that we had moved out of the way here, we're just gonna use some zip ties to zip tie it up behind the paneling here to keep it out of the way. And now, with all of our hardware torqued down, the base plate for our driver's side here is fully installed, we'll perform the exact same procedures over on the other side to get that one installed. And that completes our installation of Roadmaster's crossbar-style base plate on our 2019 Ram 1500..
Customer Satisfaction Score:
95% were satisfied with this product
5% of customers were not satisfied
- etrailer mistake
- Alternate product found
Customer Reviews
Roadmaster Crossbar-Style Base Plate Kit - Removable Arms - RM-522203-4
Average Customer Rating: 4.8 out of 5 stars (882 Customer Reviews)
Roadmaster's crossbar-style brackets have such a low profile that they are virtually invisible. Each arm is easy to mount and simple to remove. Brackets install on your vehicle's frame to provide attachment points for your tow bar.by: Shad 05/02/2023
Chevrolet Silverado 1500
Watched the installation videos a couple of times and it was a piece of cake that saved me about 1500.00 by doing it myself.
by: Matt 08/16/2023
Easy to install very happy with the product. Thank you.
by: John 08/21/2021
2021 Ram 1500
Easy to install. Note to installers of trucks without factory tow hooks, the 18mm bolt has a star washer holding it from dropping out, use a mallet and something to attach to the bolt to pound it out.
by: John02/01/2023
Extremely timely response. All items ordered arrived on the time quoted with nothing missing. Highly recommend
by: Keith04/29/2022
2019 Ram 1500
y are also very well made and fit good.
the brackets are e-z to install on my pickup.The
by: Leslie11/30/2019
2020 Ram 1500
super heavy duty. Nice!
by: Brenda 02/29/2024
by: Billy 05/07/2021
by: Jerry09/04/2022
This was a straightforward install. The instructions were easy to understand and follow. All the necessary parts and hardware were included. It is pretty well hidden once installed. I highly recommend this base plate and etrailer.


by: Daniel kb7uxe04/13/2024
great fit. a slight cut needed to be made in the bumper bracket to facilitate the round tube to fit through the bracket. but, other than that, it was an easy install took about 2 hours if you include the coffee brakes. this part is highly recommended. Fast shipping. the beast human service. thank you.


by: David05/03/2022
Had Base Plate installed today, shop gave me 2.5 hr labor time. I returned just under 2hrs and they were backing my car out the shop. They parked it facing me. I told the Mechanic "That was quick" He said that's because it wouldn't fit. I was disappointed and asked what do I owe you for your labor> He laughed out loud and said it on there, but hard to see. I was so surprised and pleased you have to just about get down on your knees and bend down to see it. took me about 8 min to install everything and connect it to the Tow vehicle. I'm very pleased with it.


by: Jeffery 05/15/2024
Working great on my Fiat 500l with the automatic euro transmission. Towed over 10000 miles and was easily installed using etrailer video instructions. Yes you can tow a Fiat 500 with the automatic euro transmission. The firmware was flashed on a recall and revised in the manual. Most dealers don’t even bother checking for the latest version.
by: William02/17/2024
So far has performed very well. Was easy to install and hookup is pretty quick and easy. You install instructions were very thorough. Practically invisible when not in use. Tried to attach two pics, but would only take one.


by: Reggie 05/26/2024
Works perfect and very hidden. Cannot even tell it is on my Honda HRV. Installation was time consuming since this was my first on a Honda. Your video did make things go smooth. I would buy this item again.
by: Mark06/12/2023
Ordered Product on Saturday afternoon, delivered on Wednesday, Installed on Friday. My 23 Wrangler Sahara 4Xe did take the spacer and washer on each side of the frame and was no problem getting them to fit. The lower passenger outside nut that holds on the bumper will not tighten down all the way, the flange of the factory nut gets caught in a slot in the base plate on that side. Will look into a standard nut to see if that will work - it is tight against the slot and holding.


by: Richard11/01/2022
Super-cool. It's been a year. I installed it myself and it was way less of a task than I expected. The fitment of this was incredibly spot on (no "tweaking" or drilling). Performance wise . . . it does what you expect. You insert the removable "arms", clip in onto your tow bar, and when you get to your destination the vehicle is still attached to your tow bar. Quality product.
by: Larry02/10/2024
I’m always extremely satisfied with Roadmaster products. I had just bought a new truck and planned on towing it so I needed everything to get it ready to tow. This review also applies to to the other items I purchased.
by: Steven 08/17/2022
I installed this kit on my 2015 Honda Fit. The instructions are very good, however, there are a couple of "snags" to watch out for. You might have to enlarge the holes on the blind hole part of the bumper installation in order to get all of the mounting bolts to align. The other recommendation I have is NOT to use the Loctite "red" thread compound on the blind hole bolts where you cannot get a wrench on the inside. The Loctite will dry too fast and cause issues tightening the bolts on those areas. They have lock washers anyways and you can use the Loctite on the bolts you can get a wrench on the backing nut mounts. I have been towing for months now and I am very happy with it, especially the crossbar style. You will have to purchase the crossbar separately. It's more weight and a little clunky compared to the direct attachment but it allows you to disconnect in some tough situations by pulling the crossbar off while one arm of the tow hitch is still attached. I use an Falcon All Terrain tow bar so I can release the tow arms in uneven conditions. And I have encountered all types of uneven ground, it really makes disconnect of the TOAD very easy.
by: Louis 01/20/2024
Good fit, works well. Very happy with the base plate after 1st year of use.
etrailer staff was very helpful with my questions, making certain I got the base plate that was right and advice with minor problems I had with installation.
by: Rob01/19/2019
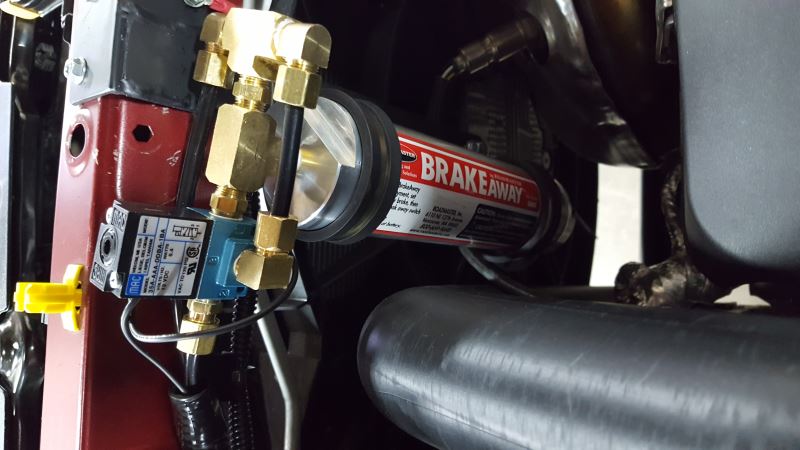
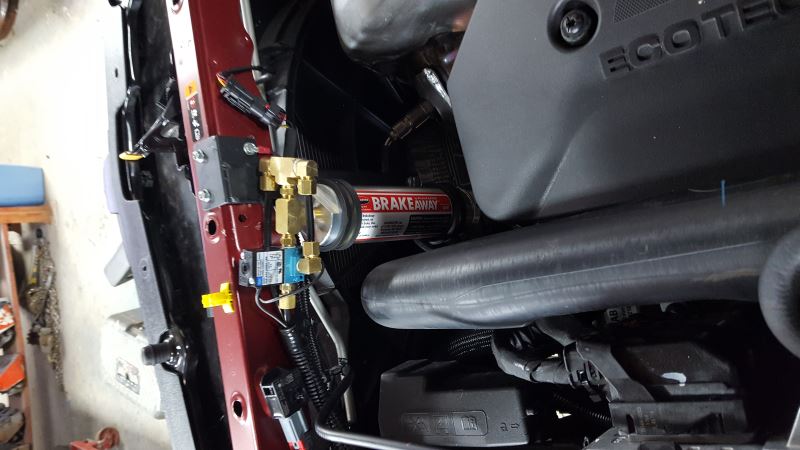
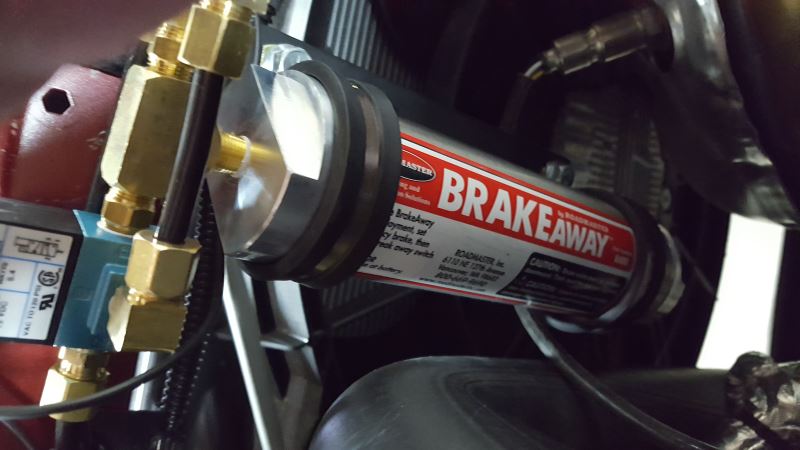
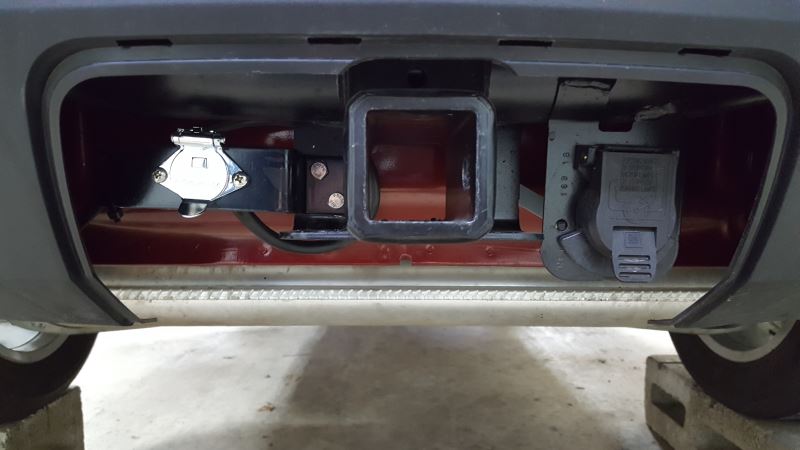
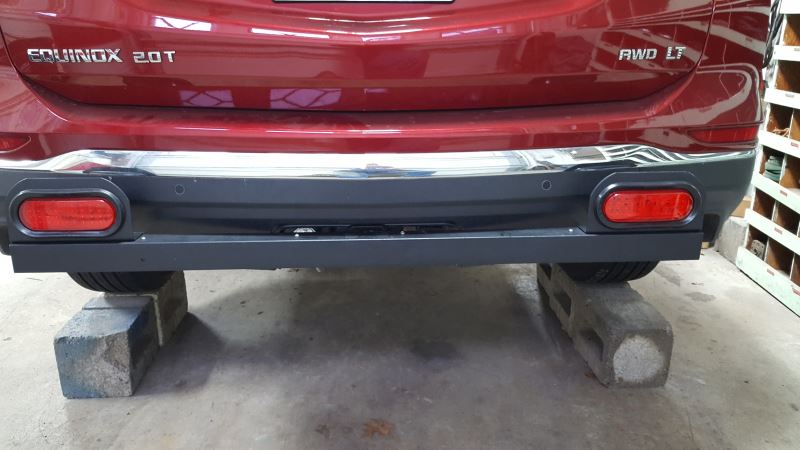
The Jeep project went very well everything fit great and worked well. I really love Roadmaster products and quality and your company is the best place to purchase them. I sold the Jeep and replaced it with a new 2019 Chevy Equinox 2.0 L AWD and just purchased and installed the following items from you and installed them, RM-156-25 & RM-156-75 Battery Charge Line Kit, RM-146-7 Flex Coil Kit, RM-523193-4 EZ4 Plate Kit, RM-88333 Custom Seat Adapter, RM-751489 Stop Light Switch Kit and a RM-98160 Second Vehicle Brake Kit w/brakeaway. All these parts were in stock and arrived quickly and normal with you people, I really enjoy the o-line vidios as I do all my own installs. Thank you so much for your great service.
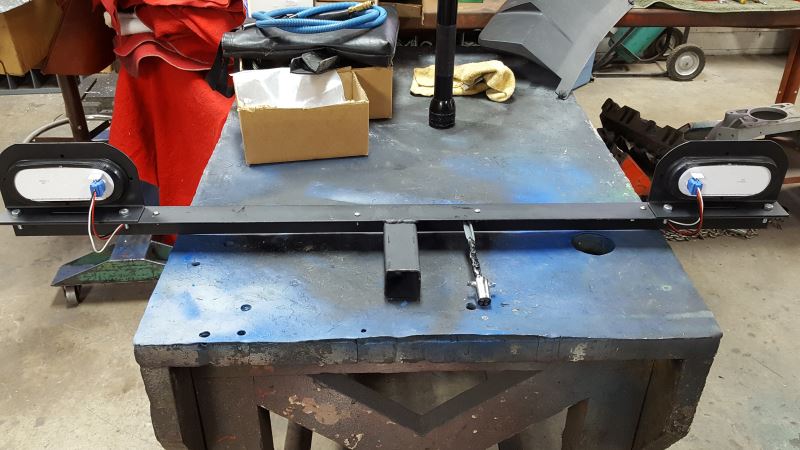
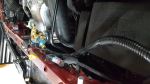
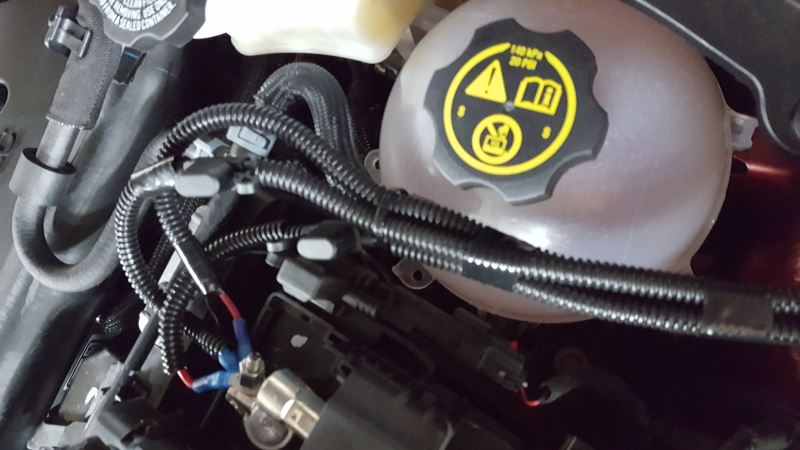
I will attach pictures of my install, you will see how I was able to fab a bracket and attach it to the existing mount on the base plate to mount the brakeaway switch and the air connection for the brake system.
I also fabricated a tail light bar as I didn't want to use mag-lights or splice into the factory lights and bulbs installed into the lights would not work as the factory brake lights will come on when the brake system is applyed and the turn siginals would not be visable.
Thanks for all you do, I would and do recommend you people to everyone who needs your products. Rob


by: Bob T.04/20/2014
Great product for my 2014 Wrangler. Good materials, solid attachment to vehicle, and looks good. The e trailer installation video was great for assisting installation. Made the install much quicker and easier. The most difficult procedure for me was disconnecting the wiring harness on the back of the bumper. An old tack puller (or tool of similar design) would have been great for leveraging the pins out of their holes. Cutting the air dam was a slow process to ensure I didn't cut too much. A paper template to mark where to cut the air dam would make this process much simpler. Again, I can't emphasize enough how great the installation video was for making the steps easier.


by: Jeffrey10/29/2017
etrailer service was great. Received my Roadmaster base plate in 3 days. The directions from Roadmaster were fair, but etrailer's video was excellent. I had trouble mounting my base plate as the space between the two baseplate ends were too tight. I needed to use a floor jack and bottle jack to get it on. Once it was in position everything went together fine. I trimmed the Jeep' air dam differently keeping the ends that Roadmaster wants you to cut off. I think it looks better. I also had to modify the center cut in the air dam to accommodate the breakaway switch I have.


by: Larry 05/16/2024
The whole etrailer family has been great to deal with.
by: David10/12/2022
2019 Ford Fusion Energi. A lot more trimming required on the facia than noted in the instructions, but I'll chalk that up to running changes I suppose. I used a combination of a Sawzall with a fine blade and a Dremel tool, both worked well. In the end, it took me about 8 hours (over two days) to install, and had it's challenges. I had to do some pulling and tweaking to get holes to line up, and the already mentioned extensive trimming of the facia. Overall well designed product, and of course etrailer was excellent in shipping.
Side note, adaptive cruise control is not affected when the drawbars are removed. With the bars in and the towbar mounted (it's a Stowmaster car mounted bar) the cruise control works just fine as an old fashioned CC, the adaptive part just doesn't work (it won't slow down for you when a slow car is in front, because it can't see around the tow bar). Basically perfect and what I was hoping would happen.


by: William12/05/2023
Unfortunately first set was defective from Roadmaster. Etrailer sent another set and return label which installed correctly, eTrailer was great to work with.
25
882
Show More Reviews
See what our Experts say about this Roadmaster Base Plates
- Install Video for Roadmaster Base Plate Kit that Fits 2021 Ram 1500While we don't have an install video for the # RM-522203-4 on a Ram truck like your 2021 model we do have an install video for the # RM-522203-5 that I attached to this page for you to check out. The only difference between these tow base plate kits is the removable arm design. How they install on the truck is exactly the same.
view full answer... - Connecting A Roadmaster Base Plate To A Blue Ox Tow BarI can help you out, use the RoadMaster Base Plate to Blue Ox and Demco Tow Bars Adapter # RM-033. You can use this adapter with a roadmaster base plate. This will let you connect to a blue ox tow bar. It is not compatible with RoadMaster EZ5, MX, or MS series brackets. That said you would need to use it with a base plate like the Roadmaster Crossbar-Style Base Plate Kit - Removable Arms # RM-522203-4.
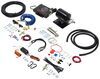
view full answer... - Base Plate Kit and Lighting Kit Recommendation for 2019 Ram 1500 Towed With Roadmaster Tow BarYes, you can reuse your Falcon tow bar with your 2019 Ram 1500. You'll need a new base plate kit which for that you'd want the part # RM-522203-4 and that aspect would be covered. For lighting you can use the diode kit, # RM-15267, and not have to worry about cutting into the taillight housing. This will splice into your taillight wiring to allow your tow vehicle to control the taillight assemblies of the towed vehicle. This comes with a round 6-way connector that you will install on...
view full answer... - Roadmaster Base Plate Kit for 2021 Ram 1500 For Use With Sterling Tow BarWe have the exact Roadmaster base plates you need for your 2021 Ram 1500 which are compatible with your Roadmaster Sterling Tow Bar # RM-576, which are the following: - Roadmaster Crossbar-Style Base Plate Kit # RM-522203-4 The crossbar-style is what is required for use with the Sterling tow bar, and I have added a link below to the installation instructions for you to check out of this kit. Also, for a tow bar wiring kit the best option is the Roadmaster 4-Diode Universal Wiring Kit...
view full answer... - Flat Towing Base Plates for 2020 Ram 1500 Big HornWe do have baseplate kits for the new 2020 Ram 1500. If you need a direct connect base plate, take a look at the Roadmaster # RM-522203-5 , which offer a quick and easy installation as well as a concealed design to make them barely visible when not in use. The built-in pull rings let you unlock arms so you can twist and remove them to make attaching and detaching the draw bars easy. If you've got a crossbar style tow bar, you'll need to use the Roadmaster # RM-522203-4 . If the brake lights...
view full answer...
Do you have a question about this Base Plate?
Info for this part was:

Edited by:
Lindsey S

Expert Research:
Jameson C

Video Edited:
Jacob T

Updated by:
Wilson B

Updated by:
Ronnie R

Video by:
Jonathan Y

Test Fit:
David F

Written by:
Mike S
At etrailer.com we provide the best information available about the products we sell. We take the quality of our information seriously so that you can get the right part the first time. Let us know if anything is missing or if you have any questions.
Product Experts Available Now!
Call 1-800-940-8924
Leslie S.
12/1/2020
Strong