
Summer Starts Here - Save up to 70%


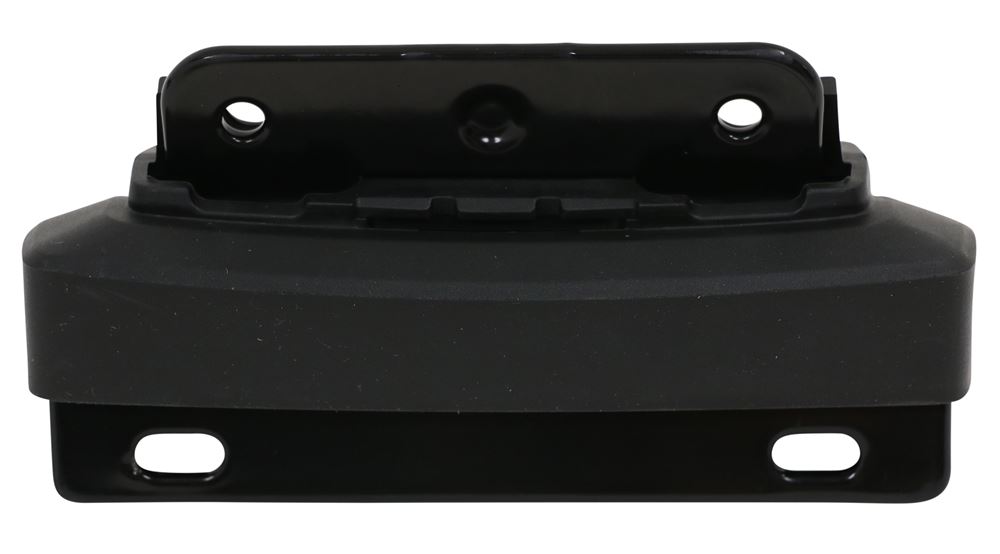

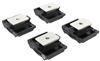
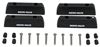
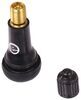
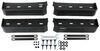
This fit kit lets you mount Thule Rapid Podium-style feet to your vehicle with factory roof-rack tracks. The fit kit includes pads, hardware, and tools necessary for installation.
Features:
Specs:

Videos are provided as a guide only. Refer to manufacturer installation instructions and specs for complete information.
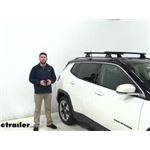
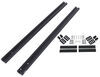
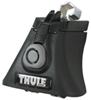
Today in our 2018 Jeep Compass, we're going to be doing a test fit on Thule WingBar Roof Rack System. This is a great accessory for your vehicle. It's going allow you to use your favorite Thule accessories, whether you got a bike rack, a kayak carrier or a cargo basket, anything like that. It's going to let you put on your roof rack and just get anything that won't fit in your vehicle up on your roof. This is going to be made up of three different components. First we have our Thule WingBar Crossbar.
This is going to be a 47" crossbar. It is in black right now, but also does come in silver. Just see etrailer.com for that color. It has a nice aerodynamic shape to it, so that's going to help cut down on wind noise and drag while you're traveling.What's really cool is that if you have any T track accessories, we don't have to take the end cap off. We can just slide the cap up like so.
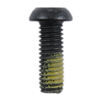
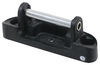
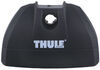
That gives us access to the channel. Now what Thule has done with these new wingbars is instead of the old load bars, we have to peal the rubber strip up and then cut it to length for your accessory. You just slide it in between these two rubber strips and then this locks down. And when you have it in place you just bring it back up right here, just lock it down.Now the middleman is going to be our podium foot pack and that's what's going to be connecting our crossbar to our fit kit and right under you're going to see just the different components to it. We have the two screws that are holding down our fit kit plate right here, and that brings us to our third component, which is the fit kit for our specific Jeep Compass.
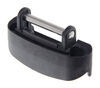
It's going to be this rubber pad right here with a rubber coated plate. Both of those are going to not damage your vehicle at all because of their nice rubber coating.Another great feature about this roof rack system is we're not going to have to do any type of measuring. Our Jeep Compass is going to have its own fixed mounting points on the inside of our flush mounted rails, you're going to have one option up front, so it's going to be one spot where the front crossbar can go. But in the back you're going to have two different options. You can either put it right here or if you want a wider spread, there are two more points back here, which is going to bring the bar back about eight, nine inches.
That's a very nice hassle free installation, so you're not going to have to worry about measuring from the top of your windshield to the front of your foot pack and then you got to measure from your crossbar to crossbar to get the right spread and if you're off just a little bit, that could affect tightening down your roof rack system.Now let's take a few measurements on our roof rack. First we're going to go from the top of our roof to the bottom of our crossbar, which is going to be about three and a half inches. So that's plenty of space for any type of strap on or clamp on accessory to come under the crossbar without coming in contact with our roof. Now if we go from the top of our roof to the top of our crossbar, that's going to be about four and three quarters inches. So that's how much you going to be adding onto the top of your vehicle, so you want to keep that in mind for any low clearance situations. And also the weight limit for this roof rack system is going to be 220 pounds, which is a big step up from your traditional Thule load bars. But you want to double check with your Compass' manual to make sure that your roof can handle that weight.This roof rack's very easy to get installed. We'll go ahead and show you how to now. Now we have the front crossbar installed. We're going to go ahead and show you how to assemble the rest of the back crossbar and we'll get it up on our roof. So first when I flip it over like this, we have our end cap removed. We're going to take the pieces of our fit kit, which is this rubber coated metal plate and the rubber grommet. I'm going to feed that plate up into the grommet like that. Make sure we line up those holes right there, we'll give you a back view real quick. And then from here hold again in place, want to grab this part of our podium foot. Flip around just to show you this little cylinder right here and we're going to be screwing it in to that cylinder, but from the other side.So right here, just going to line everything up correctly. You do want to take your time. It could be tricky just because it's four sets of holes to line up. We're going to take our screw and feed it through and then we just want to get it threaded on and then we'll want to tighten it down just a few turns for now. Once you feel it threading, we'll grab our other MA bolts and do the same thing.And then once you have both of them on and threaded, then turned a couple of times, we can go ahead and just take the whole system and slide it into the channel using that little piece right there. Just going to go like that. Then we'll grab our end cap, throw it on the end of our wing bar and then we can put it up on the roof.Now you're going to want to decide which spot to put your crossbar. We have a spot right here and a spot right here. You'll notice we removed these two little plugs right here so that we could use these mounting points for our podium foot pack. And we do this on the other side too. Once you remove those plugs it's a good idea to show them in your car, on the off you want to take your roof rack off some time. Then you have the plugs to replace later.Now making sure you have your wingbar facing the correct way, you can tell because the thinner part right here is going to be towards the back. It's what helps the aerodynamic shape. We're going to go ahead and put it over our roof and set it on our raised side rail. Just like that. We can do both sides. You want to line up the hole and we'll take our included hardware right here. We're going to thread it on. It's a little bit faster just to hand tighten it instead of using the provided tool. You're going to do this for all four of them. And then once you get it all the way tightened down with your hands, you can take your included tool and tighten down the rest of the way. Then repeat this process for the other side.Now once you've done that, you're going to want to measure your crossbar overhang to make sure it's even on both sides. And when that's done, I'm going to come and tighten down these two bolts right here and that's going to lock our bars into place so they don't shift it all while we're traveling. There we go, it's locked down. Now we're just going to grab our end cap and put it on. Just slides on like that. You can lock it down. And then once you've done that, you're ready to just hit the road.And that'll do it for our look at the Thule WingBar Roof Rack System on our 2018 Jeep Compass.
Average Customer Rating: 4.8 out of 5 stars (5 Customer Reviews)
This fit kit lets you mount Thule Rapid Podium-style feet to your vehicle with factory roof-rack tracks. The fit kit includes pads, hardware, and tools necessary for installation.Super quick shipment and efficient handling services. Came in time for my rack installation prior to this weekend's road trip!
great
Do you have a question about this Roof Rack?
Info for this part was:
At etrailer.com we provide the best information available about the products we sell. We take the quality of our information seriously so that you can get the right part the first time. Let us know if anything is missing or if you have any questions.


Thank you! Your comment has been submitted successfully. You should be able to view your question/comment here within a few days.
Error submitting comment. Please try again momentarily.