
To see if this custom-fit item will work for you please tell us what vehicle you'll use it with.
Thank you! Your comment has been submitted successfully. You should be able to view your question/comment here within a few days.
Error submitting comment. Please try again momentarily.
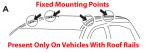
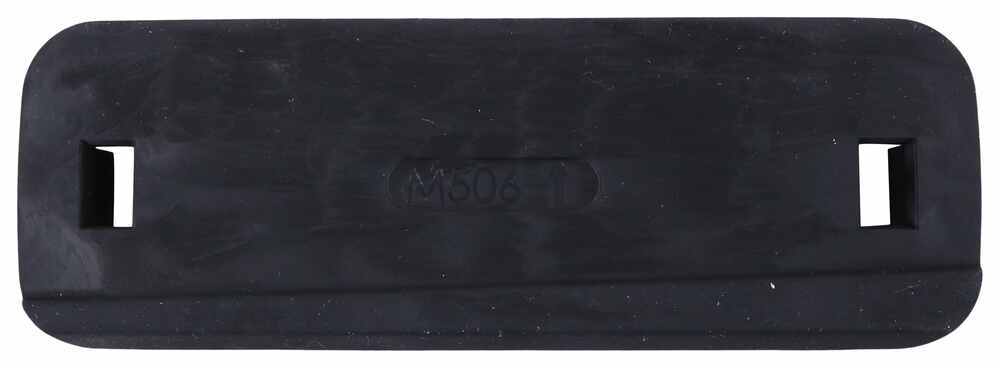
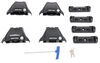
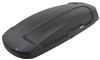
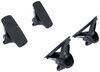
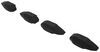
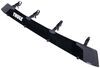
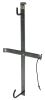
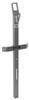
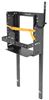
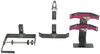
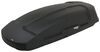
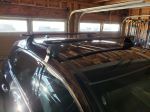
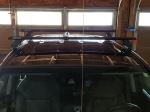
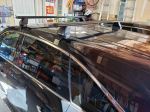
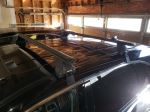
This custom fit kit lets you mount 4 Rhino-Rack 2500 legs to your vehicle with a naked roof. Clamps mount to legs with bolts. Includes 4 clamps and 4 pads.
Features:
Specs:

Videos are provided as a guide only. Refer to manufacturer installation instructions and specs for complete information.
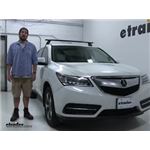
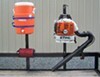
Today on our 2016 Acura MDX we'll be doing a test fit of the Rhino-Rack Vortex Aero Crossbar System, using part numbers RRVA137B-2 for the 54" Black Aluminum Crossbars, and then part number RRRLKVA for the 2500 Series Leg Kits, and then part number DK400 for the clamps and the pads. We've already got the front one installed as you can see here. We followed our instructions, we came from the door jam over to the center, we measured out the distance and how far we're supposed to be for our legs underneath the bars, and then we tightened everything up, and we got it. So let's go ahead and do the rear one together. First thing we'll do is we'll grab the leg first, and then our pad. We want to make sure that the arrow is pointing out, so away, and then we're going to push that on the bottom. Make sure that it seats all the way around.
Once we've got it seated let's go ahead and remove our bolt here. We'll grab our clamp. Now you need to make sure that you have the correct clamp because they differ from the back and the front. We don't need to tighten this down all the way. Just need to get the bolt started so it's loosely installed, and then we can turn our crossbar over. Now when you get your kit it's going to come with a scale that gets inserted through here.
When you follow your instructions it's going to give you a number to set your leg. For demonstration purposes we're just going to be using our little tape measure here. We're going to measure this direction here. We'll measure it out and we'll set that. First we'll need to remove the end cap and we're going to slide this on here.
All right, once we get it on there then we can take our tape, set it to where it's supposed to be, and once we have that set we can take our included tool and tighten that down. One we've got that tight we'll replace our end cap and we can actually use the rest of the strip that we have to fill in the gap on the other side. All right. Once we have that done we can open up the rear doors of our MDX and set our crossbar in place. Now in some cases it's not a bad idea to get an extra set of hands, but you'll want to set it down gently in the roundabout area. Now according to our manufacturer's instruction we need to have 29 centimeters ...
Excuse me, that'd be 75 centimeters from center to center. Once we get that lined up let's go ahead and check the other side. Almost got it there. All right. That looks pretty good. All right then, we can grab our included tool. Now a few things you want to look out for, you want to make sure that your clamp is going to go underneath your door here, and that your pad is actually seated on top of the roof. Once you've ensured that that is the case you can then tighten it down. Now you want to be sure and tighten them down evenly on both sides, so we'll go ahead and seat that clamp right there and then we'll run over to the other side and do the same thing. Now that we know that they are both seated correctly we can just kind of keep an eye on it and then tighten them both down evenly. This side actually looks pretty good. We'll finish up on the other side. Now the included tool actually has a built-in torque mechanism, and that's actually this blue portion here. You tighten it up until that runs straight, and that's how you know that you've got it. All right, now the only thing left to do is to put on our caps, lock them up. You of course want to make sure and set it in correctly. We can also lock up our end caps of our crossbar. With the included tool lock those up so we know they're in place. Then we're ready to load up our favorite Rhino-Rack accessory and hit the road. Well that's going to complete our test fit of the Rhino-Rack Vortex Aero Crossbars Roof Rack System on our 2016 Acura MDX.
Average Customer Rating: 4.7 out of 5 stars (2701 Customer Reviews)
This custom fit kit lets you mount 4 Rhino-Rack 2500 legs to your vehicle with a naked roof. Clamps mount to legs with bolts. Includes 4 clamps and 4 pads.This is Thai Khuu ,Thanks I got packaged ,and I already installed, It just take about 1 and 1/2 hour,but I just take time to do carefully,so it is took me 2 hours, It is great ,me and my wife like it,and I my order the other package exactly like this for my second acura mdx 2016, I enclosed the pictures installed roof rack , Thanks

The Rhino Vortex roof rack is great - As someone that leases SUV's, it's more economical to transfer a fully paid for roof rack rather than purchasing a factory installed model!
Kit was pretty easy to put on, at least my husband didn’t seem to swear a lot. Great value since we only use this once a year when we go to the great state of Maine.
It works well. Good value. Not the fault of trailer or Rhino, but if you are vertically challenged, own an suv, and lugging 50+ pound kayaks then any roof top system needs to be researched thoroughly. I’m happy with this product. My wife could use some help.
Had a bit of a problem with a couple of nuts and bolts that attach leg to crossbar. Customer service rectified quickly Great company
This roof rack system has been wonderful. I wish I had bought it sooner! The install was easy (I am good with tools and I am an engineer for comparison) with full step by step instructions. The fit is perfect and solid. It’s been great for Paddleboards and also my roof top carrier.
Got a MDX A-Spec and didn't want to put on the factory side rails and cross bars because it diminishes the sporty look. This rhino rack is a great solution for me because i can put these cross bars on for the top box and bike rack but can easily take it off to get back to the original sleek look. I'm happy with the product. Solid construction. I'm confident this will hold the load well without harming the car. I'm looking forward to using my original box top and my new bike racks. Also, thrilled that i can use this rack on my volvo too just by getting the volvo clamps. Great service from Michelle S. She answered all my questions and got me in the right products. Delivery was FAST. My only suggestion/improvement: the installation instructions. Had to read them a few time to 'get it'. It seemed overwhelming initially but the installation was pretty straight forward.
Parts fit exactly for my vehicle and instructions were easy to comprehend. Follow them step by step, and should have them on the vehicle within an hour. Going to haul two kayaks after attaching Malone SeaWings.
Product worked well. Installing was a little tricky but video helped a lot.
Good product, great service!
Solid product, very sturdy.
Great product, it's been over a year and still holding up well on my MDX.
Everything worked out great!
I couldn't be more pleased with the overall experience. The website, checkout, shipping, packaging and product were all a 5.... Thanks!
Quality product and great customer serv ice!
Easy to install. Great product and serv ice.
Ease of order, receipt, installation and excellent customer service is what I received in this order.
Thank you, e-trailer!
Do you have a question about this Roof Rack?
Info for this part was:
At etrailer.com we provide the best information available about the products we sell. We take the quality of our information seriously so that you can get the right part the first time. Let us know if anything is missing or if you have any questions.


Mjs
12/19/2020
Still enjoyment roof rack - I’ve used it on three different SUVs!