
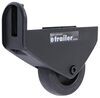
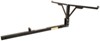
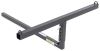
Replaces the right-hand wheel assembly on your Thule EasyFold XT platform rack (TH903202) that carries 2 e-bikes.
Features:
Videos are provided as a guide only. Refer to manufacturer installation instructions and specs for complete information.
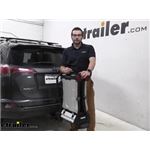
Hey, everybody, welcome to etrailer.com. I'm Bobby, and today we're gonna be taking a look at Thule's replacement wheel assembly for your EasyFold XT bike carrier. So, if you guys do have a damaged castor on your EasyFold maybe we've hit the cement just a little bit too much. This can be a decent way of replacing that assembly for yourself. I think the biggest thing for people though, especially if you're looking here at our site here at etrailer.com is distinguishing, which is the left and right-hand side. What you're wanna gonna do, take a look at your EasyFold, as if it was in the hitch of your vehicle, and by looking at it, this is gonna be my left-hand side and this is gonna be my right-hand side.
So, that can be an easy way of distinguishing. If you want another check on it, though on the inside of your wheels if you guys still have it at home, maybe your castors damaged, you can take a look kind of in here. On our right side, we're gonna have a one out of two stamp, and on your left-hand side, you will have a two outta two stamp. So, gonna be a really straightforward install and disassembly for ourself. What we are gonna need though, is a nice little hex wrench, three millimeters to be in fact.
So, hopefully, we have that in our toolbox at home, if not, not gonna be the end of the world maybe run up to a hardware store really quickly, give ourselves a decent little set of hex wrenches. That way we have it for our other tools and accessories we might have. And let's actually start taking a look at how we can get this installed. So, both our left and our right wheel are gonna install the exact same way. The only difference is gonna be basically the cutouts and the sides that they're on.
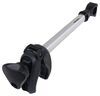
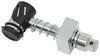
So, today I'm gonna be working on our right-hand side, which is again, the one outta two indicator on there. And I already have this removed. If you need to remove your older wheel, all you need to do, bring yourself to the bottom of your assembly here and there's gonna be a little set screw that we need to back off. And that is gonna be that three-millimeter hex wrench as well. Just back that off, and the whole assembly walks right out, making our install that much easier.
All we need to do is take our wheel assembly, insert it just like so, it's gonna line itself up, especially if you do have the right side. Take your set screw, start setting it right there and take your wrench, and to begin tightening it down. I do find sometimes, it doesn't really like to catch, and it can be helpful just to set your screw here on your wrench to begin, and then walk it up. But by simply righty tighting, we should get it to fit. Now I do find, you know, you wanna push your wheel in, is what you kind of naturally are indicated to do. However, sometimes it has a harder time biting kind of try to try to keep, create a gap between you and your screw at first, and then, as you find yourself actually finding that hole then push your holder in tighter to your assembly just because otherwise it doesn't really like to catch. So, that's my one little trick I found. Now, as I get closer, you can still see it has a little bit of a wiggle, that's when we probably wanna swap sides and then just take our 1/4 turns at a time as we actually get this in. And we just need to keep going until we don't have that wiggle anymore. We don't need to go too crazy 'cause it is just a plastic assembly and we don't need to be breaking it, or pinching it, but we definitely want it to be solid and with little rattle. So I see, I have just a bit more, I'll keep going until I can take that out, and it is secure. Well, and just like that, I've tightened it down, and it is a good job, just kind of going back to how we actually had our wheel working in the beginning. So again, if you're having trouble with your wheel, just not quite working, maybe your castors all messed up, took too hard a hit. Whatever the reason for the damage might be, now we can replace that, make it a little easier to get our EasyFold walking around again, which is great. But the other side is exact same way. So just follow that instruction, if you do need it for that left-hand side, Again, I think the biggest issue is finding those designations. So just taking a look, making sure we're gonna get the right part to replace our EasyFold. It's gonna be great for us. But otherwise, I think that about does it for our look here today, at Thule's replacement wheel assembly for the EasyFold XT bike carrier, here at etrailer.com. I'm Bobby. Thanks for watching..
Average Customer Rating: 5.0 out of 5 stars (7 Customer Reviews)
Replaces the right-hand wheel assembly on your Thule EasyFold XT platform rack (TH903202) that carries 2 e-bikes.
Exact fit replacement wheel to replace a broken wheel on my Thule bike rack.
Got the right part fit perfect in a timely manner
Do you have a question about this Accessories and Part?
Info for this part was:
At etrailer.com we provide the best information available about the products we sell. We take the quality of our information seriously so that you can get the right part the first time. Let us know if anything is missing or if you have any questions.


Thank you! Your comment has been submitted successfully. You should be able to view your question/comment here within a few days.
Error submitting comment. Please try again momentarily.