
Thank you! Your comment has been submitted successfully. You should be able to view your question/comment here within a few days.
Error submitting comment. Please try again momentarily.
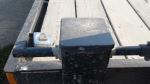
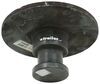
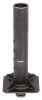
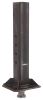
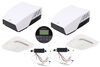
Replaces the end cap on your Fulton square, fixed-mount trailer jack (FHD2500).
Features:
Fits:
Videos are provided as a guide only. Refer to manufacturer installation instructions and specs for complete information.
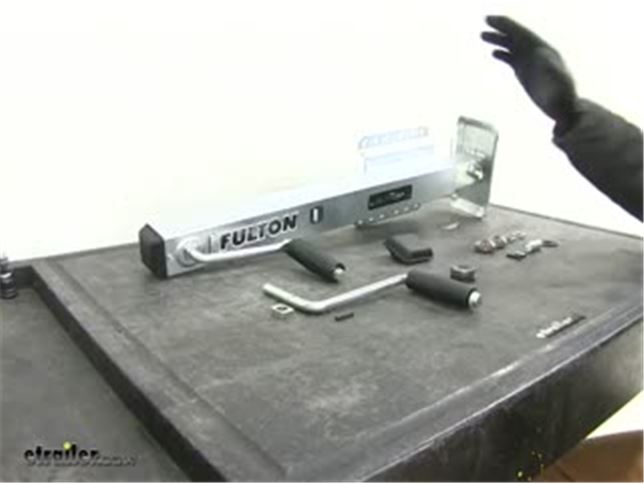
Today we're going to be taking a look at how to rebuild the Fulton 2500-HD Marine Style Square Tube Jacks. Now these jacks are not that inexpensive and it's nice that we have a lot of individual components here so we can replace whatever is broken. We don't have to worry about going out and re-buying a completely new jack. We'll start here at the top, you see we've got a black cap that's held on by two screws. We offer that right here as a replacement part. That's going to be part number F0917504. Also, we're going to have our handle kit here.
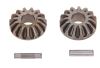
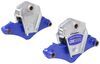
It's got a flanged bushing and then there's a pin located inside that goes to the gear. Our handle is part number F0933305S00. Again, it's going to be our handle, our flange bushing and our pin. As we work our way down just a little further we're going to have our gear kit. Now our gear kit has some nice extra components.
It's got the extra bushing, threshed washer that's going to go down on top. It's got the spacer that's going to go between our gear. It's going to have the base pin, it's going to have the handle pin and then our lower and our side gear and it also comes with two new of the flange bushings just in case we need them during that rebuild. Now once we get below that, we're going to have our bearing. You'll see this is kind of a sealed bearing on the top. It's got a cap on it.
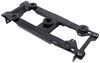
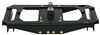
You want that to be facing up and that actually helps to make the water shed off of the bearing and that's going to ride on top of this threshed washer here, or threshed bearing there. You can see it's going to turn really nice and smoothly and that basically alleviates all of the friction that we have in our jack and it's going to help it to operate really nice and smoothly. There are going to be four bolts that hold the jack into place with a backing plate. If you've had any damage at all done to those, we do sell those as a replacement part as well. That part number is F500286. The first step is going to be get our cap off, that's going to sit over top of the gears and the bearings located inside. Use a quarter inch socket or bit driver or even a flat blade screwdriver if you want and once we have one backed out on the side, we'll kind of push up on that side, you can see the other one is just going to fit around that grease cert.
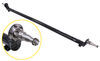
Inside there you'll see our gears, you're going to see the grease that came on it from the factory. We're going to wipe all of that out of the way and show you how to rebuild this. Now when you put everything back together, just want to make sure you use a good all purpose grease. It doesn't have to be a high temp grease or anything like that but you do want to make sure that it's good all purpose grease. Now with most of our grease out of the way, if we turn our handle, you're going to see two half moon cut outs. We've got one there and if I move the handle you can actually see the pin move up and down there. And then directly on the other side we'll have our other one. What I'm going to do is use a five-thirty-seconds punch. We'll line it up with that pin and I want to drive that pin down, once we have it started, we'll tilt it and then kind of drive it right over on that angle. We'll know it's fully out when we can move this handle up and down. Lift our handle out there. Now at this point if we're just replacing the handle, we can put that new one back down in. We'll line up our holes, put our pin back in and replace our cap so it's pretty straight forward. Now we're going to go a few steps further so let's rotate it over here. You'll see our gear laying here on the bottom. We'll take that out. Now both of our gears are going to be the same, for the bottom we're going to use the enclosed area for the pin to sit in and for our handle, we're going to use the pass through area. That base pin is just a little bit bigger but the gear is just going to sit right down on top of it. You can also see we've got that bushing there, which is one of the replacement parts and you've also got this small washer. Now this you're going to reuse. It doesn't really experience any wear. Just lift up on that base gear there. You can see it's going to come right off, again just the same thing as what the side gear was. Of course, these are brand new parts we're pulling out here. Your grease probably is going to look as nice and if you're replacing parts, one of them is going to show signs of failure. These are brand new, we're just going to replace them and put them right back in and put some new grease in and we'll be ready. You can see that base pin right here. We also have that as a replacement. That just floats, it just sits in the middle here. Now we're going to slightly pull the inner tube, the inner square tube which would be kind of what your drop leg is attached to and we're going to separate it from the outer tube. You see how that screw as I pull out on that, it's going to slide out. It's going to allow that plate to drop down. We're going to set it aside. On top of that plate, there's that flat washer and remember that's going to come in the gear kit replacement if you need to replace that. Then right down there we have that threshed washer and also our bearing. Now we can lift up our outer tuber here and that'll give you a good look at actually how the mechanism works. You see there's this screw and that just pushes down or pulls up on that leg causing it to go in and out of the jack so it's really, really hard to mess this up. This is a super strong screw where typical points of failure are going to be either the bearing or the gears or something like that. So let's go ahead and make sure we get some grease around screw there and we can start putting this thing back together. You're going to start by placing the threshed washer down on the screw and follow that up with our bearing. Now it's time to put our top plate in. One slot on the jack is going to be much wider than the other. We want to put the thicker part facing outward. You can see that thinner part, that's going to face inward. Just get it slid into position and you can see it's going to engage on that side. We can start the outer tube right back down over the inner tube and if we watch inside there, we'll see the screw is going to pass right through that plate. Now we're going to take our washer or threshed bearing and place that down on it. Once that's in place, we can slide that larger diameter pin in. Now this is just what they call like a floating pin so it's not going to take a bunch of force to get it in place. You just want it to be pretty much equal on each side that we can see exposed. Now we'll take one of our gears, we want to use the enclosed portion. We don't want to use the full pass through opening. We want to use that one and we'll slide that down and on, being sure that that engages the pin and you should notice that it's engaged because it doesn't turn freely. It has some tension to it. Put some more grease down in there. You remember we had our bushing, had that little washer on it so we can that put in position. Make sure that washer stays lined up. The grease is nice because it helps hold it in place and we're going to start to slide our handle through and as we do we want to have our gear kind of lowered down so it's lined up with our bushing. It's going to slide right on through. You can see kind of part of that hole there. We'll just rotate our jack so we can see half moon in the gears is going to line up with the hole that's in the handle. Now we just need to replace that pin that we drove out earlier. All right, we just want our pin to be about equal on either side. Doesn't necessarily have to be square but you do want it to be engaged fully so you have some tension on that pin. Now another little helping of grease, we'll work that around our gears there. Now one side of our cap needs to go around that grease sert. Other side, push down in. Now we can just reinsert that self-tapping screw. That's all there is to it. It only takes a few minutes and a few inexpensive parts and we can go through a complete rebuild process on a jack rather than actually having to purchase a brand new one. That will complete today's rebuild of the Fulton HD 2500 Marine Jack.
Average Customer Rating: 4.9 out of 5 stars (38 Customer Reviews)
Replaces the end cap on your Fulton square, fixed-mount trailer jack (FHD2500).This was a replacement part for a damaged Pro Series Trailer leveling jack. Thank you, very happy with ETrailer and their support staff they jumped into the fray and replaced a part that had been damaged by UPS during the shipping process. Again. Thanks.
Exactly what I ordered. Good quality re placement.
I ordered this square cap to replace my broken Jack cap. Shipping was quick and this thing is made very well!. The original was broken from shipping. Etrailer replaced it in a timely fashion and even notified me personally to make sure it was in satisfactory condition. Excellent product and customer service to boot. Will be buying from them in the future for sure
First time buying something from this company was extremely happy fast shipment no issues I will be ordering my future trailer parts here from now on thank you
Ordered a trailer jack that the cap was damaged! Called the company and just received the cap! Great customer service! Great company to deal with !
You guys are the BEST!! Thanks to your repair kit for my Fulton boat jack kit you saved me at least $150.00 if not more! Instead of buying a entire new hvy duty 2500 lb jack, I fixed it buy replacing the gears and pin for under $20.00! Took me 10 minutes to fix!! Even on this kit I saved! I called the local Fulton dealer located in Sayville, N.Y. and he wanted more money then what I paid though you! Winner Winner!!
Quickly shipped too I might add. Got it in about 2 days!
The original cap for my jack arrived damaged, I had no problem with etrailer replacing it immediately. This cap looks strong, and should hold up as long as it doesn’t take a direct hit.
was exactly whatI ordered had a minor problem with one piece not with etrailer but i think ups damaged it , but Troy H took care of that in a hurry thanks Etrailer.
The replacement square cap fit my heavy duty Fulton trailer jack perfectly.Shipped immediately upon ordering.
product was delivered in timely fashion box was a little destroyed from shipping.Everything was inside and in perfect shape. mounted on boat trailer and works perfect thanks.
Thanks for the caps. This was the only place that had the replacement cap for my jack. I really appreciated the way you guys kept me updated because it was out of stock and on back order. You have one of the best customer service dept. that I have ever dealt with !!!!!!!!!!!!!!!!!!!!!
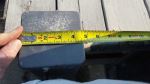
It is a good product, however it was not the correct size for the jack I have. It was 2.25 inches. My jack measured 2.5 inches. I could not find the 2.5 inch available.
Perfect part! Easy to use web site. Fast shipping. Great price. Was able to fix the trailer from rain intrusion.
Thanks!
Exactly what I needed. Service/delivery was prompt and on time. Etrailer is the best retailer on line by far.

Great replacement direct fit.
Replacement item received quickly!
excellent, works perfect. thank you.

Jose

7/31/2016
Perfect, still enjoying it. thank U.
Products look great and fast shipping

Timothy S.
11/7/2018
Works well
Perfect fit,quick shipping.
good as original

Steve C.
7/11/2016
Great!
Fits the jack that we had! solid produc t!
I’m very please with the parts I ordered from u guys, they worked out the way I thouthgt it would and I’m very satisfied
Ordered this for a customer, was super happy it was exactly what he needed. Great company to work with arrived super quick.
Part beautiful made my Jack last longer
Do you have a question about this Accessories and Part?
Info for this part was:
At etrailer.com we provide the best information available about the products we sell. We take the quality of our information seriously so that you can get the right part the first time. Let us know if anything is missing or if you have any questions.


Kevin
2/27/2019
It’s still like new