
To see if this custom-fit item will work for you please tell us what vehicle you'll use it with.
Thank you! Your comment has been submitted successfully. You should be able to view your question/comment here within a few days.
Error submitting comment. Please try again momentarily.
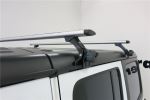
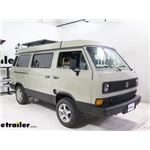
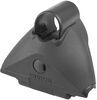
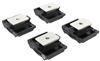
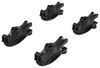
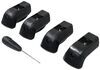
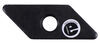
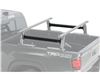
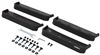
Landing Pads allow you to attach SkyLine and Control Towers to any vehicle with underside access, like truck or camper shells. Permanently mount to fiberglass roofs, combining with removable Towers to form a base for an aftermarket roof-rack system.
Features:
Specs:

Videos are provided as a guide only. Refer to manufacturer installation instructions and specs for complete information.
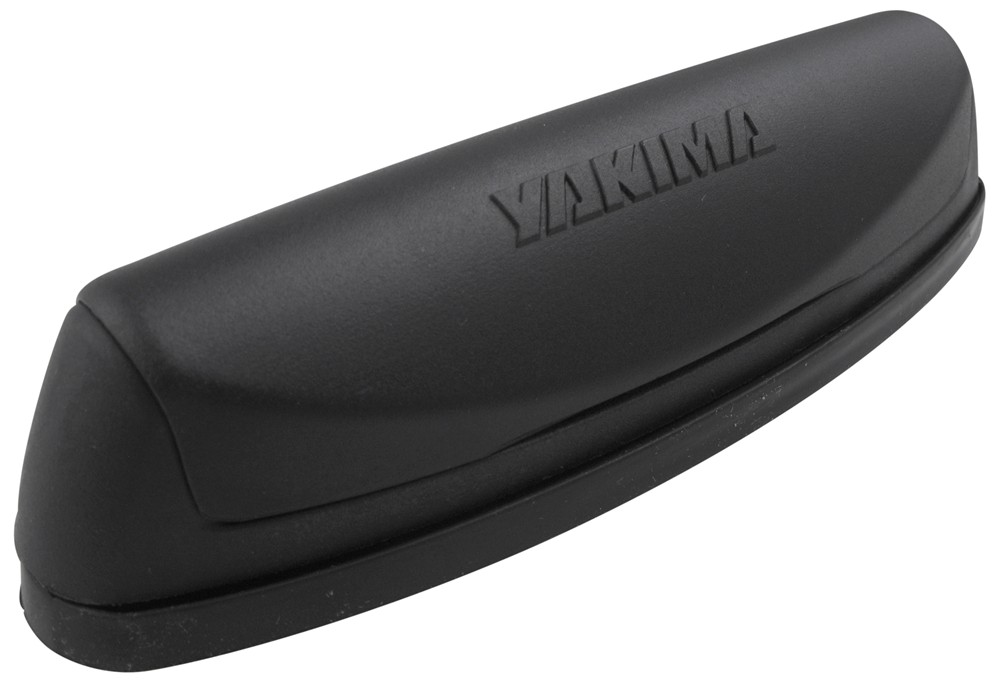
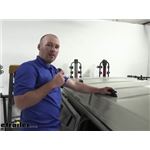
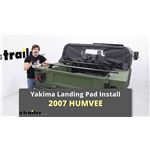
Andy: Hello everyone, Andy here with etrailer.com. Today we're taking a look at the installation of our Landing Pad 6 on a Volkswagen Vanagon. Looking at our Landing Pad 6 installed now, we have them paired with the SkyLine Towers. If you needed to remove the lock and load tray here, or let's say we had some bars that are mounted to the top of our camper shell, or on top of our van as seen here, we can just go ahead and push down on the pressure on each side of the tower here. That is what will allow you to move, and install, and re-install your tray or your bars that you have mounted on the top. If you actually aren't using your lock and load tray and you want a cleaner, simpler look with your Leap Pad 6, there are the included covers, and we can just snap that in place, and it gives us a nice fit and finish.As for the installation on this, it did seem like at first it was going to be a pretty intensive task, but I found that it really overall wasn't that bad.
You will need a couple extra set of hands because you have to get everything loaded, mocked up, marked, loaded off, drilled, and then mounted back up and everything secured down. Overall, I do think it is a great item. Installation really wasn't that bad. Just have those extra set of hands. You also want to make sure that the air deflector here is placed towards the front, that way you don't have to shift anything while it's on top of the vehicle.Now with our tray on the roof, before we actually get our mounting brackets and everything settled up there, you do need to assemble them.
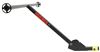
Today we are using the SkyLine Towers with our SL adapter plate that is going to be attached to the tray. Also, we are using the Landing Pad 6. For our assembly, we have our tray mounting plate with our tower and adapter plate as well. You want to attach this to our SL adapter plate using the Loctited bolts that are provided. We are just going to go ahead and get those lined up and just kind of finger tighten them down.There is a provided Allen key that you can use to tighten those.
Now these, you want to make sure are pretty secure. This is what is going to hold that tray down solid. From there, we are going to use our brackets here. Now with this hardware, it just will place into the middle of the slot. You can twist it and you'll go ahead and set that bracket in.
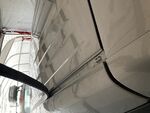
Now do not tighten these down yet, because once we get onto the top of the vehicle, we can make those adjustments on where exactly we want our tray to be placed. We have our tile up here just for added protection in case there is any shifting of the tray. Also, I went ahead and took a couple little pieces of cardboard that we're going to use whenever we set the tray down onto the landing pad and the roof.From here, you want to take your assembly and lift up the corner. I found it easiest for those sliding mounting pieces that are going to fit in the tray, to move them as wide as you can. From here, you can fit them into those slots and move your piece of cardboard underneath the landing pad. There we go. Since this roof has a pop-up option, what I'm going to do is, I have everything mocked up, and I've measured from the channels and the roll edge on all sides to make sure that everything is symmetrical. It's going to be a little bit more on the difficult side to drill with our tray set up like this, so I also want to make sure that where I have marked in the back, that clears with the bed or any other type of obstruction that might happen when the top is folded down in this position.Instead of making permanent marks on the roof, if I have to make any adjustments, I have used a dry erase marker. That way, once we're done with the installation drawing, we'll just wipe it away cleanly, and it's nothing that's permanent that's going to stay on our roof. We did pull the tray back off of the vehicle, just to make sure that our marks are going to be correct. We brought our landing pad up to the top in order to Mark our centering holes before we start drilling. We just wanted to make sure that the measurement from hole to hole on both the left and the right, front, and the rear all match symmetrically, and we're good to go. What we're going to go ahead and do is use a punch just to make it a little easier for that first small drill bit to make that first indention on there, and one there.Also, I want to make a note that the roof of this top does have a fabric style lining to it, so you want to start with the smallest drill bit you can find, that way you don't rip through that lining that's going to be there. Whenever we get that first couple holes drilled, we're going to make a small incision, so it's kind of an X pattern to make it easier to feed our bolts through that fabric material. Now that we have our holes punched, we are going to go ahead and start to drill. I'm going to use the smallest bit possible right now, just to get that first hole started, and we'll slowly stagger our way up to a larger bit that will fit our hardware a little bit better. Also, I just want to be aware of that material lining that's on the inside of the roof. Let's go ahead and get started. As I'm doing this, I'm not really pressing very hard, I just want to use the weight of the drill.This is just a first initial hole. I definitely don't want to pull that material way underneath the inside of the ceiling. Now that we have our holes drilled, I'm going to go ahead and take a little bit of window cleaner and wipe away my dry erase markings, and the markings I used for the hole positions. Now that we have our first hole drilled, let's go ahead and go to a slightly bigger drill bit. Using that first hole as our pilot hole, slowly start your second process. I found it easiest to go a little bit on the slower side. That way, if you are on a painted surface, you don't cause any major chips or cracks in that paint.There we go, we made that last hole. Then we'll move to this one. We're going to slowly work our way up with those drill bits. Although the instructions state to use a 1/4th inch drill bit, we found it best to use a 3/16th. It fits our hardware a lot more snug than using that 1/4th. Now that you have your holes completed and drilled, you're going to grab your pad and the hardware that's included, along with the nut and knob. What you need to do first, in that same package is going to be a little tube of RTV sealer. You're going to make just a nice bead circle around that hole that was both on the rear and the front. What I have done also, was put a little bit of RTV around the thread portion as well, once I get my bolts through the mounting pad. I'm going to go ahead and put this bead of RTV around our holes that are drilled.I'm going to go ahead and put my hardware through like so, and hold onto this as I'm doing the front one. We're just going to finish up this, and that's going to do it for the RTV around our drilled holes. Here, I'm just going to put a couple of little beads on the base of the bolts. This is just going to add a little bit of extra protection in case we didn't make a solid enough bead around our holes. This will kind of help that main hole through the pad as well. So with the provided Allen key, I'm going to go ahead and take our nut and knobs and hand them to our extra set of hands inside the vehicle. I'm going to go ahead and lower the bolts into the holes now with us. Using that tighter fit of a drill bit, our hardware is about perfect and won't have much movement, but you may need to just kind of start those threads. Once those are started, you can start to crank down, and have your extra set of hands hold that knob tight as you slowly crank down.Go ahead and tighten this rear one down. there it goes. Start it through our holes that we drilled. That knob can be a little bit on the tighter side, so it might take a little bit extra effort, but you will feel a point to where it stops spinning from inside the vehicle. Can you feel it spin Nope. Andy: From there, I'm just going to make a half rotation and move back to the front, and we should be good to go from there. same thing. Now that we have that last one tightened down, you just want to make sure everything's secure. As you can see, we have completed the other three. What I'm thinking is going to be the easiest way to get the tray on there. If this was mounted to a tray, we're kind of worried about finding where it really needs to mount. I don't want to scratch or dent the roof.What I'm going to go ahead and do is leave these brackets loose, and we're just going to go ahead and attach this. From this point, we'll be able to lift the tray onto the top end, able to set it, and then we can make our adjustments and tighten things from there. As we are going around one at a time, making sure that our clamps are secure, we first measured some distances in order to get everything kind of squared up and lined up. You will want to check the tensioner as far as the leveling of the track, and you'll take your provided Yakima tool. There is a silver Allen key bolt in here, and you'll just make sure that that is torqued. You'll hear it, click, then you can put your clamp back and secure that. From that point, we are going to double check the clamps up here and make sure we get this secured down.There is one more bolt I want to take a look at, it's the Allen key on our adapter plates. I just want to make sure that that is secured as well, on the front and the rear. That was a look at the installation of the Yakima Landing Pad 6 on our 1984 Volkswagen Vanagon.
Average Customer Rating: 4.8 out of 5 stars (283 Customer Reviews)
Landing Pads allow you to attach SkyLine and Control Towers to any vehicle with underside access, like truck or camper shells. Permanently mount to fiberglass roofs, combining with removable Towers to form a base for an aftermarket roof-rack system.Great product as always with Yakima. Just be aware the towers are not included and they currently don't carry a tower for round bars.
etrailer is great, from a great ordering process to quick delivery and great follow up. The Yakima Landing Pads are exactly as expected and are just what I needed for my truck cap. I have not installed them yet, but am sure that they will work perfectly. Thanks etrailer!
Simple install. Drill holes and attach. Appears to be an easy disconnect from Control towers when wanting to drive without rack. Lower profile than expected. Regret the years of driving with rack on cab of truck. No more high speed wind noise!
As always yakima is the best rack system on market in my opinion, Havel owned several different models and love all them
Everyone was very helpful ! It was nice to have a place that cared about their customers.

Joni

1/7/2022
Great! Exactly what we wanted!

with so many variables having someone that could sort through all them was very helpful Thanks etrailer
Honestly, I love etrailer. I love the expert help that you all provide. It's clear by the 1 year follow-ups that you care more about the relationships with your customers then just making a sale. Your service is friendly, informative and fast. I always come here first to look for my next purchase. Thanks again-Rob.
First trip with the new rail system and it looks like it worked out just fine. Thanks to both of you and Kimberly for all of your help and follow up I do appreciate it.
I have these installed on a 2022 Honda Pilot. I could not get them to fit on my raised roof rails with the included rubber gaskets. I have mounted them without the gasket but this leaves a gap between the rail and the landing pad. This seems secure but does not have a finished look. I will be trying to see how to get the gaskets to fit.
It was what it was advertised and fit perfectly on my 2023 Ford Maverick
In the confusing world of roof racks, the etrailor site had a locator tool that made it easy to identify the correct landing pads and towers for my vehicle.
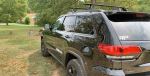
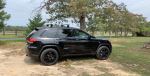
I had cross bars and landing pads on my Jeep Grand Cherokee. I bought these to put on my wife’s new Grand Cherokee L. They were extremely easy to install and now I can easily move the roof rails between the two vehicles. They are a great product as is most of Yakima’s products. I highly recommend them.
Very nice and heavy duty. They don’t look too fragile on a lifted truck with oversized tires.
Wanted to salvage my round bars and all other Yakima products I had previously on my Tacoma. These worked great. Easy to install. The directions are very clear. I only recommend taking your time with the install to make sure you've got it all aligned and waterproofed correctly.
My experience with etrailer has been excellent. There was going to be a potential delay in one of the products, but their customer service promptly informed me, half the price of some of their competitors so can't really complain. In the end they got the part ahead of schedule and was able to ship in a timely manner. I will definitely keep them in mind for future purchases.
Fit good with the OE track on roof. I like the new covers they supplied with the mounts.
Amazing quality easy set up fast shipping buy the locks the 4 pack With this fast shipping super impressed
I recently purchased a rack system for my 1979 Ford Bronco to haul our new Kayaks. And believe me it was not easy to "fit" a vehicle as old as this.
I had some interesting challenges - my truck has a 3" lift and only clears my garage entrance by about 1.5 inches, so whatever I got had to be easily removable (at least in the front). I also wanted it to be multi functional so that I could carry other stuff as well, and the Yakima/Thule systems are great for that. Lastly, I wanted whatever I put on the truck to look good as I have put a lot of time and $ into fixing up this old truck and I didn't want it to look cheezey.....
Thanks to the good folks at etrailer I ended up with somewhat of a hybrid approach (my choice) but it worked out exactly as I envisioned it. I purchased the Thule Xsporter Pro system for the rear which works well with only minor modifications to the truck. I can lower it easily so I can get the truck into the garage without removing the system altogether. I really like that the tailgate is still functional with the system installed as some others I had in mind were bumper or hitch attached and would not allow use of the tailgate.... And, lastly it looks nice enough to just leave it on all the time.
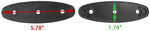
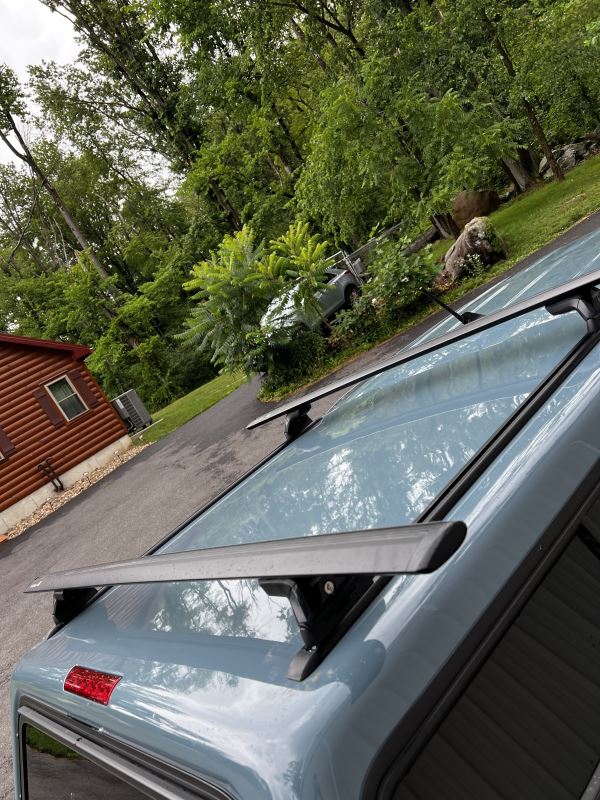
On the front I chose the Yakima JetStream cross bar held up by a pair of Yakima SkyLine Towers and Landing Pads which I chose because I can easily remove the crossbar/towers to get the truck into my garage. The Landing Pads have covers for when not in use and are small enough to not be too noticeable.
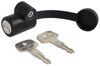
I also added the security locks for peace of mind.
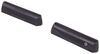
I have added 3 pictures, the first shows the Landing Pads without the towers & crossbar. You can also see the Xsporter Pro on the rear in its lowered position. The 2nd shot is a closeup of the Skyline Tower. The 3rd picture shows the entire system installed ready for my kayaks (or whatever).
Thanks again to the folks at etrailer for their expert advice and customer service.
Parts arrived as advertised for the model
Car so happy to find the right fit
But super pricy for some plastic.
I was seriously disappointed ?? the landing pads are not made for the Tacoma and sit on the roof with a gap that looks bad and will let water and trash into the bolt parts of the rack to roof juncture. For the amount of money it should be made correctly. I was also shocked to find that the landing pads upper parts were plastic… I have used Yakima for over 30 years and never expected a “cheap out “ like that! I was so disappointed I have never used the racks! They also only have provisions for one of the two bolts at each landing pad roof juncture. Disappointed ??!
At first, a little tricky to install, as the kit comes with hardware for a variety of applications (different length/size bolts, etc). But after a quick look at the directions and identifying which bolt to use for my car, install was a breeze. I love this Yakima setup because I can remove the bars/towers and leave the landing pads with a cap. Makes it great for taking the canoe out on weekend trips, but not taking the fuel-economy hit during the weekday commute to work.
Very good product. The Yakama towers and cross bars feel very solid and appears to be high quality. Very easy install. Others have complained about the instructions, but guess I'm a visual person because the pictures all seemed very clear to me and the install was very easy. They do sit higher than I expected. After adding a Rhino Rack cargo basket, we only have about 4-5" clearance below the garage door.
I love the ease of removing my crossbars at the end of the season with these landing pads. Highly recommend these.
Do you have a question about this Roof Rack?
Info for this part was:
At etrailer.com we provide the best information available about the products we sell. We take the quality of our information seriously so that you can get the right part the first time. Let us know if anything is missing or if you have any questions.


Matthew
4/8/2021
Still working great, no leaks in camper roof!