
Stealth Hitches Hidden Rack Receiver - Custom Fit - 2"
(2 reviews)
Price: $588.00
In Stock
Stealth Hitches Hidden Rack Receiver - Custom Fit - 2"
Item # SH94FR
Our Price: $588.00
Will this fit?
To see if this custom-fit item will work for you please tell us what vehicle you'll use it with.
In Stock


- All Info
- Reviews (2)
- Q & A (0)
- Videos (2)
- Photos
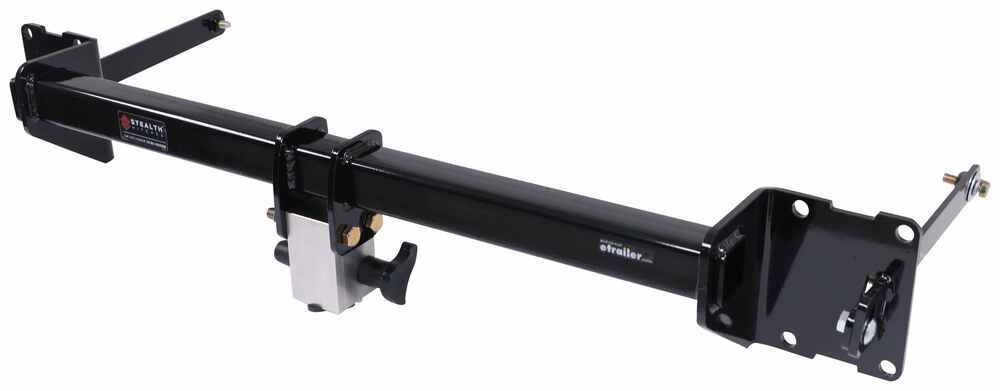
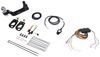
Stealth Hitches Trailer Hitch - SH94FR
- 2 Inch Hitch
- Completely Hidden
- Stealth Hitches
- 350 lbs TW
- Custom Fit Hitch
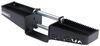
This completely hidden hitch keeps your vehicle looking like it just came off the assembly line. Remove the receiver for a fully concealed look when you're not carrying your bikes to the trail. Only for use with hitch-mounted racks and carriers.
Features:
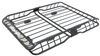
- Custom-fit rack receiver lets you carry a bike rack or cargo carrier with your vehicle
- Totally hidden design offers a clean, from-the-factory look
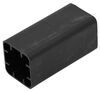
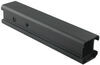
- Cross tube is concealed behind your rear bumper
- Receiver detaches with no tools and can be stowed away when not in use
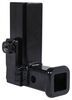
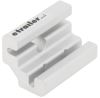
- Sturdy center block allows secure mounting and easy removal of rack receiver
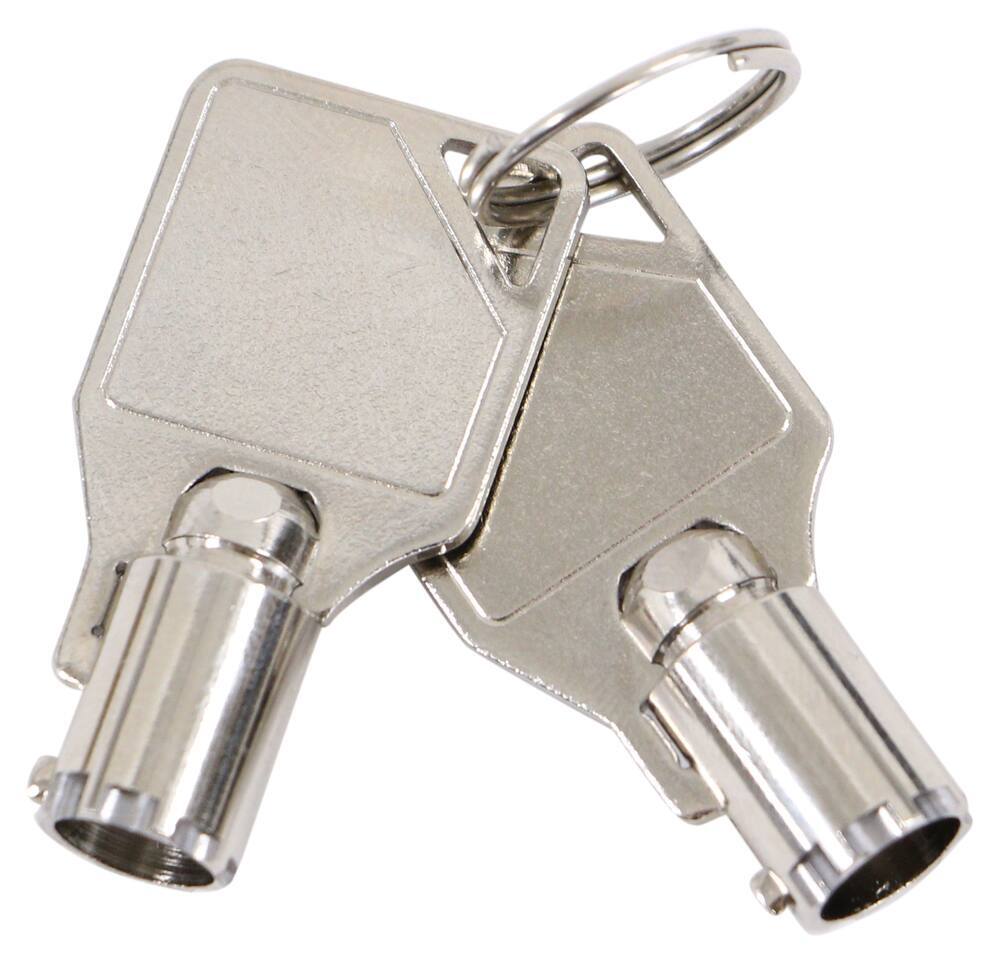
- Integrated lock protects the rack receiver from theft
- Durable stainless steel construction resists corrosion
- Hitch won't affect ground clearance or block your trunk's foot-access sensor
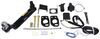
- Simple, bolt-on installation - no drilling or welding required
- Uses existing connection points to protect your vehicle's crumple zones
- Black powder coat finish offers superior rust protection
- Meets SAE J684 safety regulations
- Made in the USA
Specs:
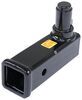
- Receiver opening: 2" x 2"
- Maximum tongue weight: 350 lbs
- Limited lifetime warranty
Note: This rack receiver is for hitch-mounted accessories only. The receiver tube included with this hitch cannot be used for towing.
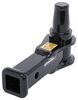
If you would like to upgrade this rack receiver for towing, you will need to purchase the Stealth Hitches towing kit (391CONVC5 - sold separately). The ball mount included in this kit inserts into the center block of the hitch in place of the receiver attachment. A 2" hitch ball is included with the ball mount, making it ready to tow with out of the box.
- Maximum gross trailer weight with towing kit: 3,500 lbs
- Not rated for weight distribution systems
If you want to take your bikes to the trail with your family this summer, you have plenty of options. You can carry your bikes on top of your car with a roof rack, but that bulky rack can increase drag on your ride. You can use a trunk rack, but that's a pain to mount and it can scratch your car's paint. Or you can install a hitch on your ride and use a hitch-mounted bike rack to carry your bikes.
This rack receiver is designed to act as a mounting point for your hitch bike rack or cargo carrier. Just slide the shank of your carrier into the receiver for use, and when you're done you can not only remove the carrier, but the receiver as well, leaving your vehicle looking clean and unmodified.
Completely Hidden Design
Nothing can ruin the clean, stylish look of your vehicle like a giant piece of metal bolted beneath its bumper. Luckily, with the Stealth Hitches rack receiver, you never have to worry about messing up your vehicle's lines.

This hitch installs behind your bumper, keeping the cross tube concealed and leaving only the hitch receiver visible. Even better, the receiver can be easily removed from the cross tube when it's not in use so that you won't see any trace of the hitch. This means that you can retain that clean, from-the-factory look for your ride, while still being able to carry your bikes and gear on the next family road trip.
Simple Set Up
The receiver can be attached or detached in seconds with no tools required. To insert the receiver, simply pop the base up into the stainless steel block at the center of the hitch until it automatically latches in place.

Be sure to then press the lock on the side of the block to fully secure the receiver. When you're finished carrying your bikes or cargo, use the included key to unlock the latch. Then turn the handle on the block clockwise and remove the receiver. You can stow the receiver in a safe place, like your vehicle's rear cargo area, or you can use a convenient carrying case (391CASER - sold separately).

And when you're not using the receiver attachment, the included hitch plug covers the center block's opening to protect the hitch's body from dirt and debris.
etrailer.com Technical Support
At etrailer.com we're committed to the products we sell, and to our customers. Our experienced and knowledgeable staff are available via both phone and email to address your questions and concerns for the lifetime of your hitch. The technicians at etrailer perform hitch installations on a daily basis, making them a valuable resource for do-it-yourselfers. The one-on-one, personal service you'll receive comes straight from an expert in the towing and automotive field. We've installed it, we've wired it, and we've towed with it, so whatever your question, we can answer it.
SHR30011 Stealth Hitch Hidden Receiver Rack Package - Custom Fit - 2"
Installation Details Alternate Instructions
This Product Fits The Following Vehicles
- 2015 - 2018 Audi Q3


Video of Stealth Hitches Hidden Rack Receiver - Custom Fit - 2"


Videos are provided as a guide only. Refer to manufacturer installation instructions and specs for complete information.


Video Transcript for Stealth Hitches Hidden Rack Receiver Installation - 2017 Audi Q3
Hi there, Audi owners. Today on your 2017 Audi Q3. We're going to be taking a look at showing you how to install the stealth hitch. This is either available with the rack receiver, which is just going to have your two-inch receiver that you see here. Or you could also get the towing package, which will also include a drawbar, as well as your trailer wiring. And this is what our hitch looks like when it's installed.
That's right, you can't see it at all because this is a stealth hitch. The stealth hitch is going to stay completely hidden, and you can find it behind our panel here if we pull the panel down.What you might notice, is that even when we pull the panel down, you almost don't see anything there, because with the stealth hitch, the receiver is removable. When you're ready to use your hitch, the receiver simply pokes in here on the bottom, locks into place, and then we'll just press in on the locking mechanism, and we're ready to tow. When you're done using your stealth hitch receiver, you'll just simply unlock the lock, twist the handle, and once you to put the panel back in place, your vehicle will look like it's factory once again.If you have just the regular rack receiver hitch, this is what you'll receive in addition to the crossbar, and this is going to work with any of your accessories, it's a standard two inch by two inch receiver. Now you want to keep in mind when towing, you don't want to exceed your vehicle's weight ratings.
The receiver is going to use a half-inch hitch pin and clip, which doesn't come included, but we've got plenty of different pins available here at etrailer.com, as well as Anti-Rattle devices and locking ones to protect your investment.When using your receiver, I've got some measurements for you to help you when deciding on accessories. From the center of our hitch pin hole to the edge of the bumper, it measures about one inch. That's important when determining if any of your accessories can be placed inside the receiver without contacting the bumper. And from the ground to the top inside edge of the receiver tube, it measures about 14 inches. And that's important when determining, if you need a drop or rise or a raised shank on your accessories.
Now we're going to go ahead and insert the draw bar, and we're going to give you some more measurements here. From the edge of your bumper, to the center of our ball, it's going to be about four and three quarter inches. And from the ground to the top of the ball, it's going to be about 19 inches. We'll begin our installation here at the back of the vehicle with the lift gate open. And on each side, you're going to have a large plastic screw on our fascia that we're going to remove using a T 20 Torx socket.We're now just behind the rear wheel, on our passenger side.
There's four screws, located here just behind the wheel and the wheel well that we're going to remove using a T 25 Torx socket. You'll need to have a pretty small tool to get in here with the tire, so you'll want something like this, that you can have it a 90 degree to take them out. Once we get the four screws removed on this side, we'll be taking the same four screws out over on the driver's side. We can now remove our trim piece here. And this trim piece is going to be held on there pretty darn tight. There's adhesive that's behind it that holds it on, as well as clips that hold it on, so we're just going to pull pretty much just straight out, but a little wedge can help get it off of there,Cause we can get kind of behind it a little bit. I also find it somewhat easier if we take the, wheel well here in fabric and you can just kind of peel this back. That's just so we can get a little bit better grip on it, to start getting it out of there. So once we get kind of a little bit piece started, you'll notice that there's a little tab here. And if you pull up on that tab, that's how you get those to come out of there, and there's going to be several as you're working your way up, and there's also going to be adhesive. So just use your wedge, and pull, and just slowly take your time working your wedge up, as you're pulling outward, and you may need some different size wedges just cause it's, depending on where you're at, and if you need a set of pry tools, you can get some here at etrailer.com. You can see just slowly working it back.And that's the adhesive that you're hearing, breaking free. So you're going to hear that as well, and you can see it right here there's that adhesive.So, we finally got it pulled back there, it's just a bit of a bear getting it from that adhesive, getting it off of there, but if you take your time and go slow, you'll get it. Now I can take a folded piece of towel or a rag, whatever you got lying around some kind of cloth, and just slide it up in here and you see, it gives us a wedge there a little gap, so that we, when we're pulling our fascia off, we don't have to worry about it hitting up against our trim, and we'll do the same thing over on the other side.We're not underneath the vehicle at the back and there are four bolts we're going to need to remove. Two here at the center, one on each side, we'll use a T 30, for those two. And then the two on the outside. We're going to be using a T 25, and that's these little guys right over here. Now here at the back of the vehicle, we're going to remove the covers that cover up our spare tire, and then we can go ahead and get our spare tire out. And these just lift up, just pull them up and set them aside.Now to take our tire out, there's an electrical connector here, we're just going to disconnect that right there, and then we can remove the spare tire, by removing the wing nut here in the center. With, the plastic component out first, and then we'll lift out the whole tire. We can not take out each of our side panels, just twist the knob, and then pull it out. On your driver's side here you are going to have electrical connector, for your 12 volt outlet. So just want to make sure you disconnect that. We're going to press in on the release tab, and then we can pull it out.The release tab is really small, but your fingernails should be able to get on it there. Then we can go over to the passenger side and pull that one out as well. There's no connector on this side. We'll now need to get our threshold taken off here at the back. Starting on one side, you can get a pry tool up underneath of it. And once you get it started, it'll then just kind of pull straight up. It can be a little difficult getting it started, and it is a very sturdy piece.Once you get the one side popped up and you go to pop out the other side, the whole thing would just pop up and release, and we can pull it up. But you don't want to pull it up too far, and there is an electrical connector right here towards the center. And we just want to press in on the release tab, and then we can pull that out of there. Now the whole thing can come out with our tray at the same time, cause it is kind of hooked underneath our tray here. To get your tray out, you will have to loosen up the strap on the Jack there. You just pull that guy side, and then, now our whole thing can come up together, and then we can pull our threshold out, set it aside, then grab our foam piece, pull it out and set it aside as well.We'll now need to remove the nuts, that's holding our fascia on here at the back. Underneath our threshold, you're going to have these grommets. So we're just going to remove the grommet here, peel back and then pull out on the grommet. And then on the inside, we're going to have a long stud, so you're going to need a deep well socket. And on that stud, it's way up in there, you're going to have a nut on it, that we're going to take out with our 10 millimeter socket.And if it stays behind, that's no big deal we can grab a magnet, and grab it to pull it out. We're not going to remove all the remaining ones as well. And we're just going to take our magnet, stick it on there.And then we got our nut, and will do that for the remaining ones Once you get the two nuts removed from our center studs, the studs here on the outside are going to be right here. You're going to be able to see them, sticking right through. So we're just going to remove the nut on the outer ones. You'll find one just like this over on the other side.And you can feel the fascia getting looser as you're taking these out. We're not ready to remove the fascia. And at this point, you're going to want to put something down, if you're doing this in your garage, at home you might want to set a mat down, maybe a couple of pieces of a two by four, something that you can throw something on to raise this up and set your fascia on, because there are electrical connectors behind here. But if we disconnect those electrical connectors, we will have to go to Audi for service, for reprogramming. So we don't want to disconnect anything. We're just going to remove it, and then just set it on this cart here. Again, if you're outside, just set it on like a blanket, whatever you've got around. So we're just going to start on one side, and just lift up on her a little bit. Starting on one side, we're just going to pull back on our fascia until it releases here towards the middle, and then we'll release the other side, the same way.And now I do recommend the next to the hands, because at this point you're just going to slowly work it back. And again, we have an electrical connector. It's going to be on the passenger side over here, so now that we've got it loose, we're just going to rotate it around the outside, and set it right on our cart, just like that. We're trying not to put too much tension on this electrical connector. You can see, we still got a little bit of play in it. It's not tight. We can now remove our bumper beam. There's a total of six bolts, two on the driver's side and four on the passenger side. We'll be removing each of these using a 13 millimeter socket. What I'd like to do after removing a bolt on one side, just reinsert a couple of threads. Now, that's to ensure that once we get all the hardware removed, there'll be at least one bolt on each side to hold it up, so it can't just fall off.Now that we've got all the bolts loose, we'll just take those two bolts that we had thread in a turn and unthread those holding onto our bumper beam, and then we'll pull it off and set it aside. We can now install our support braces. You're going to have two brackets, that are just like this, will have weld nuts on them and then an extra hole. The extra holes going to stick towards the rear, as we slide it in like this. And we want the holes, to be facing towards the outside of the vehicle, so the nuts are going to be towards the inside. And that's just going to slide in and it'll line up with holes on the side of the frame. So just line up the hole with the nut, and then take your bolt, you'll have a flat washer and a lock washer on it, just like that,And then we're going to just thread it in there. And we just need to get it loosely started, we don't need to go crazy with it right now, cause we'll be lining it up here in a bit. So just get it started. And then we'll get the next one started. The next one is a little harder to see, it's right here by the wheel well. So it's a little bit tighter. But you should be able to get your hand up in there, no problem. Once we get each bolt started on this side, we'll then slide the other side in, and get them started on that side as well. We're going to be raising our hitch up in just a moment.So I find it easier if you've got all your hardware prepared, so take each of the eight bolts that come in your kit, slide on a lock washer, followed by a flat washer. We'll now take our hitch, hold it into position, it's going to slide over the tabs, on the brackets that we had just inserted, then we can line up the holes, and then the bolts that we had just prepared are going to thread right into the factory weld nuts. That'll be the same as before, four on one side and two on the other side.Then we can take the short carriage bolts that come in our kit, slide those from the outside in, and then take a flange nut, and thread it on the other side. We'll do the same thing here, where it passes through the tab on the other side as well. We can then go back and tighten them down, using a 13 millimeter. We can go back and tighten the ones on the frame that we had loosely installed previously. We're going to do that with a 58 socket. Then we can tighten up our carriage bolts using an 18 millimeter wrench. Once we've got all the hardware tightened down, we can go back and torque it all. We're going to do it in the exact same order that we just torque these down. Now we can install our mechanism. The release handle is going to go towards the passenger side and the locks going to go towards the driver's side, and it's going to slide up right here in the middle. We'll then slide our bolts through from the passenger side to connect it in.But I wanted to point out the bolts. If you received just the stealth hitch, with the receiver end for your accessories, you're going to receive a shorter bolt. This is the shorter one that's going to come in your kit. If you purchased the full tow package kit that comes with your ball mount and safety cable loops, you're going to also receive a longer bolt. So you're only going to get a short one if you have just the receiver kit, but if you've got the full kit, you'll receive two, and we want to use the longer ones for the full kit, so we can install our, safety cable attachment points. But if you don't have any of this, then you'll use the short ones. So we're just going to flip the short ones aside. We're going to grab our safety cable loops.I find it a little easier if we just slide the bolts through first. So now we're just going to take our mechanism. We're going to hold it up here, and I'm going to slide just a single bolt through because we have to get our, safety chain loop around our lever there. And then once you've got it around the lever and we got the bolt slid through, we can then just tilt it up, and get the other one to slide through. On the other side, we're just going to slide the safety cable extension on.You might have to pull the boot out of the way, in order for it to slide all the way around there. Then we can just attach the nylon lock nuts that comes included with it. And then we'll tighten these down using a three quarter inch socket and wrench. We can then go back and torque our hardware to the specifications found in our instructions. Now that we've got these torque down, the hitch is fully installed. So at this point, if you have just the receiver kit, you can reinstall your fascia in reverse order of how you removed it. And that completes our look, at the stealth hitch on our 2017 Audi Q3.
Customer Reviews
Stealth Hitches Hidden Rack Receiver - Custom Fit - 2" - SH94FR
Average Customer Rating: 5.0 out of 5 stars (2 Customer Reviews)
This completely hidden hitch keeps your vehicle looking like it just came off the assembly line. Remove the receiver for a fully concealed look when you're not carrying your bikes to the trail. Only for use with hitch-mounted racks and carriers.by: Gerald04/17/2022
I haven’t ever used this product, as I bought this mainly for towing.


by: Santiago 04/19/2023
Nicole was beyond helpful. She helped narrow down my search!
2
2
See what our Experts say about this Stealth Hitches Trailer Hitch
Info for this part was:

Edited by:
Lindsey S

Video Edited:
Jacob T

Video Edited:
Jonathan Y

Video by:
Dustin K

Updated by:
Wilson B

Updated by:
Mark S

Updated by:
Noah M

Updated by:
Manda E

Written by:
Alexander C

Test Fit:
David F
At etrailer.com we provide the best information available about the products we sell. We take the quality of our information seriously so that you can get the right part the first time. Let us know if anything is missing or if you have any questions.
Product Experts Available Now!
Call 1-800-940-8924
Thank you! Your comment has been submitted successfully. You should be able to view your question/comment here within a few days.
Error submitting comment. Please try again momentarily.