
To see if this custom-fit item will work for you please tell us what vehicle you'll use it with.
Thank you! Your comment has been submitted successfully. You should be able to view your question/comment here within a few days.
Error submitting comment. Please try again momentarily.


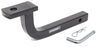
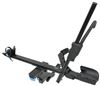
This fully welded, corrosion-resistant vehicle trailer hitch receiver is perfect for your light-duty towing needs. Draw-Tite's Tested Tough guarantee ensures that this hitch exceeds industry standards. Drawbar sold separately.
Features:
Specs:
Draw-Tite's Tested Tough program provides testing standards far superior to those outlined by the Society of Automotive Engineers (SAE), the go-to source for engineering professionals.
Each Draw-Tite trailer hitch receiver undergoes extensive fatigue testing and static testing with the ball mount that is either supplied or recommended for use with that particular hitch, thus ensuring results that are applicable to real life use. Fatigue testing is also conducted on hitches rated for use with weight-distribution systems.
In addition, Draw-Tite performs static testing on a simulated automobile, as opposed to the rigid fixture used for SAE testing, resulting in a more true-to-life scenario.
At etrailer.com we're committed to the products we sell, and to our customers. Our experienced and knowledgeable staff are available via both phone and email to address your questions and concerns for the lifetime of your hitch. The technicians at etrailer perform hitch installations on a daily basis, making them a valuable resource for do-it-yourselfers. The one-on-one, personal service you'll receive comes straight from an expert in the towing and automotive field. We've installed it, we've wired it and we've towed with it, so whatever your question, we can answer it.

California residents: click here
Videos are provided as a guide only. Refer to manufacturer installation instructions and specs for complete information.
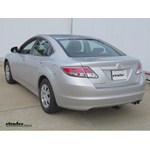
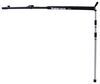
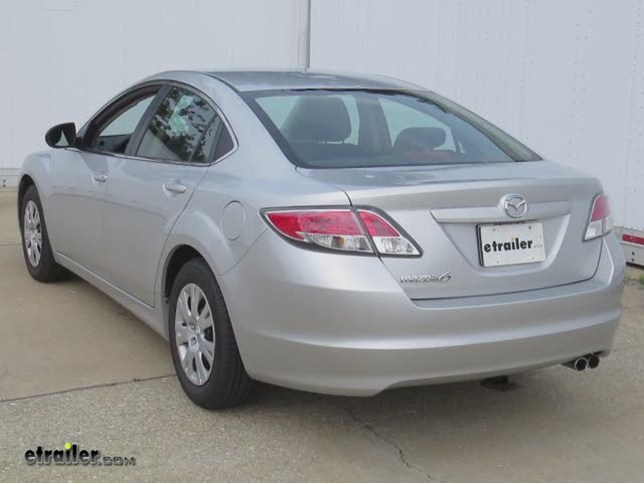
Today on our 2010 Mazda 6, we'll be installing the draw tight hitch, part number 24832. This is what our hitch will look like once installed. Next we'll go ahead and give you a couple measurements to assist you in selecting accessories for your new hitch, such as a ball mount, bike rack, or cargo carrier. From the center of the hitch pin pole to the outermost edge of the bumper is 6 and a half inches. The top of the receiver tube to the ground is 7 and a half inches. Now we'll go ahead with installation. To gain easier access here on the passenger's side we're going to go ahead and lower the exhaust.
To safely lower the exhaust we'll put a safety strap underneath first. Then we'll remove the two rubber isolators that hold the rear portion of the exhaust, one just behind the muffler, and one just forward of the rear axle. To remove the rubber isolators, we'll spray each one with some spray lubricant and then use a pry bar or pliers to remove the rubber isolator from the metal hanger. Now the rubber isolator is removed, we'll go ahead and use the safety strap to safely lower the weight of the exhaust. We're going to have a total of 6 attachment points. 4 predrilled holes, 2 in the rear portion of the frame and forward of the frame we'll be drilling out an access hole which will also serve as an attachment point. You're going to go ahead and get an extra set of hands to help hold the hitch up into position so that you can use a paint marker to mark out the forward attachment hole.
Now that the forward attachment hole is marked out we'll bring the hitch back down and set it aside, and, using a whole saw bit, cut out our large access hole and forward attachment point. Be careful to stay away from the edge of the frame, as you do not want to drill into the edge. You want to stay in the flat, bottom portion of the frame. Keep in mind, each process we do here on the driver's side will get repeated identically on the passenger's side. With our access holes drilled out, we're ready to go ahead and start installing the hardware. For our frame attachment points, we'll be using the 7/16ths carriage bolt and block in the frame and a 7/16ths inaudible 00:02:13 washer, teeth of the washer facing the hitch and a 7/16ths not to secure it. Starting with the rear attachment point we'll take our pull wire, go through the attachment point and out the access hole.
We'll slide on the block and thread on the carriage bolt. We'll feed the block and carriage bolt up through the frame and pull them into position. We'll leave our pull wire attached as it will assist in getting our hitch up into position without pushing our hardware back up into the frame. Next, we'll install the forward attachment hardware. We'll be using the reverse pull method where we'll slide the block onto the pull wire, followed by threading on the carriage bolt. Then we'll feed the carriage bolt into the access hole first, followed by the block, then pull them both back over the access hole, creating our forward attachment point.
We'll go ahead and repeat this same process for the opposite side. Now with our frame hardware in place, we're ready to install the hitch. It's a good idea to get an extra set of hands to help you hold the hitch while you install the fasteners. As we put the hitch in position we'll take the pull wire and feed it through the attachment points of the hitch and then bring it tight to the frame. Once we have it tight to the frame, we can install our fasteners. Next, we'll install the vertical hardware. This will be the bolt and flat washer going through the body and then through the hitch, being secured with a conical tooth washer and nut. We'll repeat this same process for the opposite side. We'll remove the pull wire from the rear frame fasteners and install the conical tooth washer and nut. With all the hardware installed, we'll tighten it down. Next, we'll torque the specifications as indicated in the instructions. With our hitch secured and torqued to specification, we're ready to go ahead and reinstall the exhaust. With that, we're ready to hit the road. That does it for the install of our draw tight hitch, part number 24832 on our 2010 Mazda 6. .
Average Customer Rating: 4.8 out of 5 stars (20 Customer Reviews)
This fully welded, corrosion-resistant vehicle trailer hitch receiver is perfect for your light-duty towing needs. Draw-Tite's Tested Tough guarantee ensures that this hitch exceeds industry standards. Drawbar sold separately.I ordered this late one night and it arrived the next afternoon. I attached it in my father in law's garage - retired mechanic with all needed tools. It did take about two hours, and the access holes seemed rather large after cutting the holes into an x with an air chisel per the suggestion in the video. The hitch probably adds about 40 pounds to the car, but is fairly hidden and the bike rack purchased from etrailer fits well. Seems like it will last the life of the car. I only plan to haul bikes with the hitch.
I wanted to let you know that both the hitch and carrier arrived and I have already installed them both. They are awesome! Shipping was fast and the box arrived in great condition.
The video you have on your site helped out tremendously. I didn't have the use of a lift, but had a jack and two jack stands. It was a little difficult that way, but still doable.
I bought this for transporting bicycles on a receiver rack. I had bought a hitch for another car from a local trailer rental merchant years ago but was disappointed with the quality and durability. The Draw-tite hitch arrive safely packed and in good condition after about a week. Although I intended to install it myself, it was readily apparent I needed an extra set of hands due to weight and bulkiness. A web search revealed a company with a stellar reputation for installs of this type in my area. Despite charging me $100 for the install, the quality of the hitch and free shipping,still made it $75 cheaper (and a better value) than a purchase and installation at the other merchant.

Jim B.

7/16/2018
Still very pleased with this hitch. I cant think of a better compliment than that I dont give it a second thought.
Fit perfectly, came with all the hardware you need. Nice video online that clearly shows how to install it. If you can drill and 1-1/8 hole, you are capable of installing it. Took about an hour. You will need a way to lift the car up some to work on it.
Hitch receiver is nice and rugged as far as class 1 hitches go, its a draw tite which is a good brand in my experience. The only thing that I did not like is the hitch receiver had an indentation where the hitch slides into presumably to prevent hitches from going more then few inches into the receiver. I can't say that I understand the logic to it, might have been manufacture defect, not really sure. It stopped me from sliding my bike rack in far enough to put the locking pin in. I just drilled out the indentation with a 3/8 bit, then I could fit the hitch all the way into the receiver. Not a deal breaker by any means,
Highly recommend overall. I'll come back to e-trailer in the future for such needs.

Heather A.
4/18/2018
Mark, thank you for your review. The tab on the inside of the trailer hitch receiver part # 24832 is meant to insure that the user only uses Class I rated accessories in the hitch. This hitch only handles up to 200 lbs of tongue weight. If you use a class 2 accessory and you overload the hitch, you could cause damage to your hitch or the accessory. We do not recommend removing the tab because it voids your warranty and may also lead to damage to your hitch in the future.
The hitch looks good, and installation was simple. I was a bit put off though, because the hitch is not actually from Draw-Tite. It was from some company I've never heard of, built in Mexico.

Ryan D.
4/16/2015
Installation was a bit tougher than expected, but all the necessary hardware was included. Fits perfectly under the car, almost out of site. Concerns about the quality are gone.
Excellent product with pretty easy installation. I have a 2009 V6 Sport version, and the holes lined up perfectly. I did not have to take off the exhaust trim pieces since the bumper had enough play to slightly bend it to get the exhaust tubes to move past.
I had some trouble "widening the hole" to fish the bolts through since the included bolts have very wide heads. I attempted to use an air hammer like in the video, but I think my air compressor isn't beefy enough. Ultimately I used an angle grinder to make some pretty nasty cuts before I had an opening wide enough to push the bolts. I bought a can of Rustoleum paint to spray the exposed gashes after the hitch was mounted to prevent any rusting.
The hitch itself sits pretty far under the bumper and might require a hitch extension to use some bike racks. I have not used a bike rack with this product yet, but the hitch feels very snug once you get all the nuts torqued to the specs.
Receiver hitch fit Mazda 6 very well. You will need help holding it in place to mark holes and attach. Wiring was the most time consuming part routing hot wire from battery to trunk. All wiring fit and hooked up just as it was explained in directions. Hitch is well built and worked great on first towing of a jet ski. Great product and highly recommend if your in need of a receiver hitch.
The product arrived quickly and all was in order. My wife and I were able to install the hitch without any issues. I was concerned that lowering the muffler on an 11 year old car would damage the muffler, that didn't happen. I was able to release the muffler from the hanger using WD40 and Channel Lock Pliers. The installation video was very helpful. I was also concerned that the bicycle tires would be too close to the muffler but the rack I'm using positions the tires above the tail pipe and far enough away to prevent issues.
Being completely clueless and brand new to the towing/trailer world, I ordered mismatched parts. Roger R immediately reached out to me to ensure I had what I needed to properly install my hitch. I'm completely impressed with the customer service and affordability of etrailer.com and will recommend it to anyone... now to just get the parts installed and go get on the water!!
Installation on 2011 Mazda 6 isport required to drop the muffler. need to drill an addtional 1 1/8" hole saw to drill that I was not expecting. My last Mazda didn't require any additional holes.
Definately want to do this while the car is new so you don't have to deal with any rust getting exhaust bolts loose.
Other than that, installation wasn't too bad. Took about 2 hours but can be done much quicker if your real familiar with the process.
As described installed nicely.
You will need a xtra set of hands if you will be lifting your car in a driveway.
Good fit and finish watch video and go easy with hole saw pilot bits break easily.

The video and instructions were great! Easy to install, came with everything i needed and tows great!!
Works as advertised.
Very good match with our mazda 6 and we have used it several times it has already paid for itself in usage alone. Great product. we always recommend it.
Do you have a question about this Trailer Hitch?
Info for this part was:
At etrailer.com we provide the best information available about the products we sell. We take the quality of our information seriously so that you can get the right part the first time. Let us know if anything is missing or if you have any questions.


Patrick B.
11/6/2013
Just want to clarify, the hitch only weighs about 30 pounds.