Roadmaster Tail Light Wiring Kit with Bulbs

Will this fit?
To see if this custom-fit item will work for you please tell us what vehicle you'll use it with.
Thank you! Your comment has been submitted successfully. You should be able to view your question/comment here within a few days.
Error submitting comment. Please try again momentarily.
- All Info
- Reviews (247)
- Q & A (0)
- Videos (3)
- Photos
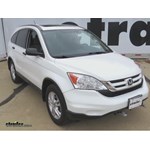
2010 Honda CR-V - Roadmaster Tail Light Wiring Kit with Bulbs
- Bulb and Socket Kit
- Bypasses Vehicle Wiring
- Tail Light Mount
- Universal
- Roadmaster
Use your towed car's signal lights without tapping into its wiring. This self-contained wiring kit bypasses your Honda CR-V's electrical system, eliminating any concerns over violating the manufacturer's warranty.
Features:
- Lets you use your towed vehicle's brake, running and signal lights without tapping into its wiring
- Bypasses towed car's electrical system completely - wiring is routed beneath the car
- Works via independent plugs and sockets mounted inside the tail lights
- Maintains manufacturer's warranty on towed car by avoiding any involvement with its electrical system
- Overall measurement of bulb: 2-1/4"
- Length of bulb from flange to top of bulb: 2"
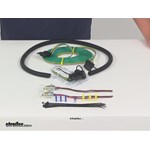
- Includes all necessary wiring, 2 lights, 2 sockets, zip-ties and instructions
- Made in the USA
- Limited Lifetime Warranty
Note: Towed car must have enough room inside the tail light lens housing for an extra bulb and socket.
155 RoadMaster Tail Light Wiring Kit with Bulbs
Installation Details

Videos are provided as a guide only. Refer to manufacturer installation instructions and specs for complete information.
Video Transcript for Roadmaster Tail Light Wiring Kit Installation - 2010 Honda CR-V
Today on our 2010 Honda CR-V, we'll be taking a look at and installing the Roadmaster tail light wiring kit with bulbs, part number RM-155. First thing we'll need to do in our installation of our Roadmaster tail light kit with bulbs is go ahead and open up our rear hatch to gain access to our tail light assemblies. Then, we will remove the caps located here and here on both sides. To remove the tail lights, use a small screwdriver to stick in the slot and pop it out. Once you've popped out both the caps, repeat that same process on the passenger side. Anything we do here on the driver side, as far as the removal and re-installation of the tail lights, is going to be repeated on that passenger side. All right. Now, we're going to remove the two bolts on the inside.
It's either going to be an eight millimeter or a Phillips-head screwdriver, if you have one. We're gently going to pull out. Once we have the bottom loose, we'll bring that top around. With our tail light now out, we're just going to use a little stool to support it, while we mark all of our wires. You can see that we have all of our lines marked starting at the top, and we just did, "Top #1," and labeled it down from there, through four.
We'll twist and pull out on the bulbs, removing the lines as we go, all the way down to the bottom. Once you have all the bulbs removed, we'll set the tail light off to the side. Where we're going to drill the hole is going to be right above the light that's right above the notch. That's going to be in this light here. You'll see this nice little area right here on the side of it. We're going to drill in right there using that one-inch hole saw.
If you come down, you'll see there's going to be a point there. Go right in there. This is the other side here. Now, we're going to take our one-inch hole saw and since we already center-punched our little hole there, we'll line it up and drill through. Try and keep it pointed down, so we don't get anything on the inside of our tail light assembly. Once we have it through, we'll shake it out and we'll even take our vacuum and vacuum it out, any kind of dust that's on the inside of there, that way we can make sure we don't have any residue built up in there. This is going to be our driver side and you can see how it's going to be done, like so, meeting up right in that area and looking really clean.
Now, we'll drill out our passenger side. We'll go ahead and prep our bulbs to be placed inside the holes. Here's our bulbs that we're going to insert, our bulbs and socket. We're going to place it into the hole and if it jiggles around a little bit, we'll need to make some adjustments by using the little tabs here on the side until we get a nice, snug fit. We'll take a small screwdriver and bend those tabs back all the way around until we get a nice, snug fit inside the hole. Once we have a nice, snug fit with no jiggle, we'll take some black RTV or black silicone and seal it up so no moisture gets inside. Now that we have the driver side done here, we'll repeat that same process on the passenger side. We're going to go ahead and take our 30 foot of four-pole wiring and cut off one end. The end that we're cutting off is going to go towards the back of the vehicle to wire into the tail lights that we just hooked up. This will make it easier to run the wires back to the back without having the four-pole connection on it, that way we can run it through the frame or around any obstacles that we may need to, keeping it away from any sharp objects, any hot objects, such as the exhaust, or anywhere where it can get pinched or frayed. Onto our wiring for our four-pole, we started the wiring by bringing it down through the engine compartment and around the grill and radiator in the front, coming down right where we're going to hook it up to our seven-pole connector for our tow bar that's getting hooked up to the vehicle. You see, it runs back behind the grill and then up and around the engine compartment here. I left the tabs on here so I could show you exactly where it was. Now that you see it, we'll go ahead and cut it off. With the tails removed, the wire then goes down along the back of the firewall, down past the independent front suspension, and then, goes along the frame to the back. We'll go underneath and show you that now. This is going to be where it comes down off the back of the firewall, underneath the brake lines, and then, we're going to follow those brake lines along the back. We'll snip off those tails as we go along, then, through the cover, and along the back. It's suggested that you have a pull wire 05:46 here, maybe an extra piece of air tube or something solid like a coat hanger, that way you can pull through the wire down to the backside through things like this, without having to remove them. It'll be helpful when we get to the back. From the backside of the fuel tank, it's ran up to the side and then, hooked to the brake line. From there, we attached it to the fuel tank line, that way we know it isn't going to be near anything that's going to be a moving part. Going over the top of the independent rear end and along the side of the spare tire well. We're just separating our yellow wire from our green and brown wire over to the passenger side, making it easier to make that connection. Then, we'll connect our green, white, and brown to our whole wire, which is an extra piece of air hose. We'll set it back across the back of the bumper and pull it back up into the passenger side. You'll be able to see up into the gap; it goes up into the tail light assembly. Making sure that it goes over the top of the exhaust, so it's not near any heat, so our wires don't get melted . All right. Once we have our wire pulled up, we'll go ahead and make our connections to our bulb and assembly and cut the brown and white. Now, we'll strip the ends of our bulbs that we put in. Once we have those stripped, we'll cut our green wire to length. We'll strip off the three wires that we have over here and give them a little twist. We're going to crimp on our jumper cable, so brown to brown, put our yellow butt connector on and crimp them down. Once you have it crimped on, we'll do the white next. We can put our butt connector on the green side and that's just going to connect to our red wire on our new bulb and socket set. Run down your extra brown to white wire that we're using as that jumper. With our wires with the butt connectors on them, we'll grab our passenger side tail light assembly and start making our connections. All right. With our tail light in-hand, our brown wire is going to go to the brown, so, we'll get the easy one out of the way first. Go ahead and crimp it down. Black is going to go to white, and red to green. Once we have all of our connections made, we'll tape off our wires. All right. With our wires in place, we'll reattach our factory bulbs. We'll look at our tape that we put in there, figure out which one goes where, and make those connections. Press them in and rotate them. Now, we can put our passenger side tail light assembly back in place. With the bulbs back in place and our tail light assembly secure, we'll place in our caps. We'll pull our brown wire and our white wire back across to the driver side, going back across the backside of the bumper. With our pull wire, pull our extra wires up to the top, making sure that we don't get hooked on anything on the bottom side and that our wires are tight. Go ahead and give ourselves a little bit of room and cut off our extra wire. Go ahead and strip the ends back. We're going to cut off about an eight-inch piece of wire that we're going to use for our ground piece. Go ahead and strip both ends. Then, we'll add a ring terminal on the one side. With the ring terminal added, we're going to add that to our white wire. Crimp it down. Now, with the other two, we'll put on our butt connectors and hook up our wires. We'll first need to strip back our driver side tail lamp. Once we have those stripped back, remember, white goes to black, brown goes to brown, and red goes to yellow. Once we get all these crimped down, go ahead and tape them off like we did on the other side. Now, all we have left to do is attach our ground wire. We'll go ahead and take our self-tapper that was included and we're just going to connect it down here on this bottom side. We'll connect our factory tail light bulbs in the order that we labeled them. Once you have it all reconnected, we'll put our tail light assembly back in place, line up our alignment tabs, and press in. Once it clicks in place, we'll then be able to return our screws to the backside. With our driver side tail light re-installed, we'll now check our lights. I'll attach our four-pole to our camper, RV, or four-pole relay 12:05. Go ahead and test out our tail lights, brake lights, right turn signal, and our left turn signal. We're good! That will do it for our review and installation of the Roadmaster tail light wiring kit with bulbs, part number RN-155, on our 2010 Honda CR-V.
Customer Satisfaction Score:
94% were satisfied with this product
6% of customers were not satisfied
- Wrong item was ordered
- etrailer mistake
- Did not arrive in time
Customer Reviews
Roadmaster Tail Light Wiring Kit with Bulbs - RM-155
Average Customer Rating: 4.7 out of 5 stars (247 Customer Reviews)
Use your towed car's signal lights without tapping into its wiring. This self-contained wiring kit bypasses your vehicle's electrical system, eliminating any concerns over violating the manufacturer's warranty.Always completely satisfied with Etrailer service and products! Jamie B is very knowledgable and courteous!
This was a good option for our 2020 Chevy Equinox because it does not tie into the tow vehicle electrical system and runs directly from the Motorhome electrical system.
Went pretty easy. Holes for bulbs do fit in the rear lights. I had to use a 6way plug that had a 4way line on it also.
Put this into a 2002 Jeep Liberty. Good directions. Drilled out the lower part of tail light housing and install bulb sockets into it. You may have to deburr the tail light housing a bit and manipulate the tangs on the bulb socket but is fine. I put in 1157 LED bulbs :) Good stuff!
This product was easy to install but it took some time routing the wiring harness from the front bumper to the rear. Pick up some extra zip ties, you will need several. The lighting system is independent allowing for the use of LED bulbs. Great product.

easy install one year later still working perfectly

it worked well
very well made and packaged
Great customer service fast delivery and reasonable price. Been purchasing from ETrailer for years
Found this item was wired with the brake lights for the brown wires and turn/running lights for colored wires and this fact kept me from getting this done very rapidly. Once identified, went together really nicely and actually grounded to frame for higher light output. I upgraded 3 wire into 2 wire converter with "Roadmaster Brite-lite 3 to 2 Wiring Converter" and they are as bright as the lights already in the housing. Except for that wiring issue, it would have been excellent. As to performance after install, great. Customer service was nice from Roadmaster as well. Did receive a call back message from etrailer a couple days later.
I purchased a Blue Ox base plate, Air Force One braking system, and a light kit for my 2013 Durango. I could have not asked for an easier process with selecting and ordering, also the tutorials and videos were a great help in determining what was the best system for me . Everything arrived as planned and in great condition. This is not my first time using etrailer.com and my prior experience was equally good.
Ken G.

10/23/2017
After using the items I reviewed, about 6,000 miles, I am more than satisfied. The towing setup is easy to hook up and unhook and the braking system is second to none. All of the installation was completed by myself and a friend, both of us have a technical background him more than me and we found the videos of the installation extremely helpful.Thank you for following up and providing excellent products as well as support services.
great kit i have installed them before

I like this product and would definitely buy it again. I like not having to splice into the vehicle wiring and install diodes, etc. It is a clean installation with good instructions. All I have to do to hook up the lights is raise the hood of the towed car and pull out the pigtail and hook it to the motorhome. It is powered by the motorhome and does not run down the battery in the towed car. Great product.

Gary Y.

8/19/2017
Works great! Would definitely recommend it.
Great idea. After years of towing with magnetic lights now all I have to do is plug it in, and I'm done.
The kit kit comes with more parts and wire than I needed and was simple to install on my 2010 JK.

Frank S.

6/27/2014
Thanks Patrick. It works so well I forgot I had it.
This kit really simplifies wiring tail lights on a vehicle that will be towed. No cutting into the vehicle's wiring and adding isolation diodes. Very functional and easy to install.

Kim P.

1/26/2016
The parts are working perfectly. Thank you.
I have used the brake light wiring kit on 2 other towed vehicles. It is an easy install, does not compromise the original factory wiring and works well.
Robert

11/12/2018
Easy install, working well 1 year later.
Kit was of good quality components. I would recommend about twice a much protective wire wrap along with extra of the smaller butt connectors. Fortunitely I had what I needed on hand. I also used a larger ring terminal.
Jack M.

5/9/2020
Works great. 2002 Jeep Wrangler tail lights have plenty of room for the extra tail light bulbs.
Good instructions. Everything need is included for 4flat connections. One bulb socket arrived with the ground (black) wire loose in the bag. The solder joint had failed. Resoldered but had to remove the other wires and rubber insert from the bulb socket to avoid melting. Not a shining example for Roadmaster.

Joel

8/16/2015
no issues, working as expected
A very clever idea for an easy, neat, simple installation to safely operate tail lights on a towed vehicle. We installed this kit on our 2017 Chevy Sonic and it works great.

Edp

8/15/2018
Thanks for the follow up. Everything is working just fine, no problems, nothing but good performance.
Great product, not a bad install and works great. I chose to cut off both 4 flat connectors and I installed a 4 round connector with spring cover on the front of my CRV. Looks and work out great.
W. D.

7/19/2017
Still working fine.
Nice to not have to splice into vehicle wiring harness. Separate bulb assembly in existing tail light housing works great for towing our "TOAD" behind motor home.

Kevin M.

9/2/2020
Still works great after a year of towing to many destinations.
This time it went without a hitch. last time was another thing. hopefully moving forward its all good.
thankyou

Watched video and installed with no issues. Great product! Will buy again for future vehicles.

I really didn't want to install a separate bulb kit but our Equinox light was not compatible with our motor home. I was also installing a trailer lighting harness for the Equinox at the same time and doing them together made a lot of sense. I found this kit to be easy to manage and that drilling into the rear light housings not nearly as difficult as I had imagined. I would share a picture of the result but fortunately there is nothing to see - everything fit right into the Equinox's rear lamp structure. I compared the original lights with those from the kit driven by the RV and found them to be a great match. I upgraded the kit bulbs to LEDs for greater longevity.
Good materials and instructions. There is a YouTube video that is very helpful. I would have liked a longer connector that goes between the motor coach and the towed vehicle.

Ron S.

6/15/2017
Still working great!
See what our Experts say about this Roadmaster Tow Bar Wiring
- Flat Towing a 2016 Chevy Sonic Behind a MotorhomeTo flat tow your 2016 Chevrolet Sonic you're going to need several items. For starters, I recommend the Roadmaster Sterling Tow Bar # RM-576 which connects to your RV by your trailer hitch receiver. It's non-binding, making it easier to connect to your Sonic and the Alpha comes with safety cables. Next you'll need the Roadmaster base plate kit # RM-523173-5 which is compatible with your Sonic. It's fairly easy to install, with no welding and is barely noticeable when the arms are...
view full answer... - Using T-1 Wiring Harness, Part # 118407 for Lighting Vehicle Towed By RVThe T-1 Vehicle Wiring Harness, part # 118407 is designed for towing a trailer behind a 2007 Chevy HHR. It will not work for towing behind an RV, because the harness is designed for output only. To light your HHR while it is towed behind your RV, you have three alternatives. You can use a magnetic mount lighting system, like part # RM-2120. This system is very easy to install and use. It also remains completely independent of the towed vehicles wiring system. For occasional towing, or...
view full answer... - Tips for Installing the Roadmaster Tail Light Wiring Bulb and Socket Kit on a 2008 Honda PilotI recommend removing the tail light assemblies on your 2008 Honda Pilot before drilling into the back of them to install the bulbs. Also make sure that you do not drill through any vital components on the assembly. The wiring should be able to get routed down through the vehicle through where the tail light assembly mounts. When drilling, use bits that are made for plastic and start with a small pilot hole first and work your way up to the correct size for the bulbs. When routing the...
view full answer... - Replacement Bulbs for Roadmaster Bulb and Socket Flat Towing Taillight Wiring Kit # RM-155The Roadmaster Bulb and Socket Taillight Wiring Kit, part # RM-155 would take a standard 1157 replacement bulb. We offer them as part # DI79VR.
view full answer... - Parts Needed to Flat Tow a 2005 Jeep Wrangler TJ Behind an RVThere are several main parts needed to flat tow your 2005 Jeep Wrangler (TJ); base plates, tow bar, safety cables, lighting, and supplemental braking. Since you like the Blue Ox tow bars we can start with Blue Ox base plates, # BX1120, which fit models that have the stock double tube or U-channel front bumpers. Then for a compatible tow bar I recommend the Alpha, # BX7380. It is rated for up to 6,500 pounds and comes with safety cables so you will not have to buy any separately. With...
view full answer... - Parts Needed to Flat Tow 2007 Mini Cooper Hardtop S modelWe do have a base plate option for you but it is not the Blue Ox Base Plate Kit, # BX1307 as this for later model years than 2007. I recommend the Roadmaster EZ Base Plate Kit, # 521877-1 for a 2007 Hardtop S model. For a tow bar, I suggest the Roadmaster Falcon 2 Tow Bar, # RM-520. This hitch-mounted tow bar has stainless steel, telescoping arms that automatically lock into place. Its large hookup radius allows you to connect without perfectly lining up your vehicle. Easily folds up...
view full answer... - Base Plates Recommendation For 2013 Honda CR-VWe offer two base plates that are designed to fit your 2013 Honda CR-V. The first is part # RM-521567-4. These base plates have removable drawbars that make the base plates almost invisible. These base plates will work with any Roadmaster tow bars. The second base plate kit we offer is part # RM-521567-5. This has the same features with removable arms but will work with Roadmaster tow bars that are motor-home-mounted only. There are five items you need when flat-towing. You will need...
view full answer... - Parts Needed to Flat Tow a 2015 Subaru XV CrosstrekFor you 2015 Subaru XV Crosstrek we do have base plate kits available.. You would want the Roadmaster kit part # 52922-1A as it has been confirmed to fit your vehicle. In addition to the base plates, you will also need a compatible tow bar, safety cables, lighting, and supplemental braking to flat tow your vehicle. The most popular compatible tow bar is the Falcon 2, # RM-520. For safety cables you can use # RM-643. The coiled design helps keep the cables off of the ground. For lighting...
view full answer... - Equipment Needed to Flat Tow a 2013 Toyota Tacoma X RunnerI did some research, and found that Toyota states that the Tacoma shouldn't be flat towed. There are aftermarket lube pumps that can be installed to keep the transmission lubricated during towing, but they aren't anything we carry. You'd need to do a Google search to find that item, and obviously using the lube pump would void your vehicle warranty. If you decide to flat tow the vehicle, you'd need a towbar, a base plate kit, safety cables, a wiring solution and a supplemental braking...
view full answer... - Can a 2007 Honda Pilot Automatic with Front Wheel Drive be Towed with 4 Wheels Down Behind an RVThe owner's manual for the 2007 Honda Pilot, page 221, states "Your vehicle is not designed to be towed behind a motor home." If you were to flat tow this vehicle and damage occurred you would have to pay for it out of pocket. People do flat tow this vehicle despite this information from Honda. The Blue Ox base plates are only a fit for AWD models and not FWD models. For a FWD model you can use Roadmaster base plates # 1550-1. For a compatible tow bar I recommend the Falcon 2, # RM-520....
view full answer... - No Drill/No Splice Tow Bar Lighting Recommendation for a 2012 Jeep WranglerWe have exactly what you would need. For an easy to install tow bar lighting option for your 2012 Jeep Wrangler the Hopkins kit part # HM56200 is what you are going to want. This kit plugs in line with the taillight harnesses of your vehicle and would make install very easy. No drilling or splicing at all. I attached an install video for you to check out as well.
view full answer... - Parts Needed to Flat Tow a 2011 Mini ClubmanFor your 2011 Mini Cooper the correct base plate kit is the part # 521880-1. This will work well with your Falcon Tow Bar part # RM-520. For safety cables you can use # RM-643. The coiled design helps keep the cables off of the ground. For lighting you can use the bulb and socket kit, # RM-155, and not have to worry about cutting and splicing into the vehicle wiring. And finally, most states now require supplemental braking in the vehicle being flat towed. The easiest system to set...
view full answer... - Base Plates, Tow Bar and Flat Towing Equipment for 2015 Chevy Captiva SportAccording to Blue Ox, the # BX3332 is a fit up to the 2014 Captiva Sport. They haven't yet had the opportunity to do a test fit. However, Roadmaster states that the 2012-2015 Captiva uses the same # 3151-1A Base Plate. I'd recommend going with the Roadmaster Base Plate because it has been confirmed as a fit. If you went with the Blue Ox, and there was a problem, you might not have warranty coverage because the fit hasn't been tested yet. You'll also need a tow bar, safety cables, a wiring...
view full answer... - Parts Needed to Flat Tow a 2005 Jeep Wrangler with Roadmaster Tow Bar Behind an RVSince you already have the tow bar # RM-522 as well as safety cables there are only a few more items needed to flat yow your 2005 Jeep Wrangler. First you will need compatible base plates for the tow bar. For that use # RM-521424-4 which will fit with the factory bumper on your Jeep but will not work on models that have front leaf spring suspension. Next you will need lighting. Since you already have a 7- to 4-Way cable you will just need the light kit for the Jeep. The 7-Way plugs into...
view full answer... - Tow Bar, Base Plates and Other Necessary Equipment for Flat Towing 2015 Chevy Colorado 4WDI'm assuming that you're speaking of the 4-stranded yellow, green, brown and white wire. One set is for connecting the new taillight bulbs you'll be inserting into the taillight assemblies of the vehicle. You'd cut off one of the 4-pole connectors and wire it to the bulb assemblies. That wiring harness would run under the vehicle up to the front, being sure to avoid anything hot like exhaust components or anything that's moving like steering or suspension components. The wiring harness...
view full answer... - Wiring Harness to Flat Tow a 2015 Jeep Wrangler Behind a Motor HomeThe bulb and socket kit # RM-155 is not a fit for the 2014 or 2015 Jeep Wrangler so you would not want to use it. Since you do not want to splice into the vehicle wiring I recommend using Hopkins kit # HM56200. It just plugs in line with the vehicle tail light wiring. No drilling, cutting, or splicing required to the vehicle wiring. I have linked a video showing installation for you. The only other way to bypass the vehicle completely is to use a magnetic kit such as # RM-2120.
view full answer... - Parts Needed to Flat Tow a 2004 Honda Pilot with a 2013 Jayco Melbourne 28F Motor HomeYou have come to the right place. The first thing you are going to want to look at is the vehicle owners manual for the manufacturer recommended towing method and if there are any special recommendations for your 2004 Honda Pilot. There are 5 items you will need to flat tow a vehicle: Base plates, tow bar, safety cables, lighting, and supplemental braking. For base plates, there are several options, see link. I like the Demco products so I recommend part # DM9517143. These base plates...
view full answer... - Parts Needed to Flat Tow 2016 Chevrolet Silverado 3500 High CountryWhen your Silverado 3500 owner's manual refers to the transfer case and its neutral position this refers not to the column shifter but to either a floor-mounted manual shifter or to the dash-mounted electronic transfer case control knob. Both will have 4WD high and low settings indicated by up or down arrows and both will have a neutral position. Flat towing a vehicle like your Silverado 3500 requires a number of components, all of which are outlined in the linked article. These include...
view full answer... - Bulb and Socket Kit for Flat Towing that Uses LED BulbsThere is an LED bulb and socket that you can use for flat towing. It is # RM-152-LED. The LEDs are red which work better than white lights if behind a red lens. I have linked a video showing an example installation for you.
view full answer... - Recommendations for Parts Needed to Tow a 2007 Jeep Wrangler With 1999 Class A Sea Breeze MotorhomeThere are five items that you will need to tow your 2007 Jeep Wrangler behind your 1999 Sea Breeze Motorhome - base plate, tow bar, safety cables, lighting, and supplemental braking system. To start off with the base plate for your Jeep, I have attached a link with base plate options, however, these options are dependent upon what type of bumper you have on your Jeep. If you have the standard vehicle without aftermarket bumpers, winches, and guards then the RaodMaster XL # 1429-1 is a...
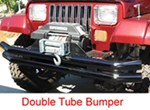
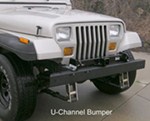
view full answer... - Parts Needed to Flat Tow a 1999 Jeep Wrangler SaharaYes, the Demco Commander tow bar # DM9511012 will work to flat tow your 1999 Jeep Wrangler. You need several other items to complete your towing setup though. The first thing you will need is a base plate kit. If you have a double tube bumper you want the part # DM9517046, if you have a U-channel bumper you would want part # DM9519045. Check out the pictures I attached to see the differences between the two bumper styles. For lighting you can use the bulb and socket kit, # RM-155, and...
view full answer... - Parts Needed to Flat Tow a 1994 Jeep YJ Wrangler Behind a Motor HomeThe first thing you are going to want to check is the vehicle owners manual to determine if the Jeep can be flat towed and if there are any special requirements. Both base plate kits for the 1994 Jeep YJ, # 1409-1 and # 1409-3 are standard kits and will fit your Jeep. The only difference is the design of each kit. Kit # 1409-3 has a crossmember and 1409-1 does not. And since they cost the same you cannot really go wrong with either one. For a tow bar, I have included a link to all of the...
view full answer... - Tow Bar Recommendation for a 1990 Honda Civic with a Standard Roadmaster Base Plate KitYes, the RoadMaster StowMaster Car-Mounted Tow Bar # RM-501 that you referenced is compatible with the Roadmaster Classic Base Plate Kit # 508-1. The StowMaster would work well for you, if it were me though I would go with a Roadmaster Falcon 2 part # RM-520. This tow bar would store on the RV so when you disconnect your 1990 Honda Civic you would fold up the tow bars on the back of your RV instead of having to remove the tow bars from your vehicle and RV every time you needed to wanted...
view full answer... - Base Plate Kit Recommendation for a 2002 Dodge Dakota 4x4Since you have a Roadmaster tow bar, Roadmaster Blackhawk Tow bar part # RM-422 I recommend you go with a Roadmaster base plate kit like part # 266-1. This base plate kit is confirmed to fit your 2002 4 wheel drive Dodge Dakota. There are several other components needed to flat tow your vehicle. For safety cables you can use # RM-643. The coiled design helps keep the cables off of the ground. For lighting you can use the bulb and socket kit, # RM-155, and not have to worry about cutting...
view full answer...
Do you have a question about this Tow Bar Wiring?
Info for this part was:





At etrailer.com we provide the best information available about the products we sell. We take the quality of our information seriously so that you can get the right part the first time. Let us know if anything is missing or if you have any questions.




Robertbenita
6/30/2014
Continues to work as it should! Very pleased with end product after installation by myself and continue to be happy every time I hook up since! Nice item! And customer service...Well they checked back with me a year later to see if I needed anything. How is that for the best customer service around! A