
To see if this custom-fit item will work for you please tell us what vehicle you'll use it with.
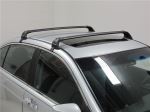
This aerodynamic, flush-mount roof rack lets you carry gear and cargo on your vehicle while maintaining a clean, factory look. Crossbars work with channel-mount and clamp-on accessories. Installs on your vehicle's naked roof.
Features:
Yakima BaseLine FX LG:Videos are provided as a guide only. Refer to manufacturer installation instructions and specs for complete information.
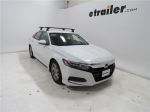
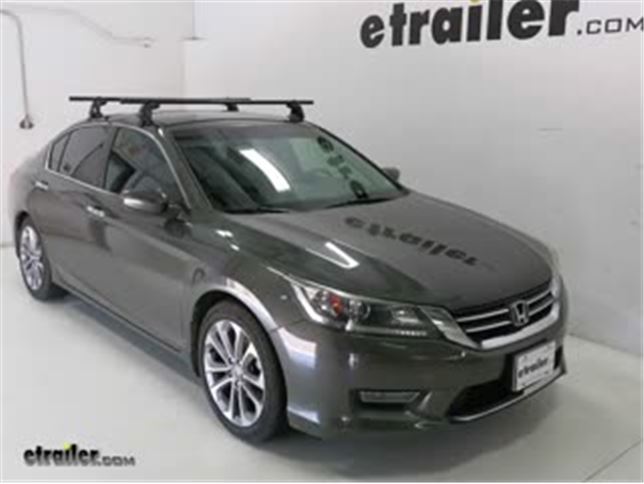
Speaker 1: Today on our 2013 Honda Accord, we're gonna be test fitting the Yakima RoundBar roof rack system, consisting of part numbers Y00409. These are the round 50-inch crossbars for the Yakima roof rack systems. Part number Y00146, theses are the baseline towers for the Yakima crossbars. Part number Y03536, this is the RoundBar SL adapter for the Yakima baseline, Skyline, Timberline and Ridgeline towers. Part number Y06148 and Y006150, and these are the base clip fit kits that you're gonna need for your vehicle.The Yakima RoundBar roof rack system is great for carrying a wide variety of accessories on your rook or freeing up space inside your vehicle. These bars are tough and durable, and together have a combined carrying capacity of 220 pounds, but you always wanna check with your vehicle's manual to make sure you roof can withstand those weights.They're very easy to install.
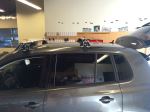
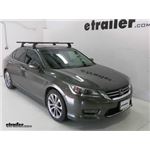
They simple clamp around your vehicles doorframe. They come with these end caps here that just snap into place and also have a knock out for Yakima same-key lock system, which when installed, can secure not only your roof rack to your vehicle, but you can also make it key to like with whatever accessories you're installing on top of it.Now that we've gone over some of the features of the roof rack system, let's go ahead and show you how it installs. We already have our rear bar partially assembled on our table and we'll go through the rest of the steps. We'll start by installing our RoundBar adapter, starting with this plastic piece here that fits to the top portion of our tower. Just snaps into place.
We'll take our round bar adapter, which has this screw end on the bottom of it, line it up with that portion there, and we'll come to the end of this, pulling out this gray tab, flipping it upside down, going to the screw, which by loosening up that gray tab we can see now. Let's loosely install it at the moment. Then, we'll slide it on to the other end of our bar.We'll also install the pad portion of our fit kit. It just pushes in at the bottom of our tower until you hear a little bit of a click. Also, you wanna check your fit guide to make sure that this is in the proper notch.
If not, you loosen up the screw there and push it into its proper place. You can see that it moves our pad here. Once it's in its proper place, turn it to the side like that.Now, we're gonna measure it from tower to tower on the inside. Again, this measurement's gonna be in your instructions. Once you got that measurement down, we'll come back to that screw in the bottom here with our adapter piece and tighten it down the rest of the way.
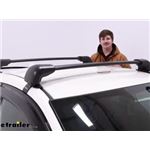
You're gonna hear audible clicks once it's tightened down from our tool here. Like that. There you know it's tightened down enough and you're not gonna over-tighten it.Next, we'll put on our end caps here to hold everything in place. Do this on both sides.Now, we're ready to install it on the rear portion of our vehicle. We'll open up both doors to get ready to receive the rear cross bar. Set the bar in place. I want you to notice that I haven't put the clips in yet. I'm gonna do that in a second. I kind of saved that for the last thing that I do because I don't want the clips to possibly make contact with the roof of the vehicle and possibly scratch it. Make sure they're set evenly on both sides. Next, I'm gonna get the crossbar spread measurement. That's gonna be from center of the bar to center of the front bar. You'll find this measurement in your instructions as well.Next, I'll open up the little door here and our plate will slide to the inside like so. Then, we'll turn this screw. That's gonna lower our clamp onto our vehicle, as you can see there. We'll repeat this for the other side. Next, we'll tighten it down with the center screw here. Again, until you hear those two or three audible clicks. There we go. Then we can close that up. Then we'll put our end caps on. These two portions here fit into these hook portions there. Then they just snap into place. Now, we're ready to load up our gear and hit the road.There you have it for the Yakima RoundBar roof rack system on our 2013 Honda Accord.
Average Customer Rating: 4.8 out of 5 stars (21 Customer Reviews)
This aerodynamic, flush-mount roof rack lets you carry gear and cargo on your vehicle while maintaining a clean, factory look. Crossbars work with channel-mount and clamp-on accessories. Installs on your vehicle's naked roof.
One year later and everything works well. I had a problem early on where the rubber protection for one of the j clips from the base towers came off. Contacted etrailer and they sent me a whole new assembly direct from Yakima. Thanks for the prompt response and service!
Work exactly as they should and hold everything securely to my vehicle without interfering with the car’s normal operation. etrailer had best prices based on my research.
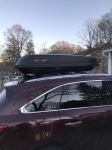
I have truly enjoyed this system. It allows our family of five plus our dog to stretch out in the car while our gear is secured on the roof. It takes a bit to mount it but I want it secure and it does fine with a roof box at interstate speeds. I absolutely recommend this system.
Roof rack fits and works as advertised. Over the phone customer support for sales and install directions were very helpful and thorough. Geoff is an excellent brand ambassador who goes above and beyond to fulfill customer expectations. I will definitely be shopping at etrailer for my future vehicle needs. Well done!
Worked well with install of rack system. Protected vehicle finish during install and no issues after install. Recommend this product.
Great quality and extremely durable. Still have them on my car a full year later.
I love this product and do business with you guys because of unparalleled service. You tutorial and explanation of the product has definitely prepared me for effective use!
Awesome! Thank you!
I purchased clips that were stated as being compatible with our 2010 Chevrolet Impala. The front clips fit well, however the rear clips do not.
From start to finish, the folks at etrailer -- and I spoke to several people there, so it was a consistent corporate vibe -- were fantastic to deal with.
There were delays in getting my product that were on the supplier side and out of eTrailer's control, yet etrailer folks kept me up to date and also worked on a customized solution.
My goal was to be able to carry my surfboard on the roof of our 2019 Hyundai Santa Fe to the beach more than 3 hours away. But the particular model we had had no existing racks, no recessed areas, nothing to fix racks to. Not even the dealer had a solution. I was sh*t out of luck.
But etrailer hooked me up. The racks did take me a while to put on, but most of that time was fine tuning to reduce “hum” while driving. I’m very happy with them.
Thanks to etrailer, I have gone surfing and can go surfing whenever I'd like to.
Had two different vehicles to get ready for two different trips and Joshua diligently tracked dow the correct Yakima accessories and backorder challenges. No other provider came close to this level of service. Excellent work! Both trips made better!

Do you have a question about this Roof Rack?
Info for this part was:
At etrailer.com we provide the best information available about the products we sell. We take the quality of our information seriously so that you can get the right part the first time. Let us know if anything is missing or if you have any questions.


Thank you! Your comment has been submitted successfully. You should be able to view your question/comment here within a few days.
Error submitting comment. Please try again momentarily.