
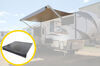
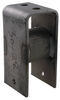
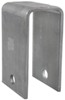
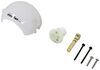
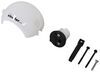
Replacement Roller and Fabric Kit for 16' Solera XL Power RV Awnings - Black Fade
(63 reviews)
Price: $905.26
Replacement Roller and Fabric Kit for 16' Solera XL Power RV Awnings - Black Fade
Item # LCV000334959
Retail:$927.95
Our Price: $905.26
You Save: $22.69


Need help with installation?
Locate installers near me- All Info
- Reviews (63)
- Q & A (0)
- Videos (1)
- Photos
Lippert RV Awnings - LCV000334959
- Roller and Fabric Kits
- 16 Feet Wide
- Black Fade
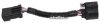
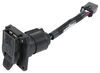
- Powered - 12V
- Extends 116 Inches
- Lippert
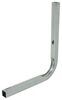
Replace your RV's old or damaged awning roller and fabric with this heavy-duty assembly. Fits Solera XL 16' power awnings that extend 9'8" from your RV. Installs more easily than replacing just the fabric.
Features:
- Awning fabric and roller assembly replaces the old or damaged fabric and roller on your RV
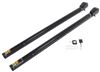
- Pair with your Solera support arms to create a complete awning
- Heavy-duty, durable fabric is made with premium 13.5-oz vinyl
- Cold-crack tested to -25 F
- Heat-welded seams prevent leaks
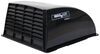
- Black roller tube comes with fabric pre-installed
- Black Fade fabric starts black on the RV side and transitions to white
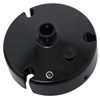
- Simple installation with included hardware
- Roller tube easily slides onto the head of each awning arm
- Awning rail (LC715217 - sold separately) required to attach fabric to RV
Specs:
- Application: Solera XL 16' power awnings with a 9'8" projection
- 16' Width is measured from center of left arm to center of right arm
- Dimensions:
- Fabric: 15'1" (181") wide
- Roller tube: 16' wide
- 1-Year limited warranty

To determine what size roller and fabric you need, measure from the center of your Solera awning's left arm to the center of its right arm. You can also measure the width of your old roller and replace it with a roller that's the same size, but measuring the distance between the two arms will give you the most accurate dimension. Do not order based on the old fabric width, as it will be too short.
Can You Just Replace the Fabric on an Awning?
Can you replace just the awning fabric without the roller tube? The answer is absolutely yes - but do you really want to?
To replace just the fabric on your awning, you will have to disassemble your whole awning anyway, just like you would if you were replacing the roller and fabric assembly. When you get your new fabric, you will have to unfold it and let it lie out for a good while to get rid of the creases. Then you'll have to painstakingly feed the fabric into the roller tube and into the awning rail on the other side. Once your awning's put back together, you'll still have to extend and retract it multiple times, tweaking and tugging at it to try and get the fabric centered and wrinkle-free between the roller and the rail.
If you get the roller/fabric combo right from the get-go, it's going to make it so much easier. You just have to feed the other end of the fabric into your awning rail and attach the new roller to the heads on your awning arms. Roll the awning in and out a couple of times to get the fabric even and you're done. Save your weekend and get the roller and fabric kit.
V000334959 Replacement Lippert Solera XL Power Awning Roller Assembly - 16' Awning - 15'1" Fabric - Black Fade
California residents: click here


Video of Replacement Roller and Fabric Kit for 16' Solera XL Power RV Awnings - Black Fade


Videos are provided as a guide only. Refer to manufacturer installation instructions and specs for complete information.

Video Transcript for Solera RV Awnings Replacement Roller with Fabric Review
Hello, shade seekers. It's Brad here at etrailer. And today we're taking a look at the solara replacement, roller fabric and awning for your camper. Now these are gonna be available in different measurements all the way from 10 foot, up to 21 foot, and also available in a variety of colors. Now we're gonna walk you through some of the standout features and also how to measure to make sure that you get the proper one. And we're gonna walk you through a typical installation as well.
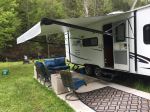
So let's get started. So as you probably know, having an awning on your camper is great because it really does give you a whole lot of real estate. You can kind of move the party from inside the camper to the outside and that way everyone has space. And it's gonna protect you from that sun beating down in the summer months or a sprinkling occurring maybe in spring. Either way, you get to hang out with all your friends underneath the cover of the awning.
Now over time that sun can kind of break this down and being out in the elements, it can actually bend the rollers, or you can just get a mold buildup. Whatever it may be, you may wanna replace that. Well, without having to replace the entire system. You're actually able to do that with our replacement roller awning and fabric. When upgrading your awning, you can actually choose from a variety of different colors, including a solid white, a solid black, or you also have different fade colors.
Here we have our blue fade. There's also other fade available as well. Now the wind's kind of playing havoc here on our awning today, but you can see this little overhang that's gonna be really nice for when it rains. It's actually gonna have that rain running off rather than channeling back. Now also, it does give you a little bit of extra shade as that sun can be at a certain angle that might block that out a little bit better.
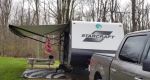
The fabric used on the solara. It really sets it apart from other competitors. Reason being, the fabric is anti scuff, anti mildew, and it holds up generally better than other ones on the market. Now it's also cold crack protected to negative 25 degrees Fahrenheit. So even if you're storing it over winter, should hold up for a long time. Many times when these are retracted back, if there's hunting moisture, that's not gonna really be able to breathe out. So sometimes that mold and kind of just brown spots will start to form on this while having that anti mildew buildup is gonna keep this looking nice for a long time. Now, keep in mind that the replacement roller and fabric is not gonna actually include the arms. So you need to make sure that you already have your existing arms and you can actually replace just the fabric. But sometimes that can actually be kind of tricky as it does wanna roll up. This is pretty drop in and go, and it replaces your old actual system. Now, why would you replace the roller Well, our customer that came in today, you'll see in our installed portion, actually had a dip in the roller causing it to kind of be uneven as it extends and retracts. So here we have it actually retracted all the way back and you can see it looks great. It follows the roofline very well. It's got a nice white color and it looks just fresh having that new awning up there. So now as we actually extend, you can see it's a nice smooth operation and it's gonna give you that coverage within a minute or so of rolling out. So now with this out, the sun's not blinding me and I can actually hang out here and enjoy the outdoor space. The only thing missing is some friends, some chairs, and some cold drinks. Getting a new roller and fabric already attached is gonna make that installation a nice and quick, easy one for you to do. The first step that you're gonna wanna do is measuring your actual arms from center to center. Now it is gonna differentiate from the actual measured size of the roll itself of the awning. So first get your measurement of your arms and you are gonna need an extra set of hands for a lot of the steps here, as well as a few ladders, because we're gonna be working at height and also having something that's extremely long. It's gonna be nice to have that extra set of hands to help you get it in place. You put that . So with our measuring tape center to center on the arms, we are right at 18 foot. Now this is what you're actually going to be using when you place your order on the roll itself. So the roll is gonna be a little bit shorter than that overall 18, but you're gonna be going off the center point of your arms when placing that order. So once you have your arms extended out a little bit, you're gonna want to make sure that they're supported and not going to actually open up anymore. I feel like the best way to do that here, is we're gonna run some zip ties just around where our strut is here. And that's just gonna kind of keep this bound up and that way it's not gonna move up. So grab some long zip ties and go ahead and secure those up. Maybe you have a bungee cord or something along those lines. It's pretty much just gonna be kind of our fail safe here to kind of keep that from falling out. So you can see that is supported. Go ahead and do the other side as well. So now we're gonna wanna go ahead and take our covers off. And these are attached just by some Phillips head screws. So we'll go ahead and remove those. Now, make sure that you hold onto all your hardware as you're gonna need that for re installation. Now on the inside, you're gonna see that there are some slots and you can put a small flat head in there, but I was able to kind of just press that plastic to separate the clips, have a few of them there, and then your face should come off. This back one should also just kind of slide up here. Now, make sure you are holding onto that hardware that was in those holes there. Now we can go ahead and repeat that same process on the other side. So now we're going to be taking off this square head screw here, and that just attaches it to this arm. So we're gonna be taking that out. Now, you're gonna wanna be careful because it might not be supported. So I actually have an extra set of hands here in the middle and that way, if it does start to move, we at least have that supported weight-wise. So let's go ahead and take this out. Once you have your screw out, we're gonna go ahead and repeat that process on the other side. So now you're gonna wanna look here in the channel. There's gonna be a screw that's run through there, and that's just to kind of keep this from moving around. Go ahead, ours is a Philips head, go ahead and remove that. And there's gonna be another one on the other side as well. So now you're going to wanna have a few extra sets of hands with ladders because we're gonna be sliding this out. So makes sure that you have an ample space to go either forward or back. Either way, we're gonna be taking this roll out. And first step is gonna be separating it here. Now be careful because this can be tension. This should just slide out like that. This one doesn't feel like there's a whole lot of tension on it, which is good. You may have to kind of wiggle it, but then you should have it come out. So make sure you're separated from the other side. And then you can kind of work this down. Got it. So we're gonna be feeding our new one back in just kind of the opposite way that we took it out. But you can see here, this channel has a nice bend here and that's gonna just make it easier to actually fit that piece into the slide. So if yours doesn't have that, you might wanna just grab just spare pliers and kind of bend that down just to make that channel a little bit easier to load that in when you have it supported. So now orientation wise, you're gonna wanna make sure that the actual part that we're sliding in, it's flat there and curling around in that way, it's not gonna trap stuff as it rolls up. And I'm gonna just peel these off as we go one by one. So just get that black tube fed into there. And you're gonna wanna have someone here, kind of following this to make sure that it's going in without catching that metal. And then as you're working along, you're gonna have some support down there and just feed it in. So while feeding it down, my help Kevin down there, he already put his in the slot, we're gonna do the same things that way it's supported. And you're gonna see this white hole needs to align with the hole here on the actual arms. Now you may have to kind of wiggle this back and forth 'cause it is slotted. So you want that to line up properly. And part of that might be accomplished by pushing that arm back just a little. And then once you get those holes in line, we'll be able to put our hardware back in. And then we'll go ahead and do the same on the other side. Now, we're gonna wanna put our screws back in that channel to hold it in place, but we also wanna make sure that it's actually centered up. So I'm gonna just measure here from our bracket to the end of our canvas here, and that's gonna be three and a half inches. So I'm gonna double check the other side, make sure that it's the same, and then we can get that extra screwed in. So I've gone ahead and got these centered up. So now I'm gonna go ahead and put our self-tappers back in where we had them. Now we'll be putting our caps back on. Now these are actually side specific. You're gonna have this cutout here and also this hole here, and that's gonna be on the drive side. So you can see this little nut here. That's gonna fit into that hole. And then your backside here should align pretty easily. So go ahead, you can get this installed and this should slide in. And then this should cap around it. Now let's go ahead and we'll take our support. Zip ties off, and we're gonna actually test this to make sure that it's working properly. So it looks pretty great extended. The real test is gonna be when we roll it back up. We're gonna be looking for any seams. And that could be just the tension of it being slightly off from one side to the other. So as you roll it up, you might wanna just to have an extra set of eyes, keeping look to make sure nothing's binding up. So now we can see we have our arms fully retracted, and you're gonna see that there's no weird tension going on. A lot of times you'll see wrinkles if they are offset. And if that's the case, you're gonna wanna adjust it kind of side to side and finding that sweet spot. That way it's not gonna have a crease down it. And it's also not gonna have odd tension on either side of the arms. Having this balanced out, it looks like we have our install done incorrectly. And that was a look and installation of the solara replacement awning roller and fabric. Thanks for watching..
Customer Reviews
Replacement Roller and Fabric Kit for 16' Solera XL Power RV Awnings - Black Fade - LCV000334959
Average Customer Rating: 4.6 out of 5 stars (63 Customer Reviews)
Replace your RV's old or damaged awning roller and fabric with this heavy-duty assembly. Fits Solera XL 16' power awnings that extend 9'8" from your RV. Installs more easily than replacing just the fabric.by: Scott04/20/2022
I just finished installing the Solera Power Awning. I was impressed with the durability and engineering of this awning. I did have to make some modifications (shims added to the vertical supports), but that was due to the critical length of the awning, and where it was placed on the motorhome. I also custom painted the vertical supports to match the motorhome.
I did deviate from the suggested installation. After installing the top rails, I mounted the right vertical support first, then slid in the awning roller. I then held up the left side of the roller with a ladder, and installed the left support. As a result, we only needed two people instead of three. I think it would have been more difficult to try to slide the whole unit (left/right supports and roller) into the rails as one unit. The reason being is that this unit (as a whole) has some weight, and would be a bit unwieldy!
I am very satisfied with the final product and how it operates, and we are very much looking forward to hitting the road and trying it out!


by: Donald08/17/2022
I like the awning because it was very easy to install and easy to operate. I installed in an hour using several neighbors to help lift it into place. The wiring was straightforward. I did have an issue because I had to mount it next to a window frame but by making a few shims out of aluminum stock at the fastening points everything looks and works great. After several days at the beach it was never adversely affected by the wind, and I could easily move it as the sun moved and it kept me in the shade.


by: Michael 03/29/2024
The online application made it easy for me to find the right product. The ordering process was easy. The right product was sent. The only problem was that the 2 pieces were delivered on different days. However, I think this is the shipping company's fault and not etrailer.
by: Malcolm 02/24/2024
Well, shortly after installing it, it would not respond to the switch and needed to be deployed manually a couple turns and then would unwind with the switch. I know I should have said something but I don't use it alot and just forgot about it
by: Thomas05/28/2023
It was a great addition to my trailer. It was easy to install and it works great.


by: Kristi07/24/2023
I ordered the Solara awning that you expressly said fit my model number however the mounting arms are to long and run into a running light and leveling jack button so I either have to modify my trailer or buy a different awning.
by: Robert08/25/2022
Awning great install went well , cover for motor was broke needs replaced , The 2 assembly’s where just rapped in plastic when unpacked found motor cover broken .


by: David 04/04/2024
made a stressful situation better. Knowledgeable and accommodating. I was educated by her as a new RV owner, and you have earned by business for a long time to come. Impressive and professional - a great customer service experience. I own 2 small businesses and this is teh exact type of talent we are always searching for.
by: Cliff 04/12/2024
The install was easy and the shade works just fine. Very satisfied with it.
by: Paul 10/17/2023
Etrailer always has the correct part and their customer service is exceptional. Shipping is very fast. They are great to work with, whether I am repairing or upgrading my RV.
by: Douglas Jones04/28/2021
The project is a 1988 Holiday Rambler Aluma Lite XL. The original 21 foot manual awning needed a lot of work so I decided to go power. The 13 foot extra long awning is just super. Lots of good shade. Needed a little special attention to the installation because of the structure attachment points. Turned out great, does a super job!


by: Donald05/06/2020
Awesome! Just unbelievable communication to begin with which made everything easier! Also the information available through details and videos also made the choice clear and simple. My arms on awning bent and the awning was old faded so it made the decision for me..time for new. Installation was super simple and easy. All of 30 minutes took longer for my friends to come and put hands on it than it did to install. Once on just incredible the more coverage!!! The pitch adjustment is just a pull so simple and this units arms are much taller to the point I can walk under them (6’4”) which I could never do before. Really happy and etrailer shipped way faster than expected.
by: 12teachscience05/29/2022
So far so good! The awning was slightly damaged in shipping. They offered to pick it up and send another. Angela B. was helpful in sending me replacement parts instead. while I haven't used it yet except while installing, it seems to work well.


by: Ronald05/17/2020
Unbelievably great product. We are now the talk of the campground. Neighbors helped us install our new electric awning the foot and a half more for no drip on our concrete pad. We are so pleased. What a great product. Installation took two hours.

by: Micheal01/05/2024
My order was not delivered
by: Dave 03/29/2024
Great service. Thanks!!!
by: Tim03/06/2023
Well had problems with the truck freight, arrived in two shipments. The first the end of awning roller tube was damaged,awning was not damaged so I accepted. The arm shipment box was damaged but arms looked fine, but afterwards I found no switch, mounting hardware, or instructions. Etrailer got all I needed for the installation but it took a while to get the missing parts. My advice on accepting delivery is if the box is damaged don’t accept it!! Install went well, my son, grandson, and installed in a couple of hours. I really like it. Will get so pictures and post later
by: Jay 05/19/2023
Great awning easy install definitely need 2 people awesome shade and easy to adjust
by: Susan 05/02/2023
Nice awning. We like the extra shade and also being able to tilt the awning to accommodate the movement of the sun
by: Susan 06/08/2023
Good product although be cautious of the advertisement claims and the warranty.
by: James 01/05/2023
Love the awning but if you roll it completely out it buckles the arm you have to give it a push to start up. If you stop 1/2 round still on roller it works perfect.
by: Tracy10/26/2022
This awning arrived exactly as promised and performs exactly as expected. We purchased this last year as a replacement to one damaged on our travel trailer by 60+ mph winds. The install directions were well-written and easy to follow. I wouldn’t hesitate to recommend this product.
by: Kevin 10/03/2023
AWESOME TIME FRAME. CLEAN DELIVERY
by: Dallas S09/29/2022
Great awning, excellent transition between colors. A bit long for shipping, recommend picking up direct if possible. Overall nice awnings and beautiful once installed. Oversize awnings don’t like wind, be careful using if any wind, can be difficult to wind up if windy, motor is slightly undersized. Overall very happy, beautiful awning and hardware.
by: Brad08/03/2021
Had a hard time having this item delivered via UPS with damaged item received. etrailer was great and helped by sending a new item. Again had a hard time getting any local RV shop to schedule an installation time so I finally did it myself with the help of my wive and neighbor. If I read the instructions correctly they read to line the vertical arms with the awning rail. I wish I mounted it at least 2" lower as now the roll is above the awning rail so when fully retracting the awning it pulls downward and not horizontally inward.
To date I have camped with it about eight times and I have noticed a small tear in the awning fabric near the awning rail. Just hope it does not begin tearing. Again, being mounted too high seems to put undue stress on the awning fabric when fully retracted. Also, it does not do well with any wind, but is fine when I stake it down.
On the good side, it is so nice to have an electric retractable awning which makes set up and tear down that much easier with camping. The extra length adds to shade and the adjustable pitch is a snap.
Overall I am very happy with the product now that I finally received it and got it installed. I just hope the awning material does not tear or the motor give out
25
62
Show More Reviews
See what our Experts say about this Lippert RV Awnings
- Will the Auto Close Sensor work for my 16' Power Arm Awning There are two options for the Solera Awnings the Solera Smart Arm 12V Power RV Awning - 16' Wide part # LC517486 and the Solera XL Power Awning Roller Assembly - 16' Wide part # LCV000334959. If what you purchased is the Smart Arm kit then the Solera Smart Arm Wind Sensor Kit part # LC715123 will work if what you have is the Power RV Awning the Wind Sensor Kit will not work.
view full answer... - Parts Needed to Install Solera/Lippert XL AwningThe Solera Lippert 16' X 9'8" Awning # LCV000334965362241 is White at the RV wall and fades outward to black. The Solera Lippert 16' X 9'8" Awning # LCV000334959 is Black at the RV wall and fades outward to white. Both include XL power awning roller and fabric. Hardware arms are sold separately and are required for mounting awning. They are available in white # LC362241 and black # LC362243. If your RV has not previously had an awning of this width installed you will additionally...
view full answer...
Do you have a question about this RV Awning?
Info for this part was:

Edited by:
Lindsey S

Video Edited:
Dustin K

Updated by:
Wilson B

Updated by:
Amanda K

Installed by:
David F

Written by:
Mike S
At etrailer.com we provide the best information available about the products we sell. We take the quality of our information seriously so that you can get the right part the first time. Let us know if anything is missing or if you have any questions.
Product Experts Available Now!
Call 1-800-940-8924
Thank you! Your comment has been submitted successfully. You should be able to view your question/comment here within a few days.
Error submitting comment. Please try again momentarily.