
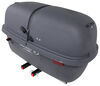
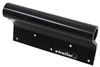
Solera RV Slide-Out Awning - 181" Wide - Black
(1107 reviews)
Price: $601.38
Solera RV Slide-Out Awning - 181" Wide - Black
Item # LCV000251478
Retail:$975.57
Our Price: $601.38
You Save: $374.19
In Stock


- All Info
- Reviews (1107)
- Q & A (0)
- Videos (2)
- Photos
Lippert RV Awnings - LCV000251478
- Slide-Out Awnings
- 176 Inch Wide
- 177 Inch Wide
- 178 Inch Wide
- 179 Inch Wide
- 180 Inch Wide
- 181 Inch Wide
- Black
- Extends 48 Inches
- Lippert
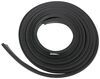
Protect your RV slide-out from debris and keep moisture out of your siding with this slide-topper awning. Prevents water damage and mildew. Made for slide-outs that measure up to 15'1" from edge to edge. Includes all necessary components.
Features:
- Protects your RV slide-out from damage from clogging leaves, debris, and pooling water
- Prevents water damage and mildew
- Blocks out sun to help keep the RV cool
- Extends and retracts with your slide-out automatically
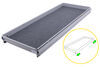
- Made of heavy-duty, durable fabric with premium 13.5-oz vinyl
- Won't crack in cold temperatures
- Prevents leaks with heat-welded seams
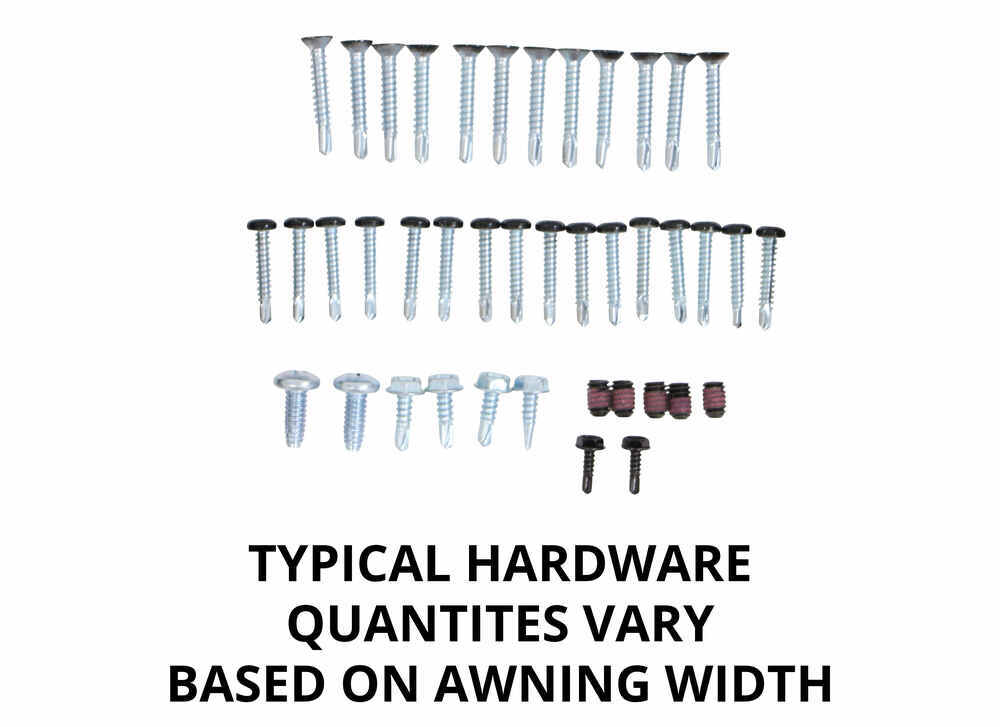
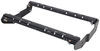
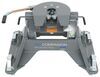
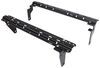
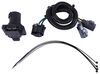
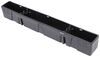
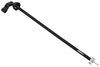
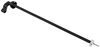
- Includes brackets, hardware, and awning rail
- Black awning fabric matches black hardware
- Made in the USA
Specs:
- Application: slide-outs 176" - 181" wide with 48" extension
- Minimum 7" of clearance needed on both sides of the slide-out - order next size down if needed
- 2 Slide-outs next to each other need 14" total clearance between them
- Awning dimensions:
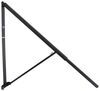
- Awning rail: 181" long
- Awning fabric (when fully extended): 181" wide x 48" long
- Bolt hole diameter: 3/16"
- Mounting bracket dimensions: see below
- 1-Year warranty

How to Measure for an RV Slide-Out Awning

To ensure you get the correct size awning for your slide-out, measure from outer edge to outer edge of the trim. You will need 7" of clearance on both sides of the slide-out for the awning. If you don't have 7" clearance on both sides, go down to the next size; this will still give your slide-out plenty of coverage.
If there are two slide-outs next to each other, you will need a total of 14" of clearance between them for them both to have a slide-out awning. Again, you can go down a size if you are low on space.
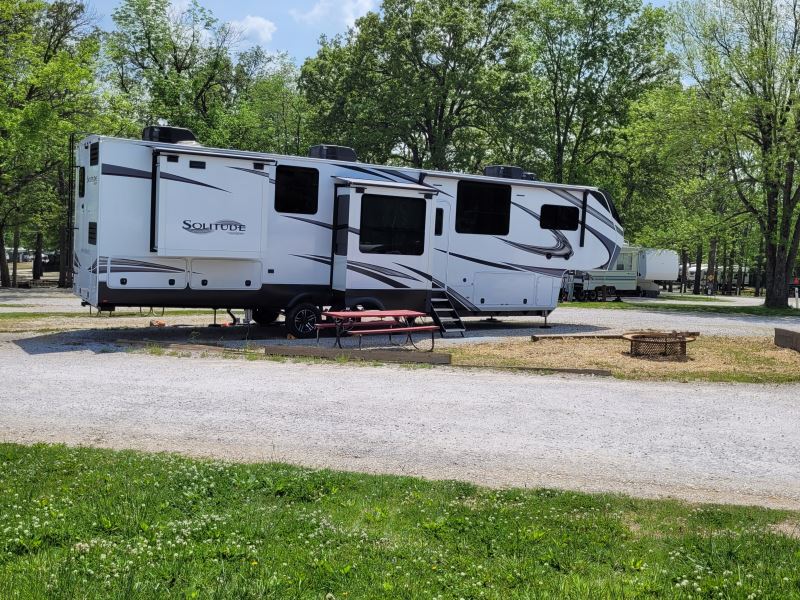
Protect Your RV Slide-Out
Without a slide-topper, the roof of your slide-out room is continually exposed and can accumulate leaves and bugs and different types of debris. That debris can build up along the rubber strip at the top of your box, preventing a firm seal when your slide-out is retracted. Rain water can then get in and pool on the top of your slide-out. If you don't clear the water off each time it rains, mold can begin to form. And when your slide-out is pulled in, that mold gets inside your RV.

The Solera RV slide-out awning alleviates those problems by serving as a protective covering over the top of your RV's slide-out. Not only does it prevent debris from collecting on the roof of your slide-out, but it keeps water from pooling and potentially causing damage down the road. Because it mounts directly to the front of the slide box, the slide-out awning is able to automatically extend and retract every time the slide-out room is extended or retracted.
Durable Vinyl Fabric

The durable awning fabric holds up to the rigors of the outdoors. It's made of premium 13.5-oz vinyl, which is an upgrade over the 10-oz fabric used in many awnings. This fabric also features heat-welded seams to prevent leaks. And it is made to withstand cold temperatures down to -25 degrees Fahrenheit, so it won't crack or degrade during the winter.
Simple Installation
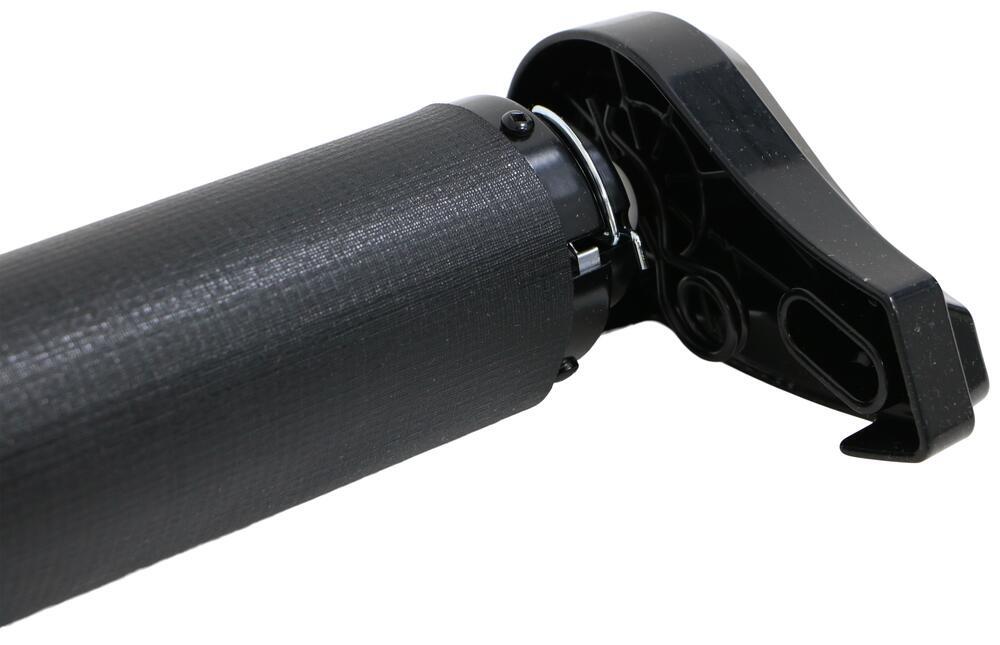
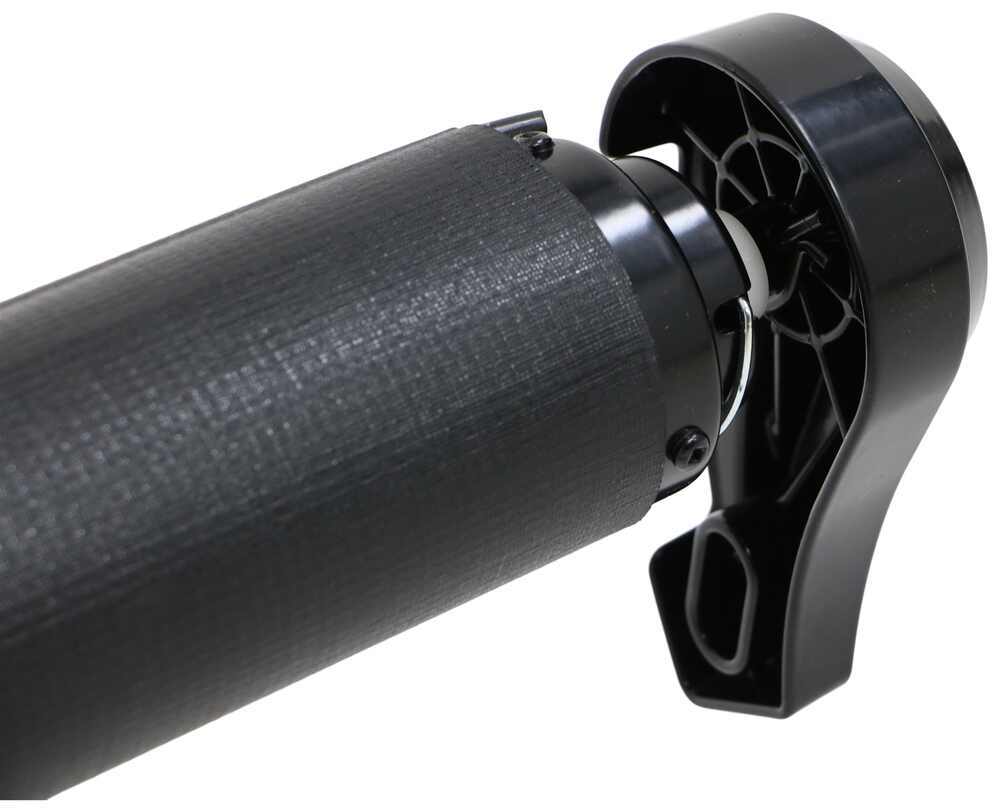
Use the self-tapping screws to secure the included access plate to the side of your slide-out, positioning the plate at the bottom of the T-molding. The two access brackets slide easily onto the access plate's track. The rods that are located at each end of the roller tube, which comes with the awning fabric already mounted, slide through the hole in the two access brackets.
The included awning rail is used to anchor the other side of the fabric to your RV. This rail can be mounted up to 5" above the trim on top of your slide box.
Note: It's important that the slide-topper sits at as steep an angle as possible so that any rainwater will drain immediately. Any water that sits in the awning can stretch out the fabric permanently and warp it out of shape.
V000251478 Lippert Solera 15'1" Slider (Slide-Topper) in Black w/ Black Hardware
Installation Details
California residents: click here


Video of Solera RV Slide-Out Awning - 181" Wide - Black


Videos are provided as a guide only. Refer to manufacturer installation instructions and specs for complete information.


Video Transcript for Lippert Solera Slider Slide-Topper Review
Hi there RV and camper owners, today we're gonna be taking a look at Solera's line of their 5,000 series slide toppers. These come in either black or white, and we're gonna be showing off the black edition today. And these slide toppers that we've got here are designed to protect the top of your slide out from debris such as sticks, leaves, pine needles, acorns, all kinds of stuff that can get up on there, as well as moisture. And if you get dirt and debris up there and that moisture starts to set into that debris, it can actually set and hold and then you can get mold across the top, and mold on there is no good for anybody. And when you go to bring your slide top in, if you've got mold on your roof, you're just bringing that mold inside. Additionally, the debris that gets up on top of there can cause leaks with your seals and then you could potentially have water leaks inside which could potentially cause even further damage, further mold and just lead to costly repairs that could even potentially make you sick.
So with our slide topper here, it minimizes the amount of work that you have to do to keep things clean 'cause it keeps the moisture off, as well as a lot of the dirt and debris out of there. This is what I would consider really ideal for people that host camp sites where they let their rigs sit out for a really long time and you know you're out in the campsite in the woods where a lot of trees and debris can get on top of there and collect and when you gotta move from one campsite to the next to host at another area, if you don't clean that off, you're just gonna be pulling all that inside. The slide topper here is gonna help to prevent how much debris and mold is gonna collect over that amount of time, minimizing how much work you have to do. If you don't have a slide top where it's something you might have to tend to a couple of times while you're hosting it on site versus this is probably something you're gonna be able to just clean off really quick and easy before you pack up and go home. We offer these slide toppers and a variety of sizes.
You can get fabric lengths from 61 inches up to 187 inches, which will fit a wide variety of slide out units. As far as the slide out units go, you'll measure from team molding edge to T-molding edge and with this range of fabric sizes that are available, that can fit between 57 inch slide outs all the way up to 193 inch slide outs. The extension length on our slide out is 48 inches, so your slide out can come out a full four feet from the side of your camper, and that's a little bit longer than what a lot of the competitors are, usually about six inches longer or better than what the competitors are. So that way it should fit most of your modern campers. Now when you are using your slide top or fabric length, this is the most important measurement and ideally you want to have a little bit of an overhang on the side, but they do only come in specific lengths.
So there are some instances where you might be just slightly on the inside or you might have a little bit more overhang just to get the best thing fit. In order to ensure that it's gonna fit as well as your fabric length, you wanna make sure your arms are gonna be able to insert into here and both of your screws inserted. So your arm length here coming out of it is gonna be about 17,25 inch. And then the distance that it needs to travel through the bracket is about 7,5 inches. And the distance between the two screw holes is seven inches so that way you can get the right length one and you can also make sure that your arm is going to be able to insert into your bracket and your screws inserted.
Your bracket's gonna sit just to the inside of your T-molding, so you'll wanna measure your T-molding, those are gonna vary for manufacturer to manufacture on your motor home or your RV or trailer. Ours are 4,5 inches and that's fairly common, but again, they do vary slightly. So those are some other measurements just to help make sure that this is gonna fit properly for you. And whether you go with the black or white edition, the top is gonna be constructed of vinyl, which is gonna be nice and durable. It does have some flex, it's able to withstand the UV sun rays that are out there as well as the elements that your camper sits in outside potentially for several months. So you don't have to worry about your slide top going bad on you for many, many years, and it is pretty durable as far as what I push down on it, I don't feel like there's gonna be any tears or anything. So I think some smaller branches and stuff would have no problem kind of just hitting that and bouncing off. And the brackets also have a powder coating on them to help protect them against rust and corrosion and that is gonna match the color that you purchase. So if you've got the black edition here, you can see we've got all black hardware. If you get the white edition, you would get all matching white hardware. And here you can see our slide topper, it does fully cover up the wall there and it extends out to a point where you get a little bit of an overhang to help keep that dirt and debris from collecting on there. Also, again, keeps that moisture from getting up on top of here and causing mold. Our seals are located here. Sometimes there are seals on the inside edge of your T-molding as well. Not on this particular camper, they're located here but they could be on either side. And that dirt and debris that collects in here, if you go to close your unit and that debris is still in there, it can actually cause issues with your seals, especially sticks, pioneer needles and stuff like that could damage the seal which can lead to leaks in the future. So keeping something like this up here is gonna minimize how much you get up there so that way you don't pull this thing in and accidentally cause damage to your seals. And sometimes you're pulling this thing in, you're going home and packing it up for winter, and if it's stored outside, it could be in a state where you don't even realize till next year that you've had a leak issue. And you can see where the railing is located versus our roller tube here. It does have a gentle curve towards the outside so when water and stuff hits the top, it's able to roll off and not just pool up on top of the unit. And the new 5,000 series from Solera is gonna be the new standard that they've gotten now. So it has a slight redesign over the previous editions that they had. The arms have changed from a hex type shape to this more oval shape here, it's a little bit sleeker, it slides together a little bit easier than the previous one. The ends are a much bigger end than the previous design so it's a little bit more robust, kind of has a nicer looking cap on it, that gives it a little bit more protection against something that might come in on the side there and contact the roller. You also get a cover for your hardware here now. So the brackets are also slightly different than what they we're before on the frontier as well as the portion where the rod slides into it. So we do have an older one that was actually installed on this camper so we can go take a look at that one so you can get a better look at what the differences are. So here we can see the previous design, you can see how the ends are different, it doesn't have quite the coverage that the new outer arms have on the roller so you don't get quite as much protection from falling debris on the roller edges here. And you can see here we've got the more hex shape design where it goes in. It's really fairly similar in its operation, mostly just aesthetics and just a little bit more robust there on the end. And then we do not have a cover plate here for the set screws that come in place. But we did wanna mention this because if you do have an older unit, maybe you've headed in service for a decade or so and something happens with your roller to where you need to replace it, the arms that are gonna come on, the new rollers are gonna require a different size. So you'll have to likely take the plate here and slide that off. It will still slide onto the access plate that's below it so you won't have to remove the part that's sealed up onto the side, you can just remove those set screws and slide that off, but you will have to update the brackets to accept the new arms. So now that we've covered some of the features of our slide topper, we'll go ahead and show you how to get it installed and you'll see this is a prime example of all the debris and stuff that can get collected on the inside when we get right into this one. So here we can see our customers slide out that he's got here and you can see he is in a pretty rough spot here, he has got actual tree branches stuck in there. We can see that there's leaves and debris on there and stuff like this when it gets caught in here is only gonna cause damage to the seals and components that's located behind it, can cause your slide out to leak, potentially on the inside which can lead to mold and other damage to your RV or your motor home. And in addition to preventing all this debris from getting in there damaging seals, it can also help to prevent damage to the rooftop of your slide out when it's out. So we don't have expensive repairs there and it'll also help on those hotter days by keeping some of the sun off of the slide top, just an added layer of shade which will minimize the run time, potentially even keep the camper overall cooler with the units that you're currently using. We can see that this is a filthy top right here, it's got tree branches and stuff in it. So we're gonna get all this stuff cleaned up first, that'll give us a way to be able to first assess to see if any further repairs are gonna be needed in addition to the slide topper and just give us an easier time installing our components without potentially trapping dirt and debris behind it which could potentially also lead to leaks. So we're gonna get all this out and get it all cleaned up and then we'll get into measuring. We're gonna start with our leaf blower here and get all this off of here. So now we're gonna go ahead and get the roof cleaned up. We've got a couple of different brands that we offer here of, rubber roof cleaners. That's what we're gonna use to get this all cleaned up on here. This one's also a conditioner as well with the . They do come into a couple of different styles, you can get a premix spray bottle version or you can get it in a concentrate, and it's the same for both of these. The concentrate is for those bigger jobs where you're gonna need a whole bunch and you'll mix it yourself according to the instructions on back or if you're just doing some minor cleaning, you can just grab the bottle and just take care of what you need to take care of. So we're gonna just get this sprayed down. We're gonna use a soft bristled brush so we've added some of the cleaner to it and now we're just gonna give it a good scrubbing to get this off here. And you can really see a big difference between the side that I clean versus the side that I have yet to clean. And lastly, we're just gonna use some vinyl and rubber dressing, this will just help to restore the rubber, to keep it from drying out, restore some of its sheen. So now we're gonna measure, when measuring your slide out, you wanna do it actually on the T-molding and that's kind of the overhang and trim that goes around the outside. You actually have a seal on the inside that goes all the way around that T-molding when your camper is all the way in on your slide out, it seals up against the side. So we wanna measure from here all the way to the other side's T-molding on the other side. So we've got 142 on this one and that's how you would wanna measure to determine the length that you're gonna wanna purchase for your fabric length. 'cause ideally we want our fabric to be the same width as our T-molding there. That way you'll get a slight overhang 'cause our actual wall on the inside for our slide out is about three inches in from the edge of our T-molding. So having that little bit of an overhang is gonna further protect the top from debris coming inside of it. So we're gonna take a look at our awning now that we're gonna be using. So you can see the difference between fabric length, which is how we list them on our website. So the number you see there is gonna be the fabric length for your awning, and then we're also gonna show you the overall length so that way if you do have obstructions on either side, like we've got plenty of clearance here on this one, but depending on your camper, you may have some obstructions so you would wanna keep that in mind. So now we're measuring our slide topper and this is just for you guys at home so you can see the difference. Our fabric length that we've got here is 145 inches. So it is a little bit bigger than what our slide is but go in a little bit bigger is typically what you would want to do to make sure you've got a little bit extra overhang for a little bit more protection because the fabric doesn't come in every single size, like every single inch. So you may have to go slightly longer or shorter, in most cases you're gonna want to go slightly longer. So while our fabric is 145, if we we're to measure from the edge of our actual arm length out to the end, we're at about 152,5. So that means that the extra distance that you're gonna need beyond your fabric just to make sure you've got clearance is gonna be about three and three quarter inches off each side of the fabric. So just keep that in mind, if you do have maybe another awning or another slide out nearby, you may need that clearance in which case you can usually go a size down just to make sure that you had that clearance. The next thing you would want to check is if you do have an existing rail like this one does, this one is a gutter and a rail already installed, you would wanna just verify that it is gonna be the appropriate length. So this one does stick out beyond our T by about an inch and a half on each side, which means it's gonna match our fabric well. And you also wanna measure the distance from the top of the T-molding to where the portion is where you'll slide your fabric in. It needs to be at least a minimum of three inches above our T-molding. So just double check that to make sure that this is gonna work, and you don't have to pull it down, you do get a new railing with your fabric, but if you can reuse this one, I'd recommend that it saves you a lot of time. You know it's already sealed, it's been on there for a long time. So just double check that measurement and we're right at about three inches there. We're gonna go down to the other side just to make sure that when it was previously installed, when it came from the factory that it was straight, and if it is, then we're gonna use this one up here. So this is the one you'll get in your kit here. You see that it does have pre-drilled holes in it so that way you can just run your screws right into the side. Now this one though is just a channel for sliding your slide topper fabric into. And if we look at the one that's up here, and this is how most of 'em are, they come pre-installed, it actually has a gutter channel on top for having water to run off the sides, and then just below that gutter channel, it's got your slide topper attachment. So this one here is gonna give us a little bit better protection against moisture than this one. So if you've got one like this, again I'd recommend using this. If you are gonna get hardware provided in your kit, the pan head bolts with the square head, these are actually for installing the railing, so you're gonna get a bunch of these and it does vary depending on the length that you purchase, how many you're gonna get. We're not gonna be using these today since we're gonna use the existing railing, but it's nice that they do provide the hardware. The other hardware that has a black head on it is going to be these ones, but these are tapered if you see there. These are for installing the brackets that we're gonna be putting on the slide out. So we are gonna use these today. So we're gonna get all those separated out and we're gonna put our pan head ones aside for now. Now we're gonna go ahead and install our access plates. That is these. Some of the more modern campers do come with the access plates already installed. So if you've got those installed, you can just skip right past this to putting the brackets on there, but ours doesn't have 'em installed so we're gonna be installing them. You can install it either way, you can see there's a lip on this side and the attachment is on the opposite side, it's one of the attachments where you'll piece will slide on, grab the other piece so you can see that here. So our piece would slide on, I mean, obviously it's gonna slide on facing the other direction upwards but you can see that it slides on there like that. There's two sets of holes there for it to slide into for two different positions. These can be installed either on the T-molding itself or right below it, in most cases I'd recommend to install it below the T-molding. It's gonna be a more secure attachment to this location here. It's gonna be a nice thicker wood and if you install it on the T-molding, you gotta be careful not to put any screws above where your seals are or you're gonna get potential leaks to the inside. So I just kind of recommend to stay away from installing it on the T-molding and putting it below if you possibly can. Just pay attention to the heights to make sure that you don't have any rubbing of your roller onto the T-molding when you install it. So since these can be installed in either way, when installing it below the T-molding like this, I typically recommend putting this side up top. That way it ensures, since the T-molding sticks out just a little bit, that ensures that you're gonna be able to easily slide on your other piece 'cause it gives you just a little bit of a gap there. So that's how we're gonna be putting it. Now before we screw it up there, you don't wanna put it just directly up there, we wanna seal this up 'cause we are gonna be screwing into the outside here. So we're gonna be using some beetle tape on the outside. We're gonna cover the backside, making sure that we cover all of the screw holes. So we're just grabbing our beetle tape. It's been sitting out in the sun here a little bit so it's getting a little bit tacky. Make sure that we do have enough to cover all the way across there. We'll put it on the backside and we can always trim off any excess later on. You're usually better off going extra and trimming off the excess than not having enough 'cause leaks are good for nobody. So we'll adhere that to the back side and you can just kind of peel off excess out of the way there. Same on the other side over here. And we'll pull our backing off of there, trying to keep the beetle tape on to the back side of our access plate. Now the beetle tape here, if you let it sit out in the sun like we did, does kind of get a little bit sticky to the back piece there. So just make sure you're not pulling it away from your plate, keeping it on the plate. So there we go. You can see we've got a small gap there, so we'll take a little bit of excess that we ripped off here to fill that in with. All right, so it's a nice good coverage across it. We've got it covered where all of our screw holes are gonna be located and this is gonna smoosh out a little bit so we'll grab a little bit more clean up that we'll have to do at the end. But again, having more is always gonna be better, you can clean it up later. So that looks good there. We want to be as close to the corner as we possibly can. Now a lot of your motor homes have these kind of caps on 'em here or your trailers as well for your slide out. So that cap usually does kind of extrude down a little bit. So we're gonna be as high as possible and then probably right up to the edge of that cap. And that'll be a good spot for us there. Take the tapered screws that we have, and we're gonna put 'em in place there. And we're gonna get another one in. We're gonna put it in the opposite side so that way I can make sure it's nice and straight along the bottom edge of the T-molding there. Once we get each of those in, now we'll just take the remaining screws that we've got and fill in the rest of the holes there. So now we're gonna take our bracket here and install it onto the access plate. It is just gonna slide on there. You know we got multiple channels there. We're gonna choose the higher position. So we're gonna be using the set of holes here for the higher position. That'll slide in place on there. And then you'll notice, you've got four sets of pre threaded holes, if you're installing it in the lower position, you'll use the top set. If you're installing it in the higher position like we did, you're gonna be using the lower set. So we're just gonna get that even with the edge. And then we'll take the set screws, they're really small, they'll use a number eight, oh I'm sorry, they'll use an eighth inch Allen key to install 'em, and I usually like to start it with just by hand first. So we'll slide our Allen key in there and get it threaded in there just to make sure that we get it threaded in straight. Get the other one started as well. They got a pretty thick coating on 'em so you're not gonna be able to go too far in by hand, but it just helps verify that you don't cross thread it. Well, we got those started, we're gonna just snug it down a bit. And we're not gonna go too crazy on this just in case we need to maneuver it. Sometimes when installing your rail, it can be nice to be able to slide it a little bit so we're just gonna kind of get 'em just about to where they touch and we'll hang out right there. And I can feel it just barely starting to touch there. So we'll stop, we'll go in maybe just a hair more than that for it, but we don't wanna lock it necessarily just yet at this point. All right, it still can slide there just a little bit. We'll get the other side kind of snug down. Again, it's kind of nice to be able to have that ability to slide for just lining it up. A lot of times what I'll end up doing is usually lock one side and not the other side so I can kind of maneuver the other side when installing it. Now we do also have a cover plate here that will install over top, just kind of slides in the side here. Now we're not gonna put it all the way in yet, it'll kind of snap in there so it does kind of make it difficult to reinstall it and uninstall it. This piece would go on there and cover up all your fasteners, giving you a nice clean look. But we're gonna save that until kind of a final step. So now we're gonna install the other side the same way and we're probably come back as well and clean up some of the beetle tape that's squished out around the outside. All right, now that we got these installed, we're getting really close to where we can start taking our fabric and sliding it down our rail and getting the actual slide topper awning installed. Now before we do that though, regardless if you're using an existing one or if you installed your own up here, I recommend spreading out the end. So we're just gonna take our screwdriver here and just kind of just ever so slightly taper the end of it there a little bit, that'll make it start a lot easier. We do have a fastener we'll be using to secure the awning and you can always squeeze that as well at the very end. I do have some silicone spray here as well too. We'll be using a little bit of that to help it slide down easier so it doesn't catch and moves down the rails, we don't tear it. If you don't have silicone spray though, soapy water works really well also. So if you do that at home. Now if you are installing your own railing, I did tell you the, I hope you checked the three inch minimum distance from here on each side. If you're doing your own install, I would recommend maybe every foot or so making that same mark so when you're installing it, you get it straight all the way down. We could tell visually that this one was installed straight from the factory but it can be difficult doing it yourself, especially on a really long awning, they kind of tend to want to dip under their own weight. So having a mark every so often will help you get it straight as well. So we're getting close to being able to slide our awning in place. We got a little preparation on this side. We're gonna slide the arms in with the hole that's pre-drilled and it should line up with the hole in your awning there. And you'll get a large self-tapping screw here, it's just a Phillip's head on it and we'll run that in place. We'll prepare the other side the same way. So we went ahead and took off the, just cardboard pieces, just rip the paper off of there and then we're gonna pull this out one roll all the way down. That way we can have a little bit to be able to hold onto this and then slide this portion into the railing. So now we're gonna feed it in place here, we've got an assistant down there 'cause with it being so long, you're gonna need 'em. You can use a little bit of that silicone spray if you need it on the end. Put a little bit on this side if you want as well. And then we're gonna take the end that has these cord in it there. Feed it in place, and just start sliding it down. You have to feed it along the way so don't just pull with the roller, support the roller but make sure you're feeding the fabric so it doesn't tear. So here on the other side, if you need to, you can go slightly past and then bring it back. Just make sure you get it lined up and slid in there. And then we'll need to center it, making sure that we've got it centered side to side. So we'll probably take our tape measure and use our T-molding as kind of a point to measure from to make sure we make it even. So we're gonna snug up our set screws now making sure that our brackets that are attached to the slide out stay in place and then we can slide this portion inside of that bracket. That's secure. So now we'll try to get these roughly the same, so we'll see what we got here. So from our edge to the T-molding, we're about 4.75 quarter and you can also measure to your bracket, but we know the T-molding is gonna be the same on each side, so that's kind of a decent way to make sure you get it roughly the same. To the T-molding, about 4.75 quarter. So now that we've got it even, we're gonna attach the arms here so they can't move. We're gonna use the larger self-tapping screws. These are gonna be the chrome ones and we'll use a 5/16's socket to secure those. There's pre-drilled holes in the bracket that's attached to the slide out, so just run these right into the arms. Once you've got your fascinators attached, we can put our cover on. It should just slide in the grooves. It can be a little bit difficult to get it to line up just 'cause this is a, it's a plastic piece going into the metal piece. Once you get it started, it pushes in there nice and easy. And when you get your roller, it comes already wound up and it's under load. So we want to pull the pins now that's holding it in that position, that's gonna make it roll back up. This first one we remove usually doesn't make it roll up but the second one will. So make sure you're holding it when you go to remove the pin. It kind of pulls out of there. Take it off to the side. Slide it out of there. There we go. And then we'll go do the other side now. It works the same way, you'll pull it out and then slide it out, and if you turn it the right way, you can get it to where it just kind of falls right out of there. And it'll then roll up on you and then you'll wanna save these pins for the future, if you ever need to do any service or repairs, we have to take this down, you can reinstall the pins to hold it in this position so that way it doesn't roll itself all the way up and you lose your tension. So now we want to test its operation, we're gonna go ahead and operate it in and out a couple of times. So make sure that when it extends and rolls back up, it rolls up evenly and doesn't have like a offset to where it's rolling up uneven on one side. So after operating a few times, we noticed that it had a slight crinkle on this side and we can see that the fabric is ever so slightly further on that side. So we're just gonna come up here and pull the fabric in the railing just a little bit further this direction. So we've run it out a few times and we're satisfied with the finish and that it rolls up nice and smooth. We can install the fastener that's gonna hold our fabric in place on the railing here, this is gonna be the smaller one that's painted black. You're gonna use a quarter inch socket for this one and you wanna come in about an inch. So it's about a width, my thumb there and we're running it right into the top of the railing, down through the cord that is in our fabric. It can be a little tricky to get it to start 'cause it's a round tube. But if you just take your time, go slow, get a little pilot hole kind of started and then it should run right in there. And that'll hold this side. We'll head over to the other side and again come in about an inch and place our screw over there. rolled it in and out a few times and gotten out any creases, you can see, we've got some very minor ones there. When you've got a long fabric and a lot of the weight's in the middle, you tend to do get some real minor ones in the middle, as it sits outside over time, sometimes the sun helps work those out, sometimes you're just gonna have minor ones that are just there. You can kind of massage 'em with your thumb to minimize 'em, which can help to smooth it out some. But once you're satisfied with the look, we can go ahead and secure it with our fasteners. And that completes our look and installation of Solera's 5,000 series slide toppers..
Customer Satisfaction Score:
78% were satisfied with this product
22% of customers were not satisfied
- Arrived Damaged
Customer Reviews
Solera RV Slide-Out Awning - 181" Wide - Black - LCV000251478
Average Customer Rating: 4.6 out of 5 stars (1106 Customer Reviews)
Protect your RV slide-out from debris and keep moisture out of your siding with this slide-topper awning. Prevents water damage and mildew. Made for slide-outs that measure up to 15'1" from edge to edge. Includes all necessary components.by: Donald G.03/29/2022
I installed in the spring of 2021, went thru a windy-raining summer, and now winter, they have held up well, easy to install.


by: Homer F09/30/2020
Worked great
by: Donald 02/15/2024
by: Todd 02/02/2024
by: Glenn 02/26/2021
by: Jimmie04/23/2023
Carol, I wanted to send you photos of how I received my two packages from the freight company. Y'all have been great to deal with but the delivery method needs improving. As long as my awnings are not missing any parts and are not damaged, I will be happy. But I just got back home and found the boxes like this. I thought you would want to know.


by: Robert03/13/2024
This awning was packaged well and it arrived undamaged, however, when I took it out of the package the top rail was bent and the groove where the awning slides in was damaged. I was able to open the groove by bending and it was still serviceable. The hardware package had been opened previously, but nothing was missing. On the bead end of the vinyl where it is glued together was not glued properly. It was on the leading end of the awning so it would take a beating while driving. I repaired it with super glue and hopefully it will hold properly. Those are my complaints and why I gave it only 3 stars. On the other hand, the instructions were thorough and easy to follow. The hardware installation was straight forward and was completed without issue.
I have purchased from etrailer for years and have been very satisfied with the service and quality of their products. This one didn’t measure up due to the factors above.


by: Mitch12/29/2023
Product was destroyed in transit. Please refund my money. I will not be interested in further negotiations with e trailer. It seems to be a systematic issue with your choice of transportation vendor. Best wishes.


by: Hansen48902/09/2023
I purchased a total of 5 slide toppers for my Grand Design Solitude 390RK. After a year of use I love them. No more climbing on the roof to clean off the slide outs before retracting them. Very little flapping and only in very strong winds. Had one person helping to install 3 of them, 2 I installed by myself. It wasn't that hard. Took a little over an hour to install each one. Saved hundreds of dollars by doing it myself. Would definitely buy them and install them again again. Had very fast and good service from etrailer.


by: Ryan05/30/2022
Perfect fit for my Coachmen Clipper 17BHS slide out. Install was easy with the etrailer install video! They cover every step in the video and explain assembly better than the supplied instructions. Works great at keeping out the leaves, hoping it works to help keep water out of the slide out seams too.


by: GR07/10/2023
I am not sure whose fault it was, but it took about 3 months for my order to be completed. It was backordered initially, which is fine, but somehow shipped two weeks early. I get ready to install and realize the awning rail, and half of the screws are missing. It appeared to be an open box item, or maybe items taken, and sent to another customer. Customer service was great, (through the whole process, keeping me informed) and they requested the missing parts, which were also back ordered. Two months later, the parts become available and they ship me another slide topper, with the awning rail, but missing all of the screws again!!!! This required another order to be placed for the screws, which took almost two weeks to arrive. I then needed to return the extra awning with the freight company, which was aggravating because they kept canceling/rescheduling dates. Finally got it all installed which took about an hour. The slide topper looks great now that it’s finally installed!


by: Cecil08/01/2023
Your choice of LTL carrier is poor at best. They arrived a week later than what they originally scheduled. All 3 packing tubes that the slide toppers were shipped in were damaged. Off loading and inspecting was a challenge in 106deg heat and a busy roadway. Did manage to confirm that the hardware kits were still intact. As for tube damage we will see what they look like during install this weekend


by: Travis01/03/2019
While we love the slide out on our travel trailer, that is nothing but a potential problem. Leaves and debris lay on top and eventually prevent a good seal when closed, water pooling and potential leaking...and the list goes on.
We made the decision to buy and self install the Solera Slide Topper. The topper arrived in a large, well packed cardboard tube. All parts were present. It took my wife and I about 1:45 minutes to complete the installation. We are super pleased with how it turned out and have no complaints at all. Once again...eTrailer to the rescue!
I will note a couple of things that buyers/installers need to be aware of. While none of these are a deal breaker...knowledge is power. Some of the hardware (screws) are not painted black. After installation, I took a can of black spray paint and sprayed a little in a paper cup and used a Q-tip to apply the paint to the unpainted heads. The other thing is the tension. Wow...that is one strong spring! I found that the tension was so tight that it actually prevented the top of the slide out from fully extending. I knew this because before installing it I actually felt how tight the inside seal was against the interior wall when the slide was out. After the install I could easily slip my fingers between the inside trailer wall and the slideout seal. I ended up unwinding the spring by two full turns. After that, the slideout seal was firm against the interior wall! Yea! The awning itself was still very taunt and without sag.
A word of caution about removing the spring keeper pin or unwinding the arm. Make sure you FULLY understand what you are doing. That is NOT something you want to mess up on. While we had no problems in doing this...I am familiar with spring loaded rotational forces and understand the instant damage they can do!
Very pleased...and would highly recommend this product to anyone looking for an inexpensive way to cover and protect your slide out!


by: Jeffery12/05/2022
I purchased the Lippert solera slide topper for our camper sence all the reviews and information I have read is that this is the best brand to get.
Looks good and can't wait to install it this summer. The first one showed up damage & missing parts during freight shipping but I called etrailers customer service and they got things going on what to do next. Alison B. a customer service rep contacted me and with a few calls and emails they sent out a New one & everything worked out great. Thanks again to Alison & the customer service team .I will definitely purchase more from etrailer in the future. Pictures to be posted of the install later when warm weather returns.
by: Stanley01/29/2024
The product is a good product if I could get one shipped to me that was not damaged. The shipper etrailer uses Tforce and they really suck. I have received two of these awnings and both were bent and unusable. I received a refund for the first one ordered another it was also bent. I recommend ordering from another vender.


by: Randy04/17/2022
Great product. Very timely delivery. Installation was a breeze. Looking forward to the added protection this provides my slide out.


by: Michael05/05/2024
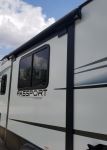
Delivery went well, slight damage to tube, contents were fine. Install was pretty simple, following video from etrailer. Very pleased with quality of topper n look of it on our Camper which is a 2021 Keystone Passport. I've ordered a few things from etrailer n haven't ever had an issue.


by: Stephen 01/20/2024
I originally bought 3 of these toppers after doing my due diligence on the BEST brand to go with , quality matters to me . Once installed 1 didn’t perform correctly when it rained I contacted Etrailer who’ve I also did research on mostly focused on shipping times and mainly customer service AFTER the sale , their customer service/support is over the top , it was like dealing with Sears forty years ago! . I’m glad I had the great experience working with them and will never purchase another product fo my fifth wheel anywhere else . I am not a review writer by nature so for me to write one good or bad means they really are the only company in my opinion that you need to consider if you are shopping for a , in my case a fifth wheel a accessory, pricing was competitive but where it really matters to me was customer satisfaction is a 100% for me . Thanks
by: Mario 01/03/2023
No complaints. The awning is holding up well. It was exposed to a few months of constant use/extended as our camper was parked at a campground in TX during summer. When the time came to pack up the camper, all worked well.
by: Lyle08/06/2022
Start at 5-stars.
Awning arrived damaged. That may be the sellers fault or it could have been damaged by the shipper. Now 4-1/2 stars
etrailer sent out a new replacement part that arrived quickly. Back at 5-stars.
Unfortunately there was no instructions in the package regarding how to safely change this spring loaded part. After contacting etrailer requesting info on how to change the part, they had no clue. I was told to contact Lippert. Remove 2-stars.
Final Rating of 3 Average stars. Nothing special about etrailer. They did not go above and beyond average…but could have by sending or at least having detailed information regarding how to safely replace this spring loaded part.


by: Chuck04/15/2023
Easy to install, took a helper to slide on the awning after hardware was installed. Keeps slide out roof clean and dry. I think it also helps keep it cooler as the sun does not shine directly on less insulated slide out roof.


by: Brent 03/22/2024
Received item as described. Have not opened package to verify everything but ordering and follow up after delivery by etrailer was great.Shipping company was great as well as they called prior to delivery and were able to accommodate time since they needed signature upon delivery.
by: Teressa04/10/2024
We purchased the slide out awning and it was delivered in a timely manner, we had it professionally installed by a local dealer, and so far we are satisfied with the topper.
by: Larry04/07/2024
The awning is a tremendous help in keeping rain off our slideout. Would definitely recommend. Fairly easy to install
by: Kyle08/24/2022
I like the slide toppers except in the extreme wind because they do flap when the wind is from the right direction. I should note that I was sent this review link by etrailer and not Lippert. etrailer is great to order from. However, one of the sets of brackets were different dimensions than the other set, causing my topper to rub on the slide flange. I contacted etrailer and was sent to Lippert. The first individual I spoke with didn't appear to know much about slide toppers even after I sent him photos pointing out the difference in brackets and, he confirmed that the two sets should have been the same. The next person acted as though they didn't believe me and I sent more photos with a tape measure in the photo to illustrate the difference between the two sets of brackets. Many many many more email exchanges as well as numerous phone calls later, they agreed to send me a new set of brackets. By this time of course, I had already jury rigged it with a doubled up piece of hard rubber to act as a spacer. Lots of miles and high winds and they are holding up pretty good. etrailer, good. Lippert, not so good customer service.
25
947
Show More Reviews
See what our Experts say about this Lippert RV Awnings
- Can Slide Topper Fit Right Next to Awning on RVWe've had this question before and when asked about this Solera has informed us that in order for a slide topper to fit with an awning there needs to be at least 7 inches between the awning and the slide out. If you can let me know the width of your slide out I can determine what slide toppers would fit.
view full answer... - Black Awnings for 7' and 15' Slide-OutsFor your 7' slide-out you should be able to use the Black Awning # LCV000165062 which fits 80" - 85" slide-outs and an awning rail that is 85" wide. Then for your 15' awning it can be a little tricky because there isn't a replacement awning that is only for 15'. You'll either need the 14'7" Black Awning # LCV000251477 which fits 170" - 175" wide slide-outs with an awning rail 175" wide OR the 15'7" Black Awning # LCV000251478 which fits 182" - 187" wide slide-outs with a 187" wide awning...
view full answer... - Correct Solera RV Slide-Out Awning for 15'1" Slide-OutYes, if your slide-out measures across the front, from flange-to-flange, at 181" then the Solera RV Slide-Out Awning, # LCV000251478 is correct part.
view full answer... - Black Slide Topper Recommendation for Flange Widths of 180 and 154-1/2 inchesFor the slide out that measures 154-1/2 inch from flange to flange the slide topper you need is the part # LCV000168109 and then for the slide outs that measure 180 inch from flange to flange you'd want the # LCV000251478 and you'd be set. These come with all of the hardware needed to install as well.
view full answer...
Do you have a question about this RV Awning?
Info for this part was:

Expert Research:
Jameson C

Video Edited:
Jacob T

Video Edited:
Dustin K

Video Edited:
Chris R

Video by:
Kathleen M

Updated by:
Chelsea B

Updated by:
Shelly K

Updated by:
Wilson B

Updated by:
Kristina F

Updated by:
Mike S

Updated by:
Isabelle B

Updated by:
Amanda K

Installed by:
Randy B

Written by:
Kristen H

Test Fit:
David F

Test Fit:
Bradley B
At etrailer.com we provide the best information available about the products we sell. We take the quality of our information seriously so that you can get the right part the first time. Let us know if anything is missing or if you have any questions.
Product Experts Available Now!
Call 1-800-940-8924
Thank you! Your comment has been submitted successfully. You should be able to view your question/comment here within a few days.
Error submitting comment. Please try again momentarily.