
THIS ITEM IS NOT A FIT FOR
2021 Ram 3500
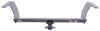
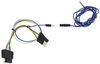
Curt T-Connector Vehicle Wiring Harness with 4-Pole Flat Trailer Connector
Item # C56135
Retail:$101.95
Our Price: $60.93
You Save: 40%
2021 Ram 3500
Will this fit?
To see if this custom-fit item will work for you please tell us what vehicle you'll use it with.
In Stock
Thank you! Your comment has been submitted successfully. You should be able to view your question/comment here within a few days.
Error submitting comment. Please try again momentarily.


- All Info
- Reviews (22)
- Q & A (0)
- Videos (3)
- Photos
CURT Custom Fit Vehicle Wiring - C56135
- Custom Fit
- Trailer Hitch Wiring
- 4 Flat
- Powered Converter
- CURT
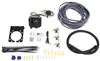
Quickly and easily install a 4-way trailer connector on your vehicle with this custom harness. T-connector plugs directly into existing wiring. Powered converter reduces strain on wiring system and is made using SMT to ensure superior performance.
Features:
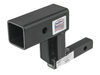
- Provides a 4-way flat trailer connector at the back of your vehicle to power your trailer's signal lights
- Compatible with 5-pole, 6-pole and 7-pole adapters (sold separately)
- Connects quickly and easily - no cutting or splicing of wires
- Locate connection points in rear cargo area
- Plug in T-connector
- Run hot lead to car battery
- Includes a tail light converter to ensure that your vehicle's wiring matches that of your trailer
- Powered module connects directly to battery to avoid overloading vehicle's electrical system
- Constructed using surface-mount technology (SMT) for consistent, reliable performance
- Maximizes trailer light yield and intensity while producing minimal heat
- Ensures superior operation in rough road conditions
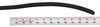
- Comes with dust cap for 4-way flat connector
Specs:
- Maximum amperage:
- Stop/turn lights: 3.0 amps per circuit
- Tail lights: 5.0 amps per circuit
- Limited 1-year warranty
Installation
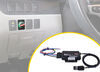
This custom-fit T-connector plugs into your vehicle's wiring harness, which is located behind the interior trim panels in your rear cargo area. Once you've plugged in the T-connector, run the hot lead up to the fuse panel near your car battery. Remove the fuse panel's cover and find the stud that has the red battery cable attached to it. Connect the hot lead to this stud using the included ring terminal. Then insert the included fuse into the integrated fuse holder.
Once installation is complete, the 4-way connector will be stowed in an out-of-the-way location within your cargo area.
It is recommended that you use a small amount of grease on all electrical connections - the plugs on your automobile and the 4-pole connector itself - to help prevent corrosion.
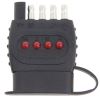
Powered Tail Light Converter with Surface-Mount Technology
A tail light converter is built into this T-connector. This converter is a circuit-protected, battery-powered unit that bypasses the electrical routes that are used by a basic wiring harness. As a result, there is virtually no draw on your tail light circuits.
Because most trailers run on a two-wire system - wherein the brake and turn signals are carried on one wire - the separate brake and turn signals from your vehicle's three-wire system need to be combined so they are compatible with the wiring system of the trailer. This converter combines the brake and turn signal functions of your automobile so that they run on one wire to properly activate your trailer's tail lights. Note: This will not affect how the tail lights on your vehicle operate.
Curt builds each tail light converter using surface-mount technology (SMT). This method of construction involves soldering electronic components directly to the surface of a printed circuit board. SMT eliminates the need for leads, which are used in older through-hole technology. The result is a circuit board that is smaller yet provides more routing area and that offers superior performance, reliability and durability.

Circuit boards constructed using SMT have been shown to perform better under rough conditions with excessive vibration than those made using the through-hole method. And where would vibration be more likely to occur than in towing applications? Curt converters also produce less heat, leading to increased durability and longer life. In addition, lower levels of resistance ensure better performance, especially for parts that operate at higher frequencies.
Each Curt circuit board is made using high-quality components that are pieced together in the most technologically savvy fashion, leading to greater predictability and reliability in functioning.
56135 CURT T-Connector - Surface Mount Technology - 4 Wire
Installation Details
This Product Fits The Following Vehicles
- 2011 - 2014 Dodge Charger
- 2011 - 2014 Dodge Charger
California residents: click here


Video of Curt T-Connector Vehicle Wiring Harness with 4-Pole Flat Trailer Connector


Videos are provided as a guide only. Refer to manufacturer installation instructions and specs for complete information.


Video Transcript for Trailer Wiring Harness Installation - 2013 Dodge Charger
Today on our 2013 Dodge Charger, we're going to be installing the Curt T-connector Vehicle Wiring Harness with a 4-pole flat trailer connector, part number C56135. First, we're going to need to open up the trunk of the vehicle. First, we're going to need to remove this rear scuff panel or the center threshold here that goes across the trunk area right here. To do that, you'll simply just lift outward and up and it will release the tabs. We can go ahead and set that aside for now. Next, we're going to need to remove a couple fasteners here that help hold this felt area in place or this trunk lining in place.
We need to get back in behind this to our taillight connector. This middle fitting here, you have to kind of get the center plastic screw to back out so that it will allow you to pull the fastener out. Right here is the fitting, or the plug, that we're going to be disconnecting and here's the wiring harness that we'll be adding in on our car. Over here on the driver's side we'll need to find the connectors. One's green and white and it will have a brown, a yellow, and a red wire going to it. We'll go ahead and peel back the interior here.
We'll reach in, we'll squeeze in on the locking tab on the top. This little tab right here is the locking tab and you push that in. We'll go ahead and take our T-connector, plug the factory harness into the one side of it, making sure you hear it click or snap into position. Then take the other side and plug it on in to the backside of the taillight assembly. It'll be like that.
Next, we're going to go ahead and take a paper towel with a little bit of rubbing alcohol on it, going to clean the back of our converter box as well as the area in here that we're going to adhere our box to the body. Right up underneath here is a pretty good area. Go ahead and wipe that down to make sure there's no dirt or debris or grease or anything that might happen to be on it to keep the two-sided tape from sticking. We'll then take our two-sided tape that comes with the kit, peel the one side off, add it to the backside of the box, and go ahead and make sure we got our area where we want it, somewhere up in there. Go ahead and peel the other side off and push the box firmly to the body. Next, we're going to need to take our white wire with the ring terminal on it.
This is the ground. We're going to need to attach that to a metal portion inside the trunk area here using the self-tapping screw supplied with the kit. We can then go ahead and take the 4-flat wiring for now and just set that into the trunk area where the spare tire would be located. We'll then need to route the black wire with the red fuse holder connected to it over towards the battery, which is located right here on the passenger's side, as well as our other T-connector that has the red and the green wire connected to it. Over here on the passenger's side we'll again have to remove this fastener right here as well as this one right here to gain access the wiring behind the passenger's side taillight assembly. Go ahead then and peel back the felt. Right there is our connection point over here on the passenger's side, so we'll again need to squeeze the locking tab in order to undo it from the back of the taillight assembly. Here's our connector. Go ahead and route our T-connector up into place. We can go ahead and connect it in the backside of the taillight and you want to make sure that you hear the locking tabs fully engage or click into position. With that done, we can go ahead and put the felt back in place and the fasteners on the passenger as well as the driver's side. Go ahead and use a couple little zip ties that come with the kit to help secure the wire as it runs across the threshold area. We're just going to go ahead and use the zip ties to attach our wires to some existing wiring. Then come back and trim off any excess zip tie. Next, we're going to go ahead and remove the battery cover or lift it up out of the way. You then need to get into this fuse box right here. To do that, you'll simply push in on the tab and lift up on the cover. This vehicle does have quite a few extra things already added to it, so there's some additional wiring that you may see that you probably won't have in your particular vehicle. We're going to be adding this in right here, to this stud right here, so now we're going to go ahead and remove the nut. With the nut removed, we'll go ahead and add our wire in line as well. Now that we have our wire connected, go ahead and add our ten amp fuse that comes with the kit to the fuse holder. Go ahead and put that all the way in. Once that's in place, you can go ahead and cover it up. Now we'll go ahead and take a couple zip ties, secure our wire here, then put the fuse cover back on. Go ahead and trim off any excess zip tie. Then go ahead and put our battery cover back in place as well. Then we can go ahead and take our center threshold piece, push that back in place as well. The kit does come with a dust cap. Simply slide it over the 4-flat so when you're not using your 4-flat it'll help protect the connector. Now we're ready to go ahead and test our 4-flat. We're just going to use a test light to do that, so we'll take the ground on our test light, connect it to the open prong on our 4-flat, which is the white wire. That's the ground. With our running lights on, we'll touch the brown wire circuit. That works. We'll go ahead and turn the left blinker on. We'll touch the yellow wire. For the right turn signal, we'll touch the green wire and for the brakes we'll touch the yellow and the green. You can see here all of our functions are working just fine. When you're ready to use your 4-flat wiring, you'll simply pull it out of the trunk area, keep it away from the center latch area as this could easily damage the wire, but yet put it on the area where there's the rubber weather stripping so that when you close the trunk down the 4-flat wire will push in on the weather stripping and will not damage it. Now you're ready to hook up to your trailer. When you're done using your 4-flat wiring, simply put the dust cover back in place, open the trunk back up, and you can coil your wire up and store it down here in the area where the spare tire would be. With that, that'll do it for our installation of the Curt T-connector Vehicle Wiring Harness with 4-pole flat trailer connector, part number C56135, on our 2013 Dodge Charger. .
Customer Satisfaction Score:
93% were satisfied with this product
7% of customers were not satisfied
- Wrong item was ordered
- Did not arrive in time
- Product did not meet expectations
Customer Reviews
Curt T-Connector Vehicle Wiring Harness with 4-Pole Flat Trailer Connector - C56135
Average Customer Rating: 4.8 out of 5 stars (22 Customer Reviews)
Quickly and easily install a 4-way trailer connector on your vehicle with this custom harness. T-connector plugs directly into existing wiring. Powered converter reduces strain on wiring system and is made using SMT to ensure superior performance.by: Don sands05/23/2014
2013 Dodge Charger
Ordered this product with the hitch for my charger. I received them the next day. Installation was extremely simple and has great instructions. The only thing I would change is that it says drill into the inner body to mount the ground lead. This can be accomplished by taking the nut off the left rear tail light and scratching off some of the paint around the bolt and re attaching.


by: Thomas02/27/2023
easy install, only problem was the double-sided tape that is supposed to hold the controller to the car is not very good so don't rely on it. Works great after a year use it every time I go on a trip, you just lay the wire out of the trunk and put it away when you are done.
by: Patrick 09/19/2023
Works fine, good parts, easy install
by: Thos08/25/2014
2013 Dodge Charger
The product is great, all connectors were correct and it worked immediately upon completion of the installation.
The wiring instructions were accurate and adequate.
Instructions for removing the lining from the trunk were for an older model of the same car and the configuration had changed a bit. I worked my way through it.
by: Tim01/20/2015
Dodge Charger
I know..why tow with a charger? Why don't you get a truck! I've heard this from all my friends. I have a small bug out trailer I use for camping and hurricane evacuation and I wanted to be able to pull it with the charger. The light assembly from etrailer was a little intimidating when i first opened it. After reading the instructions and looking in the trunck where it's located I realized it was a very simple install. unplug the taillight and insert the harness in between the connections. I had it installed in a half hour! All the wires are conceled behind the panels and there is enough lead to connect with the trailer without having to worry about the extra wire rubbing the ground. Very well thought out!!
by: Chad06/08/2017
2014 Dodge Charger
This was the cheapest wiring harness I could find for our 2014 Charger. My 11 year old daughter and I installed this in well under the 45 minute estimate. I think my daughter could have installed it without me other than releasing the electrical connections at the tail lamps. We used electrical tape rather than the provided zip ties to hold the new wires in place. I will probably install some black flexible tubing over the wire that hangs outside of the trunk during trailering.
by: Addison D07/25/2017
2011 Dodge Charger
I'm 100% satisfied with my tow hitch. I purchased this for my Dodge Charger in order to use a utility trailer so I could stop borrowing my relatives' trucks. I'm happy and they're happy too. Maybe I'll even get a jet ski next year!
by: Troy S07/28/2015
2014 Dodge Charger
So far works as should. Only thing I did was cut a hole in plastic plug in trunk and silicone the trailer wire through it and zip tie it to hitch, this keeps the wire from rubbing on the bumper paint that would happen if you run it through the weather strip and close trunk like the video.
by: Aleece05/04/2022
Ground wire is no where near long enough, had to lengthen it to be able to ground to the battery. Two way tape was not sticky at all on either side, so had to use my own.

Jenny N.
5/6/2022
You can run the ground wire to the negative terminal on the battery however this for this harness it grounded near the connector with an existing screw with a nut in the frame or drill a three thirty second hole and secure the eyelet of the white ground wire using the screw provided.
by: Chris03/08/2015
2014 Dodge Charger
The process from purchase to delivery was smooth and fast. The product itself (Curt) is very well put together and install was very straight forward. With the video supplied by Etrailer, I had zero issues with the install. Thanks a lot!
by: Russell05/11/2019
2014 Dodge Charger
Just received the wiring kit. Looks to be excellent quality, and has complete installation instructions. Shouldn't take very long to install.
by: Adam A. 04/24/2015
2014 Dodge Charger
Awesome kit!!! Straight forward and simple. Watched the tutorial on how to install while I was waiting for it to come. Package came in about 3 days. Took about 45 minutes from opening the box to testing it after installation. Etrailer.com is awesome!!!
by: Marc P.09/24/2014
Very good quality but the instructions for my car were not right at all need to update the way it is installed for every vehicle out there, But all in all very good product
by: Gary F06/21/2022
2014 Dodge Charger
Quick delivery great shape great product thanks etrailer.com We will be purchasing product from you again
by: Sean Harvey 07/01/2015
2014 Dodge Charger
A very easy install no drilling needed installed in aprox 30 minutes after fully ready instructions.... just need to figure how to run it outside the trunk so plug is always accessible if wanted.
by: Aaron 03/04/2020
Plug and play system keeps the factory harness intact
by: Jon12/16/2014
2014 Dodge Charger
Very simple to install with easy to follow instructions.
by: Duey P03/10/2014
Perfect fit on the Charger! The only thing that can be seen is the receiver, just the way the wife wanted.
by: Jim K09/09/2015
2013 Dodge Charger
Super easy to install. I'm glad I went this route instead of trying to splice the wires. I'm sure it took less than five minutes to install and I know it was done right.
by: Jeremy P.07/29/2019
Easy install. The factory plugins worked great
by: Travis02/22/2018
Fast delivery. Great customer service. Great products. As a business owner myself i can tell you that they do everything right!
by: David 12/14/2022
22
22
See what our Experts say about this CURT Custom Fit Vehicle Wiring
- Curt Hitch Recommendation for a 2011 Dodge Charger All Wheel DriveYes, the Curt Trailer Hitch # C13093 that you referenced is confirmed to fit all model 2011 Dodge Chargers so it will also fit your all wheel drive Charger. I attached installation instructions and an install video for this hitch for you to check out also. To complete your towing setup you may be interested in the following products: etrailer.com ball mount kit part # 989900 to provide ball mounts, hitch balls and pin and clips. Curt Trailer Wiring harness part # C56135 to provide the...
view full answer... - Trailer Hitch Recommendation for 2014 Dodge Charger for Towing Jet Ski TrailerFor your 2014 Dodge Charger the Curt Hitch part # C12064 is a confirmed fit. It has the towing capacity of 3,500 lbs total trailer weight. This means it would easily tow a PWC trailer like what you have. For a ball mount you would want the part # C45520 with either the hitch ball # C40001 for a 1-78 inch ball or part # C40018 for a 2 inch ball.
view full answer... - Trailer Wiring Harness Recommendation for a 2012 Dodge ChargerFor your 2012 Dodge Charger you would want a Tow Ready Custom Fit Vehicle Wiring # 118560 like you referenced, or you could get a Curt T-Connector Vehicle Wiring Harness # C56135. I attached a copy of the installation instructions for the # C56135 for you to check out, but to install it you will basically need to access the tail light harnesses of both your driver and passenger side taillights and plug the connectors from the # C56135 inline with those harnesses. You will then need to...
view full answer... - Output Voltage of Curt T-Connector Vehicle Wiring Harness with 4-Pole Flat Trailer Connector C56135All of the circuits of the Curt wiring harness # C56135 that you referenced when active will show 12 volts.
view full answer... - Trailer Wiring for a 2013 Dodge Charger RTFor a 2013 Dodge Charger you can use # 118560 to add a trailer wiring harness. The other option is to use # C56135 from Curt. I have included a link to the installation instructions for this harness for you.
view full answer...
Do you have a question about this Custom Fit Vehicle Wiring?
Info for this part was:

Video by:
Andrew K

Video by:
Dustin K

Expert Research:
Jameson C

Video Edited:
Jacob T

Test Fit:
Shane T

Test Fit:
Matthew S

Installed by:
Steven C

Updated by:
Wilson B

Updated by:
Kristina F

Updated by:
Isabelle B
At etrailer.com we provide the best information available about the products we sell. We take the quality of our information seriously so that you can get the right part the first time. Let us know if anything is missing or if you have any questions.
Product Experts Available Now!
Call 1-800-940-8924
Thos
8/25/2015
As great as when new. It ALWAYS works!!