
Thank you! Your comment has been submitted successfully. You should be able to view your question/comment here within a few days.
Error submitting comment. Please try again momentarily.
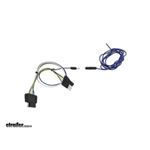
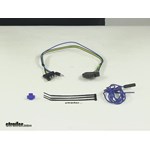
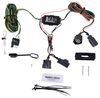
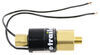
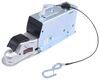
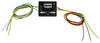
Trailer wiring adapter changes the 4 pole flat on your vehicle into a 5 pole flat.
Features:
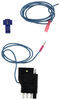
The blue wire gets spliced into the reverse light wire on the vehicle which is easily done with the included quick splice wire connector.
California residents: click here
Videos are provided as a guide only. Refer to manufacturer installation instructions and specs for complete information.
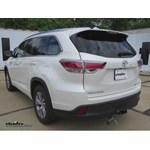
Today in our 2015 Toyota Highlander we're going to be showing you how to install the Tow Ready 4 Pole to 5 Pole Trailer Wiring Adapter, Part Number is 20036. Now our installation's going to begin by attaching our blue wire that's going to come with the kit to the reverse light wire, so that the wire that becomes hot or turns on are reverse lights. Now they're in the door in the hatch of the Highlander here, so we're going to go in to one of the wire looms located inside. We're going to go to the one that's on the left side here, and we'll just pull the boot up of the bracket that's holding it down. What we're going to do is just slide that loom up, get it out of the way now where we can get into our bunch of wires here. The wire that we're looking for is going to be a red wire. The good news is that there's only 5 of them. We only have to test 5 wires to figure out which one's going to be which, it should be this thicker one here but we'll see in a minute.
To test it out to figure out which one we need, we got somebody in the vehicle, of course they've put their foot on the brake, turn the ignition on, and they put the car in reverse. Now we're going to take this regular test light, our ground clamp, we can go right down to the latch that holds the door close. Let's go through it and test wires, with the reverse lights on we should be getting a signal to the wire. Let's start connecting, let's see, all right, nothing on that one, our next here, all right. Now in that red wire I'm getting the signal. What we're going to do is have our partner now take the vehicle out of reverse. Right, it goes off, back into reverse, comes back one, and then out of reverse, so we know that's the wire we're looking for.
Then we take a look here. There's 5 red wires in the loom, this is the thickest of those wire, just to give you an idea of what you're looking for there. Now the wire that comes with the kit, 60 inches long, that's not going to be quite long enough for us to make it down to where we want to go, so we're going to add on just a little length of wire. Just a piece of wire we have laying around the shop here. A little bit larger in size to the wire that we've got there. As we see here it's going to be the same diameter as the wire that we're running. We'll just make a Heat Shrink Butt Connection at the end of those to keep it nice vapor sealed.
We've got a quick connect, quick connect will slide on the wire, take our add on wire and slide on right behind there, hold that bolt together, where we can click that metal tab down. We'll going to squeeze that until that metal tab goes all the way down flush, has a good grip on both of our wires. Then we'll just bring that cover over and click it close. Then what we'll do is just slip that out to our cover here. You can bring that down. It's going to go over the top of that quick connect that we had.
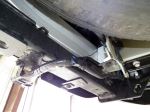
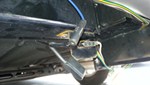
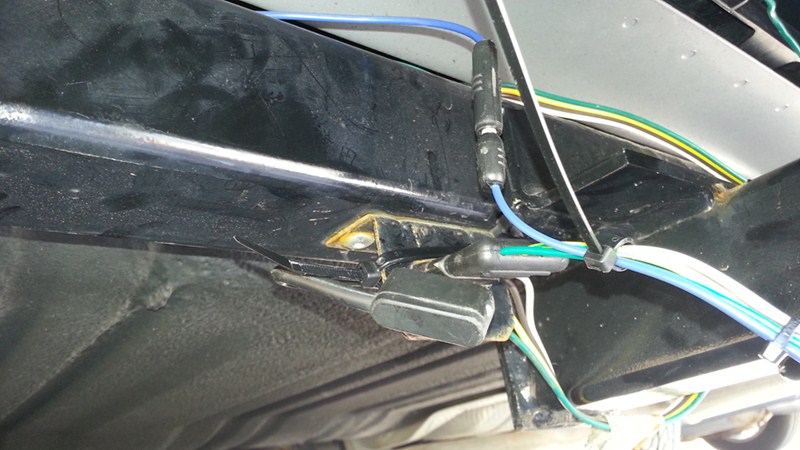
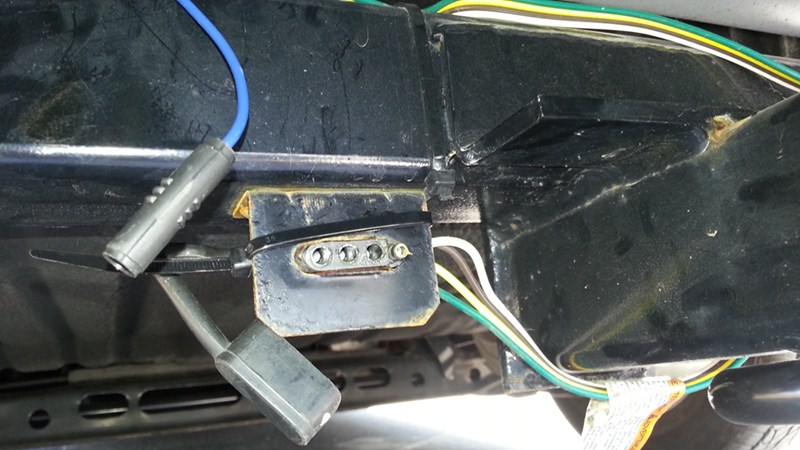
Then I'm going to try to do is bring that wire out through the boot right up here on the top. We'll take a little tiny Philips screwdriver, we'll poke it through there just like that. Tape this white wire here that we've added, I'm going to tape it under the screwdriver and then just try to pull that through that rubber grommet. Take this off, we'll pull the rest of that through. As you're pulling it through you don't want to get too rough with it. You don't really want to stretch that grommet out, we like it to hold right around that wire and give us a nice little seal. Just ease it it on through. All right. As you can see, pretty nice clean looking install. Let's slide that, cover it back on, and try to get it in place. If you see another 4 push tabs, 1, 2, 4, and then 1 on that back side, it's going to be easier to pull that out and get that gasket back around, than it is to fight with it when it's still in there. Just press those tabs and it will come up and out. I'm going to get that stretched all the way around, and then poke it back in just like that, perfect. Now we'll bring our wire all the way around, and what we're going to do to get it outside is I'm going to tuck it right in behind our taillight housing, and run it down and out of the bottom of the vehicle. They'll appear in the top and all the way around there's a nice gasket. I'm just going to tuck that wire right along, behind the back side of that gasket, bring it all the way. As you can see it hides it really well. You can take a pick or a screwdriver or whatever you want, and just work it in all the way around that. You really won't be even able to see it once you get done. Now let's take off the 2 10 millimeter headed bolts that we got, just a 10 mil socket, get in there, remove these out of the back of the taillight housing. Always pull out towards the rear of the vehicle, wiggle it a little bit. If they don't come freely, we'll trim removal tool, plastic screwdriver, plastic spatula, or something. Just work it out a little bit. Basically we've got a little pressure clip right here, then another little clip there. What we'll do is just move this long enough so we can get our wire down past, and we'll continue running to where we can tuck it behind the bumper right here. Place these 2 screws. We've got a piece of airline tubing here, but you can use coat hanger, or a stiffer piece of wire, whatever. We'll just going to run it down alongside here, and see if we can get this to come out below the vehicle where we can grab it and direct the wire down there where we're going to want it. Now we're going to remove the panel here and take a look and see if our pull-wire isn't locate right behind it. To do that we've got 1, 2, 3, 4, and 5 fasteners, you'll need a 10 millimeter socket for them, and then there's just a push pin fastener there. Let's start backing these out. The interior tucked right in here beside the spare. These are just a little push nuts, these are something you can remove just by hand. If they get twisted, a 12 millimeter socket will go over those good. All right. Then the last thing will be a little push pin fastener there, a little screwdriver or pick, pull the center out, and then the outside will come with it. Pull it down, and here we'll see our fish wire which is great. Now let's connect our white wire to it. Here is the white wire, place it right in the end of that tubing, we'll tape it off to your coat hanger, or other wire, whatever you've used, and then just pull away. If starts to get hung here at the top you can pry it out just slightly with a screwdriver, just to allow it to pass in. Then once you get to the wire it should be super simple to drive through. What we're going to do is tape our blue wire off to our white wire. We're going to draw that up slightly, and we want to get our connection where we put our Butt Connector, we're going to hide it in here behind the bumper. That way it's away from any moisture and stuff like that. If we pull up on what we went down, we can get that wire up here and then draw it back in behind our bumper. We want our Butt Connector to be about right in here, maybe right in here, somewhere protected, so that's going to wire down about right there. We'll trim it off, strip the end off, add the Butt Connector, crimp that off, let's strip the end of our blue wire, all right, nice and snug. Now we can take a heat gun, or a lot of times if I'm just doing one like this, I just use a lighter. You want to use the lower part of the flame, so that's yellow and then blue, you try to use that blue part, you'll have a lot less of the black carbon. We'll just heat this up. That's going to start to shrink, there's a nice sealing in there. All right, so nice and sealed off, let it cool for just a second, then for extra little layer of protection with an electrical tape. Get rid of our white wire, we're done with that, now we can use our blue wire to get that pulled down and in. Just like before, with a little pick or a little screwdriver push that back behind our rubber stripping. Now we'll just route our wire, over here towards the 4 Pole connector. Notice the wire loom that runs over for the 4 Pole right here, we'll take a couple of those zip ties there and just secure our wire off here. We don't want it to be pulling down from the tap, give a little bit of slack there. Don't want too much tension on it. We're going to bring that right over here, we got a little bit of extra, which is good in case we ever need any repairs. Zip tie that off there, and that'll leave our connector back here where we wanted. Your customers are going to want to plug into this, so we'll mount it right there, should make it easily accessible for him to get to it. Also keep it up out of the way. Now then just trim off the excess. There's an option to clean up the look of the install, we can take some electrical tape. We just go around that blue wire, it's going to clean it up, make it look a lot more like a factory harnessed one. Right now to test it out what we're going to do is take our 4 Pole Plug in that comes as part of the adapter, you can see here, this is the 5 Pole, here is our 4 Pole. Take our cap off our existing 4 Pole, we're going to slide that in. In here you can see our add on. We're just going to plug in the blue wire from that, right into that reverse light circuit. Now what we're hoping for is that we'll have . The normal lights are going to run right through here, that's not an issue, but we want to test this last one, this fourth, the new add on plug. With our vehicle in reverse, foot on the brakes, somebody in there, we're going to hit it with the test light, as you can see we're getting a great signal. Now we'll be able to plug our harness right into that and have that deactivation when we want it back up. When not in use, pull the plug, and just recap just like that. If you choose to, you can also wire this. This will be tucked up underneath the vehicle, and this will be exposed on the rear. This should work fine with most of the 4 Poles that you'll plug in, unless if it has that rubber shroud that goes all the way around, it may interfere as you try to plug it in. Just keep that in mind if its got that on it. Now our panel need to go right back up where we found it here. Tuck it in behind and then just push it, there it go. The tin push studs here, I like to do those first, I'm just going to push up on them. That'll hold it in place while we get everything else going. All right, with that working at it should that's going to complete the installation of the Tow Ready 4 Pole to 5 Pole Trailer Wiring Adapter, Part Number is 20036 in our 2015 Toyota Highlander. .
Average Customer Rating: 4.9 out of 5 stars (250 Customer Reviews)
Trailer wiring adapter changes the 4 pole flat on your vehicle into a 5 pole flat.Not installed yet but looks as good as one used before in a former vehicle. The actual adapter I received is "Reese", which is a reputable brand for towing accessories.
Good quality and everything needed for install in my 2006 Honda Odyssey. Now I can easily tow with either a 4 wire or 5 wire since the harness retains both.
Adapter 4-pole To 5-pole Flat - works as described. Installed on 2013 Chrysler Town & Country. Connected blue wire to left rear light harness. Strongly recommend using a 12v tester for this install, as visual diagnosis can be wrong. Deduct one star because 5-plug has no cover and is susceptible to road grime. My solution is to leave original 4way plug with cover underneath the vehicle and connect 5plug adaptor only when towing boat.
Have a multimeter ready so you know which wire to splice on the reverse light. Glad this product exists!
Simple install on my Jeep JK. Tapped the reverse light lead wire and harnessed all the wires in flex conduit. Tie strapped it all under bumper. Can either use 4 or 5 pin trailer.
E-trailer is one of the best online companies I have ever dealt with. I just make my second purchase on Sunday evening and had my hitch installed on my vehicle on Wednesday evening. The videos are very helpful. The communication back to me the customer is way above expectations...

This kit was easy to install and exactly what I needed. I had a particular need and reached out to eteailer and received a quick response. Perfect!
Speedy delivery.
Simple and easy to use; just plug it in and connect it to the trailer harness. Works like a charm!
My Ford Edge with the tow package had a 4 pole harness and my boat trailer had a 5 pole harness with the extra wire for locking out the brakes when reversing. This adapter was easy to install and works like a charm. No more need to use a lock out key when reversing the trailer.
4 to 5 pin wiring plug is awesome bought the bracket that it fits in to secure to truck and it works very well was very secure until I backed into trailer hitch with it ..its still square and hold tight just need to rescrew it back on with bigger bolts and it will be good as new. I recommend this to everyone that needs 4 to 5 pin for there trailers its so easy to install takes 5 minutes.

Eldon W.

3/29/2021
the product is still holding true to the truck and still preforms just as it was the day I installed it
Great service. Wonderful (and numerous) how to videos are very easy to follow
Fast delivery! Works great with 5 pole flat connector on my Goldwing M/C and 4 pole on my truck
This was exactly what I needed. Our Nissan Pathfinder came with a 4 prong plug already installed, but our new boat trailer has a 5 prong plug. This fit perfectly, works great (already used it this past weekend) and the installation was easy, thanks in part to the instructional video included on the product page. Would definitely recommend to anyone that needs to go from a 4 prong to 5 prong for your trailer.

Rich S.
6/8/2014
Which wire did u crimp on to for your Pathfinder? Could u tell me the colour pls. Thanks.

Had to rewire my 8' utility trailer. Purchased the wiring kit and couldn't be more pleased. Easy to install, clear instructions and fast shipping. THANKS!

Maj M.
10/20/2017
Reliable
This is for a 2014 Jeep Cherokee Latitude. It took me a little extra time as my helper was a 5 ton floor jack and it supported the receiver and if only my right foot had fingers it would have helped a lot. Loading the bolts and plates into the frame was a snap, I left the fish wires on the bolts and that helped a lot and I didn't lose a bolt into the frame,you must leave the exhaust hanging to get to the rear bolt closest to the exhaust curve just before the mufflers I didn't and it was a bear to torque it. Also after I cut the opening on the bottom of the bumper and already had torqued the receiver I had to pry the bottom edge over the receiver there was no other way to get the hitch up inside not enough forward space to get it to slide up and in. Other than that it was a snap.
Now for the wiring harness, went well had a bit of a time getting the connectors up to the tail lights even with all 4 screws out and a little bit of play I had to pry the plastic support away from the body to get the connectors through. That was for the 4 flat, for the power for the harness I have a rig runner 4005 from Powerwerx for all my power as I am a volunteer Fire Fighter and have all the goodies that goes with it and every thing runs fine. For the 5 flat all I had to do was find and take out the backup bulb in the tail light and test to find which wire was hot. And then it was over and done put it all back together and drive away with my trailer. Sorry no picture it looks just like the factory/dealer put it on.
Ray H
Works as advertised but the 5th (blue) wire provided is too short for my 2006 Honda Pilot. Not a big deal. You can buy 3 feet of 16 gauge wire at Ace Hardware (even in matching blue if you wish) and use butt connector or bullet plug to splice. Regarding which wire to tap into for the reverse lights: On my Honda Pilot, there are access ports to the reverse lights on the inside panel of the rear hatch. I just popped one of those covers out too see what color wire powers those reverse lights. (In my case, it was a green wire with silver spots and a very thin black line.) You can then tap into that wire at top of the hatch in the same manner shown in the video on eTrailer's website (for a Toyota Highlander if I recall correctly).
My trailer has a five plug harness. The cord made it easy to convert from my wiring harness.
I have been using adapter #47515 to convert my 4 pole vehicle to my 5 pole trailer plug. The extra wire was necessary to operate the solenoid on my surge brake trailer. It worked ok, but because the wire came into the 5 pole plug at a right angle, the wire seemed vulnerable to bending and then breakage. This product has the extra wire coming straight out the back to alleviate the bending/breakage concern. So far it has met my expectations.
I used this part to convert the four-pole wiring in my 2014 Toyota Sienna Van (previously installed using etrailer.com parts) to a five-pole so I can pull a boat trailer with hydraulic "surge" brakes. Everything worked well, but I had to get an extra length of wire and a butt connector at an auto parts store for my Toyota Sienna. The most time consuming part of the process was finding the reverse light wire in the bundle of wires going to the tail lights. A test light with the ability to pierce a wire (sharp point) is required for this.
The install was extremely easy on my 2017 Jeep Wrangler. Just route the wire from the left backup light down to the trailer connector following the current wire bundle. I haven't tried it with the trailer but with the back up lights on there was voltage to the trailer connector, so it should work.
Super fast shipping also.
The adapter was fine. The video showing how to route the backup light wire to the harness was terrible. Routing a wire under the hatch seal caused a leak that went undetected for 3 months. Had to pull all the seats out several times, remove all the moldy carpet padding, scrub the car and carpet many times, replace the padding, put all the seats back and have the interior professionally detailed. A better method is to route the wire under the headliner down the side. Stay away from the hatch seal.
very easy it took me about 30 minutes the hardest part was getting the left side tray out of spear tire well witch was about 15 minutes The factory plug was hanging beside wiring harness plug it in hook up ground splice the power wire to backup light for my 5 pin connecter for trailer brakes
Everything is as described. All of the tutorial videos are Excellent. Unfortunately, There is no install video for my make and mode. However, i have reached out to eTrailer and am waiting on their reply now.

Joey J.
8/16/2021
Everything is working well. I did receive a call from etrailer from a guy who told me exactly how to find the wire i needed to splice into. That was a very pleasant surprise. Great Company and Great Customer Service.
This seems to be a good option for an adapter to get a 5 wire trailer connection.
The single wire for the back up light connection is odd to secure to wire harness so it don't get damaged from dirt. The socket could have a cap to cover so dirt can not get in it when not in use.

Do you have a question about this Trailer Wiring?
Info for this part was:
At etrailer.com we provide the best information available about the products we sell. We take the quality of our information seriously so that you can get the right part the first time. Let us know if anything is missing or if you have any questions.


Rw
3/30/2024
It works as it should. It pays to first thoroughly read instructions and look at a color-coded wiring diagram that I believe I found on e-Trailers online site. Thats how I was able to positively identify the correct back-up light wire in the Outback, without testing other wires while needing another person to put the vehicle in reverse gear.