
Thank you! Your comment has been submitted successfully. You should be able to view your question/comment here within a few days.
Error submitting comment. Please try again momentarily.


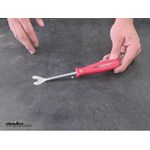
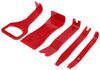
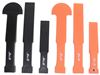
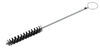
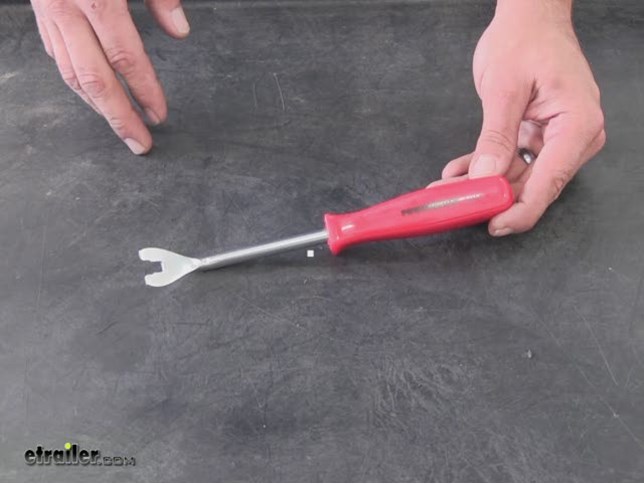
The trim pad remover is perfect for easily prying up plastic or metal trim fasteners to safely open up panels in your vehicle. The contoured handle allows easy access to fasteners. The trim pad remover helps to prevent blemishes on surfaces.
Features:
Videos are provided as a guide only. Refer to manufacturer installation instructions and specs for complete information.
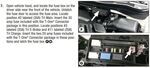
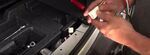
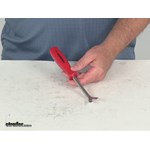
Today, we're going to be taking a look at the Powerbuilt Trim Panel Remover Tool. This is where it comes in handy for all types of fasteners, whether they're plastic or metal. Part number on it is ALL648544. Now, let's take a quick look since we're here in the hatch area. There are few different uses or a few different areas where our Powerbuilt trim remover tool will really come in handy. To start our push pin fasteners here, we'll be able to use the almost similar to a screwdriver edge there.
To pull out the center core, then we can go right in behind it with the panel tool and pull that right out. Another place where it really works out well is being able to get that along the underside of our trim panels themselves, and then you can see all we have to do is kind of tip up on it slightly. Then, we can hear our fasteners popping out of place. We can continue that all the way across to free up that rear panel. Another great aspect. Again, the screwdriver kind of style here, we'll be able to tip that right in there.
Pop off our panel giving us access into the bolts below, if we wanted to remove that or something of that nature. That's going to complete today's look at the Powerbuilt Trim Panel Remover Tool, part number ALL648544. .
Average Customer Rating: 4.7 out of 5 stars (484 Customer Reviews)
The trim pad remover is perfect for easily prying up plastic or metal trim fasteners to safely open up panels in your vehicle. The contoured handle allows easy access to fasteners. The trim pad remover helps to prevent blemishes on surfaces.After watching the etrailer video I installed the hitch in about 2 hours. The rear panel popped out and back on easily. I removed the lower bumper panel after removing the main panel, installed the hitch, reinstalled the main bumper panel, cut the subpanel around the hitch and reinstalled it last. I also bought the
Trim Pad Remover Tool to take out the securing clips and it was worth the $10.00. You guys have great videos.

Installed myself with help of one friend. Assistance with install using the videows was invaluable. The installation on a brand new vehicle brought praise and comments on how clean the install looked. Great job etrailer.
The video made installation simple!! I almost bought a hitch from uhaul with installation would of cost me $[XX] total. I just saved around $[XX] and learned the process. I’m not a professional and did it myself in about an hour. Freakin love the hitch and etrailer’s highly competitive pricing and very informative video!
Super finger saver! not just for installing a new hitch but this tool now stays in my car so I can quickly pop the plastic plate off the bumper to use my hide away hitch!
Work as described. Wanted to use the proper tool instead of a screwdriver to prevent slipping and scratching the paint.
Works great for our bicycles. Installation was easy after watching the e-trailer video.
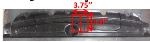
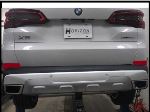
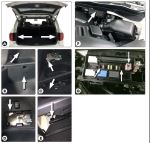
Ultimately the product is excellent I am completely satisfied with the end result. I included a few installation tips for those of you who plan to install this by yourself. (1st jpg) The trailer hitch + bumper are heavy and are difficult to hold up and get the bolts started. I stacked up some blocks and scrap wood and threw a towel over it to protect the paint on the hitch. This holds the hitch to the right height and makes it much easier to hold up just the aluminum bumper to get the bolts started. (2nd jpg) Because the hitch has slotted bolt holes it is easy to accidently install it off center. I thought I had it installed right the first time because I measured the outside of the hitch to outside of the aluminum bumper on both sides, but it ended up being installed 3/16 of an inch off to the passenger side which way off of where it needs to be. To correct this I drew a line down the center of the Honda aluminum bumper and made sure the center of the hitch was lined up to the center of aluminum bumper before I tightened the bolts. The outside of the hitch mount may seem off alignment compared to the Honda aluminum bumper, but this doesn't matter. The center of the hitch being dead center to your car is what matters. (3rd jpg) The end result is excellent so I am happy! :-)
Wings too thick. Damaged several trim pads during removal. Will grind the wings down next time I need this tool.
We used this to remove the trim pads on our Subaru Crosstrek so we could install the wiring harness we also purchased. The tool made is easy peasy.
Works just as required/described.
Works as it should
This tool made the job of removing the trim pins MUCH easier and without breaking them!
Works great
came as promised, in excellent condition and went on without issue after I watched the video that was available on the etrailer website. Very helpful and I would purchase another hitch here again!
This item was not included in the original shipment as indicated on the original invoice. However, I was able to use a series of screwdrivers as a substitute to get the job done. I advised customer service that the item was not shipped and requested a credit/refund because I got the job done without it. Instead of the requested refund they shipped the not longer needed tool. Not happy.

Jenny N.
4/28/2023
I am very sorry for the mistake in shipping and error in communication. I will have our Customer Service team reach out to you.
Clever tool which made the job much easier. Should have bought one of these years ago.
The sipping box had been torn open and I was afraid I would be missing things. It looked as if it had been done on purpose. The whole top had been ripped free of the staples, like you would do to open it. But the small box was still inside with the rest of the order. The hitch is very nicely made.
Worked perfectly. Great tool!
To wire my trailer hitch for lights, I had to pull paneling off my brand new car. (!!!) This tool helped me do it without breaking a single fastener. The operation was a success.
This was recommended and not needed for the hitch I chose but it will come in handy at some point!
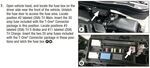
This was a relatively simple and straightforward installation on my 2019 Volvo XC40. The directions were clear, although the black and white pics can be a bit hard to follow. I would add the following points. First, the left plastic rail in the spare tire compartment needs to be removed, and it has an odd hook at the front that is a challenge. It will come with some wiggling. It's equally challenging to put back on. Second, I used the Volvo ground terminal to ground the T-One module. Third, I ran the wire from the module to the positive terminal down through a grommet in the spare tire compartment, then along the brake lines under the car to the battery. This was easy to do with the vehicle on a hoist, but will be more challenging if you don't have access to a hoist. I removed 2 of the protective panels under the car to route the wire. It was fairly straightforward. The product works as advertised and fits very well in the car.
Good quality tool
A very handy tool! Especially helpful when I was removing the push screws from my bumper fascia.
Worked great to assist with removing the clips on the car panels.
Awesome product


Do you have a question about this Automotive Tool?
Info for this part was:
At etrailer.com we provide the best information available about the products we sell. We take the quality of our information seriously so that you can get the right part the first time. Let us know if anything is missing or if you have any questions.


Buzz
3/19/2024
Worked great! Way better than breaking the tabs trying to get the tabs out with the wrong tool.