


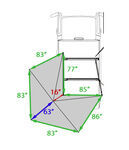
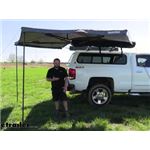
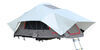
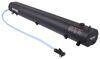
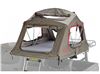
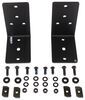
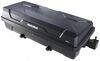
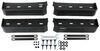
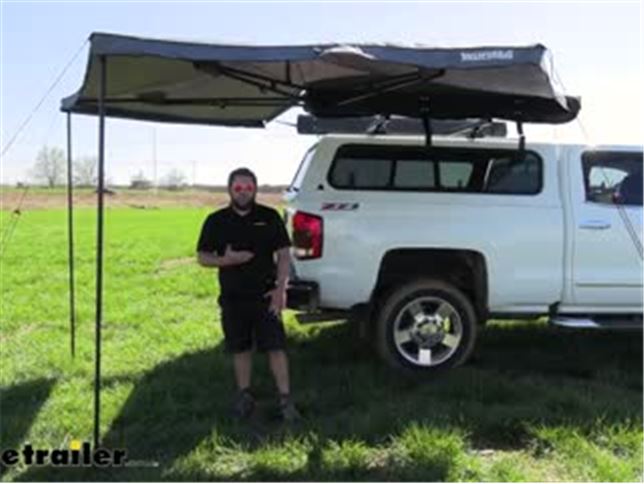
Perfect for the campsite or a tailgate, this awning deploys around the driver's side of your vehicle to provide 80 square feet of shade. One-person setup with integrated drop-down poles. Bolts to top channels in your crossbars or platform.
Features:
Specs:
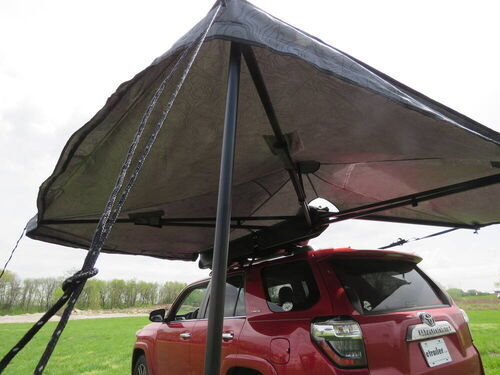
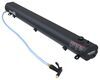
Using just one motion, the MajorShady unfolds 270 degrees from your vehicle's roof to provide 80 sq ft of shade. Just unzip the storage bag and bring the awning from the side of your vehicle toward the rear. After it's deployed, use the taught line to secure the awning to your roof rack. Then, extend the inner pole to prop the middle of the awning up.
The telescoping support poles are built into the awning, which means you don't have to attach each pole separately during setup. Simply undo the hook-and-loop straps on the awning and drop them into position. After this, tighten the poles to the necessary height. You can also adjust the poles to different heights to suit any type of terrain, so they are always on solid ground. Finally, to bring the MajorShady to maximum tension, attach the guy ropes to the frame and secure them to the ground with the pegs.
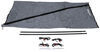
Coated with polyurethane, the awning's durable, poly-cotton fabric is waterproof so it'll easily withstand a rain shower. Also, the telescoping poles and awning frame are constructed of aluminum and finished with a black powder coat. This means they won't rust or fade when exposed to the weather. When not in use, all the parts are stored inside the heavy-duty vinyl cover.
The MajorShady has an optional extension (sold separately) to provide more shade and improve your outdoor experience. It easily installs by zipping to the outer edges of the awning. And just like the MajorShady, it uses telescoping poles, guy ropes, and pegs to secure to the ground. It's also made from the same waterproof material.
Using a single extension, you can either increase your overhead coverage or form a sidewall that functions as a windbreak. When you add 3 more extensions, you can create a full enclosure around your vehicle.

California residents: click here
Videos are provided as a guide only. Refer to manufacturer installation instructions and specs for complete information.
What's up everybody, it's AJ with etrailer.com. Today we're gonna be checking out the Yakima MajorShady. It's gonna be an awning that goes all the way around your vehicle. Mounts on your roof rack, gives you 80 square feet of shade in the sun. Let's check it out. This awning's gonna be a great addition to your vehicle, whether it's the passenger side or driver's side.
They offer both options. They both work the same. They come out from the side. You see how much coverage we have right here More than enough for me and some few other people too. As you can see, it's a windy day out today.
Not too bad, but we are still moving the awning up a little bit. I like the support beams, they're gonna help us out with that, and keeping everything down, along with the support legs, and they even gave us guide line to run with stakes to the ground. So that's really keeping it in place and there's not too much movement I'm worried about. They even thought of some extra things like this bar that you pop up here which puts little pressure on the tent so that it's not just flat. That way when it rains, it doesn't collect lot of rain and then come down on ya when you're in the awning.
Now it's come up to a point so the rain's gonna run right off. There's also gonna be space in between the awning and our camper shelf. So you see I could open up the back glass and still sit on the tailgate and no issues or contact there on the awning. As I mentioned before, they have included guide lines with the tensioners in 'em and stakes. You're gonna get eight of the stakes and then six of the guide lines.
So that's gonna be really helpful for setting up the awning. Now when it comes to the install, it's not so bad. You're gonna need a second set of hands to lift up the whole awning. But the brackets are gonna slide into the T-tracks. We have 'em on HD bars on this camper shell today. We did the hardware down on a table, lifted it up, slid it right in the tracks. The installs are gonna be different for what kind of bars you have, but with those T-tracks, they slid in, you tighten them down and that's pretty much it for the installer, it wasn't bad at all. First thing you wanna do when setting up your awning is go ahead and unzip both sides all the way to the ends. (zipper buzzes) You wanna flip the cover up behind the awning, that way everything's exposed. We're gonna undo the hook and loop straps here in the center and then we can bring it out. You got one in the center, undo that. Bring some of this down and there's gonna be one towards the front of the vehicle too. Let it come down. Before we bring our awning out, you wanna make sure that you hook in. We're gonna use the top line to fan out our awnings. We're just gonna walk it over. I've already run the strap around our bars on the other side, so you'll make this connection to help hold it in place. With the strap already wrapped around our top bar, and bring it over here, run through our cam buckle and pull it tight. Now with the extra strap, you can go ahead and tie that up. Make sure you don't tighten down too much 'cause you wanna put the prop rod up. That's gonna help it having angles for rains. The rain can come down, it doesn't just gather here on our awning. Next we're gonna want to get this hook and loop strap, and bring these legs down. Just gonna twist it to loosen it so it drops the leg at the bottom. Get it right where you want it and twist it to tie it back up. We're gonna repeat that same process on the other one right there. Now we're gonna take our guide line, run it through the loop here at the end. We're gonna want to tie that off 'cause we're gonna wanna stake our awning down. So we're just gonna tie this to a knot to keep it in place. Go ahead and double knot it, and then we'll put our stake in the ground. Now that's gonna take one of the stakes that's included, run it into the ground at a 45 degree angle and get it started. Might help to have a mallet or soften the ground to get it through. Now we're gonna take our tensioner with our stake in the ground. We're gonna take the longer loop here, put it around the stake, and then pull up on the tensioner. I know you probably wanna go down to tighten it towards there, but this actually is what it's made for. We're gonna pull this other rope, and see how tight it gets helping hold the awning down. Last thing you wanna do is flip the cover back over onto the awning. We'll start here. Go ahead and do it back there as well. That's gonna prevent any moisture from getting in. Something you can do for extra support is to bring the hook and loop straps that'll hold the arms in. Just wrap it back around there. This is gonna help keep it from flapping as much. Something else I like about this is that it stores really easily, just as easy to put away as it was to set up, and all your bag of hardware goes in there too. So everything fits up in the assembly when you go to zip it up. So it's all gonna be there when you need it. Overall, I did like the MajorShady. I like how much coverage you get on your vehicle. Plenty of room for me and some friends if we're hanging out. The fact that it mounts up on the roof rack on the vehicle already and it takes up so little space there at the edge, I could put a few more, maybe one more accessory, on the other side and I'm gonna be more likely to use this more often since it's with me at all times. Well, I think that does it. Thanks for hanging out and hope this helped.
Do you have a question about this Car Awning?
Info for this part was:
At etrailer.com we provide the best information available about the products we sell. We take the quality of our information seriously so that you can get the right part the first time. Let us know if anything is missing or if you have any questions.


Thank you! Your comment has been submitted successfully. You should be able to view your question/comment here within a few days.
Error submitting comment. Please try again momentarily.