How To Install A 7 Pole Connector And Brake Controller On A 2018 Honda CRV
Question:
Hello, I already have a 4-pin connector installed on my 2018 CR-V vehicle. What would I need to have power not just a 7-way connector to all 7 pins of the connector? My trailer has a 7-way and I want to ensure that power is supplied to all 7 pins, most importantly the 4-pins + back-up light. Are there any kits for this task? Are there any instructional videos for a DIY job or do you recommend mechanic shops do this job?
asked by: Lyndon P
Expert Reply:
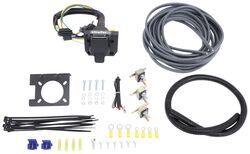
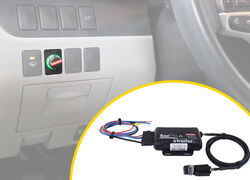
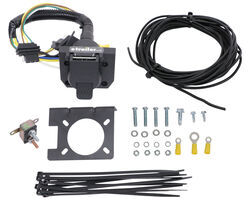
There are two options for adding a 7-way connector to your 2018 Honda CRV. One is the Universal Installation Kit for Trailer Brake Controller - 7-Way RV and 4-Way Flat - 10 Gauge Wires Item # ETBC7. This kit is going to be more involved and requires wires routed inside the vehicle, a brake controller mounted inside the vehicle and a wire connected to the cold side of the brake signal output wire as well as wires connected to the brake controller. For this kit I recommend the Redarc Tow-Pro Elite Trailer Brake Controller - 1 to 3 Axles - Proportional Item # RED44FR. This brake controller can be mounted any where inside the vehicle accessible by the driver. The main control box can be mounted anywhere under the dash, in any orientation, to a solid surface. Make sure it is not zip tied to a bundle of factory wiring.
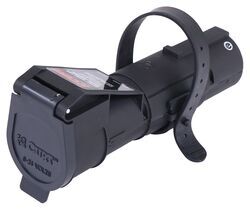
The second is the 7-Way RV Upgrade Kit for Trailer Brake Controller Installation - 12 Gauge Wires Item # ETBC7L. This kit is a less involved install but requires a wireless brake controller. Because a wireless brake controller only requires a power wire ran up to the battery and no wire inside the vehicle it is less intrusive inside the vehicle. For this kit I recommend the Curt Echo Wireless Trailer Brake Controller - 1 to 2 Axles - Proportional Item # C51180. This brake controller plugs directly into your 7 pole plug on the back of your vehicle and your 7 pole from the trailer plugs into the other end. This brake controller is controlled using a cell phone once the app is downloaded. The blue wire in this kit is not used. You simply connect the two four pole ends together, route the black wire up to the circuit breaker and battery in the engine compartment, attach the white wire to a good frame ground and extend yellow wire up to a taillight to obtain a reverse light signal.
To obtain a reverse light signal behind the taillight you first need to remove the taillight. The taillight has a plug on the back that connects the taillight wires to the vehicle factory wiring. Have someone inside the vehicle with the reverse light on. Probe the pins on the plug until you determine which wire is the reverse light wire. The wire can either be cut and the extended wire spliced into it and reconnected with a butt connector or a quick splice connector can be used.
In my honest opinion between the two options the ETBC7L is the way to go. The kit is much easier to install and doesn't require holes in the firewall or in the dash to mount the brake controller.
I have provided a few videos to help with the instillation process for each option. The tow pro elite install video is on a 2016 Acura MDX but it can help give you a general idea of how to install it inside the vehicle. The ETBC7 is on a 2014 Honda CRV. Once all the wires are routed inside the vehicle, your wire is connected to the brake light switch wire, you can refer to the tow pro elite install on the Acura for the remaining connections.
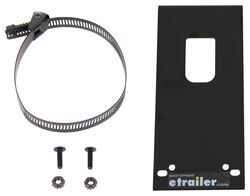
I also recommend a No-Drill Mount Bracket, Long Item # 18136. Because you adding a 7 pole connector, the bundle of 7 wires coming out of the plug require a little extra room. The bracket is a no drill bracket, mounts to your hitch with the included hose clamp, the 7 pole bracket that comes with both etbc kits mounts to the long bracket.

Products Referenced in This Question
- Accessories and Parts
- Trailer Wiring
- Mounting Hardware
- Brackets
- 4 Round
- 5 Round
- 6 Round
- Tow Ready
more information >
Curt Echo Wireless Brake Controller - 7-Way Plug Mount w/ Bluetooth App - 1 to 2 Axle - Proportional
- Trailer Brake Controller
- Proportional Controller
- Hidden
- Up to 2 Axles
- Smartphone Display
- CURT
more information >
Universal Installation Kit for Trailer Brake Controller - 7-Way RV and 4-Way Flat - 10 Gauge Wires
- Accessories and Parts
- Trailer Brake Controller
- Installation Kits
- etrailer
more information >
Redarc Tow-Pro Elite Brake Controller - Dash Knob - 2 Braking Modes - 1 to 3 Axles - Proportional
- Trailer Brake Controller
- Proportional Controller
- Electric
- Electric over Hydraulic
- Automatic Leveling
- Dash-Mounted Knob
- Hidden
- Up to 3 Axles
- Indicator Lights
- Redarc
more information >
Product Page this Question was Asked From
7-Way RV Upgrade Kit for Trailer Brake Controller Installation - 12 Gauge Wires
- Accessories and Parts
- Trailer Brake Controller
- Installation Kits
- etrailer
more information >
Featured Help Information
Instructions
Miscellaneous Media

Continue Researching
- Shop: Trailer Wiring
- Shop: Brake Controller
- Shop: Universal Installation Kit for Trailer Brake Controller - 7-Way RV and 4-Way Flat - 10 Gauge Wires
- Shop: Redarc Tow-Pro Liberty Brake Controller - Dash Knob - 1 to 2 Axles - Proportional
- Video: Tekonsha Prodigy P3 Trailer Brake Controller Review
- Video: Redarc Tow-Pro Liberty Brake Controller Review RED24FR
- Video: Trailer Wiring Harness Installation - 2016 Honda CR-V
- Q&A: Replacement Faucet for Pop-Up Camper with Removable Spout
- Shop: Tekonsha Prodigy P3 Trailer Brake Controller - 1 to 4 Axles - Proportional
- Shop: T-One Vehicle Wiring Harness with 4-Pole Flat Trailer Connector
- Shop: 7- and 4-Pole Trailer Connector Socket w/ Mounting Bracket - Vehicle End
- Shop: Redarc Tow-Pro Elite Brake Controller - Dash Knob - 2 Braking Modes - 1 to 3 Axles - Proportional
- Shop: Curt Echo Wireless Brake Controller - 7-Way Plug Mount w/ Bluetooth App - 1 to 2 Axle - Proportional
- Article: Trailer Wiring Diagrams
- Video: Redarc Tow-Pro Elite Trailer Brake Controller Review
- Shop: Trailer Hitch
- Article: Brake Controller 7- and 4-Way Installation Kit (ETBC7)
- Q&A: How to Tell if a Vehicle has a Tow Package or Not
- Q&A: Recommended Wiring Kit For Using Saris Door Country Bike Rack With a 2020 Toyota Highlander 4-Way.
- Search Results: 18136
- Search Results: redarc
- Q&A: What is the Difference Between a Class II and a Class III Hitch?
- Video: Choosing the Right Trailer Wiring
- Search Results: trailer brake controller
- Search Results: brake controller
- Q&A: What is the Difference Between a 4-Way and 7-Way Trailer Connector
- Video: Choosing the Right Brake Controller
- Q&A: My Vehicle has a 4-Pin Trailer Plug, but Trailer has 7-Pin Trailer Plug
- Search Results: etbc7
- Article: How to Choose the Right Trailer Hitch Class


