
To see if this custom-fit item will work for you please tell us what vehicle you'll use it with.
Thank you! Your comment has been submitted successfully. You should be able to view your question/comment here within a few days.
Error submitting comment. Please try again momentarily.


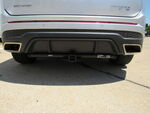
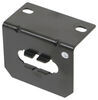
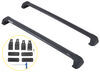
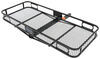
This fully welded trailer hitch receiver bolts onto your vehicle's frame with no welding required. Matte black, powder coated steel is durable and corrosion resistant and creates a rugged look.
Features:
Specs:
The sturdy steel construction is protected with a matte black finish for added durability. This unique powder coating gives etrailer hitches a carbide-like appearance and a rugged look that sets them apart from traditional glossy hitches. In addition to being rust and corrosion resistant, the tough matte coating hides dirt, scuffs, and dings better than a glossy finish.
At etrailer we're committed to the products we sell, and to our customers. Our experienced and knowledgeable staff are available via both phone and email to address your questions and concerns for the lifetime of your hitch. The technicians at etrailer perform hitch installations on a daily basis, making them a valuable resource for do-it-yourselfers. The one-on-one, personal service you'll receive comes straight from an expert in the towing and automotive field. We've installed it, we've wired it and we've towed with it, so whatever your question, we can answer it.


Tech Tip
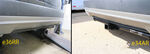
Hands-free Liftgate sensor areas will be limited to areas away from the center where hitch receiver opening is located. No drilling required for installation , Exhaust must be temporarily lowered for installation , Trimming or removal of underbody panel required for installation , We recommend that all non-trailer loads (bike racks, cargo carriers, etc) should be supported by stabilizing straps, such as 18050, sold separately
Videos are provided as a guide only. Refer to manufacturer installation instructions and specs for complete information.
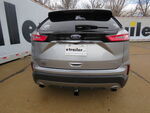
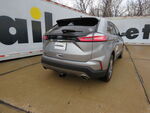
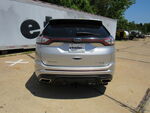
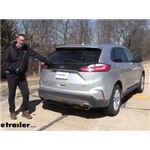
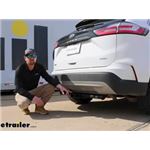
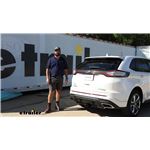
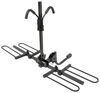
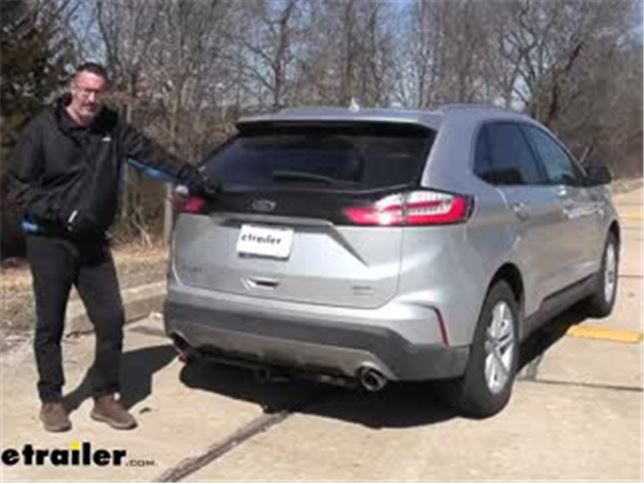
Hi. John with etrailer. Look, trailer hitches aren't just for towing anymore. They open up your world to a lot of different accessories, like cargo racks and bike racks. Today we're gonna be taking a look at the Etrailer Class Three Receiver Hitch on our 2019 Ford Edge. So, let's get a little bit closer and take a look at the etrailer hitch.
Now, this is an exposed cross tube version that we have here. We also have another version that's gonna have a hidden cross tube that's up a little bit higher. The other one has a little bit more of a maybe a towing and a tongue capacity. Otherwise, they're gonna be about the same. They're both gonna have this nice textured black mat powder coated finish.
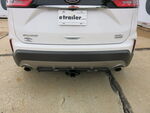
They're both gonna have a reinforced collar. This is a two inch by two inch receiver opening. This is the way you want to go, as far as I'm concerned. This is gonna have the most options for you as far as ball mounts, cargo racks, bike racks. It's just the most popular size.
So of course, you're gonna have a ton of different accessories that can fit up to this. If you are doing some light duty towing, it's gonna have a plate-style chain hanger, and that'll accept your standard S-hooks, and the little bit heavier duty clevis-style hooks. If you're new to towing, you do need to know that the pin and clip are not included. This is a five eights inch pin and clip. So, if you're gonna be doing some light duty towing with your Edge, you're gonna need these.
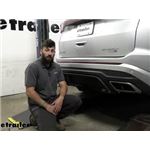
We have these available at etrailer. We also have a locking style if you wanna lock everything up. Now, if you're in the market for cargo racks and bike racks and other different accessories like that, most of those accessories will already include some sort of anti-rattle device or a pin with it. Now, speaking of those accessories, there's some measurements that you need to know. This'll help you in choosing like, ball mounts or bike racks and such. We're gonna take a measurement from the ground up to the inner collar up here. And with this one on the Edge, we're looking at just about a foot, 12 inches. And the other one, the other measurement we like to get, is from the center of the pinhole here, and it's gonna be out to the edge of our bumper. And this one sits back quite a bit. We're looking at about six and a half inches. So, these are important measurements for you. Again, like if you're doing some light duty towing, you'll need a ball mount, more than likely this is gonna have a rise to it. And as far as bike racks and cargo carriers, anything like that, that would fold up, you need to have this measurement to make sure you're not gonna contact the back of your fascia. So, let's talk about some weight capacities for this hitch. We're looking at 600 pounds of tongue weight. Now, that's gonna be the force pushing down on this hitch. That's quite a bit. That's gonna enable you to get, you know, one of those big four bike rack carriers or a cargo rack, and be able to put a generator on it. As far as trailer weight rating, if you're gonna be doing some light duty towing, 4,000 thousand pounds is what you're looking at. It's gonna be the weight of your trailer, and then any cargo that you put in it or on it. Now, check with your Ford's owner's manual to see how much weight your Edge can actually tow. So, if you're interested in this hitch and you're wondering whether or not you can install it. Well, chances are it's gonna be yes. This can be done on your driveway or in your garage. It shouldn't take any more than an hour and a half, or maybe even a couple hours working if you have a jack stand or a set of ramps or stuff like that. That'll make it easier. Both of these trailer hitches that we offer here, both this exposed cross tube and the hidden cross tube, I don't really know if there's a big enough difference between the two, personally. I think it comes down to personal preference as far as, do you mind the cross tube being exposed, or would you like it hidden As far as installation on both of those, it's pretty straightforward, pretty easy. All the hardware is included. You probably have all the tools that you need. If you wanna see how we did this one, stick around. All right, let's go ahead and get started with the installation. We have our Ford up on a lift here. It just makes it easier for us to show you what's going on underneath here. This is absolutely a job that you can get done on your driveway or in your garage. We're gonna start, we're gonna lower the exhaust down. I've got some silicone spray and we're gonna come to either side of the vehicle. You're gonna have some rubber isolators for the exhaust. Just go ahead and spray these with the lubricant here. If you don't have silicone spray, try not to use anything like oil base. It'll end up hurting the rubber. So, just regular soap and water works pretty darn well to get these off. While we're letting that lubricant work, we're gonna take a cam buckle tie-down strap. I'm gonna come to underneath the vehicle, just to the coil springs. We're gonna hook on the left side and the right side over here, and tighten that up. Once we loosen the exhaust, we can lower it down in a controlled manner, and it's not gonna hurt anything under the vehicle. So, you can take a pry bar like this. And one of the things I found easiest on these Edges is put the pry bar at the bottom down here. Use the muffler as leverage, and then just work that off. Do this on both sides. And then we can lower the exhaust down and give us room to work. Next, we'll come over to the rear corner of the vehicle here. We're gonna be removing the two fasteners here. These are 730 seconds, or if you have metric, you can use five and a half millimeter. (drill whirs) And then there's gonna be two flange nuts up here, one and two, on the frame. Those are 10 millimeter. Those need to come off, too. (drill whirs) Now, we can remove this plastic inner shield here. And you're gonna want to do the same thing for both sides, it's the same process. Now, we're gonna be fishing the hardware in through the frame. Now, included with the kit, you're gonna have the fish wire, you're gonna have the carriage bolt, you'll have the square block spacer and the serrated flange nuts. Of course, the nuts will go on at the end here. So to begin with, we're going to be fishing the hardware. There is a hole at the end of the frame. It's back here. It's really hard to see and really kind of hard to get to. But this is where we're gonna be inserting the hardware. We're going to work with the holes furthest away from us. It's just gonna be easier. So, take the coil end of the wire, and we're gonna go up towards the back of the frame here, and there's an opening. This is not particularly gonna be easy, but just take your time, and you can kind of bend the wire however you need to. So, it took a second, but it'll be easier the next time around. I just kind of went around and was able to feel the spring and pull it out. So, you'll take your spacer block first and thread that on the wire, and then take your carriage bolt and screw that on to the spring. Now, because of the tight turns and everything up here, you want to put the spacer block up first and push that into the hole in the frame, and then go ahead and let the carriage bolt go in after that. It is a pretty odd angle up here. So, the block's in, and I'll go ahead and let the carriage built come in. Okay, and it's through. Now, just go ahead and repeat that for this one here that's closest to the back of the bumper, and then the one above it. And you're gonna do this on both sides. Okay. Now, with all the hardware in place, our next step is gonna be to raise the hitch up. But before we do that, take the top stud and push that in. We'll leave the wire out. We're still gonna thread our fish wire through the holes, but the way that the hitch comes up, it's gonna come up the side. And if this outer stud is out, it's gonna keep us from having the hitch come up. So, our next step is going to be to actually raise the hitch up. Now, I've got another tie-down strap over here, just to support this side while we do this. If you have an extra set of hands, of course, that's gonna be a lot easier. So, what we need to do is fish the wires down through the holes that are in the hitch itself. So, the bolt hole closest to it is gonna go in this, the oval hole on the hitch is gonna stay empty. And then this'll be our rear location on the hitch. And don't forget the side wire here, but remember the bolt we kept out. Go ahead and thread that through. Unthread the fish wire, and then carefully thread the serrated flange nut on. And that'll be enough to hold this side up. That way you can work over to the other side and just go ahead and secure all the hardware on both sides and snug it up. And then, don't forget to do the top one up here. You pull it out and I take my finger and put pressure on that bolt, so that it doesn't slide back into the frame. Then as you tighten that down, you could pull back on that nut, and that'll keep it from spinning. Now, once you have the serrated flange nuts tightened up on both sides, go ahead and torque these to the specifications that are found in your instruction manual. Now, with the hitch torqued up to the specs in the instruction manual, we can turn our attention to the plastic panels that we took off earlier. Now, with this particular hitch, you're gonna need to cut the panels. And basically, what you're gonna be doing is leaving this hole to mount up onto the frame. The rest of it, you're gonna be cutting off. So, you'll come over three and a half inches and then straight down. And so, this part right here will be eliminated. So, the attachment points are gonna be right here. That's gonna be up on the frame rail, and then the two outer tabs here and here. The only other thing we have to do is raise our exhaust back up. Just kinda line it up and you can actually slide the exhaust. And lastly, don't forget your can buckle tie-down strap. And that was a look at the Etrailer Class Three Receiver Hitch on our 2019 Ford Edge.
Average Customer Rating: 4.6 out of 5 stars (26 Customer Reviews)
This fully welded trailer hitch receiver bolts onto your vehicle's frame with no welding required. Matte black, powder coated steel is durable and corrosion resistant and creates a rugged look.Only the highest quality hitch receiver available! Instructions were very clear and the video made it painless! Installed in my own garage with no ramps necessary. Highly recommend.
So far it’s great, I bought it to use a motorcycle hitch mount for. The fit was perfect. The fish wire worked extremely well. I was skeptical. Getting it on was a bit tedious but with patience totally doable.
Looks great and instructions and online video made install easy. It took longer than expected but that is due to my large hands getting into a small space.
Overall the install was pretty simple and I'm glad they provided the fish wires, however 6 would have been more helpful than the 4 wires provided. I did have a fitment issue with both top bolt locations, which required filing/grinding down the receiver bolt holes about 1/16" of an inch to allow the bolts from the frame rail to pass through.
The hitch itself looks to be very well built. I have not installed it yet. My only complaint so far is the packaging. It was loosely in a box way bigger than the hitch. The hitch slid around alot and ripped through the box and scratched up the hitch. Not a big deal just aggravating.
shipment was quick and the product was easy to install. this was my second purchase and both were great experiences.
Delivery time was exceptional. When shipping a trailer hitch a little padding will go a long way. Customer service was excellent.
Package damage d have to look at it
Better Instructions would nice , poor picture quality
Always have a great experience buying from trailer. Fast shipping and quality products.
Fast shipping, great product
Said would take an hour. Or 1/2 hour if a pro. Consider myself a decent mechanic. Will lake an hour or less if you have done it before. And even less time if you have a lift.
Took me 2 hours to install.
went in a 2020 edge, perfect fit, easy install.
Great service great product. The instruction are clear, although they could have been printed a little bigger.
Delivered very quickly

Do you have a question about this Trailer Hitch?
Info for this part was:
At etrailer.com we provide the best information available about the products we sell. We take the quality of our information seriously so that you can get the right part the first time. Let us know if anything is missing or if you have any questions.


Jenny N.
9/17/2022
I recommend watching the video that we have on a 2017 Ford Edge.
Helpful Links
tv-install-etrailer-class-3-trailer-hitch-receiver-2017-ford-edge-e34ar.aspx