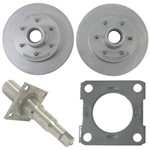
All the Parts Needed to Add Electric Over Hydraulic Disc Brakes to a Trailer
You may be considering adding electric over hydraulic disc brakes to a trailer that has no brakes or converting from hydraulic or electric drum to hydraulic disc brakes for improved stopping power and less maintenance. If so, you will need some basic information to build a system that will stop your trailer safely and dependably. The following article and tables provide information about your options and will help you find parts that will work together, including electric over hydraulic brake actuators. If you just want to find parts quickly, see our Parts Reference Table, below. To view an installation of hydraulic brakes on a trailer, see our video below.
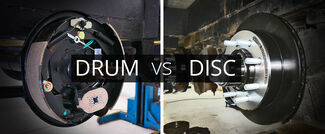
Why Go with Electric over Hydraulic Brakes
Going with electric over hydraulic brakes can give you a better braking system for your trailer than either straight electric or hydraulic surge brakes alone. Electric trailer braking systems provide fast response times and good control over the action of your trailer brakes, but they don't stop as hard as hydraulic brakes. They require the use of a brake controller that mounts inside your cab so that you can conveniently adjust the action of your brakes - how quickly they apply and how hard they stop, depending on trailer load and your preference. Hydraulic brakes can stop harder than electric brakes, but they are slower to apply. Conventional hydraulic brakes rely on a surge actuator that is built into the trailer coupler and that compresses when the tow vehicle slows and the trailer pushes against it. A delay occurs between the time the tow vehicle brakes are applied and the time the actuator applies the trailer's brakes. This delay is longer than that of electric brakes. Also, you have to lock out a typical surge actuator (which normally requires you to get out of your vehicle) so that you can back up the trailer. You don't have to do anything special to be able to back up a trailer that has electric brakes.With an electric over hydraulic brake setup, you get the best of both worlds - the great braking control that an electric brake controller provides and the stopping power of hydraulic brakes. Also, backing up will never be a problem. To set up electric over hydraulic brakes, you wire the tow vehicle for electric brakes and install hydraulic brake lines and brakes on the trailer. An electric over hydraulic brake actuator provides the key to going between the two types of systems. This type of actuator usually mounts on the trailer - it receives electric signals from the tow vehicle's brake controller and applies pressure to the trailer's hydraulic brake lines. With an electric over hydraulic braking system, you get the control and response time of electric brakes combined with the stopping power of hydraulic brakes.
If you install electric over hydraulic brakes, you can choose between hydraulic drum or hydraulic disc brakes. Generally, disc brakes are more powerful than drum brakes and require less maintenance because they have fewer moving parts.
Electric Over Hydraulic Disc Trailer Brakes Parts Reference
To operate the brakes, your trailer's axle must have a brake mounting flange attached behind the existing hub assembly on each side. Most axles have these, and if your trailer already has brakes (electric or hydraulic) it will. But if your trailer has no brake mounting flanges, you have two options:
You can replace the axle with a properly rated one that already has brake flanges welded in place. Ordering a new axle complete with hydraulic disc brakes may actually cost less than buying separate parts. However, to order a complete axle you will need to know the axle capacity, wheel diameter, wheel bolt pattern, spindle type (whether it is drop or straight) and type of brake assembly - in this case, hydraulic. You will also need to know the distance between your trailer's leaf springs, center to center, and between the hub faces.
You can purchase brake flanges and have a qualified welder weld them to the axle. When a brake mounting flange is welded to an axle, it must be welded square and concentric. This usually requires a jig to hold both parts in position. A trailer shop should have the equipment and personnel to weld brake mounting flanges to your axle.
Pictured is the most popular brake mounting flange. It's a square, 4-bolt pattern that is used on most axles up to and including 3,500 lbs. The next-most-popular flange is the 5-bolt design, which is commonly used on 5,200-lb, 6,000-lb and 7,000-lb axles. The pattern of the holes in the flange is standard, so all you need to note is the axle diameter and the number of holes in the mounting flange.
If you have a brake mounting flange on your axle or you will have one installed, you have two options. First, if you have idler hubs you can either replace them with an integral hub and rotor or install a disc brake kit that uses an over-the-hub rotor. An over-the-hub rotor kit makes it easy to upgrade an idler axle to a disc brake axle. Only the wheel bolt pattern is needed to select an over-the-hub disc brake kit. With over-the-hub disc brake kits, 14" and larger wheels are required, and fender clearance and wheel stud length should be considered because the wheel and tire combination is spaced 1/2" farther out due to the addition of the disc brake rotor.
The second and more popular choice is a disc brake kit with integral hub and rotor. If your trailer already has drum brakes and you're upgrading, this is definitely the way to go. You will have to measure your spindle or get the part numbers from the existing bearings and seal to make sure the hub/rotor assembly will work with the trailer spindle. Along with the the axle capacity, wheel diameter and wheel bolt pattern this will help to select the correct hydraulic disc brake kit for the trailer. If you cannot find part numbers for the bearings and seal, you can measure the spindle (see spindle diagram) at the inner and outer bearing surfaces as well as the seal contact surface to determine the correct bearing and seal parts needed to select a disc brake kit with hub and rotor.
Disc brake parts are manufactured with one of several different finishes - raw metal, e-coat, silver cadmium, Dacromet or stainless steel. Parts with different finishes will vary in corrosion resistance and price. The ability of brake parts to resist corrosion may be important to you if you use your trailer around water, especially salt water. Of the finishes, a raw finish will offer the least corrosion resistance. E-coat protects parts with a paint-like coating. The paint can get chipped or worn off, allowing rust to start. Both silver cadmium and Dacromet plating offer better alternatives for corrosion resistance and hold up very well. Stainless steel stands up the best to corrosion because it's virtually rustproof, but it's also much more expensive than the other kinds of finishes.
Next, you will need a brake line kit to plumb the trailer from the disc brake calipers to the electric over hydraulic actuator. Brake line kits are selected by the number of axles on the trailer. And because of the way disc brakes work, they require flexible lines at the brake caliper, so the part of the brake line that connects to the caliper is usually made of rubber. This same flexibility in the brake line is needed for brake lines installed on torsion axles because of the amount of movement of the hubs on those kinds of axles.We have an electric over hydraulic disc brake kit available for trailers with 3,500-lb tandem axles, and it includes everything you need to switch your trailer over to disc brakes for improved performance and greater stopping power.
Next, you will need to select an electric over hydraulic actuator that is compatible with disc brakes and that installs on the tongue of the trailer frame. Kits with plug-in connectors are available to make installation easier. Some electric over hydraulic actuators include breakaway kits. Most don't come with breakaway kits, but they will work with standard breakaway kits that are made for electric brakes.
Breakaway kits apply the trailer's brakes if the trailer becomes uncoupled from the tow vehicle. These systems include a battery and wiring, and sometimes have a built-in charger. When choosing a breakaway kit, be sure that it meets the minimum size required by the actuator. To find out, check the actuator's user manual or check with the manufacturer to see if a minimum size is required.
Finally, to operate your electric brakes, you will need to set up your tow vehicle with a brake controller and the proper wiring. A few actuators come with a portable or remote brake controller that communicates with the actuator by radio waves and plugs into a cigarette lighter or power plug in the cab of your tow vehicle. A remote brake controller lets you easily switch between different tow vehicles to pull the same trailer. You need to make sure that any brake controller that you are considering is compatible with electric over hydraulic actuators. At etrailer.com, we carry many popular brake controllers that are compatible with electric-over-hydraulic brake actuators. Our article, Trailer Brake Controller Information, explains brake controller similarities and differences, and our Brake Controller Application Guide will help you to determine all the parts needed for your vehicle.
Common Combinations of Trailer Brake Components
Typical Components of Integrated Hub and Rotor Hydraulic Disc Brakes
Direct Mount to Spindle
You can convert surge brakes to an electric over hydraulic braking system. To do this, you will need an electric over hydraulic actuator and a brake controller. For an electric over hydraulic actuator, I recommend looking at the Carlisle HydraStar…
It looks like you have certainly done your research in regards to the HydraStar Electric Over Hydraulic Actuator and the Titan BrakeRite EHB Electric-Hydraulic Actuator. In regards to repose time, this goes to the Titan BrakeRite EHB with a response…
It sounds like you might have an Ultra-Fab landing gear set. I have included a diagram showing how the system gets wired. On it the white wire is the power wire and the green wire is the ground.
For the absolutely best performance and reliability you can't beat the HydraStar electric over hydraulic actuators. We have found that they are the most reliable, react the fastest and just in general work the best. For just the actuator you…
The 052-003-00 number on your current shock is the part number from Dexter Axle. We don't carry the direct replacement but if the specs match for the Lippert Standard Replacement Shock #LC283271 and the axle this is being applied to is a…
Choosing the right height setting for your 5th wheel hitch is a combination of a few different variables. First of all you want your towing setup to be as level as possible. With your Montana High Country 340BH level you will want to measure from the…
I'm assuming you currently have electric brakes on your 5th wheel. The #KOD55FR, #KOD33FR, and #HSE7K-T1 you looked at will all fit your axles. Between the three, I recommend going with the Hydrastar Disc Brake Kit since it includes everything…
First you will need to remove the old hydraulic equipment. Remove the surge coupler or actuator, remove all the lines, and finally remove the brake assemblies. If you have 10 inch diameter hub and drums, you may need to replace those as well. If you…
The electric over hydraulic actuator we recommend the highest is the Hydrastar part #HBA16. This actuator is the favorite of our installers because of how well it works. It is the most reliable and has the quickest reaction time. It will be your best…
The Dexter Surge Brake Actuator #DX29FR features an electric lockout. The surge brake actuator itself does not need to be plugged in to anything for it to work. The electric lockout does need to be wired if you want to be able to back up without…
In order to switch from your electric brakes to a disc brake system there are several things you will want to consider. It is true that the disc brakes will provide better braking for you, although converting can require an involved installation.…
You do not need to add additional grease to a Dexter trailer axle hub that came pre-greased. It has the correct amount in it and is ready to be used. Adding additional grease will most likely blow out the grease seal.