
Summer Starts Here - Save up to 70%
To see if this custom-fit item will work for you please tell us what vehicle you'll use it with.
Thank you! Your comment has been submitted successfully. You should be able to view your question/comment here within a few days.
Error submitting comment. Please try again momentarily.
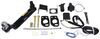
Fully welded vehicle trailer hitch is strong and durable. Draw-Tite's Tested Tough guarantee ensures that this hitch exceeds industry standards. The combination of an e-coat base and a powder coat finish provides excellent rust protection.
Features:
Specs:
Draw-Tite's Tested Tough program provides testing standards far superior to those outlined by the Society of Automotive Engineers (SAE), the go-to source for engineering professionals.
Each Draw-Tite trailer hitch receiver undergoes extensive fatigue testing and static testing with the ball mount that is either supplied or recommended for use with that particular hitch, thus ensuring results that are applicable to real life use. Fatigue testing is also conducted on hitches rated for use with weight-distribution systems.
In addition, Draw-Tite performs static testing on a simulated automobile, as opposed to the rigid fixture used for SAE testing, resulting in a more true-to-life scenario.
At etrailer.com we're committed to the products we sell, and to our customers. Our experienced and knowledgeable staff are available via both phone and email to address your questions and concerns for the lifetime of your hitch. The technicians at etrailer perform hitch installations on a daily basis, making them a valuable resource for do-it-yourselfers. The one-on-one, personal service you'll receive comes straight from an expert in the towing and automotive field. We've installed it, we've wired it and we've towed with it, so whatever your question, we can answer it.

California residents: click here
Videos are provided as a guide only. Refer to manufacturer installation instructions and specs for complete information.
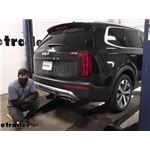
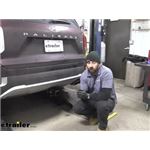
Hi, there Kia owners. Today, on your 2021 Kia Telluride, we'll be taking a look at and showing you how to install Draw-Tite's class III two inch trailer hitch receiver. And this is what our hitch looks like when it's installed. The receiver is gonna stick down here at the back, but the cross tube is gonna be completely hidden behind our bumper. That's gonna ensure that it does stay tucked under cause when you're standing up, you really don't notice it. But if you're crouched down, you are gonna notice that it's there.
But I really don't think that it attracts from the looks of the vehicle very much. It's a class III two inch by two inch receiver, so it's gonna be great for all of your towing needs. Whether you're wanting to get some work done or maybe pull a camper with it, or if you're wanting it just for accessories like bike racks and cargo carriers. This hitch uses a 5/8 inch hitch pin and clip. Now, one doesn't come included with the hitch, but we've got plenty of available here at etrailer.
You can also get locking ones to protect your investment. On bottom, we have hoop style safety chain loops that have a very large opening that should accommodate just about every shape, size and style of safety chain. If we take a look at our big guy here, it has no problem getting on there. And of course, that means our little ones here should have no problem as well. This hitch offers a 500 pound tongue weight, which is the force going down on top of our receiver.
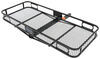
And that's going to be enough if you wanna load up a four-bike platform rack fully loaded up with four bikes. It is gonna be a little bit low for the largest cargo carriers loaded up to the max here from etrailer but it is gonna be very close. Tongue weight of 600 pounds would usually do it for those cargo carriers, getting them up to the max. So, you can see you're not really missing out on a whole lot of weight. You'll definitely be able to get a lot of stuff out of your vehicle and onto that carrier if you needed to.
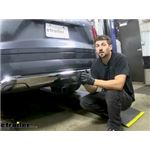
It also offers a 5,000 pound gross towing capacity, which is how much that it can pull behind it. So, if you've got a small camper, maybe a pop-up, or a boat that you wanna bring with you, you should be able to bring those things with you for the weekend and you could get some work done if you wanted to with this hitch as well. Now, it is also rated for use with a weight distribution system. When using a weight distribution system with the hitch, it does increase its weight ratings on its tongue weight up to 750 pounds. And it increases the gross towing capacity up to 6,000 pounds. We've got a lot of different styles of weight distribution systems here at etrailer. So, you can pick out the best one that's gonna work out for your particular trailer and vehicle combination. Now, as always, I recommend that you verify in your vehicle's owner's manual and ensure you don't exceed any of its towing capacities. Now, I've got some measurements for you to help you when deciding on accessories. From the center of our hitch pin hole to the edge of our rear bumper, looks like we're right at about 4 1/2 inches. That's important when determining if your accessories can be placed in the receiver tube without contacting the bumper. And if they can be placed in the upright storage position without contacting the bumper. And from the ground to the top inside edge of our receiver tube, we're at about 13 3/4 of an inch. And that's important when determining if you need a drop or rise, or a raise shank for any of your accessories. Now, that we've covered some of the features of our hitch, why don't you follow along with me in the shop and we'll show you how to get it installed to give you the confidence to do it at home. We'll begin our installation here at the back of the vehicle with our lift gate open. We need to remove the spare tire, get that out of our way. So, we'll lift up on the compartment cover here at the back, and we'll just set that out of our way. Below that, you'll find your spare tire removal mechanism here. So, we're just gonna lift up the cover for that. It's labeled right there on top. I'm gonna use my flat-bladed screwdriver to just help pop it up. And here we can see the hex that we'll use to lower down the spare tire. Your spare tire tools are gonna be located under the cover here on the driver's side. So, once you looked up on that, you can grab your tools. There's a little pouch there and we'll just take everything out, so we can get this removed to there. This piece here will go right on there like that. And then we can put the other mechanism here on top. And then we can just start lowering our tire down. We can then grab our spare tire from underneath. We'll slide the cable through the center, and then just set this off the side. We'll now remove our under shield here over on the driver's side. You can see that we've got three pins there that we need to remove. It's a little bit wet out so it makes it a little harder to see, but there are little gaps on these pins and your screwdriver will fit right into one of those openings. You can get a little twist that'll pop up the center, and then the whole pin just pulls right out of there. We'll get all these ones here on the bottom removed. And then if we look straight up on the side of our panel, there's gonna be some plastic nuts there. We're gonna take our 14 millimeter socket and slide it on there, and just kind of pull down just a little bit. Just a little bit of pressure really makes a difference in getting those plastic nuts to come off. Sometimes they wanna just kind of spin and not actually come off. And then we'll just set this aside out of our way. So, we got the driver's side exposed that we can get our hitch up. But the passenger side here has got the exhaust in the way, so we're gonna lower it down. We'll take a strap first, and we're just gonna put that underneath here on our suspension. And then this way, when we take the exhaust loose, we can control how far it goes down so we don't actually go down too far and cause any damage to it. Our hangers, we're gonna have one here at the back of our muffler. And there's also one at the front corner side here towards the passenger side on the outside as well. So, we're gonna get both of those off. We'll do that using a little bit of silicone spray. This will help make it slide off of there easier. And then we'll just take a pry bar to it and we can just pop it off of there. We'll repeat that for the one over here. And then we're gonna come to the center of the vehicle here. There's also a hanger here in the middle. We're gonna pop this one off of here as well. If you don't have really anything to pry on, in a lot of cases, if you just kinda put your pry bar on there and give it a good push, you can usually get it to just pop right off of there. So, we saw that our strap here caught it. We can then use our strap and slowly just kind of lower it down till we've got plenty of room to work. And this is probably about fine right here. We can easily get our hands up in here and our hitch moved into place. We're gonna go ahead and remove this panel here at the center. The instructions request that you trim it out, but we're gonna take it out of here. It'll be easier to trim if it's not in place. And the instructions only have us trim a very small amount out. And there's a good chance that we're gonna be able to put this panel back up without having to make any modifications, but let's evaluate that once we get the hitch in place. We're gonna remove the two pins that are located in the corners there. Just stick your blade in with your screwdriver and give it a twist, and you can pop those out and just pull them out. And then on the back side, we've got a couple of screws we need to remove. So, we're gonna remove screw here and here with a Phillips bit. And then we can start to take our panel off. You wanna be underneath anyway. And you wanna grab yourself a small pick so that way, you can release the tabs that hold it's place. We're gonna start just kind of on the sides by popping these down. You can see the tabs here we're gonna push on to get these to pop down. We'll do the same thing over here on this side. And then once we get here to the center, this is where our pick comes in handy. We're going to take a pick, and then as we pull down with a little bit of pressure on these, you might see some tabs poking down and they catch sometimes. Just give you a little bit of a pull with your pick and you can release each one of these tabs. And we're just gonna work our way down, releasing each one of these as we go. Once we get that last pin removed, our panel will drop down, and then we can set it aside. Now, we'll take our hitch and we're gonna lift it into position. We're gonna start by going up over our exhaust. And then we'll line up the holes in our hitch with the holes in our frame, and slide our hardware through. Now, on the passenger side here where it goes over the exhaust, you're only gonna have a single hole. And you're gonna use the more brass colored bolt with a flat washer on it through that hole. And it is gonna be fairly stiff when you're trying to push these in. So, you may need to use a small hammer to assist you. You could also try to get that washer. If you get the washer further down, it makes it slide in a little bit easier. And on the other side, we're gonna use the silver ones with conical tooth washers on them with the teeth facing towards the hitch. These are gonna slide from the outside of our frame, through our hitch, into the holes, into the frame. We'll have two for this side while there was only the one on the other side. Each of the bolts that we just passed through, we're gonna take a conical tooth washer, put it in place with the teeth facing towards the frame. And then we're gonna put a nut on it after that. We'll just repeat this for the two remaining bolts that we've just put through. We'll now take the smaller bolts that come in our kit. They're gonna be black in color. And we're gonna put conical tooth washers on them as well with the teeth facing away from the head of the bolt, so when we thread it up into the bottom of the frame here, the teeth will be facing towards our hitch. These bolts are smaller and the conical tooth washers are a little bit smaller as well. You really can't get it wrong because the previous bolts that we had just installed, the conical tooth washers would not fit over those anyway. So, let's get those started. Sometimes you gotta shift the hitch around just a little bit to get your other bolts in. We can now go back with a 16 millimeter socket and tighten up our lower bolts. And then we can go back and tighten our side bolts using a 19 millimeter socket wrench. We can then go back and torque our hardware to the specifications outlined in our instructions. So, now with everything tightened and torqued, we can go ahead and put our panel back into place here. And it's very close but it is gonna hit here on our hitch, so we are gonna have to make some modifications to it. But we can go ahead and hold this up here to it just like this. And we can actually get the best measurement by just marking it right on the side of our hitch here. And that will ensure that we've got the perfect width to go around our hitch. We'll then just follow our instructions for how deep we need to make the cut. So, now that we've got it marked out, we're just gonna use a pair of snips, it's all plastic here on the backside and everything, to cut this out. After we make our cuts here, we may have some rough edges or anything like that. We're gonna take our file to it just to clean that up to make sure it's nice and smooth. We can then also take a little bit of rubbing alcohol on a rag, and any marks that we had made when we we're trimming it out, we clean those off as well. So, now that we've got our all trimmed out, we can get it reinstalled in there. We're gonna start by getting all of these lined back up and clicked into place. And then we're just gonna take our screws and put them right back into the paneling. Once we get this one in, we'll do the same thing over on the other side. We can then reinstall our clips on our panel there. And now at this point, we've got our hitch all torqued down, our panel trimmed out and everything in place. We can reinstall our exhaust under shield and spare tire in reverse order of how we removed it. And that completes our installation of Draw-Tite's class III two inch trailer hitch receiver on our 2021 Kia Telluride..
Average Customer Rating: 4.7 out of 5 stars (101 Customer Reviews)
Fully welded vehicle trailer hitch is strong and durable. Draw-Tite's Tested Tough guarantee ensures that this hitch exceeds industry standards. The combination of an e-coat base and a powder coat finish provides excellent rust protection.This is the a
second hitch from E-trailer. Easy to install and excellent in use. You can not go wrong trusting this company and their products!
This hitch, like every other hitch I've bought over the years from etrailer.com, was a perfect fit for my 2020 Palisade. The directions are thorough and all hardware is included. I was able to install mine solo without having to lift my vehicle. I used two jack stands to balance the hitch as I moved it into position. Once you get the top bolts in place "it ain't going anywhere". Torqued everything down to specs. Was pleasantly surprised I didn't need use any pivot extenders / etc. Everything fit nicely with 17mm and 19mm sockets, 17mm and 19mm open end wrenches, and a torque wrench to finish it off.
The service and delivery time are consistently outstanding!
Fit a 2022 Kia Telluride SX perfectly. No cutting of the bumper. No cutting any trim etc. Watch the video that etrailer made. It walks you through the process perfectly. The bolt on the passenger side WILL fit past the heat shield. Put the washer against the opening first then put the bolt through. It will go with a little pressure. The silicon lubricant helps to get the muffler hangers off. Undo the two muffler hangers near the bumper and the one in the middle. Have a rest for the muffler at this point. You can slide the rubber muffler brackets off by hand if you spray them first. No tool needed. Get it at any auto parts store. This can be done alone but if you have a helper to get the bolts through while you hold the hitch it helps. Total install took me about an hour and a half. Bring your iPad with you and pause the video as you do each step. Average Joe can do this.
This item was installed on a '21 Hyundai Palisade with the Calligraphy Trim level. It fit perfectly with NO trimming required to the rear bumper lower edge. This is an important fact as the similar Drawtite prduct does NOT fit on the Calligraphy version of the Palisade without trimming. We also appreciated the excellent customer service demonstrated when we needed to do an exchange from Drawtite to Curt.
This is my third purchase from etrailer and the only one that gave me restoration of future orders. The trailer hitch was delivered in a battered box, with one end of the hitch hanging out of a hole in the box. Several spots on the hitch already have chipped or removed paint.
Due to poor packaging, our item arrived damaged in 2 spots. The box torn left 2areas where the protective covering is scraped off, meaning it will be exposed to the elements and rust.
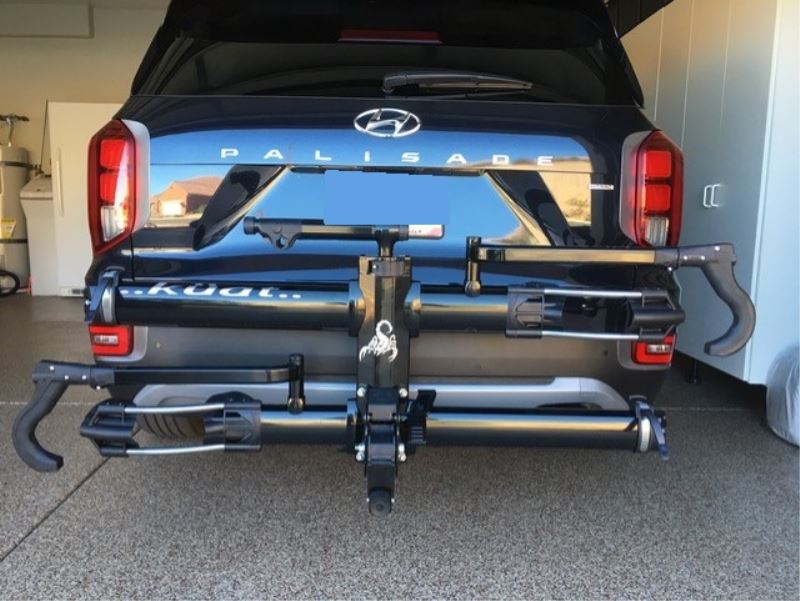
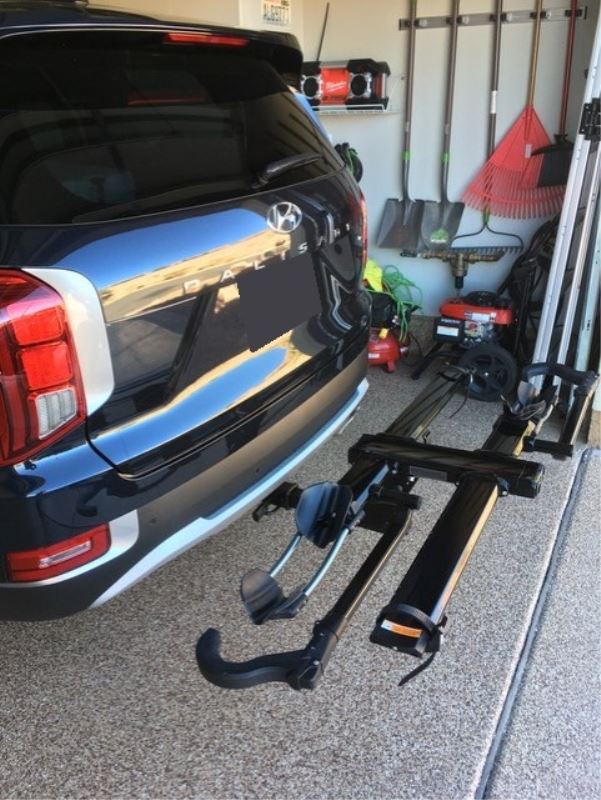
This does NOT fit a 2020 Palisade. Install was easy enough but as you can see from the picture the metal piece is pushing up into the bumper causing it to deform. There is no way around this unless you are willing to cut into the bumper. I would not recommend this hitch to anyone with a Palisade. It was obviously designed for another vehicle.
Easy install, perfect fit
High quality, great hitch. etrailer was super easy to work with and their how-to videos are great!
Thanks for checking back. I had two issues. First the power coating is very poor. A small amount of paint had chip off when it first arrive. I patched it but a lot more has fallen off since then. I have powder parts in my car restorations work and your trailer hitch was poorly power coated. I expect it to be nothing but rusted metal in couple of years.
Second item is the fit wasn’t that great. I had to cut the exhaust heat in two different locations. Now that I finally have the hitch installed the exhaust system bangs against the hitch every time I drive over a bump or ruff road. This is the third e trailer hitch I have installed and by far the worst. I wish I had bought the car manufacturers hitch.
Sorry for the poor review but I am just disappointed. In the past I have always had good experience with your company and have recommend you to friends and family but this last purchase was a just plain bad.

Jenny N.
9/13/2022
With the powder coating of the hitch, I recommend touching it up with a can of Rustoleum if you have not already done so. It will help prevent rust in the future as long as you keep an eye on it. For the exhaust ratting against the hitch we do have an FAQ with possible solutions. Please see the FAQ below.
Helpful Links
It was backorder for a while, but they kept me informed when it would ship and when it would arrive. I did not install it myself, but it looks great and fit perfectly!
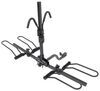
I have ordered from etrailer before and have been very happy with the service and products. The customer service staff stayed in contact with me when I had questions and when my order arrived, The Kuat NV 2.02 was a great price when compared to all other on-line stores. We are very happy with the high quality and function of the Kuat NV 2.0 bike rack. Thank you!
It's very solid and heavy, really need 2 people to install it and it fits perfectly. Here are few suggestions: The bolt for the single long screw on the right side should be a different color than the 2 bolts on the left. 1 washer on the left side needs to grind down to fit for the 2023 model. Installation instructions to trim the fascia should be in BOLD to tell this is a must.
I give etraler.com 5 out of 5 star for their customer service support. However, the product itself is not what I expected. The hitch did not fit my car perfectly. I had to trim off the bumper to make it flush. Also, the design did not account for the bolts interfering from placing back the original plastic undercover. I had to trim the plastic cover to make room for the bolts in order to place them back. In addition, round tube was in direct contact with the muffler shield. I had to bend and modify the shield so that the bar would not touch the muffler heat shield. Overall, there were some design flaws that did not account for several areas and required some modification on my end. I just expected something more "fitted" with this hitch design.

Sierra K.
6/10/2021
Thank you for your review. All of this sounds pretty normal. It sounds like your hitch was a bit flexed. I will attach a help article explaining flex. Also, the hanger bracket sometimes becomes loose and all it needs is to be bent holding the muffler tighter. Trimming is also sometimes needed. This sounds like normal tweaking for your hitch install.
Helpful Links
This was not difficult to install at all. While I was waiting for the hitch to arrive, I watched Youtube videos on the instillation. When the box arrived I already knew what I needed and got after it. Very nicely designed so that the only piece that is visible from the bottom is the square tube connector for the hitch.

Enrique N.

5/4/2022
Well it’s been a year and we could not be happier! This hitch has more than served its purpose. We use it quite regularly. When we travel we want our dogs to have all the space inside our vehicle Hyundai Palisade. For that reason we mount a luggage rack to the hitch and we’re able secure everything. From time to time we also pull our trailer and it performs flawlessly! The vibration pin is a nice touch. I don’t have that on my pick up truck and I can tell the difference between the two
I rec'd the hitch less than 48 hours after I ordered it...sent from MO to PA...amazing. Great online installation video. I was able to easily install it the same day I received it. I couldn't be more pleased with the delivery, installation, and the product!

Gary
1/22/2022
A year later my feelings about the hitch are still the same...great product!! No complaints whatsoever!
Perfect Fit! 2023 Kia Telluride

I had never heard of etrailer when I purchased this trailer hitch from them. I was blown away by the customer service, speed of delivery and quick resolution to my issues (the carrier that delivered the product mishandled the box and parts were missing). I've since ordered other products from them and have recommended them often. Great company to do business with.
Purchased a Draw tite hitch & wiring from etrailer for my sons Palisade. We watched the ‘how to’ video before starting the install. Great info gots us going in right direction from the start. As described start to finish in less than 60 mins!
Both hitch & wiring fit perfectly. We did have an advantage using my 36 in hydraulic scissor lift. Per the video, spray rubber exhaust hangers with silicon spray & they pop off with little effort. We used a jack stand to prop up exhaust while installing the hitch. Only small glitch was reinstalling the drivers side underbody trim. The hitch bolt created a interference to lining up the 14 mm bolt. A small clip off of the plastic underbody trim gave clearance & we finished the job.
First time buying from etrailer but definitely not the last! Great people to do business with
Awesome products. Ridiculously easy to install. Crazy quick shipping!
Install took a little longer than what was shown in the video using basic hand tools. Website said no cutting of the rear facia but the instructions that came with it stated clearly that it would need to be cut to fit. I installed it without cutting the facia. Receiver makes contact with the facia where it drops down for the trailer hitch. It bent the plastic down a bit and was able to install it without cutting. Packaging was good when it was received but paint was chipped in a couple of places when I opened the box. Overall it was a good fit, very well made and welds were good quality. Quick shipping, it arrived when they said it would. Staff at etrailer processed order quickly. I have bought from them in the past and will do so again in the future.
4th hitch I Ave installed with no issues. Installation videos were a great help.
Great fit for a Kia Telluride 2020. Has worked well. I have not used it to pull anything strong, have just been using it as a bike rack but works like a charm.
Wonderful experience! I ordered this along with the etrailer 24x60 cargo carrier and received both within 2 days of ordering. Both have performed flawlessly! I couldn't recommend a company and their products more.
Do you have a question about this Trailer Hitch?
Info for this part was:
At etrailer.com we provide the best information available about the products we sell. We take the quality of our information seriously so that you can get the right part the first time. Let us know if anything is missing or if you have any questions.


Jenny N.
4/26/2022
I will have our Customer Service team reach out to you. I recommend touching up the affected areas with a rust resistant paint which you will then have on hand for regular hitch maintenance. When the hitches are installed on the vehicle ove time they will be hit with raod debris which will cause nicks and scratches over time.
Helpful Links
faq-rust-prevention-maintenance.aspx