
To see if this custom-fit item will work for you please tell us what vehicle you'll use it with.
Thank you! Your comment has been submitted successfully. You should be able to view your question/comment here within a few days.
Error submitting comment. Please try again momentarily.


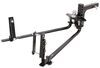
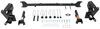
Fully welded vehicle trailer hitch is strong and durable. Draw-Tite's Tested Tough guarantee ensures that this hitch exceeds industry standards. The combination of an e-coat base and a powder coat finish provides excellent rust protection.
Features:
Specs:
Draw-Tite's Tested Tough program provides testing standards far superior to those outlined by the Society of Automotive Engineers (SAE), the go-to source for engineering professionals.
Each Draw-Tite trailer hitch receiver undergoes extensive fatigue testing and static testing with the ball mount that is either supplied or recommended for use with that particular hitch, thus ensuring results that are applicable to real life use. Fatigue testing is also conducted on hitches rated for use with weight-distribution systems.
In addition, Draw-Tite performs static testing on a simulated automobile, as opposed to the rigid fixture used for SAE testing, resulting in a more true-to-life scenario.
At etrailer.com we're committed to the products we sell, and to our customers. Our experienced and knowledgeable staff are available via both phone and email to address your questions and concerns for the lifetime of your hitch. The technicians at etrailer perform hitch installations on a daily basis, making them a valuable resource for do-it-yourselfers. The one-on-one, personal service you'll receive comes straight from an expert in the towing and automotive field. We've installed it, we've wired it and we've towed with it, so whatever your question, we can answer it.

California residents: click here
Videos are provided as a guide only. Refer to manufacturer installation instructions and specs for complete information.
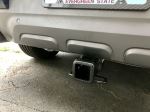
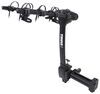
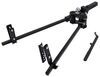
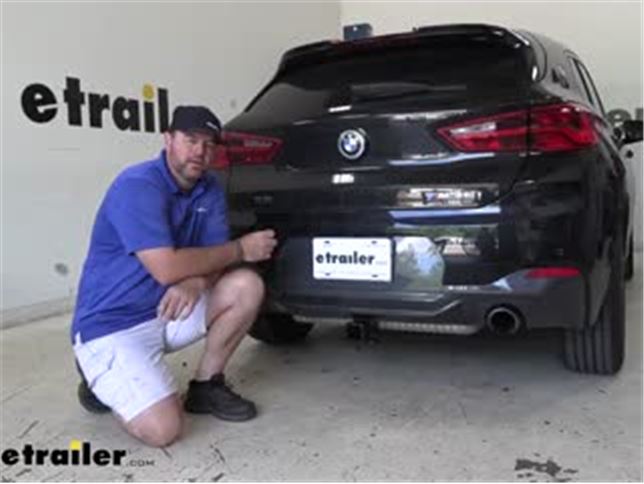
Shane: Hey guys. Shane here with etrailer.com. Today I have a 2020 BMW X2 M35i and I want to walk you through how to install the Draw-Tite Class III trailer hitch receiver. This is what's going to look like when it's on the vehicle. You can see it maintains a nice clean look. The cross tube is completely hidden behind the bumper fascia.
Only thing we really see is the receiver tube. As I mentioned, it's going to be a Class III hitch, two inch by two inch receiver tube opening. Nice thing about that is, it gives us a lot of extra availability for different hitch mount accessories. Our two inch by two inch receiver tube opening is also going to have a reinforced collar, gives us a little extra stability there. Safety chain loops, you can see very large openings, will accommodate different size safety chain hooks.Our hitch pin ball, which is going to be this hole here, is going to be 5/8 inch in diameter.
It's going to take a standard 5/8 hitch pin. Hitch pin and clip does not come with this hitch. However, they can be found here at etrailer.com. And this is going to hold any of your hitch mount accessories in place. This hole here is going to be for a J-Pin stabilization device.
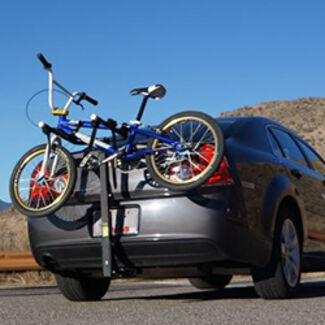
And what that does, is it takes any shake and play out of any of your hitch mount accessories. The J-Pin also does not come with this hitch, however, they can be found here at etrailer.com.Having that two inch by two inch receiver tube opening, it's going to give us a lot of different options for each mount accessories, as I mentioned before. Bike racks, cargo carriers, ball mounts. Bike Cracks, we don't have to try to load the bikes inside the car or on top of the vehicle. Cargo carriers, we can get some cargo off from inside, put it on the cargo carrier so that would make more room for our passengers.
We want to put a ball mount on and you may want to pull a small trailer. It's going to be able to accommodate all of those. As far as our weight capacities go, we're going to have a 525 pound max tongue weight. That's going to be the downward pressure on the inside of the receiver tube. So, when you're putting your bikes on, cargo carrier or pulling that small trailer, make sure you're not exceeding the downward pressure.We're going to have a 3,500 pound gross trailer weight. That's how much the hitch can pull. That's going to be the trailer plus the load included. I always recommend checking the owner's manual of the vehicle. Make sure the vehicle can withstand that amount of weight. You're going to go with the lowest number between the vehicle and the hitch. As far as our measurements go, from our hitch pin hole to the outermost part of our bumper, it's going to be about four inches. The number's important for any of your hitch mount accessories, like your bike racks and cargo carriers and they fold up against the vehicle. You want to make sure that they're not going to make contact. From the ground to the top inner most part of the receiver tube, it's about 12 inches. That number is important for any of your hitch mount accessories that may require a little bit more ground clearance.Now that we've gone over some of the features, let's walk you through how to get it installed. For our installation, we're going to take an eight millimeter socket and we're going to remove the eight bolts that run across the bottom of our fascia.(silence)Next, on the backside of each wheel, we need to remove some rivets. They're actually going to tell you to move the three, however, if you only move three of them, you're not going to be able to get to a bolt that's holding fascia on up here. So what I suggest is picking up some extra rivets, plastic rivets and what we're going to do, is we're going to move one, two, three, four, five. All you're going to need to do for the top four, you're going to take a drill bit. We're just going to drill right through the center.(silence)For the bottom one, since we can't get it in there, underneath the car right here, this panel's open. What we're going to do, we're going to take a pair of snips and we're going to snip the back of the rivet and we should be able to pop it off. Right here, it's going to be the back of it. Take a trim panel tool. You're going to slide it in back behind in between the fascia trim piece and the rivet and we're just going to pop the head off. Make sure you're using a plastic trim panel tool. Once you get those out, what we're going to do, we need to loosen this trim piece. This kind of inaudible 00:05:03 We're going to work our way up. So this bolt and this one way up here is the one that we need to take off. We use an eight millimeter socket to remove this.(silence)We're going to repeat that same process on the other side. Next thing we're going to do, we need to remove the tail lights. We have a plastic screw right here. We're going to move that taking this panel off. We're going to take a 10 millimeter socket and remove these two nuts.(silence)We're going to take our tail light and we're going to slide it straight back. Now remove the wiring, push this little tab down and pull it out. Set your tail light aside and take an eight millimeter socket and you're going to remove this bolt. Once you're in there, remove that bolt. You're going to do the same thing on the other side of the vehicle. Now, before I start removing the fascia, what I like to do is take some painters tape and we're going to go right along this edge of the fascia and right along this edge of this trim piece on both sides. That way as we're taking it off or going to put it back on, when these two pieces meet, we're not damaging the paint. And if you really want it to, you can run piece all the way up to this edge too.(silence)Next, we're to start removing the fascia. It's a good idea to have an extra set of hands. If you don't have an extra person, take your box where your hitch comes in, set it on the ground. You're going to start on the outside and work your way to the center. Using the box, once you get one side off, you can lay it on the box instead of on the ground. It keeps from getting damaged. You're going to need your trim panel tool. What we're going to do, is we're going to reach down where our fascia meets the top edge of our car here. We're just going to pull out right here. If you just pull on it, they could break off. So what I like to do is kind of pry up on this just a little bit and they'll help pop that loose. We'll do that same thing on the other side. And then we're not going just to pull this off because we have sensors and we want to make sure we disconnect that because if we just pull it off, we could potentially damage the wiring. So we'll slide this off.If you see the Fascia is not wanting to come off, come down here to this corner and then you're going to pull this down, pass those two little tabs. And then in here, we're going to have several wires. We're going to have one here. You're going to pull up this gray tab and push back to release it. We're going to work our way across. You're going to remove any wiring that's attached to our fascia. Next, we need to remove this plastic piece. We're going to have an eight millimeter screw bolt here. Then we'll have another one over on the other side. One thing we don't want to do is just pull it off. This wire that runs right here, we may have to disconnect. We're going to remove a little tab right here on each side. Kind of a pain to get off.You take a flat-head screwdriver, there's an opening right on this side. What we're going to do, is we're going to slide it on the top edge of this black piece. We're going to take the flat side here and we're going to twist it and it's going to push up the gray and down on the black. Just like that. This wire here, we need to disconnect off of the panel and then we'll set the panel aside. Push down that tab right there and pull out. Take an 18 millimeter socket, we're going to remove this nut and this nut on each side of our bumper beam and then remove the bumper beam itself.(silence)Slide this off. If this piece right here is damaged in any way, we need to put sealant on the back of the hitch before we put it in place. Since ours isn't damaged, we won't be putting silicone sealant on it. This is in pretty good shape so we're not going to worry about it. Now we're going to set our hitch in place. We're going to use it to lay the template. Were going to inaudible 00:10:57 on the car. This is going tell us where we need to cut on the the bottom lip of this heat shield. So we're going to use our hitch. We're going to mark the edges and we're going to trim it out. What I'm going to do is, I'm going to trim back to this edge right here for now, see if it's going to fit and then I can trim extra later on if I need to. I'm just going to use some sheers. What I'm going to do is, I'm going to take this part and I'm just going to fold it up. Take a pair of pliers and I'm going to pinch this bottom edge.(silence)Like that. We'll test fit our hitch and see if we're still making contact. So I'm kind of making contact with a hitch here or the down tube. I'm going to go ahead and trim that just a little bit more and we should be good to go. Once we get our hitch up, we're going to reinstall our bumper beam over the top of it. Make sure your hitch is centered and then we'll just re-install the existing hardware that came off the bumper beam originally. Once you have your hardware back in place, you're going to tighten and torque it to the specifications in the instructions. So we have our hitch torqued to the specifications and instructions. We can go ahead and re-install this plastic panel. Don't forget to plug in your wiring. There's going to take these and snapping back into place on each side. And then re-install the eight millimeter bolts that go in the bottom.Actually, we can reinstall our fascia in a reverse order from the way we took it off. You want to make sure you connect all your sensor wires that you disconnected when you we're removing it. When we put them back on, what you want to do is instead of starting from the outside, we're going to start in the middle and work our way to the outside. So we'll get everything lined up. Start from the center and work your way to the outside. Once we have our fascia clipped back in, go ahead and install these two bolts on each side and then you can remove all of your tape.(silence)Once you remove the tape, you can go ahead and pop this back into place. Once you have your trim pieces pushed back in place, you come back under and re-install the eight bolts that we removed from the bottom of our fascia.(silence)After your fascia is re-installed, get your tail lights put back in and we're going to come down and we're going to install the rivets that come in the kit. Again, they're not going to give you enough rivets to fill the two extra spots we had to take out on each side. So you're going to make sure you're getting extra ones. Rent a rivet gun, probably from a local auto parts store. All you're going to do is take the long piece there, put it inside and then take this guy up inside the hole and then squeeze. And then it pops off the head like that. Repeat that for all the holes that you remove rivets from. Once you've got everything re-installed, you're ready to go. inaudible 00:15:10 for look and installation on the Draw-Tite Class III trailer hitch receiver on a 2020 BMW X2 M35i..
Average Customer Rating: 4.9 out of 5 stars (22 Customer Reviews)
Fully welded vehicle trailer hitch is strong and durable. Draw-Tite's Tested Tough guarantee ensures that this hitch exceeds industry standards. The combination of an e-coat base and a powder coat finish provides excellent rust protection.
easy install, perfect fit, good customer service. I hitch is believe made in the USA - manufacturer consider sourcing your hardware locally as well.
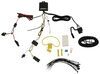
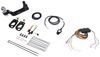
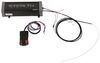
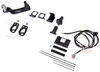
I have a 2018 BMW X2 that did not come with a factory tow package. I had an etrailer hitch and 4 way plug installed last year and has been perfect since. I just recently purchased a camper and needed to have a Brake controller & Brake controller 7 way deluxe kit installed. My mechanic installed them with the detailed instructions that the units came with without any issues. The Tekonsha P3 is extremely user friendly and is working flawlessly. A bit overkill for my car being I can only tow max 3500 pounds, and my camper is 1 axel. this unit is rated up to 3 axles. I look at it like this way, when I trade in my BMW I will take my P3 with me. etrailer is amazing with the support & products they provide and I highly recommend them to anyone who asks me.
Fits perfect. Only comes with 6 fender rivets but actually need 8 replacements. The plastic rivets supplied are slightly smaller diameter than needed so I had to get some aftermarket ones. Other than that the installation and instructions went well.
Excellent well made hitch, installed it on my BMW X2 in under 2 hours. Delivery time was extremely fast! Would highly recommend your company! Thank you
Leonard

7/4/2023
Excellent product no signs of any rust or problems. Fit my X2 perfect , very neat, clean design.
Pros:
Well built - solid construction. Good value. Some rough welds but you don't see them because the hitch is mainly hidden behind the back bumper panel. I like the fact that the hitch is designed to fit the vehicle. I have not had it long enough to see if it rusts or not.
Cons:
Nowhere in the instructions nor pictures did it mention that you have to cut the heat shield. The aluminum heat shield wraps around to protect heat from the exhaust but it requires that you cut it for the hitch to fit. A big miss in the instructions. You need sheet metal cutters and some patience.
Plastic rivets. Six come in the package - 3 for each side. However, you actually need to remove at least 5 per side so 10 in total in order to access the screws holding the bumper panel. Frankly, they are cheap so why not include 15 in case a couple of them break on install.
Wheel removal. Oh yes, no mention that you have to remove the back wheels to be able to reinstall the plastic rivets. There is not enough space to insert the tool if the wheels are on. Adds time and more hassle to remove the wheels.
Panel removal tools are essential, particularly for the wheel arch trim. Each clip is spaced about 6 inches apart which would be useful to know in advance. Use masking tape to protect the bodywork as the plastic trim is surprisingly soft.
Overall. 3-Stars because the instructions missed the need to trim the heat shield and because there are not enough plastic rivets included in the kit.
I had an auto body shop install it. They said it fit perfectly and was easy to install.
This hitch is great! Order came super quick and we installed this on our own on our BMW without a hitch! Haha. Thanks!

Rocky V.
1/27/2021
This hitch has been great! It’s been super solid with no problems at all. Definitely happy with it.
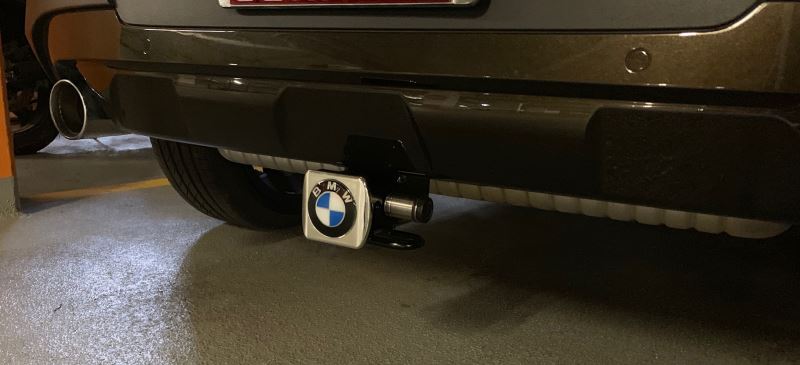
I’ve put 2 other etrailer hitches on myself but with my new bmw 2020 x2 m35i I was not that adventurous. After having a local body shop tell me it didn’t fit, Bob and team at trailer were awesome. They scheduled to have me bring it in and installed it for me. The install photos are my vehicle and they did an awesome job. A little trimming of the heat shield was required on the 2020 m35i, but I couldn’t be happier. Highly recommend these guys and this Company.
Solid hitch. Fits very well and only the receiver portion of the hitch is visible below the bumper. The X2 installation looked a little daunting but the instructions were good and they covered all of the steps and fastener locations so it just took a little time to work through the process. It took me about 2 hrs but I was being cautious. The hardest part was removing the plastic trim panel below the bumper because the snap tab was very difficult to deflect. Another reviewer mentioned the rivets. It came with 6 and they were the right size and quantity for my car. However, I snapped one before it was seated so I will have to get a replacement. It would be nice if they included a spare or two. Overall, great product and the installation went smoothly.
This item shipped quickly, and my local body shop installed it the day after they received it. Etrailer.com's customer service was very friendly! It was really helpful that I was able to verify this hitch would fit my particular car. This ended up being far cheaper than sourcing a hitch through my local rack shop. 5 stars!
Service from etrailer was excellent. I was informed about product status, shipping, etc. Fit my vehicle perfectly after a professional installation. Well-hidden too.
Hitch receiver and wiring for BMW X2 work great.
Ordering was easy and so was the instal lation!!
Fits PERFECTLY!!!
Excellent product, good price, good ser vice
.
Easy to install and good fit.
Easy to install!

Do you have a question about this Trailer Hitch?
Info for this part was:
At etrailer.com we provide the best information available about the products we sell. We take the quality of our information seriously so that you can get the right part the first time. Let us know if anything is missing or if you have any questions.


Teresa
12/24/2021
Still working flawlessly! I am extremely happy with all the products I have purchased from etrailer.