
To see if this custom-fit item will work for you please tell us what vehicle you'll use it with.
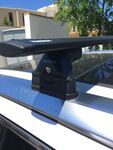
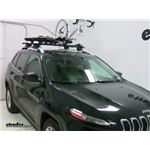
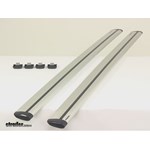
Extremely quiet, aerodynamic crossbars attach to Yakima towers to create a stylish roof rack for your vehicle. Rubber strips in T-slots push down to load carriers or accessories - no need to trim. Full-length aluminum bars maximize carrying capacity.
Features:
Yakima JetStream Crossbars - 50" Long - Silver - Qty 2:Videos are provided as a guide only. Refer to manufacturer installation instructions and specs for complete information.
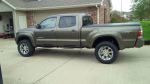
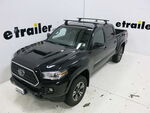
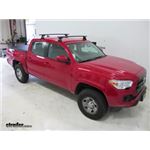
Speaker 1: Today on our 2017 Toyota Tacoma, we're going to be test fitting the Yakima JetStream roof rack system using the baseline towers. We're using the 50-inch JetStream bars, part number Y00425, baseline tower kit, part number Y00146, and we need two base clip sets, part number Y06145 for the front, and Y06128 for the rear.Now a measurement that we often get requests for is the distance of the crossbar from the roof of the vehicle. This can help you out with garage situations and things like that to make sure you have enough room. Basically from the top of our Tacoma to the top of our crossbar, it's about 4 inches. That's from the lowest point of the roof, not on top of the corrugated part.Now, each of our covers does have a hole for a lock. You can pick up the Yakima same key system, slide it in there and turn it, and turn the basic cover into a locking cover.Something I really like about the Yakima roof rack system here with the baseline feet is that any point of contact we have with our vehicle is going to be rubber coated.
So our foot packs, where they come down and make contact with our truck, we've got that nice rubber pad, and where the clips come around the edge, also completely rubber lined, all the way from this point all the way to the end of the clip. So any worries about damaging paint or scratches will be very minimal, especially if you take the time to clean off your roof before installing the system.You'll notice the design of this style bar is really sturdy. They've got the T-slot blocking piece in there so you can just push that down and slide your item into place. That's going to prevent you cutting this for every accessory that you might have. Also, you can see it's kind of in an H pattern.
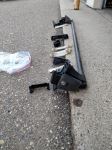
That's going to give a superior strength and durability.Not only do we get questions about how it fits and how it looks, but also about how to put it together. We've already got the front crossbar on the vehicle. I've already got one side of our rear crossbar set up. We want to take just a second to look at the assembly process for the foot pack itself. We're going to start with our adapters designed for use with the JetStream bars.
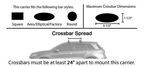
We're going to place those in and push down until we hear the click. You can see that's going to allow a little bit of adjustability there. For our application, we want that to be set right in the middle, so both sides would be even. See the screw right down here That's for that, and then we also need to adjust the toe. See right here we've got a set screw, and for the rear crossbar we need that little tip that sticks up right here to be directly in the middle.
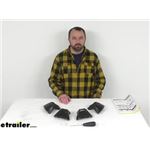
That would be what would be considered a B7.Next we've got our block that's going to slide right in. You see where that bolt comes up. That's going to thread right into the bottom. Going to use our provided tool and start to tighten that up. You can see we've got three notches here in the bottom where that screw is as well. We want this to be in that middle setting. That's where we had that level on the top. Then we're going to tighten that down until that metal portion becomes even with the black portions. You might leave it just a little bit looser than that, but not too much, about like that.Now we'll rotate that over. Typically, you're going to have the rubber gasket that's blocking our T slot there. We'll get that out of the way for now. We're going to slide that right into the T slot. May need to push in a little bit just to get it past that edge. Now we're going to slide it to the appropriate measurement. It's kind of tough to see, probably, on camera, but it's going to give us 1-inch increments right down through here, through the eighth inch. This needs to go to 36 and 7/8.Once we have that in position, we're then going to tighten down our other screw here. Now, the tool has a built-in torque limiter, so as we turn it, you want to have three clicks. It's kind of just like a gas cap there.Something else I want to mention while we're looking at the bottom side of this, it's going to be hard to see later. When we put in our fit clips, there's going to be clips. These come down, grab the roof line of the vehicle, and that's what's going to secure our rack. You can see the rounded portion here. As that goes in, it's going to fit in the gap right here. Between the tab that sticks up and the tab that's flat, there's a little notch for it to slide in. That can be really tough to see when we're doing it underneath the roof rack system, but this will slide in. That's going to come up like that. Then as we tighten that screw, that secures that or pulls that in.We'll make sure that we've got that loosened up, and we're also going to make sure that we have loosened up the other screw we can see right here on the end. That adjusts our bracket up and down, so we'll leave that loose initially, and then we can tighten it down once it's on the roof line.Last thing we're going to put on before we put it on the roof line of the vehicle is going to be the foot pack. You can see the notch there. That's going to go right down on the bar. Slide that in. There's an arrow. You want that arrow facing outward. We'll click it in position. Once your feet are in place here, you want to take the rubber stripping and you want to fill in these gaps. We want a piece on this gap, on the gap between both of our feet, and then also on the opposite end. What this is going to do, it prevents wind from getting in there, which could cause whistling or noise while you're at highway speed.Now we can place our crossbar up on our roof line. Now just for reference on the front measurement, you'll be 7 inches from the back edge of our windshield to the front edge of our foot pack, and we're going to go 32 inches from the center of our front foot pack to the center of the rear. We're going to do this on both sides of the vehicle, just to ensure we have our bars square with one another.Now we'll open both doors. We can open our gray cover. That's going to allow us to slide in our slide clips, just like I showed you on the table there. Let's get that done on both sides.Now we'll start by tightening down the upper screw, and you can see how that lowers this down slightly. We just want that to give us kind of a level clip coming up to the side. Do that on both sides. Now we can switch to the middle screw. You'll notice as we tighten this up, the gap between the clip and the vehicle is going to decrease. We'll just tighten these up so they make contact. We're going to tighten them up from side to side evenly. If we just bring that up so it makes contact here and we do the same thing on the other side, it should keep our bars squared from left to right.As we tighten this down, you'll see our foot pad. It's going to come down and it's going to rest right down there on the roof of the vehicle. And again, just a little bit at a time going side to side.Now, once we have both sides nice and snug, we'll come back to our first bolt. We want to get that tightened down until our wrench clicks. Then we'll do the middle one. Want to just pop that cover closed over the top. Go over to the other side and make sure we have the same tension.Now we've got our covers to go in place. See they've got the two little hooks. We've got one right here, one right here. Those are going to fit right down on the attachment points. Then we'll click our cover right in place there, do the same thing on the other side.Now, to get our end caps in place, just want to get them started. You'll push up on this tab on the bottom. Let me just give it a firm push in, maybe a tap to make sure it goes all the way down into place.Now you're ready to attach your favorite accessory and hit the road, whether that's a roof-mounted bike rack, cargo carrier, maybe even a cargo box.That's going to complete our test fit of the Yakima Roof Rack System with the baseline foot packs on our 2017 Toyota Tacoma.
Average Customer Rating: 4.8 out of 5 stars (139 Customer Reviews)
Extremely quiet, aerodynamic crossbars attach to Yakima towers to create a stylish roof rack for your vehicle. Rubber strips in T-slots push down to load carriers or accessories - no need to trim. Full-length aluminum bars maximize carrying capacity.Excellent solution for my 2023 Chevy Silverado. In the past, I have had rails installed on the roof of my pickup trucks, but I find the BaseLine towers to be a better solution, since they don't permanently change the truck. Plus, they are much more solid than SkyLine system on the rails.

Love my Yakima roof rack!! It exceeds my expectations.great product. Also thank etrailer for the tec support! great staff always there to help thanks again!!
Follow the instructions, and you can't go wrong on the self installation
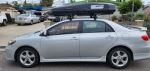
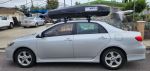
Yakima Baseline with Yakima CBX 18 Cargo Box fitted on my 2012 Toyota Corolla S Sedan 2012.
Instructions were clear and roof rack was easily installed.
Really easy to install & work as specified. So happy with the customer support/service at etrailer.
Your notice of schemes was a lot better than the yakima site provided. They did not suggest the scheme you did.
But when the products arrived, the instructions were by yakima. Generally worked as instructed except the tower to tower transverse mounting dimensions needed to be tweaked for a perfect fit.
You guys provide great products and excellent customer service.
Thanks
Ackage came 2 days early the install was somewhat easy (did it by myself)
Did not get to mount anything to it but seems really sturdy. One thing I can say is mark out your mounting points with provided stickers then put up and make adjustments to the roof rack.
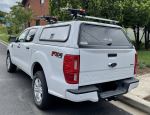
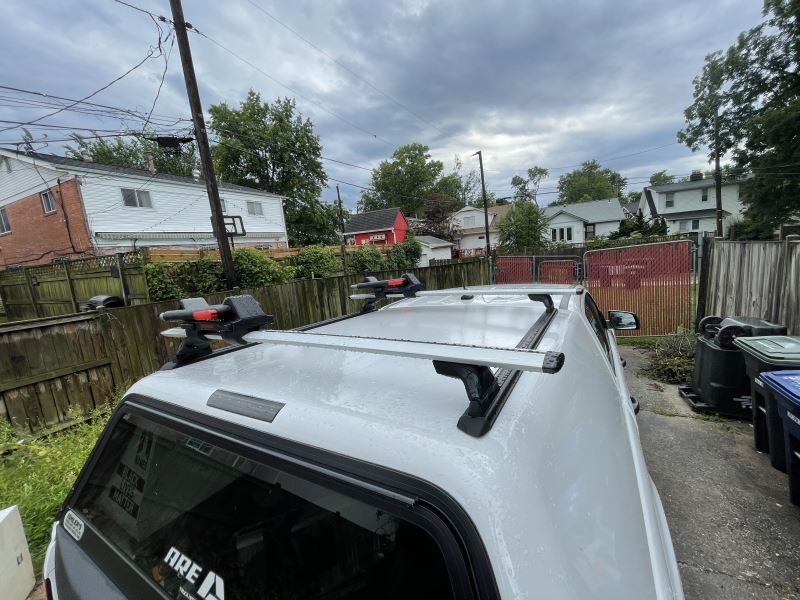
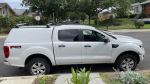
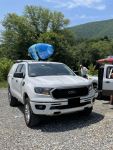
The 50” jetstream cross bars were perfect for my 2019 Ford Ranger with my ARE cap. They are paired with the Yakima Skyline towers and appropriate landing pads (protip: call etrailer when you order to ensure you have the correct setup;)
These cross bars are SILENT on my cap. Zero wind noise. My daughter and I installed them on a Friday (I do recommend watching etrailer’s installation video in addition to the paper instructions) and left for a 700 mile weekend road trip the next day to pick up a kayak, paddle with friends downstate then drop her off at summer camp.
Even with empty Yakima Jaylows on top, no wind noise. Even with a boat in the Jaylows, no wind noise.
These are the sweetest rack’s I’ve had. With the Skyline towers and landing pads, they are also easy to take off and put on. Click click done.
They look good, too;)
etrailer customer service for the win, too. When I originally ordered, I did not order all the items I needed for installation. When I realized this, I called and they got me squared away.
I’m using these towers in conjunction with the JetStream cross bars. Assembly and setup was easy, all the tools you need are provided, except perhaps a tape measure for mounting. Looks and feels solid and well made. This is my second set of Yakima towers and cross bars. I plan to use this setup for an old roof top hard shell case and for my mountain bike to get to the trail head.
After completing the installation I took it out for a spin to check for wind noise at highway speeds. No discernible noise, I’m very happy about that as I really don’t want to remove these when not needed. For reference these are mounted on a 2019 Subaru Forester Touring with factory raised rails. Plenty of clearance for attaching equipment and gear.
Side note: the gentleman that assisted me on the phone while ordering was very pleasant and helpful, got me the right products very quickly as I was in a time crunch. Two thumbs up!
Solid build quality and easy installation on my '21 Mazda CX-5.
So far so good. Purchased these towers to use on a 2022 GMC Canyon with HD bars that I already had, primarily to carry my canoe. Yakima's fitting instructions worked perfectly and the whole system seems really solid.
Well packaged and on time
Great product - very good quality. I liked the fact that I could keep the risers mounted on my car, but could remove the cross bars. It took me awhile to install - but I'm not very mechanically inclined.
etrailer installation videos were very helpful in selecting the product and first installation, although in practice, minor adjustments to method were required. Now after more than a dozen set ups, mounting the crossbars takes 15 minutes, and taking them off, 10. The system is well made, and when mounted, precise, strong, and reliable. Expensive perhaps compared to alternatives, but well worth the money. Used to carry a 50# sailboard 40 miles to the beach on weekends. ('11 Honda Fit)
One minor shortcoming: rubber sheet glued to base clips where they touch the car body have torn and moved sideways 1/16", but expect will be easily replaced with readily available 1/16" sheet rubber (e.g., shower pan liner) when the time comes.
Used in rain at least once, (sustained 60mph), with no leaks.
Good condition quality. Good and detailed instructions but aittle tedious install.
I needed crossbars for my new 2018 Mazda CX5, which came with flush side rails. The Yakima crossbars, along with the RidgeLine Towers and the the vehicle specific kit worked great. The installation (10-15 min) is super easy. They look cool, and performed great (I strapped 160-lbs rooftop tent on them!). Removing them is also super easy (10 min tops). Highly recommend.
Roof rack parts were ordered correctly and shipped quickly.
Because of the 'rona-induced supply chain interruptions, I was unable to purchase all of my Yakima components from etrailer, but I did get these, and they are typically excellent Yakima components. Well-made, easy to install, good directions, no problems.
I chose the Yakima roof rack, because It spanned 50 inches, rather than the leading competitor's 47 inches, making it better for tying down 4 ft x 8 ft sheets of building material. It also seemed to be about half the price. It took me about 2 hours to put it all together and mount it on my car. The instructions were all visual and there was one little pic I didn't understand, but the equipment seemed to go together correctly anyway. Now that it's adjusted, it should be fairly easy to remove and replace next time. I did need to put on super tacky gloves to get the covers off. Although it seemed unnecessarily complicated, I would still choose this product again.
Yakima Jetstream cross bars.. nice bars worth the extra money. can be adjusted for pitch/angle of attack to "tune" the air profile.. mine have absolutely no high speed wind noise or whistling.. rubber weather strip underneath further smoothes the bar profile.. quietest roof rack system I have ever owned..
Great product fast shipping
Great! Easy to install!
The instructions were different for another set of bars. Was a pain to get right...all the measurements on Yakima were off...I figured it out on my own...should have got Thule or nicer bars ..end caps were not good either...flawed fit... otherwise will do just not happy with the product perse or instructions...delivery good...will see how they do.
I bought a set of baseline towers and a jet stream crossbar and mounted them on the roof of my 2018 Tacoma. I have another crossbar on the back of my truck cap. This set up is perfect for carrying long items like my canoe. James at etrailer was extremely helpful in helping with the necessary parts for this configuration.
Do you have a question about this Roof Rack?
Info for this part was:
At etrailer.com we provide the best information available about the products we sell. We take the quality of our information seriously so that you can get the right part the first time. Let us know if anything is missing or if you have any questions.


Thank you! Your comment has been submitted successfully. You should be able to view your question/comment here within a few days.
Error submitting comment. Please try again momentarily.