
Summer Starts Here - Save up to 70%

To see if this custom-fit item will work for you please tell us what vehicle you'll use it with.


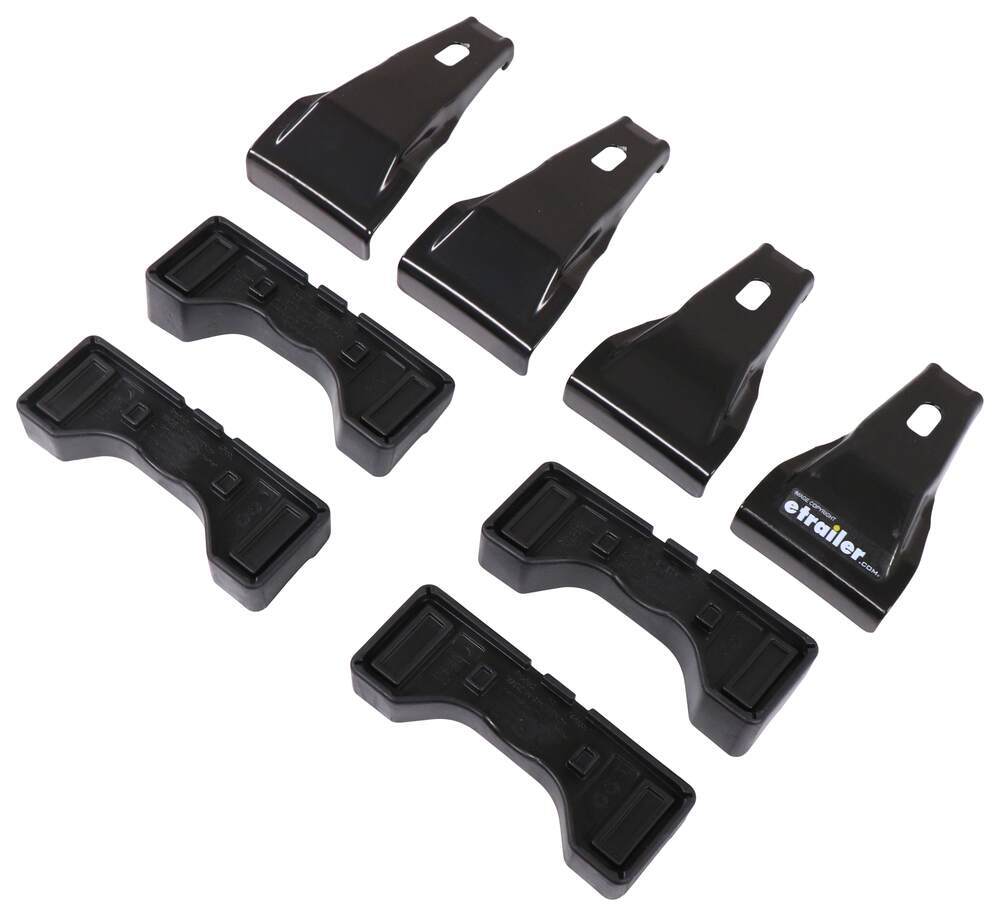


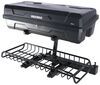
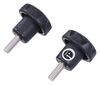
These custom clips and pads let you mount Thule Evo Clamp or Edge Clamp feet on your vehicle with a naked roof. The clips are easy to install - just slide them into the feet until they click. Rubber pads help protect your roof from scratches.
Features:
Specs:
Secure, Click-In Installation
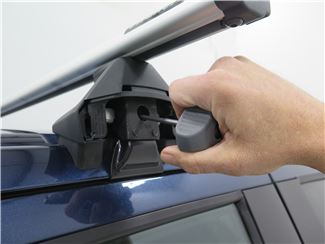
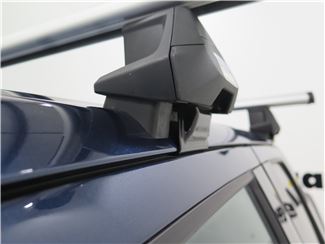
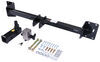
To complete installation, place the fully assembled rack on your roof at the location specified in the fit kit manual. Tighten the rack in place with the torque tool included with the feet. The single attachment point bolt lets you quickly secure the crossbars to the feet and the feet to your door jambs simultaneously. An audible click from the torque tool indicates the rack is secured properly.
Protection for Your Roof
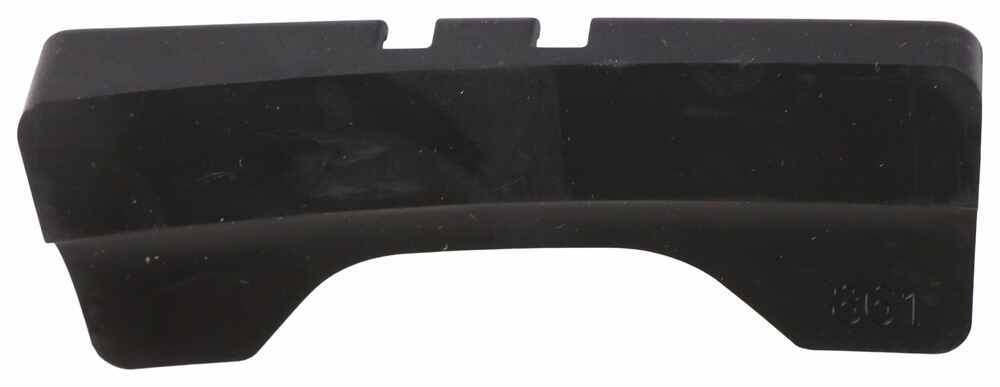
The rubber-coated steel clips and molded rubber pads protect your vehicle's paint from scratches and abrasions. The pads easily slide onto the bottom of each foot, and they are specifically designed to fit the shape and contour of your roof.

Videos are provided as a guide only. Refer to manufacturer installation instructions and specs for complete information.
Hi, Matt with etrailer. And today, we're talking about the Thule roof rack on top of our 2023 Kia Sorento. Now, a roof rack's a really good option for the Sorento for a few reasons. One of those big reasons is if you have a family and you wanna take a trip, since we do have three rows of seating, you're probably not gonna have a lot of storage in the back of your vehicle. So your roof's gonna be a great option for that. And if you don't own a hitch or your hitch was already being occupied by something else, that's gonna be another reason to store things on top of your roof.
It is important to check what kind of roof you have because what we have today is a naked roof option. And the Sorento is gonna have a few other options you can do. You can do a raised rail or a flush rail, and it's kinda easy to tell what the difference is because with any of the rails, you can really just grab onto 'em. With this, you don't really have anything to grab to. So what I'd recommend doing is just plugging in your vehicle's information into our fit guide to find the correct roof rack for you.
Some really great things you can put on top of your roof is anything from a basket, which we have up there right now, to a box, or you can even put those longer items that you can't fit inside your vehicle. Anything like a kayak up here too. The crossbar we have today is gonna be the Thule Wingbar 53-inch crossbar. And the nice thing about these ones is they have this nice aero design to 'em, so they're gonna reduce your wind noise and be more aerodynamic. And we're also gonna have this T channel at the very top.
That's gonna be an alternative way to mount your accessories if you have a T-mounted accessory. And typically, you're gonna have a weather strip that's up here too, and it's gonna look just like this. We don't have ours on since we're just doing this for demonstration purposes today, but that should keep a lot of debris from entering in here. And what I really like about that channel is if you push the end of this end cap over, we actually have access to it now. A lot of them, we actually have to remove this completely.
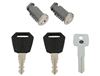
But the fact that I just have to rotate this is something I really enjoy. And the way this is gonna mount to the rest is gonna be through another channel at the very bottom. Now, channel's gonna have your tower mount to it. And your tower's actually gonna be the thing that tightens everything together. What I like about that is once I remove this end cap, you can see we only have one bolt, which is really easy to use. If we tighten down that one bolt, it's gonna tighten down the tower to your crossbar, and it's gonna tighten down the clamp to your roof. And you're gonna have an included tool to do that. Now, the thing about it too is we have this end cap that gives it more of this clean finish, but this end cap comes with a plastic lock core, which is okay. What I'd like better is if it came with metal lock cores, but you can actually buy that separately, so you have more security on top of your roof. And like I was talking about earlier, we're gonna have that clamp that connects to the inside of your tower, which grabs onto the gutter of your roof. And the fit we're getting now with this fit kit is really good. I'm a big fan of this because that rubber padding on the bottom is very flush. There's not any room for gaps, and this is really secured into place. We'll get a few measurements to see how this is gonna sit on top of your roof. The first one I'm gonna get is gonna be the total distance between your roof and your rack or crossbars. That's gonna sit at about three inches. So that's really important to think about because that's really the space you're really dealing with when you're clamping on your accessories. Not only that, how much space is gonna be left, but actually trying to tighten or untighten those 'cause that can be kinda tricky in some spots. And especially if you have a sunroof up here and that sits up when you really go to operate it, then it could make contact with whatever you have on here. Next step, I'm gonna get the total distance it sits up. That's gonna be a little bit over four inches, and that's not too bad. That's actually pretty low profile. What I would do, though, is just take the total height of your roof plus your crossbars. And if you have any gear on top of that, include that, so you know what areas you make it under. Some spots to really think about would be a garage. And finally, we can think or check out our crossbar spread since this is gonna be at a fixed point. Right now, I'm getting about 28 inches. And so that's really important to know to see if this is gonna be compatible with whatever gear or accessories you have because they're gonna require different crossbar spreads. We're gonna have a little bit of overhang too, not too much. You're not gonna likely to hit your head on it. You're also not gonna be likely to put any accessories at the very end. Now, if you're looking for something that's gonna be more flush, this does have an option for a flush-mounted option. But this is also gonna have a weight capacity of up to 165 pounds, which is gonna be pretty standard. Now, what I'd recommend doing is just checking what your roof is rated for because you don't wanna overload that and damage your roof. So you can actually find that in your owner's manual. After when you find that, just go from the lowest-rated component, and then you should be set. But in my opinion, I think this is a really clean option. I like the way it looks on a roof, and I like how that fit kit really contours to our roof too. Now, something I have noticed is this front crossbar is at a little bit of an angle, not too much. That's just gonna be because our roof kinda tapers in or curves in a little bit at the front. If you want something that's gonna be more level when you do have those T-track accessories, then I'd recommend a Yakima roof rack. Because that's gonna have a lot more adjustments to it, so you can make sure everything is level. But if you don't need it to be super level, 'cause in most cases you probably don't, and if you're looking for something that's gonna be an easier to install, then this is gonna be your best bet. Installing this is actually one of my preferred methods. I actually am a big fan about how these install. If you're curious to see what that process looks like, just stay tuned, we'll walk you through it. To start off the installation, we're gonna lay everything out. So up front, we're gonna have the crossbar. Next to that, we're gonna have the towers. Then, you're gonna have your fit kit too, which is gonna include this base and these clamps. You have an included Allen key so you can torque this down, and we're gonna have this (measuring tape clicks) measuring tape with us today just to make this a lot easier. Now, we're only gonna do the front crossbar for you, but it's gonna be the same process. There are gonna be a few differences. The first difference is gonna be where the towers are placed on your crossbars. You can find that in your instructions for those exact measurements, and the bases and clamps. Now, for this rubber pad on the front crossbar, we're gonna use the thicker pad. And for the clamps, we're gonna be using the shorter clamps for the front one. I like to start with my tower. So I'm just gonna grab this rubber base. And if I try to put it on, it's not really grabbing on, and that's because I've just gotta match the shape of this one to the shape of this platform in the bottom. We're just gonna put this on just by applying pressure through the whole pad until that feels secure. We're then gonna come over to our crossbar rest. You're gonna flip this over, so the bottom side is up, and we're gonna remove this end cap. And to do that, we're gonna press on this tab and pull this out. Might have to wiggle it just a little bit. With that out, I'll grab that tower. If I try to place this in here, it's really getting a lot of resistance. The reason is because of how the bottom of how this works. You notice we have this bolt, and that's gonna be in the way. So the only way to move that is by if we come over here, you notice we have this plate. If I squeeze that and the rubber pad together, that's actually gonna release that bolt, and that's gonna allow us to put this through this channel. Just like that. (latch clicks) Once you've completed that, you can repeat that same process on the other side, and just make sure to put your end caps back in place. With our towers in place, we can adjust exactly where they sit. This will have a measurement in your instructions, so you can reference that. And the way that works is just by pulling this out to whatever number you need it to be lined up with. Once you've lined it up, then you can just adjust this tower to sit right against that tab. And you can repeat that process on the other side. And if you want, you can put these clamps on. At this point, I like to wait to put mine on until this is sitting on top of my roof. And that's mainly because if we put this on now, this does have a chance of scratching up the top of your vehicle, so I just like to avoid that entirely and put 'em on afterwards. Before we can actually put that crossbar up here, we're just gonna mark out where it needs to sit. So you're gonna reference your instructions and get that measurement. And your first measurement for the front crossbar, it's gonna be the distance from the top of your windshield to where the top of that pad sits. And once you get that, you can measure out where that's gonna sit. And in my case, once I figure that out, I'm just gonna leave a mark on top of our roof. Today, we got a lot of pollen out, so I can just really just leave a line there. Now, in your case, if the top of your roof doesn't have a lot of pollen on it, you can either use some masking tape or this kit includes some stickers that you can put on top of your roof to really mark where everything sits. Just make sure you do this on both sides. We can put this on top of our roof now, and we need to make sure this is in the right orientation. So this thicker side, we want that to be facing in front of us and this thinner side behind us. When we've checked that, I'm gonna lift this up and roughly place it on top of my roof. It doesn't have to be perfect at the beginning. We can make some adjustments afterwards and place this down. When you've kinda adjusted everything and made sure everything's sitting up here properly, 'cause I like to try to get that base off here kinda lined up with this crease on top of our roof, with that done, we're gonna grab our clamp and put it into place. To do that, I'm gonna have to open up my door, so I can get into this gutter. Just lift up on here, push it all the way through, and it should grab on. (latch clicking) You can hear that click letting you know it's in place. And then, sit it back down. And then, we'll repeat this process on the other side. Now, the other side can be a little bit tricky if this feels a little tight. If that's the case, what I like to do is just loosen up the tower just a tad bit, so you can get this clamp around there. You can start tightening these down. And to do that, there's gonna be a bolt right inside this hole. I'm just gonna use my included Allen key, and we just wanna tighten this down enough to where this clamp is just applying a little bit of pressure to this gutter. 'Cause if we tighten this down too much, what's gonna happen is it's gonna pull too much from one side, and it's gonna give you an uneven fit where these bases aren't gonna be grabbing all the way down. After when you've tighten this down to that point, go over to the other side and repeat that same process. And then, you'll just go back and forth, tightening them up evenly. After going back and forth, you'll eventually reach a point to where when you're tightening this, you're gonna have a lot of resistance. Just keep doing it until you hear a click. (hardware clicking) Just like that. I like to do it until I can hear a couple clicks. And after when you've done that, you can put on the end caps. with these on, just give it a good shake test to finish it off. And make sure you lock these bases for the time being, so they're a little bit more secured. But that was just a look at the installation and some of the features of the Thule roof rack on top of our 2023 Kia Sorento. Thanks for watching.
Info for this part was:
At etrailer.com we provide the best information available about the products we sell. We take the quality of our information seriously so that you can get the right part the first time. Let us know if anything is missing or if you have any questions.


Thank you! Your comment has been submitted successfully. You should be able to view your question/comment here within a few days.
Error submitting comment. Please try again momentarily.