
To see if this custom-fit item will work for you please tell us what vehicle you'll use it with.
Thank you! Your comment has been submitted successfully. You should be able to view your question/comment here within a few days.
Error submitting comment. Please try again momentarily.
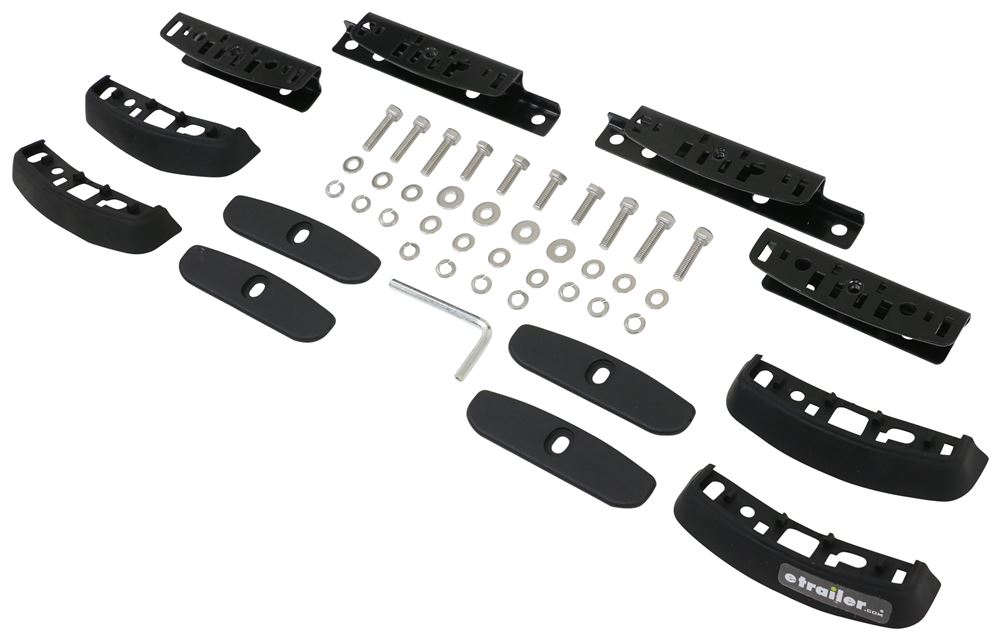
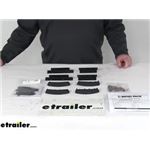
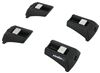
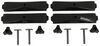
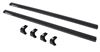
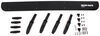
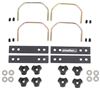
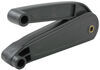
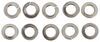
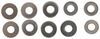
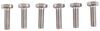
Custom fit kit lets you mount Rhino-Rack RC or RV series legs to a vehicle with fixed mounting points. Legs mount to vehicle with attachment studs. Molded inserts cover bases when the legs are removed. Includes 4 pads, covers, and mounting hardware.
Features:
Specs:

Videos are provided as a guide only. Refer to manufacturer installation instructions and specs for complete information.
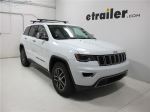
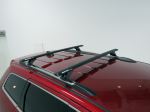
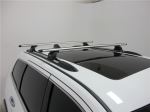
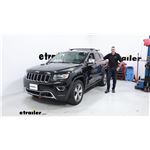
Hey everybody, welcome to etrailer.com. I'm Bobby, and today we're taking a look at the Rhino-Rack Vortex Aero Crossbars, 49 inches long, here on our 2021 Jeep Grand Cherokee. Now, guys, roof rack are gonna be an excellent way, of course, of really accessing all that you can from your vehicle. So we can go ahead, start adding a ton of accessories on top, whether it be kayak carriers, roof baskets, anything else we might need to go ahead and make our trips that much more enjoyable. The Rhino-Racks here, definitely make a great little option for yourself on the Jeep. I'm really liking how low profile these guys are.
They don't look too frail, of course, on there. And also, the installation can be a little tricky at times. However, once you finally get it in place, I think you're really gonna like how this rack starts working out for you. With 165 pounds of weight capacity as well, we should have a pretty decent time of getting everything we need up on top of the roof. Of course, make sure you are consulting that vehicle's owner's manual guide to make sure you're not exceeding your own weight limit on top of that roof.
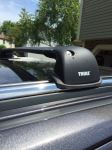
Now, they are gonna be made of aluminum as well, which is gonna be great 'cause they're gonna be lightweight, not gonna take any time to actually get them laid across, but B, they'll hold up well to that rust and corrosion that we're gonna experience, especially by leaving this on our roof at all times. That way we won't have to worry about it breaking down anytime at all. Now, one thing I really like about Rhino-Rack too, they do have these nice little plastic locking cores. Now, if you guys want, you can get those changed out to metal ones. And that way you can go ahead and make sure the roof is, our roof guard is gonna be staying there, that allows us to go ahead and make sure our T-slot accessories can't be taken out anytime soon unless we want them to.
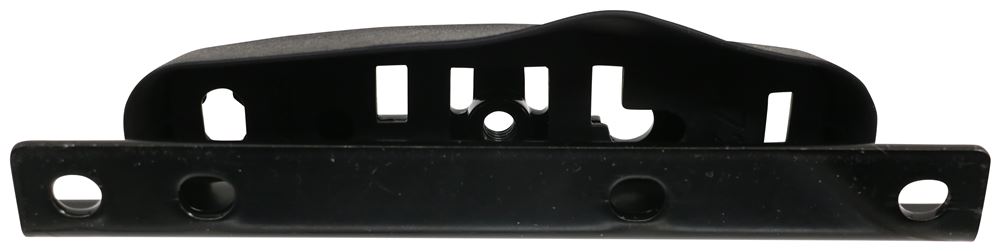
And you are seeing here too, since we are on our flush mount here on our Jeep, are certain pads from Rhino-Rack here allowing us to also lock that, that way our entire roof system stays there when we leave it unattended. Well guys, it's not gonna take too much time to go ahead and get this installed. Let's go ahead and see how we can do that. All right guys, to go ahead and get this installed, we're gonna start with a few of our things. Right at the gate, we're gonna start with our little bracket here.
Now, this is our rear one. Our front ones are gonna be just a little bit longer. And what we wanna do, we're wanna take that plastic skirt guys, it's gonna have little tabs as you can see, you wanna fit those through those open slots in your bracket. Get it nice and set. Pretty straightforward of how it's gonna go. Now, you also are gonna have six of these bolts. Your rear ones are only gonna have a single bolt. So make sure you're following your instructions, making sure what side of these you're gonna need for those front and rear brackets. And we'll go ahead and install this in just a second. But we can actually start with our other pad here to connect to here. So we're gonna start with this locking mechanism here. We are gonna have that little front plate on there, so we're gonna need to remove that really quickly. Now, that's gonna go ahead and just open this up for us for later when we install it. But we can go ahead and start putting in our middle element here. So we're gonna take our bolt, we're gonna need our washer and our locking washer of course. Put them just like that. Get that set right through the middle there. And then start adding this on. Now, I like to have that flatter side, guys, towards the inside here just so we don't have any issues with that raised side interacting and getting in our way. So we just go ahead and get that set. Now, we'll need our included tool here as well to start tightening this down and getting that in position. Now, we're not gonna tighten too much, in fact, we're gonna leave it pretty loose here 'cause we wanna actually be able to slot this into our crossbar here. So we'll keep that little tab like so. We'll lock up here, make sure that your pad's facing the correct way. And we just wanna simply slot that into our T-channel there, guys. Now, you can see it's very, very loose right there. I'm gonna go ahead and tighten that down just a little bit more. Now, I'm still gonna leave it to where I can go ahead and still slide this across, but that way we can go ahead and make it a little less floppy for ourselves. Now, we're gonna take our crossbar and start setting across our vehicle. To start getting our crossbar laid across, we're gonna have to install our bracket, of course. So we're gonna need to start by taking out the factory screw that they have in place. Now, you are gonna have your little torque key here to help you remove it. And by simply going lefty loosey here, we can go ahead and take out this screw. Now that we're released, we can take our bracket and start getting it set in place. So we're gonna want our skirt to go ahead and start fitting on our flush rail like so. And then take our included tool and start getting that screw set in place. Now, you also are gonna need the two on the front one, so keep in mind, you will have two bolts on the front, but here in the rear, we just need that solo one in the back. So we've gone ahead and laid our crossbar over as you guys can see. Now, right here, you're seeing little tabs also in on the ends of our towers. As you guys can see, that becomes easy to slot that right in place. Now, we need to go ahead and grab our screw, start tightening this down. So what this guy is gonna be a 10 millimeter wrench. So we're just gonna ahead, try to set this guy in place. Of course, get your washer set correctly. Go ahead, get a wrench in position, start tightening it down. So we can go ahead and repeat the process on the other side. One reason for actually kinda tightening down those pads, guys, it makes it really easy to shift this bar across. Now, we've already gone ahead and measured it for ourselves today. Now, this is gonna be upside down for you, but we're looking about five and a half inches on either side. Now, one thing you can do as well before you actually get that hardcore measurement, it can help just to get to one in of your car and see what those crossbars are doing to start getting lined up. That makes that dimension check that much easier. Then we're gonna take our included tool here, and that little bolt we installed earlier with that T-slot, we're tightening it up now, making sure that our bars can't swap. So we go ahead and just start tightening this across. Well now that each one is tightened down, we can go ahead and add on our end caps. We just simply wanna make sure that our logos are just like that, they'll fit right in. And then we can simply lock it with our included tool. Now, the very last part of installation, guys, is something you're gonna have to do at home. You are gonna have this little rubber striping that can fit within your channels here. So yes, you're gonna have the one on top, but make sure we are fitting this in in the bottom here as well. Now, these open holes will really cause a lot of whistling and it's just gonna be really annoying when you guys have that on top of your roof, especially as you start reaching high speeds. So make sure we are filling in those gaps, that way we don't have any kind of wind interference, and that top one as well, we can go ahead and worry about when we start adding on accessories. Well now that we've got our bars installed, we can go ahead and see how they're interacting with the roof of our Jeep here. So let's go ahead and see from our roof to the very top here is gonna be putting us at four, and just to double check me here. Oh, I'm sorry guys. About 3 3/4 there to the very top of our roof bar from the roof. And at the very end there is gonna be putting us right at 2 3/4 from the roof to the very bottom there. So, that clearance can be very important if you have any accessories that will require you to have the appropriate space between your crossbar and your roof. So make sure you're checking your accessories there. While we're up here too, we can go ahead and talk about this floral Vortex striping up top. Now, these guys, you can see that nice little design, hopefully to cut down on a little bit of that wind drag as we go across. But this nice rubber friction becomes great if have any accessories that don't need to use that T-slot attachment, gives it a nice little friction point, that way they aren't sliding across our roof bar as we go down the road, of course. Now, one little thing with that too, again that Vortex striping can be taken out and actually cut to size if you guys have any T-slot attachments. So, as you guys can see, that becomes really easy to get those T-slot to sit, accessories slotted in, and then we can cut that Vortex striping to size that we need if you have a semi-permanent accessory you're putting on your roof. Well guys, the Rhino-Rack system definitely is one of my favorites. I really like Rhino-Rack just for the quality of the products they make. I really like how low profile these guys are sitting on the grand Jeep Cherokee here today. It gives us that nice feel to it. It looks pretty factory, and not in the too kind of wonky and weird. I also like how it's not adding too much height. We're not gonna have any trouble with this getting in the garage by itself, and definitely not through any of those pesky drive-thrus that we might be going. Now, one little thing with it too, guys, one great aspect, if you do find yourself taking these off, we actually do have a nice little cover plate here. So you can go ahead and put that in, that way you don't have anything getting in those tracks, it'll cover those bolt holes and that way, you can just keep it nice and clean for ourselves. But that does kinda bring me to my kinda thoughts on the Rhino-Rack. I like how it's gonna be put on there. Now, the installation can be a little tricky at times, especially trying to get underneath it. However, once you actually have it all the way tightened down and in place, because of these locking cores and because of it's aluminum, I don't see ourselves taking this off anytime soon. I think it's gonna be right there, ready to use for the seasons to come, and we're gonna have no trouble at all with it. Well guys, I think that about does it for our look at the Rhino-Rack Vortex Crossbars here on our 2021 Jeep Grand Cherokee. I'm Bobby, thank you for watching..
Average Customer Rating: 4.7 out of 5 stars (179 Customer Reviews)
Custom fit kit lets you mount Rhino-Rack RC or RV series legs to a vehicle with fixed mounting points. Legs mount to vehicle with attachment studs. Molded inserts cover bases when the legs are removed. Includes 4 pads, covers, and mounting hardware.Worked as expected with my RCL legs and vortex crossbars. Great customer service.

Easy to mount. Great product.
Greg S was awesome! I was on quite a few different manufacturer websites trying to figure out the best solution for my sons Jeep Grand Cherokee . He’s a snow boarder and we wanted to get him the complete roof rack solution.
I came across the etrailer site and noticed they had sales and tech support .
Greg answered the phone and helped me determine the best solution.
He took the time to send me links for everything
Called me back later that night to assist with my order placement . He even emailed me to let me know when it arrived and to follow up.
Very pleased with the entire process.
We will install after the holidays and I’m confident if I need any help they will be there for us!
They fit my 2021 Jeep Grand Cherokee. Better price than the competitors.
Assembly not too difficult. The video did help
Shopped all over the place for a decently priced package for my Grand Cherokee and eTrailer was the only one that knew what the heck I needed and got it to me w/in days. Will continue to shop with them.
Rhino racks!!!
Sturdy and necessary. Also, Etrailer shipped everything I ordered with 24 hours and everything was delivered in less than 2 days. Unbeatable service and pricing.
Everything worked great!
Straight forward to install. Good directions.
Excellent
A little tricky, but fit very well
These were the only mounts I could find to fit a 2019 Toyota Highlander LE factory roof bolts. Have never used Rhino Racks before but was very happy to find their sturdy mounts for aero bar legs.

Do you have a question about this Roof Rack?
Condition: Like New
Notes: May have damaged packaging or minor cosmetic blemishes.
Info for this part was:
At etrailer.com we provide the best information available about the products we sell. We take the quality of our information seriously so that you can get the right part the first time. Let us know if anything is missing or if you have any questions.


Daniel
5/17/2023
A year later and the rack is as solid as the day I mounted it!