
Summer Starts Here - Save up to 70%
To see if this custom-fit item will work for you please tell us what vehicle you'll use it with.
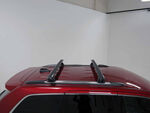
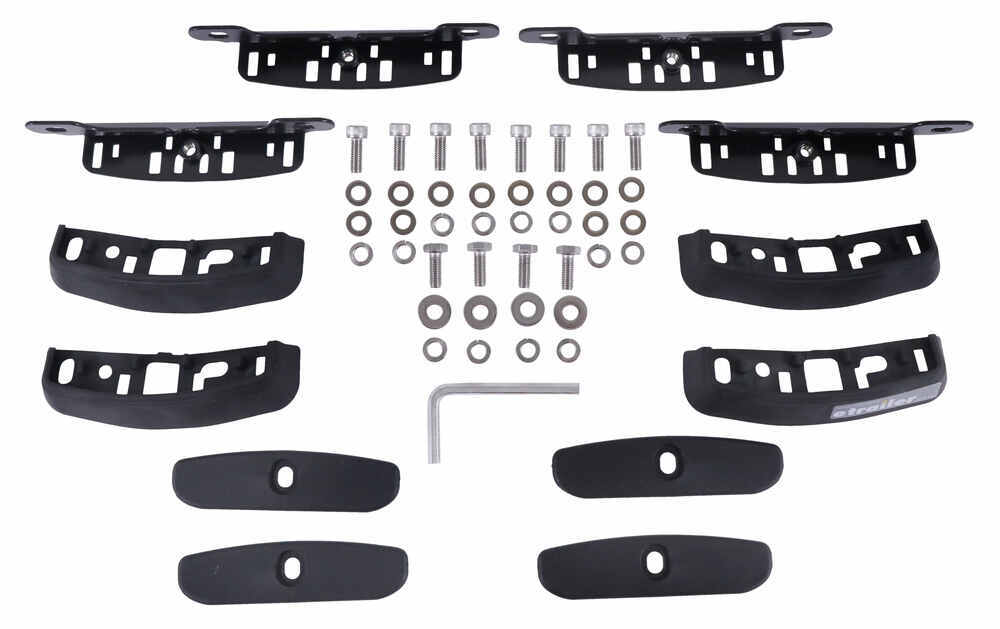
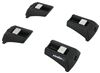
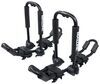
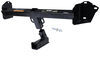
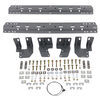
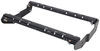
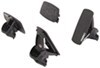
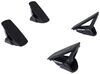
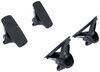
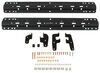
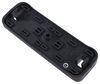
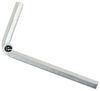
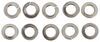
Custom fit kit lets you mount Rhino-Rack RC or RV series legs to a vehicle with fixed mounting points. Legs mount to vehicle with attachment studs. Molded inserts cover bases when the legs are removed. Includes 4 pads, covers, and mounting hardware.
Features:
Specs:

Videos are provided as a guide only. Refer to manufacturer installation instructions and specs for complete information.
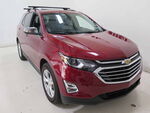
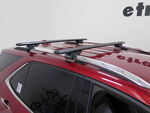
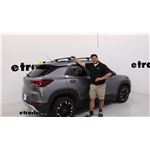
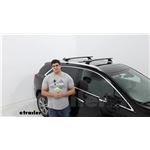
Hey everyone, it's Evangeline here at etrailer and today we have a Rhino-Rack roof rack for flush rails on our 2023 Chevrolet Trailblazer. If you wanna carry around some fun accessories like a roof box for more cargo space or maybe some kayaks, what you first need is a roof rack system. This here is a nice flush roof rack that also gives a lot of stability and functionality like locks and T channels, things like that. We'll talk about those features, but we're gonna focus on our Trailblazer here so you can see if this is the right fit for you and whatever accessories you need to carry. The first thing I like to look at is the length of the crossbar. This is a 49 inch long crossbar and because of how the Trailblazer is shaped, we do have some good overhang here.
So from the tower to the right before the end cap that's five inches of length. So you can even attach accessory clamps onto that overhang. If you need to make it easier for you to reach, load and unload cargo, that's gonna be a good option for you. But also because of how the Trailblazer is shaped usually you don't want too much overhang because then you run the risk of hitting your head while getting it into the vehicle. But because of where it sits, not that big of a deal.
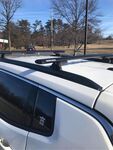
This is low profile and sleek but you still have some good space here for accessories because it sits on your flush rails. So taking some measurements here for height first measurement is how much space underneath the bar to the roof. So at the valley or like where the ridge is it's three and a quarter inches. That's how much space you have for clamps that go around. Pretty average, good for most accessories.
Next is how much height does this add to your roof So top of the crossbar it's gonna sit about four and a half inches rounding up and that's gonna be where your cargo sits. So imagine you're carrying around skis and they have extra tall bindings. You wouldn't have enough clearance so you don't hit your roof. If you don't have enough clearance you get an accessory that gives you more height. This actually is a really good number without looking too tall.
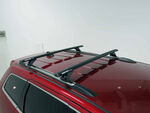
Since these do fit to fixed points on your flush rails you cannot move this back and forth. You're kind of stuck to right where they are. So it is a good thing that is in a good spot. So for crossbar spread, that's measuring center to center of each crossbar. We have that 28 inches, which is pretty average. So if you need a roof box some of them require a specific spot for crossbar spread for those clamps to clamp. For security, this actually includes locks. So you get four lock cores and two keys. They're all keyed alike so only one key needed to access the whole system. This protects the tower. Now there's also another security tool up here which is the end cap. This one includes a plastic lock core which is fine for most applications. You would get metal lock core if you wanted it to be matched to your lock core on your tower. With it unlocked, you now have access to the T track. So this channel is used by some people if they don't want to clamp around their crossbars they'd rather fit things into here. I think it gives more versatility and in some cases it's easier to do. Just something to be mindful of if you have those accessories is that you have these vortex strips that you need taken out and then cut apart to fit around. This is made of aluminum and you have this black finish which I think matches really well with the trim color for our Trailblazer here. But if you want to, you can keep this on your vehicle for an extended period of time. Just double check everything's tightened down. If you want to take it off because maybe it sits too high or you need to do something with your roof, you can do that too. These have covers so you only need to remove the crossbars and you can leave the bases on for a low profile look. I'll show you in the install how that can be done but with that we have the versatility of having a sleek roof rack that can be taken on and off whenever you want to. Personally, I'm a big fan of this roof rack. I think it looks great on the Trailblazer. It looks sleek with the low legs but because of the flush rails we still have a lot of clearance around the crossbars. The length seems a little long at first but because the Trailblazer kind of pivots upwards it all matches really well to make it easier for you to load and unload and actually use your roof rack. Here I have all the parts to make our roof rack and it might look a little confusing at first because you have crossbars, you have towers, you have a bunch of pieces on the fit kit and a bunch of bolts and hardware. So I'm gonna guide you through that process. It is pretty simple once you know which goes first. So the first thing we're going to do is we're going to prep the vehicle. Now most of the tools you need to install this are included with your kit, but I also grab some extra tools to make things easier for me. Tape measure, 10 millimeter wrench as well as a plastic pry tool and a flathead screwdriver. This tool is not necessary, but very helpful. On your Trailblazers flush rails, you are going to have these mounting holes. They will have plugs in them though and those needs be removed. So here we have our flathead screwdriver. We're gonna use it to loosen those plugs. Be very careful 'cause they are slippery and you don't wanna scratch up your rails more than you need to. Once you've lifted the plug with the screwdriver you can then get your plug pry tool and just pull that out. Now you can continue doing this with just a screwdriver but the pry tool makes it so much more easier. Once you take the plugs out, put them maybe in a small bag and keep them safe for if you need to take the roof rack off, you can pop them right back in. Now we're going to set up the fit kit. We're gonna start with this metal plate that has this bolt and then this rubber skirt. So the metal bracket fits into that rubber sleeve. Notice how there are rubber tabs so those need to be pushed up through the holes so that it's secure. So do that for all four. For your hardware, you're gonna have eight of these bolts with a hole on the head. Now we're gonna have a split washer first and then a flat washer. Set up eight of those before putting the brackets on your roof. Now we put the bracket on the roof. Notice the curved part or the rubber skirt that's gonna sit on the rail or you're gonna leave the bracket out lined up with the holes. You may need to smush down that rubber skirt to get the holes to line up and that's a good thing. So here we're gonna put the hardware we set up and thread it into the nuts on that flush rail. We're gonna just hand tighten it down first before going through them with the included tool. Tighten this down until the split washer flattens out. If you are not installing the crossbars just yet and just the brackets, you do have these covers. The covers fit into those rubber skirts. You then get that 10 millimeter head, put a split washer and a larger flat washer and that secures the cover. Now we are going to be installing the crossbars. So we're going to take this out and the cover. We have our tower and there's a plate, a square plate on the top of the tower that allows us to attach it to the crossbar. So flip that tower over and line that plate up with the track underneath your vortex bar and slide it through. We do not need to tighten it down yet since the Trailblazer does have space to tighten down. So what we're gonna do instead is we're going to lock the end cap, that way, the dower does not pop off when you put this on a roof. Carefully holding onto your crossbar, lift it onto your roof and pop it onto those brackets. So here's a closeup of what that will look like. We'll just loosely fit it into those grooves for now 'til we put both crossbars in. Then we get our tools. We're going to want our crossbars even on both sides. This actually isn't square. There's like an inch difference between the front crossbar and the rear crossbar in terms of overhang. So overhang's measured from the tower right before the end cap. I have it like five and a half inches here and then six and a half inches in the back. If that's the same on both sides, then you're good to tighten down. With that small wrench, We're then going to tighten those towers down. If you worked ahead of time you've gotten it mostly tightened down just enough to move things around, which would be good 'cause this is kind of tricky since you can't see it. Secure the tower to the rail with these 10 millimeter bolts, split washer and flat washer. So these pop in through the hole on the tower, just like that. And you're gonna need a 10 millimeter wrench. Ideally something that's low profile enough where it can fit underneath that tower. Tighten all of them down. Final step is to put the doors on. After everything is tightened down, we have the doors in the unlocked position. We're gonna fit them into that groove there. Turn the key to lock it. Remove, double check everything's in place. Do that for all four doors. Everything's tightened down. Everything's secured and locked. I like to give it just a good shake just to double check that everything is in place. Also, double check the end caps to make sure those are locked too. Put away those keys in a safe location. But now you're ready to load up your roof rack and hit the road because you just installed a roof rack. And that right there was a look at our Rhino-Rack roof rack with the 49 inch long Vortex Aero crossbars and the RCL feet for flush rails here on our 2023 Chevrolet Trailblazer.
Average Customer Rating: 4.6 out of 5 stars (40 Customer Reviews)
Custom fit kit lets you mount Rhino-Rack RC or RV series legs to a vehicle with fixed mounting points. Legs mount to vehicle with attachment studs. Molded inserts cover bases when the legs are removed. Includes 4 pads, covers, and mounting hardware.Fitment is good, did not come with security capscrews even it included a security wrench. The rack can be removed with allen wrench.
When rack is in place, I cannot use the sunroof on 2023 Buick Enclave.
Otherwise, it works fine!
Love etrailer. They always have anything and everything you need and always at a great price. Also great videos and tutorials to help with your DIY install! Salvaged my old Rhino Aerobars with a new Rhino roof kit from etrailer for my Bolt.
Custom RCP Fit Kit was perfect for my 2018 Chevy Bolt. Screws fit perfectly in the predrilled holes on the Bolt's pVery solid and holds my 80 lb tandem kayak mounted upside down on my rhino rack cross bars with 2 tie down straps over the kayak, and a front strap attached to a loop strap held in pace by the hood. I attached the rear strap to my bike rack trailer hitch. Maiden voyage this past weekend to a spring run 45 minutes from home. Kayak didn't even budge an inch. Rubber on the surface of my rhino racks prevented any slippage.

Roof rack fits great and works well as expected. We have it installed on a 2018 Buick enclave. If you attempt to open up the moon roof while installed it only opens half way running into the rack. That is the one issue we ran into which we were unaware of at time of purchase. It would be good to know upfront for consideration. Aesthetically, I do like the look of the 'lower profile' rhino bars than factory set option, but it does restrict the moon roof.
Best rack I can find for the Chevy Bolt. They will howl like a banshee at most speeds so I use them just as needed. Installation was easy and product is well made
The rail kit instructions were easy to follow and helped ensure a great fit. We’ll done.
Very easy to install and it looks great on our 2019 Buick Envision.
I had tried to buy OEM Cross Bars for my '21 Cadillac XT6, but no one had them, and it looked like a long term problem of availability from Cadillac. So- after ordering and receiving some cheap bars that the ad on (that auction site) said were a "perfect fit", and finding them to be 1/2" short of reaching between the rails, then returning them for credit (but not for the shipping!), I contacted etrailer.
I have a Thule Cargo Box that I bought from them in 2016. I use this for one long trip (1900 miles each way, every year.)
Kaylyn at etrailer researched quite extensively for cross bars that would meet my needs: strong, nice appearance and above all quiet! She got back to me a day later, recommending Rhino Rack Aero Bars, and the attachments as being the best available. She cautioned me that (like any aftermarket bars) they would not be as quiet as OEM flush fit bars. I value honesty.
I installed them, and found the kit to be very complete. See the pictures- it looks great as far as I am concerned. And they are virtually silent at up to 70 MPH (I'll try them faster when we leave!). One caution: do not forget the plastic "Measuring Strips"- they are IN the bars, and are marked for measuring. But the real purpose is to seal the BOTTOM of the cross bars to eliminate "loud whistling"- ask how I know.
Perfect fit.
Great service , fast delivery
terri took the time to review my order and called me what customer service!
Great quality product for the 2020 Chevrolet Bolt EV in Premier trim.
Arrive quickly and was easy to install
Quality product,fast delivery.
So fast, so easy, perfect thank you
Installed Rhino Rack platform on a Hyundai Kona. This kit made the transition from factory rails. Nice fit!
I AM SO PLEASED W/MY PURCHASE AND THANKS TO ETRAILER THE WHOLE PROCESS OF SELECTING WAS MADE EFFORTLESS W/THE STAFF ONLINE AS WELL AS VIA PHONE.
THE VIDEOS ARE INCREDIBLY USEFUL AND SO PRECISE AS TO INSTALLATION AND IN HELPING TO CHOOSE THE CORRECT ITEM FOR THE PARTICULAR AUTO DRIVEN. THE REPRESENTIVE, NICOLE WAS VERY KNOWLEDGEABLE AND SO CONCERNED TO GIVE YOU THE BEST SERVICE POSSIBLE. ETRAILER...PROFESSIONAL....TOP VALUE....A PLEASURE TO DO BUSINESS WITH.
The product info on your website led me to believe that the vortex strips were included with the bars. They were not. I have always bought Yakima in the past and will in the future.


Do you have a question about this Roof Rack?
Info for this part was:
At etrailer.com we provide the best information available about the products we sell. We take the quality of our information seriously so that you can get the right part the first time. Let us know if anything is missing or if you have any questions.


Thank you! Your comment has been submitted successfully. You should be able to view your question/comment here within a few days.
Error submitting comment. Please try again momentarily.