
Furrion Arctic RV Refrigerator w/ Freezer - Side-by-Side Doors - 15.6 cu ft - 12V - Stainless Steel
(5 reviews)
Price: $2,993.10
Furrion Arctic RV Refrigerator w/ Freezer - Side-by-Side Doors - 15.6 cu ft - 12V - Stainless Steel
Item # FR62PJ
Our Price: $2,993.10
In Stock


- All Info
- Reviews (5)
- Q & A (0)
- Videos (3)
- Photos
Furrion RV Refrigerators - FR62PJ
- 12V - Battery
- 16 Cubic Feet
- Full Fridge with Freezer
- Furrion
- 32W x 25D x 70T Inch
- Stainless Steel
- Freestanding
Bring the comfort of home on the road with this spacious, residential-style fridge. The elegant, side-by-side stainless steel doors are a welcome addition to any décor and require less clearance to open than traditional fridge doors.
Features:
- Refrigerator has side-by-side doors allowing easy access to both fridge and freezer
- Recessed handles give that sleek, modern look
- Moveable shelves and compartments organize your food for those long trips or off-grid adventures
- 3 Shelves, 2 drawers, and 3 door compartments in the fridge
- 3 Shelves, 2 drawers, and 3 door compartments in the freezer
- Replaceable charcoal filter keeps foul odors from taking over your fridge and kitchen
- Exterior LED display shows the temperature in the fridge without opening the doors
- Lock keeps doors from swinging open while traveling
- Door alarm lets you know if the door is open or temperature is too high
- Stylish stainless steel front complements most RV interiors
- Smart technologies ensure your fridge works under harsh conditions
- Climatesmart - fridge can withstand sub-zero temperatures and extreme heat
- Vibrationsmart - fridge can withstand shock and vibration caused by rough terrain
- Simple installation - hardwires directly to your 12V electrical line
- Adjust front feet to ensure fridge is level - hardware included
- Use back wheels to maneuver into place
- CSA Certified
Specs:
- Overall dimensions: 33-1/8" wide x 70" tall x 25" deep
- Capacity: 15.6 cu ft
- 9.5 cu ft refrigerator
- 6.1 cu ft freezer
- Voltage: 12V DC
- Weight: 176 lbs
- 1-Year warranty
Note: Install the refrigerator in a convenient location away from extreme heat and cold. You must allow 1" of space on all sides for proper ventilation.
Feel right at home with this side-by-side door refrigerator. Recessed handles, an LED control panel, and a door alarm give you all the benefits of a residential fridge while quietly consuming less power. The 2 clear drawers in each compartment are perfect for the organization of your fruits and vegetables. You can place commonly used items at the height that's most convenient for you. There is a slight disadvantage to side-by-side doors - what you gain in organization, you lose in shelf width. Some larger items may not fit, such as platters and large turkeys, even though most families do not need that kind of room on a daily basis.
RV Fridge Replacement
It doesn't matter if you are replacing your non-working refrigerator or are just ready for an upgrade for your RV kitchen, you have a few things to consider before making that purchase. Most original RV refrigerators use propane for absorption cooling, while this Furrion model uses 12V DC hooked to your RV's battery. Absorption refrigerators can be hard to fix, don't have a dedicated defrost cycle, and take a long time to cool down, but they run on propane which is great when you don't have electricity.
The 12V refrigerators require little maintenance, most have an auto defrost cycle, and they can cool in as little as 1 hour. They're also safer because they use a compressor instead of propane, which allows it to cool down 4 times faster while avoiding safety risks associated with propane such as fires, gas leaks, and explosions. The downside is that you must have the proper battery bank or invest in solar. If you don't, you could drain your batteries in as little as 1 night of dry camping.
2021123827 Furrion Arctic RV Refrigerator - Double Door - 15.6 Cubic Feet - 12 Volt - Stainless Steel
Alt FCR16DCASA-SS
Installation Details Alternate Instructions


Video of Furrion Arctic RV Refrigerator w/ Freezer - Side-by-Side Doors - 15.6 cu ft - 12V - Stainless Steel

Videos are provided as a guide only. Refer to manufacturer installation instructions and specs for complete information.


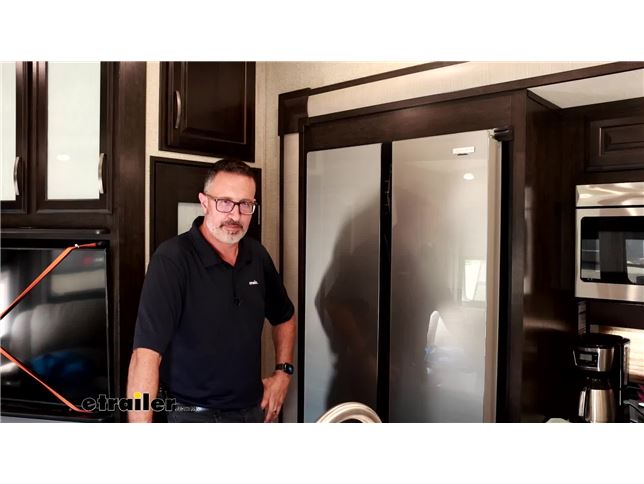
Video Transcript for Furrion Arctic RV Refrigerator with Freezer Installation - 2019 Grand Design Momentum 5W Toy Hauler
Hi, John with etrailer. If you're ready to upgrade the refrigerator in your camper, either because it quit working or you want to upgrade to just a 12 volt model and get rid of the propane, well check this out. This is the Furrion Arctic. This is a 12 volt side-by-side residential style refrigerator, and we installed it on our 2019 Grand Design Momentum. So right off the bat, there's a couple of things that we learned on this installation that I want to share with you upfront. Number one is gonna be the power requirements.
This camper had a Norcold refrigerator in it that ran on A/C power and propane. Now there was 12 volts back there, but that was really just to operate the fridge controls. This unit here is a true 12 volt fridge, so it has a 12 volt compressor back there. So the power requirements are going to be higher. It can draw upwards of 19 amps.
So one of the things that we had to do was run additional wiring for a dedicated circuit for this refrigerator. It's not the end of the world. As a matter of fact, it was probably one of the easier things we had to do to get this refrigerator in here, but that is something that we didn't know that we needed when we went into this installation. Now the second thing that we found that was gonna be a challenge was the dimensions of the fridge. Now, the Norcold that we replaced was 36 inches in width, and this Furrion comes in at just under 34 inches.
So there is gonna be a gap on either side. We're gonna get into that on the install video, but these are just some important challenges that you need to think about when you're looking to install this refrigerator. I mean, with that being said though, this is a great option and a great upgrade fridge for your camper. So I think the biggest advantage to this fridge is the fact that it's just a single powered 12 volt. You know, when I was growing up, if you we're going down the road and you wanted your fridge to run, you would've had to use the propane option.
And of course that has its own challenges and dangers. I mean it worked great, but nowadays with a refrigerator, a residential style like this, or one that's only A/C you're gonna have to get an inverter or something else to power your fridge and this makes it one less thing that you need. If you have a solar setup, which everyone is going to, then you've got a way to charge your battery bank and then your battery bank is gonna power your fridge. And it's just nice to be able to know that your food is being chilled going down the road and you don't have to worry about a flame out or any propane problems. Now the Furrion fridge does have a lot of nice features too. We can go over here. First of all is gonna be, it does have a function lock on it so you don't accidentally hit this and turn something on or off. One of the things it has this icon here is gonna be an off grid or a vacation mode. And what that does is if you need to conserve power for whatever reason, if it's a cloudy day, it's just gonna operate the fridge and freezer at a different temperature and still keep everything nice and cold for you, but it's gonna conserve your power. The other thing that it has as well is going to be kind of like my fridge at home has, it's gonna have a super freezer and a super fridge mode. And what that is, this is gonna be super freezer mode and then super fridge mode, and you can run those independently as well. Basically what that does is it runs the compressor on the fridge for a predetermined amount of time. So that if, say you went grocery shopping and just chalked this full on either side of groceries, it's gonna run that compressor and it's gonna chill your food quicker and then it'll keep it fresher for you. Now if we take a look on the inside of the fridge, this is gonna be 15.6 cubic feet, which is quite a bit for a camper, but basically you're gonna have plastic shelving that's adjustable on the doors. These are glass shelves on the either side, and you have some adjustments with these. And then down below you're gonna have two bins, two bins on the freezer side and two bins on the refrigerator side. They're on the smaller size, but the top one's a good size for deli meats or produce or whatever. So all in all, I think this 12 volt fridge is a great option. In our case, we have a camper that's gonna roll down the road, but if you have an off-grid campsite or even a camper that you're full timing in and it doesn't move anywhere, then it's even better for you. You know, we had our own set of challenges when installing this because this is gonna move down the road. And so being a residential refrigerator, we ended up having to secure it differently than the Norcold was. So if you wanna watch this installation video we can show you some of the stuff that we ran into, some of the problems that we had. And just know that your situation might be a little bit different. It just depends on your setup. Ours was in a slide, yours may not be. So let's check out the install. Okay, so before we begin our installation, there's a few things that we need to think about. Number one is gonna be the space requirements. So you're gonna want to measure your old fridge height and width and depth, and you wanna measure your doorway to your camper to make sure that you're gonna be able to get things out. Now, one thing I know for sure is these doors are gonna have to come off. We don't know yet if we're gonna have to remove this island to get it out of the way. So these are all things we're going into this video kind of blind. Every time you do a job like this, it's gonna be kind of custom. And so there's a lot of things that you need to consider, the size of the new fridge as well. Now we know the new fridge is gonna be a little bit smaller in diameter wise, so we are not gonna have any space issues with this one. This is a 36 inch fridge. The fridge that we're installing is gonna be slightly narrower coming in at 32-3/4. So we will have to do trimming later on in the video to trim this cabinet out. So we've got everything protected right now. We have the floors protected with the box that the new fridge came in. We've got this countertop. We expect that we're gonna be able to pull this fridge out, take the doors off. Hopefully it'll fit in between this walkway here and we should be able to slide it out this way. We just don't know yet. But first things first, we're gonna have to go around to the backside. We have a few connections that we need to look at. Okay, we're outside the camper here. This is gonna be the backside of the fridge. Wherever your refrigerator is mounted, more than likely you're gonna have a panel that you need to take off here. These we're just quarter turns, so they're pointing straight up and falling off. Behind. this panel here is gonna be your fridge connections. Now this one here is a Norcold. This is the fridge that came with this camper. Now this is a tri power. This is gonna be propane, 12 volt, and then house power, you know, 120 volts here. So there's a few things we need to think about since we are replacing this with a 12 volt fridge. The only thing that we're gonna be using back here is gonna be the 12 volt lines. It's not a big deal just to unplug the 120. And the propane, we're gonna need a cap. More than likely this is also going to feed the stove. So we'll need to see if we're just gonna put a union in here or if we're just gonna put a cap over here. Things we need to contend with. This refrigerator's gonna be bolted down or screwed down with this plate. So we're gonna have to get a Phillips head screwdriver and get this up and see what else is holding this fridge in before we can slide it out of its compartment. (drill grinding) Okay, so we have all of these screws outta the bottom here. There still might be more that's holding our fridge on, but for right now, we're going to handle some of these connections here. So unplugging it from the wall is easy enough. They had an outlet over here. Our 12 volt lines, do yourself a favor and identify your lines and then disconnect 'em. Not everyone's gonna have these WAGO connectors, but you know, this is easy enough to follow up. We could see the 12 volt. This is gonna be your positive and this is gonna be your ground. So I pre-labeled these to make sure that we don't get that mixed up in the future. These terminals, they flip up and you could pull the wire out. These things are pretty neat. I use these just about everywhere. So our 12 volts disconnected. the house power, the one 20 volt disconnected. Next thing we're gonna have is the gas line. Of course you wanna make sure that your propane is shut off. We have already done that, so we're gonna disconnect this probably at the fridge right here. Lemme get another wrench on this. So you have your one wrench on the body to hold that still, and you can just squeeze the wrenches together and that'll loosen that up. Now it's gonna be normal to have the odor of propane, but like I said, that's why you wanna make sure that everything is turned off. Okay. So at this point our fridge is disconnected from power. You're gonna wanna look up either side. In our case, we do have an upper vent, and so we can check for bracketing up at the top. So my thoughts on this right now is we still have something that's holding this fridge in. We're gonna check up on top and then we're gonna check on the inside as well. Now we're back inside the camper. On the Norcold fridge the upper trim and the lower trim is removable. Just grab this, there's gonna be some tabs here. Just gently pull out. Here's the tabs I was talking about. And we can see that they've got this fridge screwed into the cabinet work. So there's gonna be probably the top and the bottom comes off the same way. They're gonna have screws down there as well. (drill grinding) Okay, so with the top and the bottom screws, I can give this a pull and we can see that the refrigerator is loose now. Now these things are very heavy, so you're definitely gonna want some help when you're maneuvering this out of the camper. For right now, I'm gonna kind of scoot this out. I want to take the doors off and try to get a measurement of how deep the refrigerator is compared to our countertop here to see if this is gonna be feasible to get this out. Okay, I was able to get the fridge pulled out this far and this is what I wanted because this finishing trim right here is bolted to the fridge itself. So we're gonna gonna pull this off because we need it as narrow as possible to get out the door. And we're also gonna pull the doors off. (drill grinding) You are gonna have four screws holding that top hinge on. Once you get those loose, just like this, you can lift the door right off. I wanted to show you the side trim here. Once you get all the bolts out, you can detach it from the top and the bottom. It'll just kind of slide out like that. So as you work your way around, we can do that. The next one I wanted to show you real quick was to get the lower doors off, you're gonna have this plastic trim piece here. Let me let open the door. You can reach your finger back behind here and then it'll pop that out like that. And then these are gonna be the bolts right here for the lower door. (drill grinding) Same as the top doors just go ahead and lift up and they'll pop right off. So we have the doors off, but we still have some electronics that are sticking out. The goal of this is to make this as light as possible and as narrow as possible so we can hopefully get it out of the door. So over here we're gonna have just a regular 1/4 inch sheet metal screw, and then to the inside on this particular model, if you look down inside of here, you're gonna have two tabs. We're gonna use a right angle pick and I'm gonna pull out on this plastic piece while pushing down in the tabs, and that's gonna allow us to get access to the center screws here. (drill grinding) And we can see behind this board. So this connector has been foamed in. Looks like we can disconnect the board though. So at least the big bulky items are out of the way. I'm gonna do the same thing with this side here. Okay, so we have all of the doors off the front, we have anything that's protruding, including the bottom hinges, and we're gonna just do our best right now. We haven't tried this off camera yet. We don't know if this fridge is gonna come out and contact this, so we're gonna pull this. The nice thing is this does have handles. I got Tom here to help me. These Norcold's are notoriously heavy and this is gonna be a tight fit. If we can tilt. How you looking Okay, we're there. Yep. Yep. 3, 2, 1, up. Perfect. Okay, so I'm gonna call that a win in my book. We got the old fridge out. The main entrance we were able to maneuver it around the island and slide it out of here. Now yes, it was a tight fit. The fridge with the doors off all the way to these back coils back here is around 26 inches. And our door, just to let you know the numbers we're working with on our camper today, that main door is a 28 inches in width. So it did fit, it took three of us to get this thing out, especially when we got closer to the stairs here. So these Norcold's are pretty heavy. I know that the Furrion units are a little bit lighter. They're only 12 volts, so they're not gonna have all of this extra weight on the backside of it. From here, we're gonna clean up on the inside, get some dimensions, we're gonna get the Furrion inside the camper. Okay, so we've got the new Furrion fridge here. We're gonna do the same thing as the other one. We're gonna take the doors off. Anytime that you can reduce weight and dimension on a major appliance like this when you're going up the stairs, it's a good thing. So if you look up here at the top, you're gonna have a cover that's covering the hinges. You're gonna have two Phillips head screws at the first edges right here that are holding that cover on. And once you get those loose, this cover will kind of snap off. It has a connector back here and then it kind of slides over here. Now you want to do that carefully. Both sides here are gonna have a pin switch for the doors, for the door lights. So you need to be careful with that. But the right side door here has the controls on it. And so this connector we just push down and pull out and that'll unhook. Now I've got the temperature sensor and the pin switch disconnected from this. So we can set this off to the side. Now the door is being held on. You have four 8 millimeter screws here that we need to remove. (drill grinding) These are gonna come off the same way. Once you have the top loose, just pick up on the bottom and the door will come off. Now the left door here will come off the same way. You're just gonna have less connectors. You won't have one of these on this door. So just do the same thing to get this door off. Okay, so this is where we're at right now. We we're able to get the fridge in the front door and wrapped around right here. Now when we tried to insert it into the cavity here, we we're running into clearance issues up here on top. And it's not just gonna be the hinge covers, it's also this power supply panel in the back. Now we can temporarily remove the panel back here, but we're still gonna have issues with clearance up here. This edge of this refrigerator is gonna be sitting flush with our cabinet here. So we have a couple of options we can look at. One is to remove this upper panel and trim it to allow us to get this in. The other one is, the difference between the Norcold and this one, this one has wheels on it and it sounds nice except it's gonna be in an RV that moves. We may look into just removing the wheels on this so that it's gonna sit in place. I'm gonna check and see if we have any clearance issues with the bottom door to see if this can sit flat on the ground if it's okay for it. So that's where we're at right now. Okay, so we ended up taking the wheels off the bottom of the refrigerator. Now this is not too terribly a hard process to do. What you're gonna have is the wheel and then you're gonna have these axles that are aluminum and they're hollow and they go through. I just ended up using a small screwdriver and hammered them back out. So it appeared that the back ones we're not crimped, the back axles we're not crimped, the front ones were, but they still drove out just fine and we took off all four wheels. We don't want this rolling around. That's the last thing we want. The front wheels we're a little bit larger than the rear ones. So I was hoping to gain some space and be able to get this fridge in the hole here and it still didn't fit. There's gonna be some space requirements for that plastic panel on top. And then eventually, even if we did have enough room to kind of tilt it in and pick it up, the front door cover for the hinges are still gonna hit. So what we're gonna do is remove this top trim panel. These are usually siliconed in and then screwed in with wood screws on the side. We'll get a shot of that in just a second. They did on this one have reinforcement blocks that sat like this on the other side, so it kind of sturdied it up a little bit. So I pry these off on both sides. We'll get a shot of the wood screws on the inside so you see what I'm talking about. Okay, so standing inside where the refrigerator would be, we're looking out and these are the wood screws that you can see here they're holding that trim panel on. So in our case today, it looks like these are Phillips heads. So I'm gonna get these zipped out. It's possible that this trim board is also siliconed or caulked in. You know, we can see this and we can see along this top edge here that we have a thin bead of silicone. So we're gonna get these screws out on both sides and peel this back. (drill grinding) So we definitely had silicone holding that piece on and it had a top board going along the top here that was holding and also bracing the top of this. So we got the silicone removed and now we can get the fridge in here and start measuring for our trim. We're gonna go ahead and get the fridge installed in the hole here. Obviously you're gonna want some help. I've got Thomas here helping me today. Ready Yep. Slide it back. Now I'm not worried about the depth as this is the same depth as the other fridge and it was definitely a lot easier to get up here once we had that top trim panel removed. Now that the fridge is where it's supposed to be, we can go through and take a look at a few things. Number one, the fridge is sitting back, it's leaning back, whether that's the compartment or just the fact when we took the wheels off the way it's constructed on the bottom. So first thing we're gonna have to do is we're gonna wanna level this with the front of our cabinetry here. So that's one thing I'm gonna be looking at right off the bat. Secondly, we're going to put all of the hinges and the doors back on. We wanna see how this fridge is gonna work with opening the doors if we need clearance, how much clearance we need on either side. And then finally, once we install the top covers and everything else, we need to see how are we gonna complete and trim out our top board up here. Once that's done, once we kind of have a general idea of how to do this, then we can talk about and figure out how we're gonna fill this gap on either side. Now the important things for us, you know, is this fridge going to work in this space Yes it is. So with a 12 volt fridge like this, it's different from the Norcold. This fridge loses its heat on the sides, so it cools on the inside and it needs to get rid of the heat somehow. This one does it on the top and the sides. So we need to maintain one inch of clearance on the sides and the top. Right now I took the insulation out on the top. We we're able to leave the insulation on the sides inside of here. We have more than an inch of clearance on either side. So the fridge is gonna be able to breathe the way that it needs to to work properly. So those are some of the things I'm looking at right now. Okay, so for this next part what we did was we had this top board out and we ended up trimming it with the edge. And this is one of those things where it's gonna depend on your situation. Ours being built into a slide like this, we don't really have walls that we can tie into. So we're gonna be using kind of this flexible molding. This is gonna work for us. I mean, most people may not have this laying around. You can get this at home centers or here at etrailer. This isn't the only way that you can do this though. Like I said, this is gonna be one of those custom jobs that you know, stick with what you're good at. If you're good at trim work and woodworking, you can absolutely get some trim panels out here and trim that out. You know, I would still recommend some sort of rubber seal because the back of this fridge has to be able to be ventilated. So we're putting this flexible molding up. Once the fridge comes forward and is put into position here, this is gonna seal against the fridge that's gonna keep bugs and drafts out as well. So that's where we're at right now. I'm gonna be installing this trim. I've cut the edge back on this T-track just so it goes up and once the fridge is installed I'll be able to cut this and have a nice corner. But in the meantime, we're just gonna be stapling this all the way down where the original Norcold had been installed. And so this will cover some of the nicks and stuff that happened when they were installing that fridge. And this just is easy enough, it gets stapled in. (staple gun clacking) Okay, so we we're able to get the trim all stapled down and we have a nice airtight seal even along the top up here. Had to do some trimming. It's gonna be custom no matter what you do. But the intent behind this was to keep the outside outside and the inside inside. So we have an airtight, bug tight seal, and the fridge is supported right now left to right by this top board up here. The way that we notched it and cut it so it won't go left and right. We can go around back and we'll screw it down. (drill grinding) Now that our fridge is secure, before we do any electrical work, we're gonna cap off the gas line here for the propane. We had a 3-way and the other option is we could just put a union in here, but a cap is gonna work just fine. This is a 3/8 inch flare cap. If you're doing this at home normally these caps go on dry with no tape. This is a flare fitting, but I know there's a lot of stuff online where people would like to use it or not use it. For today's video, this is how we do it. And since it's on a T like this, you'll notice I have my vice grips and a 7/16 wrench just to give me a little leverage to tighten this down. So we'll start with that. Propane is pretty stinky stuff, so if you smell even a little bit, you can come back and tighten this up further. Now with that sealed, we're gonna take some RTV. From the factory they had this sealed off and I don't think it's a bad idea just to keep insects out. And to give this a little bit of more stability, I took the existing grommet ring here and reattached it down. So this is like a firm but flexible kind of a hold that we're looking for on this. Okay, so we have the propane line secured and capped off. The refrigerator is bolted down. We've got the back cover back on. So we get to the point now where we are going to hook this up. And this is the wire that we ran earlier. This is a dedicated line that's tied into our fuse panel and we ran this all the way and made our connections up at the top of the fridge. Even though our camper came with existing 12 volt wiring, this ended up not being heavy enough to run our refrigerator. That Norcold that we replaced, they run at about 3 amps or so. This refrigerator could run upwards of 20 amps either on initial startup. You usually won't pull that much while it's operating. But these wires probably in our camper go to a number of different places and it's just not a dedicated line. And in the end, it wasn't heavy enough to run this compressor. So this line we've got here available at etrailer, if it's 15 feet or less, which is what our run was in our camper here, 10 gauge is okay for you. If it's longer than 15 feet, they recommend 8 gauge wiring, which it's heavy wiring. So if you can make it shorter in a dedicated run, you're gonna be better off. Now with the fridge hooked up to 12 volt power, we can come inside and check the functions of our fridge and it's doing what we would expect it to do. It's gonna be cold and colder on the freezer side. Our fridge has been running for about an hour and you know, you can absolutely feel a temperature change. So these are the kind of the things you know, you want to make sure if your wire is heavy enough and everything's gonna be working normally, then that's really all there is to the installation. We're gonna go back to the back of the fridge, we'll secure the wires on the backside and replace our covers. Other than that, that's really gonna complete the installation. And that was a look at some of the features and the installation of Furrion's Arctic 12 volt Side-by-Side Residential Refrigerator on our 2019 Grand Design Momentum.
Customer Reviews
Furrion Arctic RV Refrigerator w/ Freezer - Side-by-Side Doors - 15.6 cu ft - 12V - Stainless Steel - FR62PJ
Average Customer Rating: 4.6 out of 5 stars (5 Customer Reviews)
Bring the comfort of home on the road with this spacious, residential-style fridge. The elegant, side-by-side stainless steel doors are a welcome addition to any décor and require less clearance to open than traditional fridge doors.by: Phillip 03/07/2024
Everyone I dealt with was super helpful, from the sales associate to customer service and the experts. Our new fridge is installed and running great. It also looks awesome.
by: John10/03/2023
Madison was a doll! The products and the quick responses are excellent. The weak link is the shipping Co. Tforce ( formerly UPS freight). They are junk! They show up unanounced or planned and if you are not able to drop what you are doing or you may not be there at that time they just go back to their terminal and charge you for another delivery even if you want to do a customer pickup. Tforce is all about extra fees! They dont answer their phone, dont return messages even tho we specified 24 hr call before delivery with the shipper. Puts a serious dent in the otherwise excellent etrailer. Unfortunately etrailer tells me they only use this shipping Co.
by: Chad 09/24/2023
Fridge is good quality and cooled down to temperature in a fraction of the time. Haven't had a chance to use it yet besides just running it while in storage.
by: Allen 11/14/2023
Looks good set it up so far works right only 1 day of operation time will tell
by: Bill 11/17/2023
5
5
See what our Experts say about this Furrion RV Refrigerators
- Installing A Furrion RV Fridge In A 2017 Grand Design Solitude 375RESHi Phillip, John installed the Furrion Arctic RV Refrigerator w/ Freezer # FR62PJ in a 2019 Grand Design Momentum. In the video he did up having to take the top fascia board off and trimmed it down to fit the new fridge. To cover the gaps on the sides he just ended up using some slide out seals we had lying around in the shop. You can get some rubber gaskets from your local hardware store in the appliance section to cover the gap or nail some new trim around the edge and butt it up to...
view full answer... - Does The Furrion Arctic RV Refrigerator with French Doors Come In Stainless Steel The Furrion Arctic RV Refrigerator with French Doors - Black Glass # FR42PJ does come in stainless steel with part # FR62PJ. While running this refrigerator can pull 11 amps per hour with an estimated 1.8kWh per day. That being said, there are a lot of factors that go into energy consumption, such as the temperature of the food you're placing in it, how many times you open the doors and how long they are left open, the temperature in the RV, etc. The fridge will have to work harder to...
view full answer... - How Deep Is The Furrion Arctic RV Refrigerator # FR62PJ With The Doors Removed? With the doors and hinges removed on the Furrion Arctic RV Refrigerator # FR62PJ it is 21-7/8" deep.
view full answer...
Do you have a question about this RV Refrigerator?
Info for this part was:

Video Edited:
Joshua S

Video Edited:
John S

Video by:
Chris R

Video by:
Ethan H

Updated by:
Wilson B

Edited by:
Amanda M

Installed by:
Michael B

Test Fit:
John A

Written by:
Kim H
At etrailer.com we provide the best information available about the products we sell. We take the quality of our information seriously so that you can get the right part the first time. Let us know if anything is missing or if you have any questions.
Product Experts Available Now!
Call 1-800-940-8924
Thank you! Your comment has been submitted successfully. You should be able to view your question/comment here within a few days.
Error submitting comment. Please try again momentarily.