
Summer Starts Here - Save up to 70%


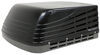
LED light bar with durable aluminum housing produces a bright white light. The combination spot beam and flood beam lets you see at a distance, as well as off to both sides. Hardware, brackets, and wiring harness included. 96 Diodes.
Features:
Specs:
Lumens are used to measure the amount of usable light that is put out by a light source. Raw lumens represent the number of lumens that the manufacturer claims the LEDs are capable of producing. It does not include the light's drive method or the amount of light lost from the lens or reflector. Effective lumens take these factors into account and represent the number of lumens that are actually produced by the complete light assembly, not just the amount of light that the diodes are capable of producing. This light has a 20,000 raw lumen capacity and produces 11,600 effective lumens.
California residents: click here
Videos are provided as a guide only. Refer to manufacturer installation instructions and specs for complete information.
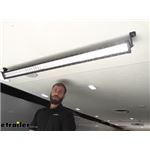
Hey guys, Kevin here with etrailer. And today, I'm gonna be showing you how to install the Optronics Off-road LED light bar here on our enclosed trailer. So if you're off-roading or maybe you have an enclosed trailer, just like our neighbor does today, you're gonna need a whole lot of visibility. To help with that, this LED light bar has two rows of 20 LEDs each to help give you optimal visibility. It has a super easy adjustment. All you have to do, is on the sides there's gonna be two bolts that you can easily tighten down or loosen, and then slowly turn your light exactly how you need it.
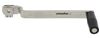
For ours today, our neighbor needed it inside of his trailer, instead of outside like you normally would because he's having a in. He needs a whole lot of visibility right here at the entrance of the trailer. So what I've done so far is I've actually tilted it down so that he can see it. And then all we have to simply do is just tighten down our bolts with the provided Allen key or to lock that in place. That way, when you're rolling around, maybe you're hitting bumpy roads or if you're off-roading with it, you know it's gonna stay exactly where you need it and not shift.
As you can see on the back here, there's these channeled fins on the back of the housing to let heat dissipate quickly so that your LEDs have optimal performance. So the actual housing around the lights is a black powder-coated die cast aluminum which is gonna help resist any rust and corrosion that you might have if this is sitting outside, in the rain, or if you're out mudding, off-roading, doing any kind of outdoor activities. The lens here is made of a polycarbonate which is also impact-resistant, which means that if a rock comes up and hits that you're not gonna have to worry about it shattering or cracking, like you would if it was typical glass. With this whole housing actually being waterproof, you also don't have to worry about any water getting in and ruining any of the wiring or the LEDs itself. Because the system is compatible with both 12-volt and 24-volt electrical systems, it makes it super versatile so that you can use it with our enclosed trailer that we have today.
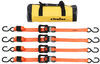
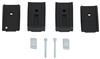
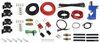
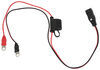
Maybe you wanna put it on the outside of a work trailer just so you have some more light when you're doing any construction work or anything like that, or if you are putting it on a jeep 'cause you're off-roading or even just on your truck if you want to have extra visibility, maybe you drive through country roads and just your headlights aren't really cutting it. So this is where this light will definitely come in handy and give you better visibility. So this light bar is only going to come with the little wiring harness that comes off and then the actual brackets itself and the bolts to mount this onto whatever kind of application you have for it. Because of that, if you do want to run additional wiring, you are going to need to supply that yourself, or a switch if you wanna be able to turn it on and off, like we did today here on our enclosed trailer. I just threw on a little toggle switch that we could just easily press on and off for our light bar.
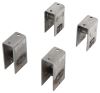
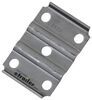
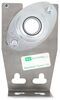
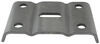
Depending on your application, this can be a very easy install. Honestly, with us, I was running it straight to another light that had already had wire available within the same vicinity. So it really wasn't too hard to tie right into it. Obviously, if you're running this further down a trailer, maybe through a car, something like that where you have to spend more time running the wiring, that's gonna be your hardest part, but as far as hooking up to the actual light itself and installing it, it's super simple. Now that we've gone over some of the features of this light bar, let's go ahead and show you how we installed it. To begin our installation, we're gonna go ahead and put our brackets on. As you can see, you could kind of put this either way just 'cause there's the teeth on here. But what you actually wanna do is make sure that you're putting it with this ring that kind of protrudes out into this slot right here instead of doing it that way. Obviously, if you absolutely had to, just because of your situation for whatever application you're trying to put it on, you could just 'cause it has the teeth. It's just not gonna be as great without that little ring kind of setting in there holding it in place. But I'm gonna go ahead and we're gonna take the smaller bolt that comes with your kit. We're gonna use our lock washer and our regular washer. We're gonna just hand tighten this down for the time being. So we get this exactly where we want it for our mounting. So there's gonna be two ways you could figure out exactly where you need to drill your holes for your brackets. You could have somebody else hold it up in place for you, exactly where you want it and then just make little marks through the holes that are in the brackets with a pen or a pencil. Or if you don't have anybody with you, you can go ahead and just measure the distance from the center of one bracket hole over to the other one. So that's what I'm gonna do right now. So when I have it lined up from center to center, I'm looking at right at 51 1/2 inches. So now I know that my distance between my bracket holes is 51 inches and I can transfer that up to the ceiling. Since we have a overall 85 3/4-inch width from our bracket here over to our bracket over there that covers up our corners. I'm gonna take off at 51 3/8-inch frame bracket width that we had originally, and then the difference between that is going to be our measurements that we're gonna draw on our sides here. So because we're gonna be facing outwards, I wanna really make sure that we have this set right. We're going to be putting right into our stud that's going across our ceiling here. So I'm gonna keep in line with that. And I'm gonna measure over 17 1/8, and make a little mark. So now I know I'm gonna be hitting my stud and I can go ahead and do the same thing on the other side. So your kit's actually gonna come with this bolt that's gonna have a nut, a lock washer and a regular washer. Since we can't really see up there to actually tighten this down correctly, I'm gonna have to shoot some self-tapping screws up into our stud. So I'm gonna go ahead and still use that lock washer and regular washer. And then you're also gonna have these little pads. There's gonna be a hole through it and that's gonna match up with the feet right here with our bracket. So we're gonna go ahead and hold that in place while we shoot our bolts through. So I'm gonna go ahead and I'm gonna do that right now. All right, so I'm screwing this in right now into that hole I drew earlier. I'm gonna go ahead, I'm gonna support this and work my way over to the other side, and put in our other self-tapper. All right, now that we have that in place, we can go ahead and start working on our wiring. So for our wiring, we're gonna be routing this just right across our ceiling. We're gonna use some wire loom, try to make it look a little bit nicer, have it come across over here and then tie into our existing lighting that's running for our little lights that we installed at the bottom already. But to do that, I'm gonna go ahead, clip this off real quick. And we're gonna dig into this wiring right here 'cause I'm also gonna be installing a little toggle switch. It's just gonna have a little quick on or off, make it nice and easy for us. That way, he can turn his light bar on as needed 'cause he is not always gonna want that shining right out into his eyes if he's just walking in and out of his trailer. So I decided this is probably a good height for our toggle switch here. So I'm gonna go ahead and I'm gonna strip back our wire loom. I'm gonna be real careful not to actually cut my wire yet, 'cause I'm only gonna be cutting the power and not actually the neutral. There we go. So now I can go ahead and make a little break in my power here, and you wanna make sure that you have this while your power's disconnected. We don't want any surges going through and messing anything up. And because I had already made this so tight before the first time I installed it. I'm gonna add a little bit more length to my wire just so that I can have this reattach correctly when we tie in our light. Crimp that down. All right. Now we can go ahead and start running our wire over for our light bar. Alright, so now we're gonna be going ahead and crimping on a butt connector to our power. Yeah, we're gonna run some wire. We're just gonna be using something that we had here. Your kit is not going to come with extra wire just 'cause they don't know exactly how you're gonna be running this and the length that you might need at place. And we can also crimp on some wire for our neutral. I'm gonna go ahead and twist this up, and then kind of cut off quite a bit of casing. We don't really need that much exposed wire. So once I get that nice and tight, I'm gonna cut off a bit and then we can do the same thing and crimp on a wire for our neutral. Now you can go ahead and route it. I am gonna grab some zip ties and wire loom and we're gonna get this kind of ran over to our other wiring over here, and out of the way, make it look kind of nice. We don't want these exposed wires showing. So right now I'm gonna go ahead and tie in our neutral wires. These won't matter for our switch 'cause the switch is only gonna be our power wire. So I already went ahead and put a butt connector on our bottom part of our wire or neutral wire that runs down to our light that's already installed. I'm gonna go ahead and twist these other two together, and we'll remake our connection with that butt connector. Crimp it down. And now we can start tying in our switch. So for that extra little piece of wire that we crimped on, we're gonna go ahead and kind of bend it back down 'cause that's gonna go ahead and match right back up to our original wire that we cut and we're gonna butt connect to that to one side of our switch 'cause we want this to always be on, and only our light bar to be operated by the switch. So with these two connected back together again, our light down there is gonna work anytime our switch is turned on. For all of our other lights, we can go ahead and crimp that to one side of our switch. Then for other side, we're gonna use another butt connector. Just go ahead and put it on this side first, and run that over to the power wire that we have running to our light bar. So now we're gonna go ahead and do a little test of our wiring. Make sure that our switch is actually working. As you can see the lights are on the ceiling and down at the bottom for our other lights. Let's go ahead and flip the switch. And our light bar is working and easily able to turn on and off. That way, it's not always blinding anytime he's happen to just walk in and out of his trailer, but is gonna be there and useful whenever he is trying to pull his race car in. So I've got some industrial double-sided tape here. That's gonna do a really good job at holding this in place since we're not actually implanting this inside the wall and we're just sticking it on but let's go ahead and do that now. And luckily, this pretty much fits this body of our switch here. Go ahead and stick that on. And now we can go ahead and peel back our backing and get it exactly where we want it, and just press down nice and tight. Make sure this is really getting stuck on there. Now that our switch is in place. I'm gonna go ahead and clean up all of our wiring here using some wire loom. Well, I think that about does it for today's installation of the Optronics Off-road LED light bar. My name's Kevin. Thanks for watching..
Average Customer Rating: 4.7 out of 5 stars (64 Customer Reviews)
LED light bar with durable aluminum housing produces a bright white light. The combination spot beam and flood beam lets you see at a distance, as well as off to both sides. Hardware, brackets, and wiring harness included. 96 Diodes.
Never worked, and unfortunately I didn’t install it until well after the return policy had expired. Too bad, it could have been perfect for my needs
Mounted on tractor with loader. Excellent option for night time work. Lights up work area well.
Does it's job and lights up the road and sides to keep you out of the ditches on rainy and foggy nights. A "must have" for me!
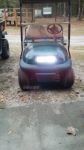
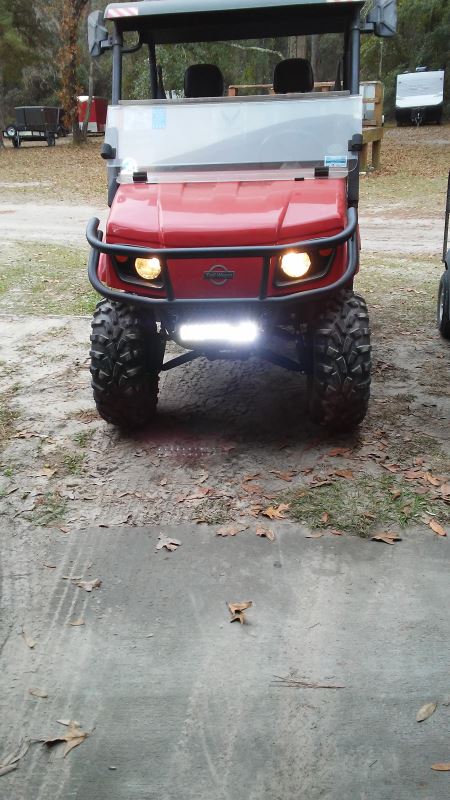
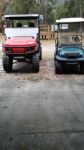
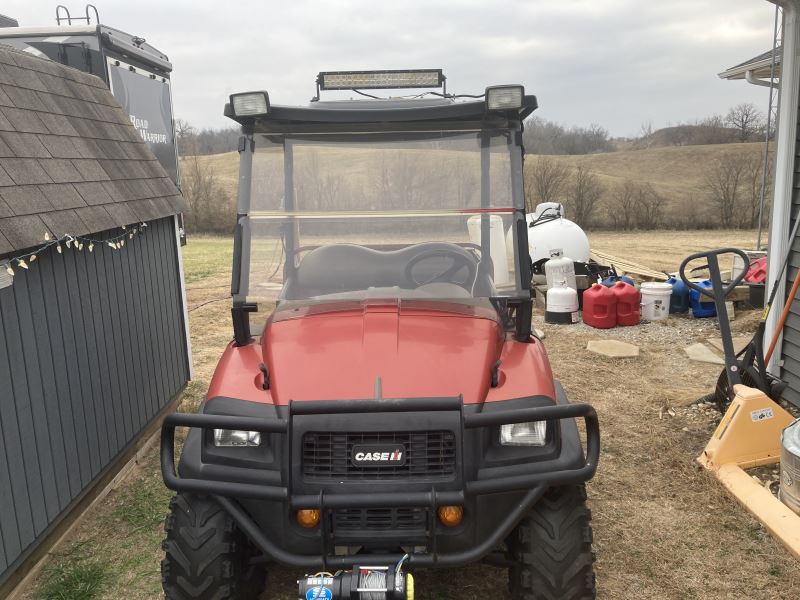
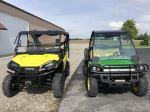
Great light bar for the price. Perfect size for my golf cart and UTV. Very bright. Easy to install and wire.
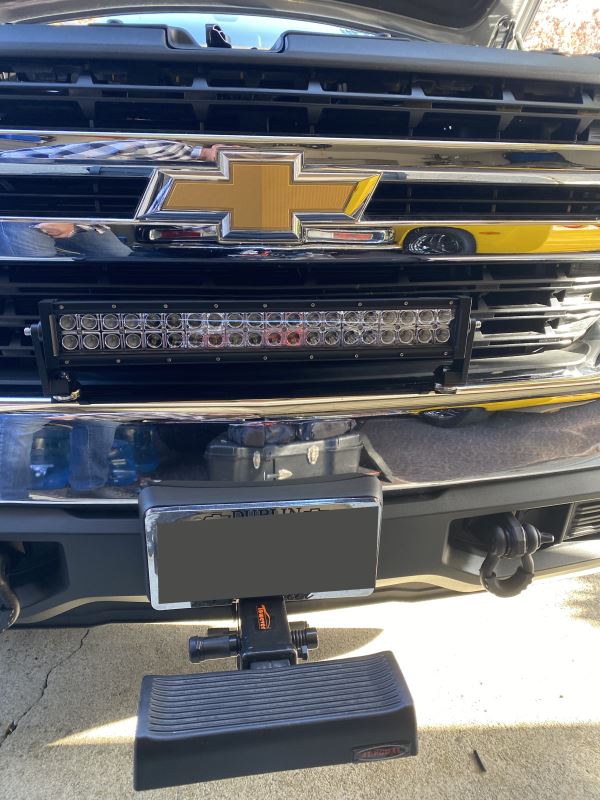
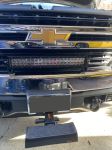
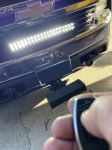
Very nice package, Very easy to install,It took a little extra time for me. I added a remote control switch to it that I can turn on and off from hundreds of feet away.
I also didn’t want to drill holes in my bumper so I found these rare earth magnets that I attach the brackets to.
With the magnets on the bumper, I couldn’t even pull it off but I did put a wire tie around one of the cooling fins around my grill Just as a safety precaution, primarily for bumpy roads.
I really like this light bar. Very bright and works really well when I am moving snow early in the morning or at night
Mounted on Polaris ATV. Great light for around the farm or on the trails.
This light works great. The only reason I didn't give 5 stars, is it didn't come with a switch to make it work. Used it on my Gator.
Easy to install. It lights the area behind my trailer very well. Great purchase.
Installed this on a golf cart for additional lighting. It’s been a year and it has been an excellent addition. Easy to install and all necessary hardware was included.
These lights are doing just what we wanted. Use them quite often on accident scenes
We have purchased this product before with great results. These are being used on big equipment trucks.
The sales representative we spoke with Lori B. Was excellent she even did research for us to find this item, because we had ordered it two years ago and we could not find the information on it, she found it and also sent us the invoice on it. Your system was down and she called us back when it came back up. She has sent us a follow up email to make sure the product is what we needed. Now that’s customer service with a smile!
It seems to get water inside the housing and on the backside of the lens if I wash my vehicle. I thought it was sealed. It still works but only time will tell if it'll hold up
Works great to see hogs on both sides of the highway ride way. But if someone is coming from the other direction turn off along way off,
Great light bar like having the turn si gnals!
Excellent light! We use it as a backup light on our 938M because the stock halogens constantly burn out. This thing has great coverage and looks plenty durable enough with cast mounts (instead of bent sheet metal) for a very rough environment like a transfer station.
Used lights for backup lights for my car hauler trailer!
Easy to mount and very bright!
Great product!!!
The Optronics light bar is a good quality light bar at a good price and definitely recommended to anyone wanting a light bar for their vehicle and/or UTV/ATV. etrailer is a great company to do business with. Everyone at etrailer was helpful especially Chris, and they are dedicated to customer service. It was also easy to track the order on their website. Thanks
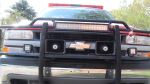
Very bright at a very reasonable cost. Mounted on front bumper of Jeep Wrangler TJ with no issues and no problems over the last year. Much less expensive than equivalent lights from other sources.
HAVE NOT PUT THEM TO USE YET BUT THEY ARRIVED TIMELY AND IN GOOD CONDITION.
I have these on the bumper of my service truck to check fences with. They are holding up well with the dirt road and vibration.
Heavy duty LED light, very bright, well made and high quality wiring.
Bright and wide beam. Perfect for my t ractor.
Awesome! The lights were just as described,a well put together quality product! Thanks for recommending them Melissa!
other than the slight shipping delay all is well, i like the construction of the product and it will fit my application as i intended. thanks.
Do you have a question about this Off Road Light?
Info for this part was:
At etrailer.com we provide the best information available about the products we sell. We take the quality of our information seriously so that you can get the right part the first time. Let us know if anything is missing or if you have any questions.


Thank you! Your comment has been submitted successfully. You should be able to view your question/comment here within a few days.
Error submitting comment. Please try again momentarily.