Blue Ox Base Plate Kit - Removable Arms

1995 Jeep YJ
Will this fit?
To see if this custom-fit item will work for you please tell us what vehicle you'll use it with.
Thank you! Your comment has been submitted successfully. You should be able to view your question/comment here within a few days.
Error submitting comment. Please try again momentarily.
- All Info
- Reviews (3040)
- Q & A (0)
- Videos (2)
- Photos
Blue Ox Base Plates - BX1679
- Removable Drawbars
- Blue Ox
- Twist Lock Attachment
Custom designed to fit your vehicle so it can be safely towed behind your RV, this base plate has easily removable arms that offer a seamless look when you're not flat towing. Base plate bolts directly to your chassis, so no welding is required.
Features:
- Custom-fit base plate provides attachment points for your tow bar when flat towing
- Hidden design provides a clean, seamless look
- Arms remove with a simple twist when not in use
- Brackets won't protrude past the front of your vehicle
- Sturdy design spreads towing force evenly to prevent stress on your vehicle's suspension
- Integrated mounting points let you easily attach an electrical connector plug with bracket (sold separately)
- Receiver covers keep dirt and debris out of the base plate when arms are removed and provide a finished look
- Durable steel construction is powder coated to resist rust and corrosion
- Straightforward installation - no welding required
- Base plate bolts securely to your vehicle's chassis with included mounting hardware
- Sturdy lugs pair with Blue Ox tow bars to form a secure and reliable connection
- Adaptable for use with Roadmaster tow bars - adapter (RM-031 or RM-031-5) sold separately
- Adaptable for use with Demco tow bars - adapter (BX88310) sold separately
- Made in the USA
Specs:
- Distance between brackets: 22-1/2"
- Bracket height: 15"
- 3-Year warranty
Simple, Hidden Design


This base plate's hidden design creates a clean and seamless look. The bracket arms are easily removable, creating a slick appearance when you're not flat towing. Because the arms can be removed, you also won't have to worry about banging your leg into any protruding arms when you walk by.

Attaching and removing the bracket arms is a breeze. To attach the arms to the base plate, simply insert them into the receivers and rotate them until they lock into place. Once you're finished towing and want to remove the arms, pull the pin to disengage the lock, rotate the arms, and remove them from the receivers. Finally, plug up the now empty receivers with the included receiver covers to help keep dirt and debris out of the base plate and provide a finished look.
Guide to Flat Towing
Flat towing your vehicle is much more convenient than using a trailer or a tow dolly. These other options take up much more storage space, leaving you less room both at home and at the campsite. In addition, securing your vehicle to a trailer or tow dolly can be a hassle and more time consuming than hooking up with a tow bar.
There are 5 basic components needed when flat towing a vehicle: a tow bar, a base plate kit, a safety cable set, tow bar wiring, and a supplemental braking system.

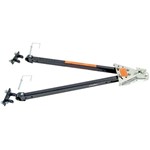
The tow bar links your towed car to your motorhome. It attaches to the custom-fit base plates that install on the frame of your towed car. Safety cables ensure that your towed car does not separate from your motorhome in the event that your tow bar becomes detached. Tow bar wiring allows your towed vehicle's signal lights to sync up with your motorhome's tail lights, which is required by law in most states. Finally, the supplemental braking system - also required in most states - brakes your towed car when the brakes in your motorhome are activated, preventing wear on the motorhome and decreasing braking distance for your entire setup.
BX1679 Blue Ox Baseplate - Removable Tabs
Installation DetailsThis Product Fits The Following Vehicles
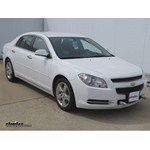
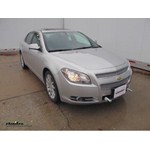
- 2008 - 2012 Chevrolet Malibu


Videos are provided as a guide only. Refer to manufacturer installation instructions and specs for complete information.
Video Transcript for Blue Ox Base Plate Kit Installation - 2012 Chevrolet Malibu
Today on our 2012 Chevy Malibu, we'll be installing the Blue Ox base plate kit with removable arms, part number BX1679.Speaker 2: I'll go ahead and do a demonstration of installing the removable arms. We'll line up the arm with the base plate tube, slide it in, and turn until it locks into position. Take the removable arm out of the base plate or simply pull back on the locking ring releasing the pin. Rotate the removable arm, it will release from the base plate, then we can install the receiver cap plug to keep out the dust, dirt, and debris.To begin our install, we'll first need to remove the front fascia. To do this, we'll go ahead and raise the hood and remove the top cover between the fascia and front core support. Theyre 00:00:56 multiple bolts and push pin fasteners.
We'll first remove the bolts and then the push pin fasteners. To remove the push pin fasteners, we'll pry out on the center of the fastener and then remove the two-piece fastener completely. Once we have them all removed and set aside, we'll go ahead and remove the top cover.Next, we'll move to the wheel well. Inside the wheel well, there are four push pin fasteners that connect the wheel well to the front fascia. We'll go ahead and remove these four push pin fasteners.
Remove the bolt that secures the front fascia to the front fender. It's secured to the cutout whole in the wheel well. We'll go ahead and repeat this same process for the opposite side. Next, we're going to move underneath the vehicle, noting for this application a good portion of the underbody paneling is missing. However, what does remain still connects the front fascia to the wheel well, so we'll go ahead and remove those fasteners. Once we have all the fasteners removed, we can go ahead and remove the front fascia. To remove the front fascia, we'll pull out in the corner of the fascia where it meets the wheel well, releasing the fasteners underneath.
We'll work the front fascia loose as it goes underneath the headlight. Once we have both sides worked loose, we'll go ahead and remove from the vehicle. Note that it's a good idea to get an extra set of hands to help you do this so the front fascia doesn't fall. Next, on the passenger side, we'll need to remove to air baffle. The air baffle is secured with a push pin fastener which we'll remove. Remove the fastener completely and a bolt that's behind the air baffle near the wheel well and inner frame.
Once we remove the bolt, we can go ahead and pull down on the air baffle and remove it, setting it aside for reinstallation later.Speaker 2: On the inside, there's a fastener connecting the air dam to the frame. Well go ahead and remove it.Next, we'll need to start trimming the air calling 00:03:41 that goes around the radiator and core support. Just below the bumper inside the frame rail, we'll need to trim the air calling 00:03:48. Using a paint marker, we'll go ahead and mark it first. Then using a utility knife or a rotary tool, we can go ahead and trim the plastic. Once we cut it, we'll remove the bottom half by removing the push pin fastener and setting the whole piece aside as it will not be reinstalled. We'll trim out a larger section. Using a paint marker, we'll draw a straight line down the corner of the air calling 00:04:21 to make room for the base plate. Once we have it marked out, we'll go ahead and use our rotary tool or knife to remove this piece. We'll do this to both sides. On the fastener side, we'll need to cut along the top edge and then down the corner.Speaker 2: Next, remove the bolt that holds the horn to the frame. Then unhook the horn wiring. We can set the horn aside for installation later.On each side, there are multiple fasteners to be removed. Some of these fasteners will be secured to you. The underbody fascia, the frame, or the inner fender well. Once they're removed, we'll go ahead and pull the inner fender well out and remove this pieces completely, setting them aside for reinstallation later. Now with that done, we've exposed the frame rails on both sides. We can go ahead and put our base plate in position. As we put the base plate in place, it's a good idea to get an extra set of hands to held it in position. We'll push it up from the bottom of the frame tight and pull it out towards the front of the vehicle hitting the front bumper flange. Once we have in position, we'll secure it with vice grips or clamps. Now, with our base plate in position, we'll use it as a template to drill out our attachment points. We'll have a total of six attachment points, three in each side.Speaker 2: We'll go ahead and take the 13/32 drill bit using the base plate as a template. We'll go ahead and mark the center point for each of the holes. Once we have the center point mark, we can use a step-it 00:06:33 process starting with the smaller pile or bit and working our way up to the 13/32 drill bit size. Now, with each of the attachment points drilled out, we can go ahead and start installing the hardware. As per the instructions, each fastener will get red Loctite applied to the threads before being installed. We'll be using the Loctite part number LT37420. Now, we'll be using a 3/8 by 1 inch long bolt that will go through the two lower attachment points. On the back side, we'll secure it with a split lock washer and nut. For the upper attachment point, we'll use a handle nut. We can take the handle nut feed it to the access hole on the bottom of the frame, then over to the attachment point, and thread the bolt into the handle nut. We'll be using a 3/8 by 1.5 inch long bolt going through a split lock washer to the base plate into the frame and securing it into the handle nut.Once we have all the attachments in place, we'll tighten them down. We can remove the clamps and secure the last connection point on this side. There are three fasteners on the other side and we can repeat the same process. With all of our fasteners tightened, we can then torque the specifications as indicated in the instructions. We can use a pair of side cutters or tin snips to cut off the end of the handle nut. Then we'll push the remaining end inside the frame. Now with our base plate installed and secured, we need to trim the air dam so we can reinstall it. First well take a paint marker and mark out the section to be trimmed. Once again, we can use a utility knife or rotary tool to cut out the sections. Once we have it cut out, we'll put our air dam back into place to resecure it with the fasteners. We'll repeat the same process on the other side. On the driver side, we'll reinstall the horn and then we'll use the open fourth 00:09:21 hole on the base plate. Next, we'll reinstall the air baffle. The fasteners will go through the air baffle to the pre-drilled 00:09:33 hole in the base plate and then secure it. Next, we'll reinstall the front fascia. As we set it back into position as closely as possible, we'll need to mark the cutout section of the lower fascia to make room for the base plate. We'll use our paint marker to mark the sections and then we'll use our rotary tool to cut it out. Now, with the necessary trimming completed, we can go ahead and reinstall the front fascia. With all the fasteners and bolts reinstalled, we need to take each of the safety cables to go around the frame with it and come back up with each of the loops connecting to the base plate using the quick link. Next, we'll use a couple of zip ties. These will assist in keeping the safety cables up and off 00:11:06 the ground and clean up the install up 00:11:08. Now, with everything reinstalled, this will complete the installation. There you have it for our install, the Blue Ox base plate, cable, and removable arms, part number BX1679, on our 2012 Chevy Malibu. .
Customer Reviews
Blue Ox Base Plate Kit - Removable Arms - BX1679
Average Customer Rating: 4.8 out of 5 stars (3040 Customer Reviews)
Custom designed to fit your vehicle so it can be safely towed behind your RV, this base plate has easily removable arms that offer a seamless look when you're not flat towing. Base plate bolts directly to your chassis, so no welding is required.The box was damaged and there were parts rolling around inside the box. Base plate looks good.
fast del. good quality prod. great transaction
looks quality made, quick delievery ,very satisfied, have appt. for install.

The size of the box terrified me but I had to do this one myself.
This project is not for the faint of heart. When you think about what could go wrong you could wet yourself. I went with my gut and just opened the box. Hmmm, packaged very well with everything you need for the install. No going to the hardware store for this or that. Sat there with a cold sarsaparilla and read the very detailed instructions, went back to the etrailer web site and checked out some vids and pics. Hmm, it didn’t seem that daunting of a job. On my 04 Lexus GX470 most of the holes were drilled. Before I knew it 5 hours had past and I owned a toad! I took it to my local Rv service center for an inspection and it was deemed safe to use.
This thing is awesome, tracs straight as an arrow.
Now, I have to figure out this diode lighting kit. Camping is fun! Yah!!! :) Noah and etrailer made this a tolerable project. I urge everyone to take advantage of the resources that are on this sight. I always learn something when I’m there. See y’all on the trail….Rod
Well, I'm glad I'm good with tools, grinders, drills, and such. It was not just bolt-on dal. The car grill was able to be used any longer as it was too tight of a fit. Some of the lower fascia had to be trimmed and also removed OEM nuts from the front, the angle wouldn't allow the stock nuts to work. But in the end, I got to work out. So prepare to spend around 4-6 hours playing with it to get it to work. I am positive it's going to work as intended.
everything bolted up easy, i simply drilled hole’s into were needed and supplied my own bolts straight through for easy installation.
I am really happy, not only with the product but the customer care I received. Very quick and helpful!!
I would make one suggestion. Take the headlights out when doing this on a Chevy Cobalt. It will make it much easier to get to the 3 bolt holding the fender to the fascia.

This kit fit well, had decent instructions, and performed perfectly every time once installed. If doing the install yourself, you'll need some metal fabrication tools to notch the D-ring plates behind the bumper but it's not complicated, just a little time consuming depending on the tools you're using. The look is also a little weird on the front of a new Bronco since you're losing the burly bumper D-rings, but it's a well engineered setup overall. I only used the tow bar setup a couple times before the vehicle was lost in a wildfire so I can't comment on the longevity, but I have no doubt it would still be working fine today.

I will start with the people that work here at etrailer are great to deal with and very helpful! These baseplates for my 2023 bronco have been great. i bought and installed myself. install pretty straight forward. and these work great for flat towing my bronco behind my motorhome.

eTrailer was very helpful in choosing the correct hitch for our rv and car. They also provided a special brake application in the car that makes it super easy for toad braking.
I am 72, and I hook up this toad and pull it with confidence. The instructions to hook up the toad was presented with ease. They knew exactly what they were doing, and we didn't rush through the demonstration. I would recommend eTrailer to anyone.
Installed successfully on my 2024 Trax LT. However, with respect to the following installation steps, I made some changes:
All - Don't use a reciprocating saw! An oscillating tool and saw attachment works best, allowing more precise cuts.
Step #8 - After consultation with BlueOx Tech Support, I elected to re-install the plastic shroud. Wasn't difficult and I felt better about maintaining the integrity of the original equipment.
Step #28 - I moved the temperature sensor to a forward facing position in the grill section directly above the baseplate.
Baseplate installation went pretty smooth with no surprises. I chose to separate the lower grill piece while I had the bumper cover off. This allowed me to install the bumper cover over the baseplate and then accurately determine where to make my cuts in the grill for the baseplate protrusions. The Blue Ox base plate is well made and fit perfectly.
Etrailer offered competitive pricing for the base plate and the package was shipped promptly and arrived very quickly...much faster than I had anticipated.
The packaging was excellent and included all documentation. Installation was very straightforward and the unit was a perfect fit with minimal modifications to the car itself. Only a few small pieces of plastic had to be trimmed for a perfect fit.
We did have some trouble with 2 of the nuts-with-wires attached in that the bolts did NOT want to thread in to them. For some reason, they just did not want to 'start' easily and this made the blind installation of the nuts on the bolts extremely time-consuming. The nuts/bolts did not cross-thread and there were no other issues once we were able to use a tool to jam the blind nut and stop it from moving so that the bolt could be tightened and torqued. 4 of the 6 went in smoothly and with zero issues, so do I not believe that it was 'installer error' (!).
In the end, a perfect installation and the base plate is nearly invisible. I would definitely purchase from eTrailer again and can easily recommend their products based on this experience.
The hitch is a great product; however, the installation is not a bolt on and you are done process as I was led to believe. It is highly doable with a little fudging, die grinding to fit, and tweaking. The grainy instruction pictures leave a lot to be desired. It looks good on my 2014 Suzuki SX4 and I am glad to have it, but even as an experienced body shop man it is still a challenge to install. Would I do it again, yes, without hesitation. It is solid, durable, and looks good in my grill.
Pretty easy to do my self but the instructions could have been a bit larger with more pictures. I think the hardest part was drilling the holes to attach the two brackets as there was only one hole on each frame. Getting the square nuts with wire attached were difficult to get both aligned because the wire on the first one got in the way each time
My only negative comment is that this base plate sets the tow bar connections 23" above the ground making it somewhat of a pain to fine towbar and hitch connections. It mounts relatively easy.
Everything as advertised. Followed the videos and instructions for installing the base plates and tow bar and all were good. Did a test pull today and it towed great, straight as a dye. I only have 2 suggestions. There was no mention in the video of the space plate, which was included. Figured it out. Second suggestion, Install a 2" ball on your work bench and adjust the receiver to it. The instructions tell you what socket to adjust it with but that could have been done on the bench before shipping. Great product, so excited. We are off on a few hundred mile trip with the Fit behind the motorhome Wednesday. So excited. No more tow dolly.

This kit was installed on my 2018 Toyota Tacoma TRD Sport 4x4 last summer. The directions aren't too bad if you have mechanical aptitude. It seemed that there could have been an easier mounting method. The nuts with wires welded on so you can snake them into place inside the box frame were definitely a pain in the a$$. You will need to have plenty of patience. A vehicle lift would also be an asset. It worked as well as any other Blue Ox baseplate we have had for other vehicles so no issues there.

Bought it at etrailer as I have with other trailer hitch related parts. Installed it myself, and it was a real job. I figure about 10 hours to get it right so I didn't have to worry if my 'toad' would pass my motorhome as I tooled down the road. Fit was perfect for my 2008 Honda CRV, but make sure you keep that oil cooler line up as high as possible or you will be redoing the fit to get the front cowling back on the car. Bought an angle grinder with cutoff wheels and that made the frame notching a lot easier. Note that if the removeable attachment pins are a tight fit into the base plate, they will loosen up with a good silicone lubricant and the wear of towing. I have towed with confidence for a year without a hitch (pun intended).
It turned out fine but my opinion is that you should have some average or above mechanical skills to install this yourself. As you can see, the base plate protrusions are hardly noticeable at a distance with the tow pins removed. One thing worth mentioning is I had to mount it more rearward on the frame because the front valance would not mount back on correctly. Overall, good base plate.
The Bx2692 is the better tow bar solution because it is higher up to hopefully keep your tow bar flat. I modified a Base bumper to install this because it is only available for the "Modular" and "Capable" bumpers. The base bumper option from bluox is for lower tow hook delete option. Took about 3hrs with the help of a grinder jigsaw and multi tool.
The item I received must have been a returned item. The box label was proof it was shipped to someone else before. Reason I'm not happy is because the bag of screws was open and most of it slipped out of the holes of the damaged box that was opened before and re-taped. The end of the crossbar was bent and not much packing inside. I needed this for our trip, so I didn't return it and had to fix and find screws to make it all work.

This baseplate fit perfectly and was a pretty easy instal after removing the bumper wrap on my wrx. Car pulls steady and straight!!
etrailers customer service is excellent. The item was back ordered, the customer service folks kept me informed on the projected delivery the entire time. And the Blue Ox part are really high quality. Only one minor issue, the bolts, nuts and washers bag was opened and the box had a large crack. Lost a few small pieces, not a big deal I have plenty of spares in the shop. Thanks etrailer

We had this base plate kit professionally installed on my wife's 2017 GMC Acadia and we've used it as our tow vehicle with no problems. It's easy to connect to the Blue Ox system we bought from etrailer and it's worked out great!
See what our Experts say about this Blue Ox Base Plates
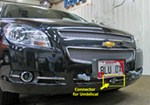
- Purpose of Two Small Tubes on Blue Ox Base Plate # BX1679 for 2012 Chevy MalibuThe two small tubes you mention are threaded on the inside, and provide an attachment point for the connector for the umbilical that connects the RV to the towed vehicle (such the one included with part # BX88206). If you look at the photo I provided, you can see the connector. I have also linked you to some FAQ articles about flat towing you might find helpful.
view full answer... - Time Needed to Install Blue Ox # BX1679 Base Plates on 2012 Chevy MalibuAccording to Blue Ox, the # BX1679 base plate kit would take an experienced technician approximately 3 hours to complete the installation. For a novice, it would be considerably longer, depending on their level of mechanical skill. I've linked you to the installation instructions as well as to an install video. To complete you flat towing set-up, you'll also need a tow bar, a wiring solution, safety cables and a supplemental braking system. For a towbar, I'd recommend the Blue Ox Alpha,...
view full answer... - Other Vehicle Fits for the Blue Ox Base Plate on a 2004 Chevrolet MalibuThe Blue Ox Base Plate, # BX1679, that you referenced will fit on your new 2012 Chevrolet Malibu. It will not fit on a 2004 Chevrolet Malibu. You probably have either the Blue Ox Base Plate, # BX1648 for classic models or # BX1655 for regular or Maxx models. These are the only two Blue Ox Base plates we carry for the 2004 Malibu. The BX1648 base plate fits a number of vehicles. I have added a link to the product page where you can find all of the vehicle fits for this base plate. You...
view full answer...
Do you have a question about this Base Plate?
Info for this part was:






At etrailer.com we provide the best information available about the products we sell. We take the quality of our information seriously so that you can get the right part the first time. Let us know if anything is missing or if you have any questions.






Jenny N.
1/24/2023
Thank you for letting us know. I will have our Customer Service reach out to you in case there was any damage.