
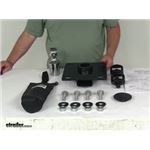
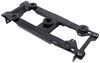
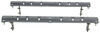
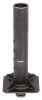
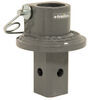
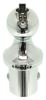
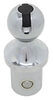
Designed specifically for your Ford F-250/F-350/F-450 with factory-installed or Reese Elite Series rails, this under-bed gooseneck hitch head includes the easily removable Pop-In ball, mounting hardware and safety chain loops.
Features:
Specs:

California residents: click here
Average Customer Rating: 4.8 out of 5 stars (439 Customer Reviews)
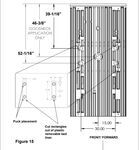
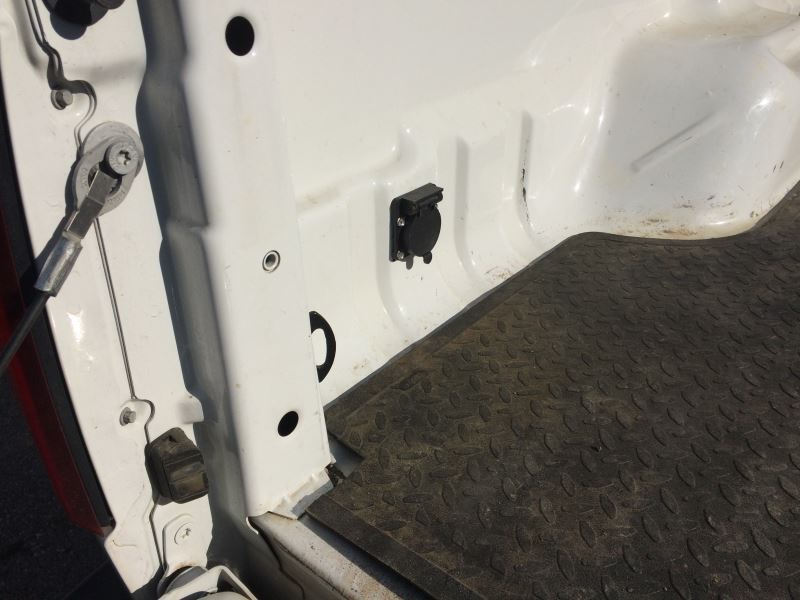
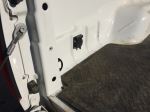
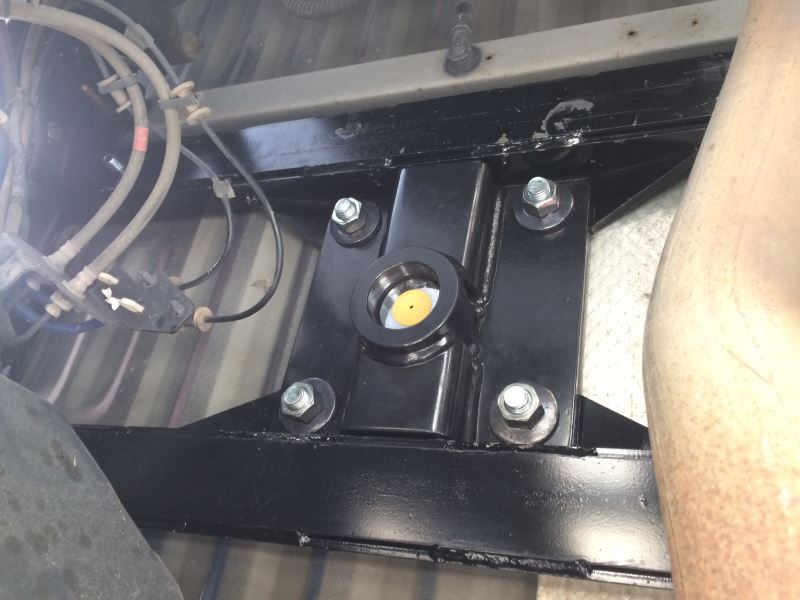
Designed specifically for your Ford F-250/F-350/F-450 with factory-installed or Reese Elite Series rails, this under-bed gooseneck hitch head includes the easily removable Pop-In ball, mounting hardware and safety chain loops.My rails were allready installed when I bought the truck so this is only for the gooseneck kit. This product is made in China but the workmanship is very good. Shipping was fast and all hardware was correct and included. One major problem I had was the measurement in the instructions to locate the 3 1/2 hole was off by 5/8 of an inch to far foward which would have screwed up the bed with a huge oblong hole. I have a Ford which have dimples marking the drill locations but I also have sprayed bed-liner which covers up the dimples so I was very careful and drilled the pilot hole from the underside using the dimple. Once the hitch hole was drilled installation was quick and easy but you will need a helper to hold the hitch in place until you get the washers and nuts started.
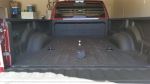
I have a 2016 Ford F250. My truck didn't come installed with any hitch equipment other than the stock bumper hitch. I insulted Reese Elite Series rails under the bed and have pulled my 5th wheel just fine since. Recently, I purchased a new 5th wheel trailer and the dealer tossed in an Andersen Ultimate Hitch 2. The only problem is that my truck hasn't been equipped with a gooseneck hitch. This product solves that problem, integrates with my current setup, and is incredibly easy to install. Can't wait to test it out on the road this weekend.
Here's my current setup:
2016 Ford F250
Air Lift Air Ride System with compressor
Reese Elite Rails with Gooseneck Hitch Kit
ALL of my orders and business with etrailer result in Outstanding service, Expedious delivery and Superb product condition upon receipt! This order of my new Reese Elite 5th wheel assembly, Underrail 5th wheel kit, and Gooseneck kit assembly meets those same conditions I stated above. Thank you E-trailer for another stress-free and wonderful experience with your business and very professional staff! Your business is my first choice when shopping online for all product of this type. Sincerely Dennis R.
Kit works perfect on 2016 Ford F-350 with prep package installed that did not come with the gooseneck ball plate. Very quick shipping and better price than any offered on [other sites] Easy to follow instructions and precise fit. Thanks
Super easy to install after the 5th wheel rail system was already in place.

Easy to install took about 10 minutes and was a perfect fit in my factory installed power puck system.
I have not installed this product yet. However, I just wanted to say how please I am with the promptness of this transaction. Right on time as promised.
Product delivered very quickly and in good condition.
Unfortunately I'm not very happy with the service. I ordered a item from your website and it premised delivered on one date and I received it 4 days after that..
I needed on the date it was promised.
I called the company and basically I was told, sorry. You can pay for it to be sent back..
So now it just sits in garage, cause I found another one at a trailer store, cause I was in need of it.
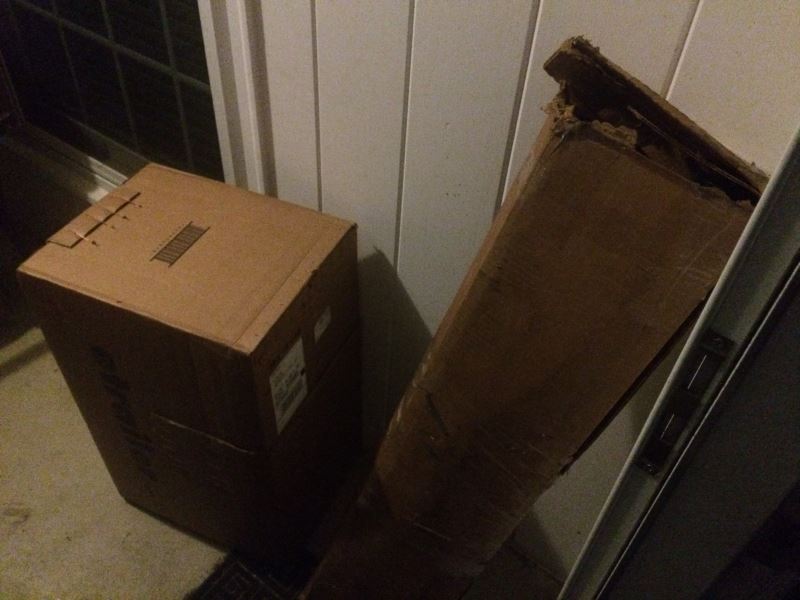
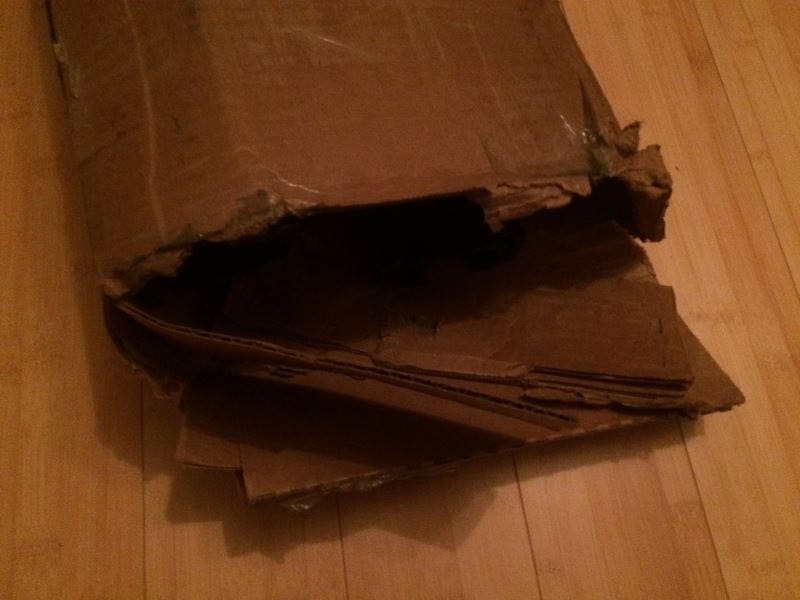
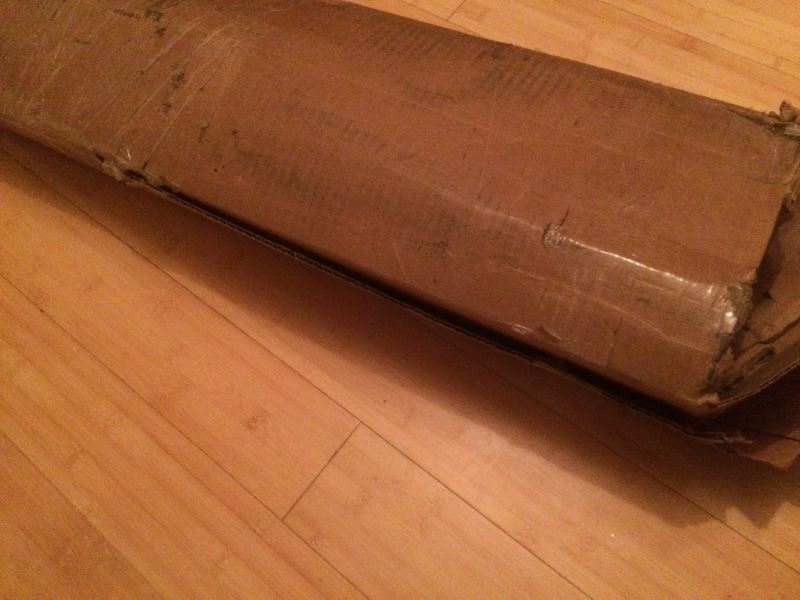
Also, the box it came in was all torn up and taped together.
The hitch worked out perfectly, The chain pucks are a little small for some chain hooks, there rating is fine but to safety hooks for the rating of the fifth wheel would not fit in the holes, so I was forced to use hooks with the less rating, put 20000 miles on the ball and it was fine.
I recently purchased a 2016 Ram 3500 with 5th wheel tow package already present on truck. I wanted an additional goose neck product and looked at various suppliers online and found etrailer products offered for sale. After to speaking with Heather who answered all my questions as well as reviewed feedback from customers I chose to go with the Reese gooseneck kit. I received the product within the shipping date provided to me and I went out to install it. It took me all of 3 mins to install with no issues. I did my best to remove, shake and couldn't get them to budge. It took me a total of 5 mins to remove the parts and storing them back under the rear seat. The parts fit perfect, look great as well as we're the cheapest price I could find. Their online video is all the install instructions you need! I will definitely use etrailer in the future. Thanks Heather!
The kit appears very heavy duty and built to work. Excited for when I get to put it work pulling a stock trailer with cattle, and whatever else I can find for it.
Will try to keep this as real as it gets out there.
2015 F250 XLT Crew Cab 8' Bed
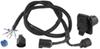
Ordered the Reese Elite Gooseneck and Barger 90 degree wiring harness.
Received the gooseneck hitch and harness quickly. Free shipping got here in two days. Item came in two boxes. The rails were poorly packaged. Box was basically open and beat to hell, leaving markings on the rails' paint. Didn't bother me, but might others. The pucks were loose in the box and were lucky they did not fall out.
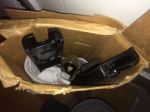
The second box with the ball, ball mount, harness and misc. hardware was packed so well it took about 5 minutes to take off all the staples and then each product was individually boxed inside. Wish they would treat the rail box with the same care.
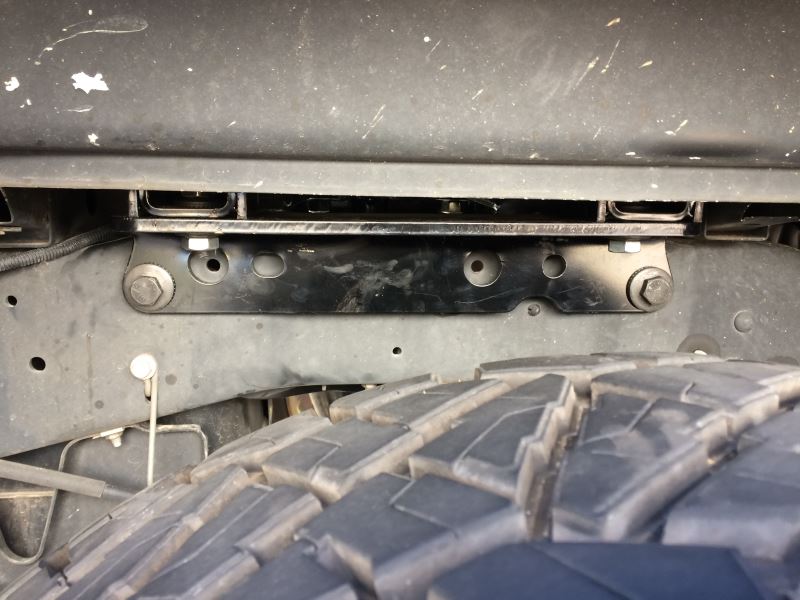
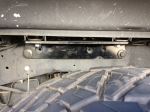
Instructions are ok. Used the online install video instead. The video is slightly simplified as getting the nuts on the bolts is a slight challenge for a one man install. I was able to do the entire installation by myself with the exception of the four rail-to-frame bolts. Getting these snugged up to the point of being able to torque took two people simply because the nuts are hidden on the backside of the rail...particularly the driver-side front...which is slightly behind the gas tank, but still accessible.
My F250 is factory lifted 4-5" so I did not have to remove the rear wheels, nor did I have to remove the spare tire or heat shield. Lower trucks will need the rear wheels pulled.
Installing the ball mounting plate took some doing. Got one bolt on then decided to actually install the ball into the plate from above pulling the plate tight below. I used vice grips to basically keep the plate mounted tight rather than trying to lift it from underneath with one had and bolt it with the other.
For me the most time consuming part of the project was getting the darned bed bolts off to lift the right side. Broke the T50 bit they supplied and then two others. Finally gave up and ground off two of the remaining bolts...and ordered replacements. Tip for those doing this on their own, you may want to spray the bolts from under with PB Blaster the day before you intend to install. I forgot and the issue was likely that the bolts were rusted.
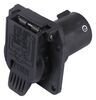
The wiring harness was a breeze, although I wish a shorter version was available. (Perhaps I missed it). Had to loop/zip tie about 2-3' under the bed. Connecting between the factory connectors did require me to pull the mounting plate. Was a bit tight to just slip the new connector in. Also, working the harness thru the hole in the bed side was a bit tight. Install probably took 10 minutes after getting the holes drilled.
Total install time for this slightly skilled guy was about 3-1/2 hours...after the bed bolts fiasco.
Oh...and did it all with a cast on the left arm. Ha!
Now to see how she tows!
Ordered in March of 2022 - installed in July of 2023 in a 2015 F350. Received boxes after a reasonable few days of shipping transit. Was fortunate to be home shortly after delivery and compare the parts list to the received contents. As reviewed by others - both boxes had extensive damage and there had been an attempt by someone to re-tape the boxes with lots of clear packing tape...but 3 of the 4 pucks were missing. Due to the marginal packaging, the larger heavy parts had some paint missing, but otherwise undamaged. Contacted etrailer customer service and they were very good about responding and immediately sending the replacement pucks.
Prior research? I could find no other system that allowed me to have full convenient use of the 8' bed and provide both 5th wheel carrier and goose-neck hitch capabilities that came as close to maxing the rated hauling ability of the vehicle (for a reasonable price).
As always...there's no better motivation than necessity (the purchase of 5th wheel RV). I planned a full day to do the install...it took 2 1/2 days. It's not the hitch's fault, it's the preparations. Removing the bed bolts took two days. There are no instructions, or edited videos, that can prepare you for 7 out of 8 bolts that are soo seized in the nuts that they are beyond difficult to remove. These factory bolts are designed to have an interference fit through the nuts. The protective coating on the bolts and nuts is effectively scraped off during installation, and with a little corrosion, no longer function as a separable bolt and nut. I sprayed penetrant oil on all the bolt threads the evening before (not easy where some of them are located), and carefully used a Dremel tool to remove the sprayed rhino-lining covering the bolt head/washers (fortunately, whoever applied the lining had covered the torx socket on each bolt). I also used the Dremel to remove the rhino-lining from where the 5 bed holes are required (referencing measurements given in the hitch instructions) and was able to find the factory dimples indicating the exact hole locations.
The next morning, I pilot drilled the dimples, checked under the bed for any possible interferences, and then patiently, with some cutting oil, slowly hole-sawed the holes in the bed (videos of this part always edit out the length of time this takes). Starting in on the bed bolts…the supplied torx bit removed the first bolt, but with difficulty. Though if the rest had come out similarly, I'd have had them all out in under 30 minutes. The supplied bit broke on the next bolt...as did 2 more impact rated bits. Neither a pneumatic impact wrench, an electric impact wrench, or a long pipe on the handle of a ½” breaker bar had any chance of turning any of the 7 remaining bolts without breaking another torx bit.
There are limits to the options you have to remove seized bolts. My possibilities were:
A. Weld something to the exposed head of the bolt to provide a better way to apply turning force.
B. Drill the head deeper and use an "easy-out" to try to turn the bolt.
C. Use a grinder to remove the head of the bolt.
D. Drill the head off completely.
A and B are desirable because (if successful) all of each bolt would be unthreaded from inside the bed. However, adequate welding creates heat that can damage the surrounding area (paint and linings) and has the potential to damage electrical systems of the vehicle. I broke 2 easy-outs on my first attempt of B. Grinding is possibly the easiest (if you have the right tools), but be aware that you could easily damage the bolt holes as there is considerable tension on each bolt and the bed will raise up around the bolt as you are close to having it ground off, but not sufficiently ground to be able to pass through the washer and the hole in the bed. Ultimately, what worked best for me was to drill the head completely. The bed bolts are hardened automotive class bolts and are not easy to drill. The torx socket in the bolt head provides both a guide, and a reservoir for cutting oil. I used first a 1/4" bit (to about 3/4" deep), then a 1/2", then a 3/4" bit, and a liberal amount of cutting oil for each (if you don’t have actual cutting oil…penetrating fluid or even engine oil will be much better than nothing). Once you reach the shoulder of the bolt below the head with the 3/4" bit, the entire head comes off cleanly. If you don't stay well centered while drilling, you may need to use a 7/8" bit at the last. You may have to almost stand on the drill, and drill slowly, but at least you have gravity working for you. Don't expect to get more than 2 bolts with each set of bits (you need at least four of each size unless they are very good drills, or you are adept at re-sharpening drill bits). This process requires at least some of both finesse and patience.
Any of the 4 methods above are going to destroy the bolt. Fortunately, I was able to order replacement bolts (which include a washer and the clip-retainer nuts for each) for next-day delivery. Be smart, and just order them to have on hand before starting this project.
All the information on the internet seems accurate about the steps necessary to raise the bed of the truck once you get the bolts unattached. Personally, I made sure to replace the fuel and DEF caps after the hoses were released from the bed (don’t allow any contaminates to get into either). Now...just because you can raise the bed, doesn't mean you can remove all the headless bolts. The enlarged shank just below the removed heads of these bolts may not all go through the holes in the truck frame. This means you have to raise the bed far enough to be able to get a grinder (thin-cut) to cut the bolt below the enlarged shank. Be sure to “block” the bed up so it is stable and safe to work under. I was able to hold the headless bolts above the truck frame with a vise-grip to get access to the smaller portion of the bolt. One of these was almost directly above the fuel tank. Without welder or grinder blankets, I used dampened towels to cover and protect the tank and hoses.
Having the bed raised an extra amount made removing the pieces of the old bolts and their retainer nuts (you’ll also have to grind/cut each of the old nut retainer clips), and installing the new retainer nuts easier. After placing the under-bed parts of the hitch (all except the gooseneck hitch mount plate), I lowered the bed back down (slowly while checking for pinched hoses, wiring, or any other interferences, and installed most of the hardware loosely (for the hitch, hoses, wiring, etc). Don’t install the bed bolts yet as you may want to see down through the holes to make sure they all line up while you measure and position the bed to be sure it’s centered (relative to the truck cab) and aligned squarely on the frame.
After all this unplanned preparation, the rest of the actual hitch install went quickly. Pay attention to making sure the puck locations are "square" (diagonally) by the measurements as you snug the bolts. I used a rope with one end tied to a ½” drive extension through the center of the gooseneck mount plate, up over a 2x4 across the top of the truck bed and back down through the plate to pull it up and hold it in place from below, to get washers and nuts started on the carriage bolts. It should center itself nicely into the hole in the bed. At this point, after assuring the bed was in exactly the position I wanted, I coated each of the bed bolts with anti-seize compound and installed the bolts. Once each was threaded in 5 or 6 turns with a manual ratchet, I used a pneumatic impact wrench to take them down to ‘loose-snug’. If a bolt quits turning with the pneumatic wrench, stop immediately and let it cool for a while. Use a manual wrench to back it out a ½ turn or so and then continue screwing it in with the pneumatic wrench. You don’t want one of the new bolts to seize during installation and have to take everything apart to replace it. The new bed bolts should come with specifications for final torquing.
Start sequentially snugging the hitch mounting bolts, all the while checking that the pucks in the bed have the right spacing and are positioned squarely. I had to buy a new open-end wrench for the bolt heads that are inside the tubes on each side of the assembly (the head on my one ancient wrench that fit the bolt head was way too wide to reach inside the tube…a new wrench worked without modification). Do not fail to torque all the bolts to specification in the instructions. The special scalloped-edge dished washers are designed to dig in and flatten under specified torque. This keeps them from loosening and assures that all the load from your cherished RV, Horse trailer, or any attached trailer, is transferred and properly distributed to the frame of the vehicle. Dropping the spare tire is almost mandatory to properly access and torque the nuts for the gooseneck hitch plate – as is a selection of ½” drive extensions.
And finally, I had to re-coat the heads and washers of the new bed bolts with something at least approximating the toughness of the existing rhino-lining. In my experience, the so-called bed liner brand-name sprays available are worthless. The only thing I found locally is “HERCULINER”. It took about 10 coats to fill up and coat over the new bed bolt heads & washers.
Yes – this is a great addition to vehicles that performs like a factory installed feature. Just be aware that the process of installation might not be as simple and timely as instructions and videos would suggest. In my case…two days of additional install time (and a slight test of ability and patience) against possibly 10 years of reliable service is a small inconvenience. A lug-mounted 5th wheel carrier dropped into this newly installed under-bed multi-purpose hitch like it was “made-to-fit”. I have full use of my vehicle for many purposes with just one installed assembly. You can’t ask more than that!
Besides removing the bed of the truck and needing to grind off the bed bolts. The installation of the hitch was easy and a very heavy duty product.
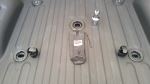
This drop in gooseneck hitch is all that it reports to be. Easy to use and convenient to store.
Product took less than a minute to install on my 2015 Ram 3500. Would highly recommend this product for those who have the factory 5th wheel and gooseneck prep package from Ram in their truck.
I'm very delighted with the product and the superior service provided. My order was initially scheduled for delivery weeks into the new year. However the very helpful contact lady found my item and got it delivered to me within days. I'm so grateful. Thank you all so very much.
Purchased for a 2006 Silverado Crew Cab Duramax. Previous owner left the underbed portion of the assembly. The actual ball mount is very easy to install with detailed instructions. Plastic trim on top is sort of cheap with unreliable double sided tape from the manufacturer, which I will have to replace. I would not recommend for lifted trucks as the ball sits approx 6 inches higher than a hideaway turnover type, unless you have that much room to adjust your gooseneck trailer. Other than that, I am pleased.
Love it , works great, fits like it's supposed too
Perfect equipment. Quick install and removal so I can use my truck to haul flat material without a fixed hitch getting in the way.
I’ve been towing a 7 ton dump trailer or pulling a 28” flat bed w a 5 ton skid steer for a year now flawlessly.
Highly recommended equipment and company at etrailer
Everything came in looking great. The ball has a little bit of slop in it, should be added the truck side is new. It will work for now.


Do you have a question about this Accessories and Part?
Info for this part was:
At etrailer.com we provide the best information available about the products we sell. We take the quality of our information seriously so that you can get the right part the first time. Let us know if anything is missing or if you have any questions.


Thank you! Your comment has been submitted successfully. You should be able to view your question/comment here within a few days.
Error submitting comment. Please try again momentarily.