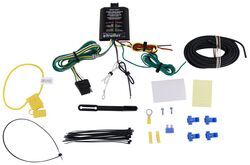
Installation Process for Curt Powered Tail Light Converter with 4-Pole Flat Trailer Connector
Question:
telling me how to do it
asked by: Guilherme C
Expert Reply:
The installation process for the Curt Powered Tail Light Converter with 4-Pole Flat Trailer Connector # C59236 varies somewhat depending on what vehicle you have. You will start by locating the vehicle battery and disconnecting the negative battery terminal.
From there, you will locate your vehicle taillight wiring and identify the wiring type. Using snap locks, you will attach the input wires of the taillight converter to the corresponding vehicle harness wires you previously identified. Next, you will located a flat spot inside the vehicle near the taillights and attach the black converter box.
Locate a suitable grounding point near the connector such as an existing screw with nut in the vehicle frame or drill a 3/32" pilot hole for the provided screw. The area should be free of rust, dirt and paint. Secure the white ground wire using the ring terminal and provided screw.
Once this is completed you will need to route the 12 GA wire to the positive vehicle battery terminal and attach it using the ring terminal. You will also need to install the 15 amp fuse in the fuse holder once all other steps are complete. See the diagram below which shows how to complete this.
I have attached the written instructions as well as an installation video for your reference. You will need to refer to the wiring guides in the instructions which give additional information based on your wiring type.

Product Page this Question was Asked From
Curt Powered Tail Light Converter with 4-Pole Flat Trailer Connector
- Custom Fit Vehicle Wiring
- Trailer Hitch Wiring
- Converter
- Universal Fit
- 4 Flat
- CURT
more information >
Featured Help Information
Instructions
Miscellaneous Media

Continue Researching
- Shop: Trailer Wiring
- Shop: Trailer Hitch
- Shop: Curt Powered Tail Light Converter with 4-Pole Flat Trailer Connector
- Q&A: Installation of Curt Wiring Harness on 2022 Hyundai Tucson
- Video: Curt T-Connector Vehicle Wiring Harness Installation - 2022 Hyundai Tucson CU94FR
- Video: Curt Powered Tail Light Converter Installation - 2023 Hyundai Palisade
- Q&A: Trailer Wiring Harness For 2020 GMC Terrain Without Factory Tow Package
- Shop: Curt Trailer Hitch Receiver - Custom Fit - Class III - 2"
- Video: Curt T-Connector Vehicle Wiring Harness Installation - 2023 Hyundai Tucson
- Shop: etrailer Hitch Receiver Lock for 2" and 2-1/2" Hitches - Flush - 3-5/8" Span - Chrome
- Shop: Anti-Rattle Trailer Hitch Receiver Lock for 2" Hitches - 3-1/2" Span
- Shop: Curt No-Drill Bracket for 4-, 5-, or 6-Way Trailer Connector Mounting Brackets - Short
- Shop: Curt T-Connector Vehicle Wiring Harness with 4-Pole Flat Trailer Connector
- Shop: BOLT brand vehicle and hitch locks
- Shop: Curt T-Connector Vehicle Wiring Harness with 4-Pole Flat Trailer Connector
- Shop: Vehicle Tow Bar Wiring
- Shop: Towing Mirrors
- Video: Choosing the Right Trailer Wiring
- Video: Curt Class III Trailer Hitch Installation - 2022 Hyundai Tucson
- Video: Curt Powered Tail Light Converter Installation - 2023 Kia Telluride
- Q&A: How To Tell If a 2020 GMC Terrain Has the Factory Tow Package for Trailer Wiring
- Video: Review of CURT Trailer Wiring - No-Drill Trailer Connector Mounting Bracket - C83DR
- Article: Trailer Wiring Diagrams
- Shop: Brake Controller
- Q&A: Brake Controller Installation on 1995 Jeep Grand Cherokee With Factory 7-Way Trailer Connector
- Search Results: tekonsha primus
- Search Results: 20127
- Search Results: c56175
- Q&A: Is DeeZee Truck Bed Auxiliary Fuel Tank Compatible with Gasoline?
- Shop: Tool Box


