
Summer Starts Here - Save up to 70%
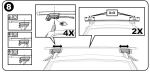
Roof Rack Includes:
Part Numbers: Y00408,Y33TR,Y03536
Thank you! Your comment has been submitted successfully. You should be able to view your question/comment here within a few days.
Error submitting comment. Please try again momentarily.
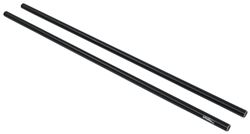
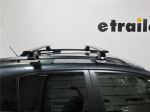
These multipurpose, galvanized steel crossbars supply the backbone for your aftermarket roof rack system. Works with accessories that clamp around the bars. Pair with Yakima towers, fit kit, and RoundBar SL Adapter to create a complete roof rack.
Features:
Specs:
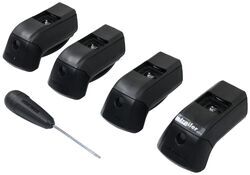
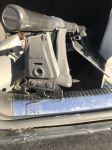
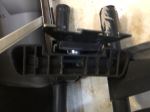
Heavy-duty towers allow you to mount 2 Yakima crossbars safely and securely to your vehicle's raised, factory side rails. Towers attach with rubber-coated stainless steel straps and tighten with the include torque tool.
Features:
Specs:
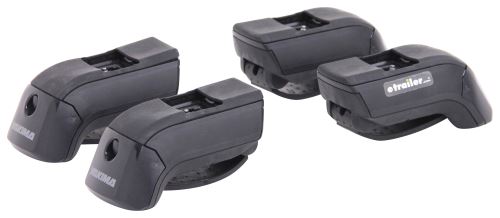
The heavy-duty TimberLine towers allow you to mount 2 Yakima to your vehicle with raised, factory side rails. The towers install with rubber-coated stainless steel straps that wrap around your side rails. And the TimberLines' versatile BarBeds accommodate Yakima's full line of crossbars.
Versatile BarBed
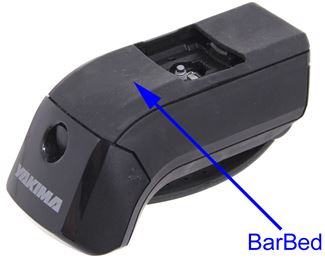
The TimberLine's BarBed is designed to work with Yakima's entire line of crossbars.
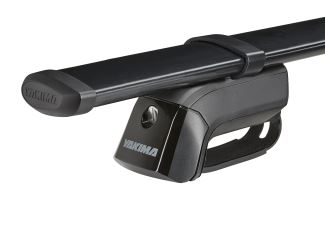
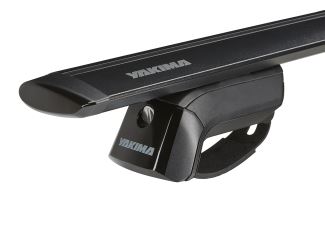
The BarBed is curved to accommodate the elliptical shape of the CoreBar and JetStream crossbar. The CoreBar includes brackets that slide over the bar and secure to the towers with bolts. The JetStream attaches directly to the tower with bolts.
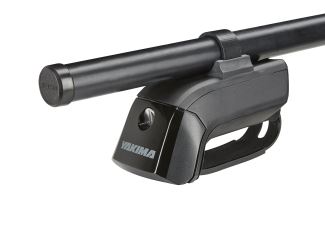
The towers also work with Yakima RoundBars with adapters . The adapters slide over the bars and secure to the towers with bolts.
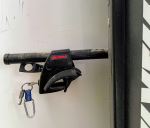
Secure Installation with Rubber-Coated Stainless Steel Straps

The towers install easily with rubber-coated stainless steel straps. Simply remove the tower covers, wrap the straps around your raised side rails, and secure the straps to the towers. The straps provide maximum contact and security by wrapping completely around your side rails.
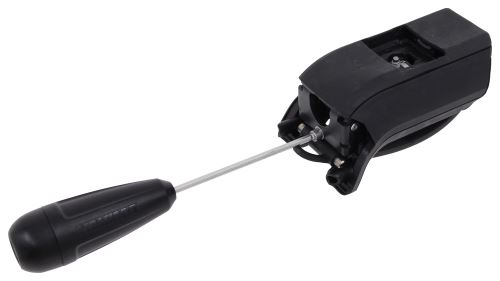
Tighten the bolts inside the towers with the included torque tool to complete installation. This is the only tool you will need to secure the towers to your rails and your crossbars to the towers. The torque tool also helps prevent over- or under-tightening. The tool clicks 3 times once you've reached the correct amount of torque.
Same Key System Locks
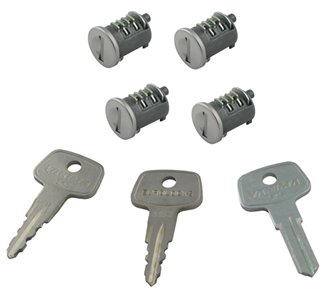
TimberLine towers are compatible with Yakima SKS lock cores (Y07204 - sold separately) that allow you to secure the roof rack to your roof. The SKS locks are all keyed alike so a single key opens all the locks. The locks can also be swapped out to make all of your Yakima products keyed alike.
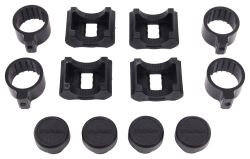
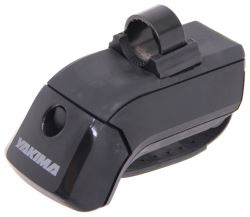
These adapters allow you to use Yakima RoundBars with BaseLine, SkyLine, TimberLine, or RidgeLine roof rack towers. Kit includes 4 adapters and 4 endcaps.
Features:
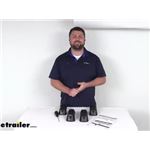
Videos are provided as a guide only. Refer to manufacturer installation instructions and specs for complete information.
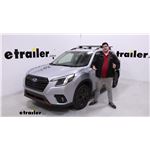
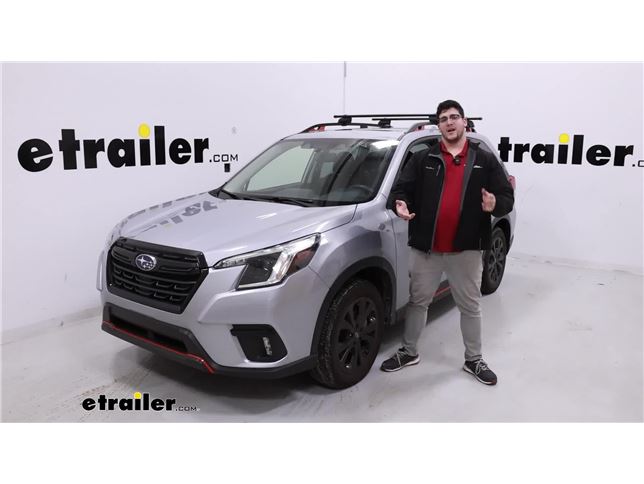
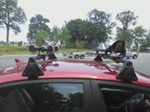
Hi, Matthew of etrailer. And today, we're gonna talk about the Yakima Roof Rack System with the CoreBars on top of our 2023 Subaru Forester. That's gonna be a great option for you if you're really trying to get a lot more space out of the Forester, whether you have a lot of people with you, or it's already filled up with other luggage or items. So that's gonna be great if you have any longer items like skis, kayaks, or roof boxes. It's also gonna be a great system if you want to get this key to like with any of your other Yakima gear. So let's take a closer look at it.
Our system today is gonna be comprised of two parts. That first part is gonna be our 50-inch CoreBar crossbars, and the second part is gonna be our Yakima Towers. So we're gonna take a closer look at the crossbars. You'll notice we're gonna have these brackets up top, and that's gonna grab around here, and that's gonna be used to attach our towers to. You'll notice we also have this arrow shape to 'em and the arrow shapes will help 'em be more aerodynamic to help reduce that wind noise.
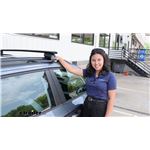
Moving to the tower, you notice we have this end cap at the very back of it. What I do like about that is it's gonna hide all your hardware. So this is gonna give you more of a clean finish, and that's actually underneath here is where your strap is gonna attach to. This strap is gonna be made of rubber, so it's not gonna be likely to scratch anything up. And since it wraps all the way around, it's gonna give you a very secure fit.
And one last thing to know about this is this plastic core we have in the back of it. You can actually go into our website and get that replaced, and put a metal locking core in that, and get that key to light to any of your other Yakima accessories. So there's gonna be a few things that set this system apart from some of the other crossbars you might see. The first thing is this is actually gonna be constructed from steel, rather than aluminum, and it's not gonna have that T-track up top, so you're not gonna be putting any T-track accessories on here, but it's gonna be great for this clamp on accessories, especially since it is made out of steel. It's also gonna have a higher weight capacity of up to 220 pounds.
But what I'd recommend doing is just checking what your roof is rated for and then going from the lowest rated component. As for how this is gonna sit up here, if I go from the top of our raised rails to the top of the crossbar, that's gonna be a little bit under three inches, which isn't too bad. What I suggest doing is taking the total height of your vehicle plus your crossbars, and then if you put any accessories on top of that, include that as well, so you know what areas you can make it under. As we overhang, we go from our tower to the end of the crossbar. There's gonna be about 3 1/2 inches which isn't too far. You're not gonna be likely hitting your head on here, but you should have some room to put some smaller accessories at the very end of here, like a ski carrier. And then talking about our next measurement is gonna be our spread. And since we have raised rails today, that's definitely a plus 'cause you can maneuver these wherever you need 'em to be and adjust for different crossbar spreads. Now, for what we have today, we have about three inches of crossbar spread, and I try to put 'em back as far as I can. They'll give you an idea of how this is gonna sit up here, and it's gonna sit at the very edge of the sunroof we have at the top. So you don't have to worry about that covering your sunroof. Now, if you have any really long accessories up here, you wanna open your hatch. That's something to definitely think about because if you have this too far back, it could impede you opening up the hatch. Overall, I think it's gonna be a great system for you if you really are trying to get a lot more space out of your Forester, especially if you like those towers too with how they secure to your raised rails and how they have that locking core at the very back of it to get it key to like the any of the other gear. Those crossbars are made of that steel which is very durable and has that higher weight capacity. Just make sure you don't overload your roof too. Now one of the downsides of these crossbars though is since they are made of steel, they are gonna be more prone the rusting. They do have that black vinyl coating on top of them, but if that coating gets scratched off, then those areas will be more prone to rusting. Now, if you want something that is gonna have a T-channel on top that can accommodate those T-channel accessories, and it's gonna be made of aluminum, so it's less likely to rust, then I'd actually recommend the Yakima JetStream Roof Rack System. It will be very similar to this, only with a different crossbar that could accommodate T-channel accessories and be made of aluminum. But if you like this one because you don't really plan on using any T-channel accessories, then I think this is gonna be a great option for you. As far as the installation, it is pretty straightforward, pretty easy to get on and off of here, but if you need a hand with it, just stay tuned, and we'll walk you through it. To start off the installation, we're just gonna lay everything out. So up front, we're gonna have our crossbar and the towers that go along with it and then the hardware that's gonna help us install the towers onto the crossbar. You have your end caps and then this tool with this built-in torque device. I also recommend grabbing a measuring tape just to make this a lot easier. We're gonna need this adapter, so we can put our towers onto our CoreBar. And when you place this on, you wanna make sure the side with the ridges is facing up. I like to place it on at an angle, putting one side in first, (adapter snaps) applying pressure until the other side clicks into place. Then you repeat this process on the other tower. We're gonna come over to our crossbar now and remove our end cap just by pulling it right off. Also recommend flipping it over. This makes this a little bit easier than grabbing the brackets that go on. And you wanna make sure you put this in the right orientation, or it won't fit on into place. So if you do have it upside down, make sure that threaded side is facing up and match the size together, so it just slides right on. If you get the first one on there, just suggest put you all the way to the other side and grabbing the second one, and repeating that process. And just make sure you put your end cap back into place. We're gonna come over to our tower now. I like to start with it upside down, and it just gonna look just like this. You'll notice we have this hole. You'll see this bolt that's inside of there, and if I push our strap in, you'll notice we have a bolt right beneath there, too, that we'll be able to tighten from the side. Now, if you don't see it, because this one's in the way, all you have to do is loosen that bolt up, until you push that strap and you're in the clear. At this point, I'd have to get control of that bolt. You can see it popping out on the other side. I like to line it up with this bracket with a threaded side, and you just place it right on top and bolt it into place. Another thing I'll note too, I just wanna make sure this isn't in the right orientation. So the side with the bolt is facing out, and the side with the strap is facing in. You just tighten that all the way down, until you hear that torque device start to click (clicks) just like that. We got both towers on. We're just gonna roughly place it on top of our roof. Now, before I get it up there, we wanna make sure this is in the right orientation, so I wanna make sure that this thicker side is gonna face forward and this thinner side, behind us. Once we have adjusted for that, we're just gonna place it up here. Try and get those straps underneath the raised rails, until it's just sitting on up here. You'll notice we already have a rear crossbar up here, and the process is gonna be the same for both of 'em. So at this point, what I like to do is make sure our tower's gonna be parallel with our other crossbar. So you can do that just by finding a point that's gonna be the same on both sides and measuring out. And if both of your towers at the, are at the same point, then you're good. We can also talk about getting the correct crossbar spread now. So if you already have one crossbar on here, what I suggest doing is just measuring from one to another, and make sure this is gonna be able to accommodate the gear that you have. Now, we can get our overhang, and what I like to do is just go from our tower to the end of the crossbar, and then I have to make sure this is equal on both sides. A way you can adjust this is just by grabbing onto your tower either pulling or pushing on the crossbar. What this is just doing at this point is just grabbing that strap and attaching that metal rod to these metal hooks. And then we're gonna come over to this bolt, not this one on the bottom, but the one above it right here. And I wanna tighten this one all the way down on both sides. (bolt clicks) We can move to the bolt below it now and tighten this. The one up top is to tighten your towers to your crossbar, and this one on the bottom is to tighten the strap itself. So when we're tightening this down, we wanna tighten it enough where it's just gonna make contact with your raised rails at first. After when it makes contact with those raised rails, then we wanna go to the other side and repeat that process, just going back and forth, so we don't tighten one side more than the other. And we have both sides tightened up. We can put on our end caps just matching it up to the shape of our tower, so it clicks in the place. I like to give it a good shake test at this point. Make sure everything feels secure and if it does, then you can load it up with whatever accessories you have and hit the road. But if you liked everything you saw today, that's just a look at the installation and some of the features of the Yakima Roof Rack System on top of our 2023 Subaru Forester.
Average Customer Rating: 4.8 out of 5 stars (16487 Customer Reviews)
These multipurpose, galvanized steel crossbars supply the backbone for your aftermarket roof rack system. Works with accessories that clamp around the bars. Pair with Yakima towers, fit kit, and RoundBar SL Adapter to create a complete roof rack. Heavy-duty towers allow you to mount 2 Yakima crossbars safely and securely to your vehicle's raised, factory side rails. Towers attach with rubber-coated stainless steel straps and tighten with the include torque tool. These adapters allow you to use Yakima RoundBars with BaseLine, SkyLine, TimberLine, or RidgeLine roof rack towers. Kit includes 4 adapters and 4 endcaps.I have been using Yakima racks for around 40 years and have never had any problems. However, I am amazed at the price increases over the years. Etrailer prices were by far lower than most. Overall, a very excellent purchase.
I'm happy that this allows me to save money by using my old round bars on my new vehicle, with only the purchase of new "towers" and these adapters.

Sue G.

2/11/2024
Its working great!

etrailer is excellent...however, not too pleased with Yakima and these cross bars - second set in four years...they make them out of a steel that rusts quickly...better out of stainless or aluminum. Maybe that is their idea of planned obsolescence. I also learned not to install end caps...that accelerated the corrosive process.
Kimberly has shown that great customer service is not dead! etrailer and Kimberly are great to work with and have earned my business and will always be the 1st and last place I look for my rack+ needs!
As for the application, I needed more space to fit my cargo box on top of my 4Runner TRD Pro’s rack. I came up this this… Thank you!
Everything from etrailer is timely and of good quality! The Yakima crossbars are no exception - they are indestructible.
They do the job. I can't say that they look like they were custom-made for my new vehicle, but I trust them to stay on and keep my boat on the car. They hold securely.
Really Easy to Install! Solid and Strong amount to Roof Rack.
Works perfectly. I am always impressed that Yakima continues to make parts for the "old roundbars" since they have since moved on to the superior JetStream bars.
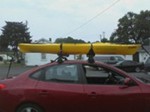
I ordered the Yakima roof rack, with the Hullyrollers for the back crossbar and the Mako saddles for the front crossbar to use with my kayak. It arrived just like they told me and I put them on my car the eveningit arrived. Got to finlly use the roof rack on June 22 to go out kayaking and it worked great. Only thing is I did not know about the air reflector piece for the front crossbar. Now I will be ordering it to help with the wind noise.
necessary for using the widest cross bar option (78"). East to install
Great rack, go on fast, easy to install and work well on my VW TDI wagon. Care has to be given and follow the instructions for the install to what type of rails you have. Works great carrying the VW luggage carrier and plan on using it to carry kayaks as well. Just have not decided what kayak rack type to get yet.
The Yakima roof rack system is an Outstanding product. I purchased the product to replace the OEM roof rack because it was too flimsy to carry the tandem bike mount and my bike. The Yakima roof rack is solid and provides me the peace of mind while hauling my bike on the roof of my car. etrailer provided the product for the best price as always.
I've attachec a few pictures of the Yakima rack on my Audi Q7. It took a few attempts to find the right combination of attachments, but in the end, the pin attachments work best with the access points on the factory flush-mount rails. Great product!!!!!
roof racks showed up in great condition, and showed up as one package.... I should have ordered the J racks from here but I found them cheaper locally so Thule J racks compliment the whole setup and i am just about ready to hit the water :)
Kit worked perfectly on my 2021 Subaru Forester. The whole install took 30 minutes. Never been disappointed with etrailer.
The installation of this rack system went very well, all of the instructions were easy to read and use. I have attached some pictures of our installation. The vehicle is a 1994 Honda Accord EX four door sedan
Roof Rack 2008 Saturn Astra The roof rack arrived one day early...The packaging was excellent and the quality of the product more than met my expectations. The instructions made the insulation very easy. It took less than 45 minutes to install the unit complete.
Excellent selection of rack parts. Very useful installation videos help when choosing between products. Easy ordering process. Quick delivery.
The rack has been so useful since I purchased it. Staff at etrailer.com were exceptionally helpful in getting the best option for my car and answering questions. I recommend this company, for its 110% customer service, excellent prices and timely delivery.
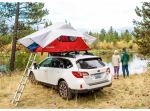
Have been rocking my Yakima rack from etrailer.com for a year now. I am using rack in conjunction with a Tepui tent. Once I added the air deflector, I would say it's the perfect setup. The Yakima gives more clearance over the factory rack, so I was able to get my hands under it to secure the tent hardware. If you're thinking of upgrading your factory rack, I would not hesitate to use etrailer.com
One quick phone call and Gwendolyn figured out exactly what I needed for our new car to use my old Yakima rack.
Great products though, again, written instructions would have been nice.
Bought as a pkg for my 2017 Golf R with Round Bars since I had a bunch of Yakima bike racks and a canoe gunwale rack for my old Yakima set up. Installation was easy with good instructions. All measurements from the Yakima site appear to be spot on.
etrailer.com shipped these out quickly and all parts arrived without damage.
Everything arrived as promised and earlier than expected just installed. Looks like it will do everything I need it to which is haul around paddleboards. So far so good!
Great product and very easy to install! I called in to put my order in due to not trusting myself in getting one that fits my car. Jessica W. Was beyond professional and helpful in the process. She went also well above her position and tracked my order and sent additional information. Couldn’t be happier with the product and customer service!
Ask the Experts about this Roof Rack
Do you have a question about this Roof Rack?
Yakima Accessories
Fit to this rack on your 2022 Subaru Forester
Info for these parts were:
At etrailer.com we provide the best information available about the products we sell. We take the quality of our information seriously so that you can get the right part the first time. Let us know if anything is missing or if you have any questions.


Gerald B.
4/24/2024
Still love the product but it is very noisy when driving.