Dexter Predator DX2 Trailer Brake Controller - 1 to 2 Axles - Proportional
Replacement Brake Control Plug-In Harness for Tekonsha and Draw-Tite Brake Controller 12" Long
Part Numbers: 58-8,20127

Thank you! Your comment has been submitted successfully. You should be able to view your question/comment here within a few days.
Error submitting comment. Please try again momentarily.
Dexter Predator DX2 Trailer Brake Controller - 1 to 2 Axles - Proportional
part number: 58-8
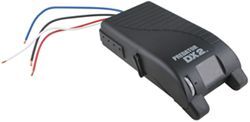
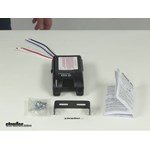
This proportional brake controller keeps it simple with intuitive controls that are easy to use. Includes a large digital LED display, fingertip gain control, a slide-bar manual override, and built-in safety features.
Features:
- Brake controller activates your trailer brakes in proportion to your vehicle's braking action
- Automatically adjusts trailer's braking based on deceleration of tow vehicle
- Large digital LED display shows your controller settings and monitors voltage output
- Simple, intuitive controls keep your settings in easy reach
- Adjustable gain setting determines the amount of braking output sent to the trailer's brakes
- Built-in, slide-bar manual override activates trailer brakes to control sway in emergency situations
- Deceleration sensor lever lets you adjust initial braking power and aggressiveness for smooth, safe braking
- Built-in safeguards protect your vehicle and trailer
- Current limiter protects vehicle from shorts in the trailer wiring
- Hazard flasher immunity prevents pulsing of the brakes when flashers are activated
- Quick and easy mounting with included bracket and hardware
- 90 To -35 degree mounting range - must be horizontally level
- Pigtail harness hardwires into your vehicle
- Made in the USA
Specs:
- Application: trailers with up to 2 axles (4 brake assemblies)
- Compatible with electric brakes only
- Dimensions: 6-1/2" long x 3" wide x 1-5/8" tall
- Mounting angle: -35 degrees to 90 degrees vertically
- 7-Year limited warranty
Proportional Braking
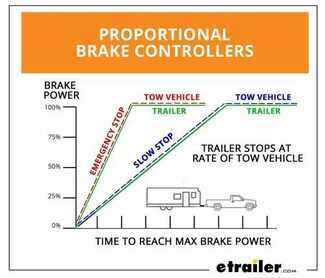
The Dexter Predator DX2 brake controller comes equipped with proportional braking to give you the best towing experience. Proportional braking means that your trailer brakes mimic your tow vehicle's brakes. If you slam on the brakes in your vehicle, your trailer brakes will activate with the same intensity; if you brake lightly, your trailer brakes lightly too. The trailer's braking is in proportion to your vehicle's braking. This saves wear and tear on the tires and the brakes on both your vehicle and trailer.
The Predator DX2 uses an internal 3-axis accelerometer to sense how your vehicle is braking so it can send the right amount of braking power to your trailer. It measures the inertia of your tow vehicle and activates the trailer's brakes to slow at the same rate. The result is uniform braking across your towing setup. No push-pull action - just smooth, proportional braking every time.
Large Digital LED Display
The Dexter Predator DX2 features a large LED display that's easy to see so you can check on your current braking output setting with a glance. This display is designed to keep it simple and not overload you with information. The display will also show you the voltage to confirm that the trailer brakes are receiving power.
Braking Output
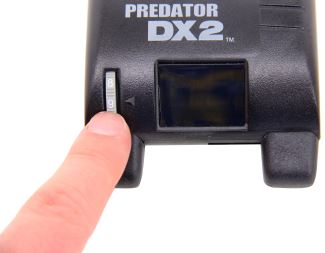
During the initial setup process, use the thumbwheel on the front of the brake controller to adjust the braking output. The output control lets you set the maximum amount of power that will be applied to your trailer's brakes. Typically, the output is only readjusted when you experience changing road conditions or if the weight of your trailer changes. The power output control on this brake controller lets you set the maximum amount of power that will be applied to your trailer's brakes. Typically, the power output is only readjusted if you switch from a heavy, loaded trailer to a much lighter, empty trailer - or vice versa.
During the initial setup process, you can use the thumbwheel to adjust the power output. To get more power to your brakes, increase the power level. To decrease the power output, lower the power level.
Sensitivity Adjustment with Deceleration Sensor Lever

Once you have the overall power set, you can fine-tune the power output by adjusting the sensitivity of the internal sensor. This controls the aggressiveness of your trailer's braking, meaning how quickly the brakes reach the maximum braking level. You can adjust this when you're towing heavy loads and you need more umph to bring your trailer to a stop. Your tow vehicle doesn't need that much power to brake in time, but your heavy trailer does. Boost gets the braking power to your trailer brakes faster and with more intensity so that it doesn't push your tow vehicle forward. To increase the sensitivity for towing heavier loads, move the lever away from you. For a lighter load, move the lever toward you.
Slide-Bar Manual Override
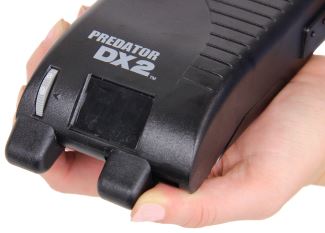
The Dexter Predator DX2 comes with a built-in manual override slide-bar in easy reach, great for stopping sway or controlling your trailer's momentum in emergencies. To engage the manual override, just push the slide-bar to the left. This will activate the trailer's brakes and brake lights without you having to apply the brakes on your tow vehicle, perfect for limiting trailer movement while you're cruising.
You can also engage the manual override to help you move a sliding 5th-wheel hitch closer to your truck's tailgate for tight maneuvering during slow speed turns. Just apply the manual override to hold the trailer in place while slowly moving the tow vehicle forward.
Quick, Simple Installation
Because the controller operates with an internal inertia sensor, it must be mounted between -35 degrees and 90 degrees vertically. The Predator DX2 also needs to be horizontally level and parallel with the direction of travel to function properly. During initial installation, the deceleration sensor lever must be positioned straight up and down. After mounting the Predator DX2 using the included bracket, hardwire the controller directly into your vehicle.
Installation Accessories
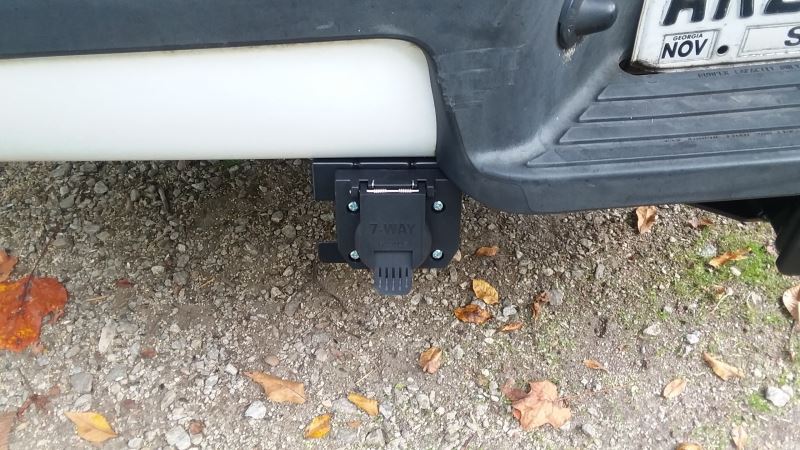
See etrailer.com's exclusive 7- and 4-way brake-control installation kit (ETBC7 - sold separately) if you don't already have a 7-way plug at the back of your vehicle
Note: One of the following will be required to ensure proper installation:
- 20-Amp circuit breaker (9506P - sold separately) for 2- to 4-brake applications
- 30-Amp circuit breaker (38630 - sold separately) for 6- to 8-brake applications
058-008-00 Dexter Predator DX2 Electric Brake Controller with Inertia Sensor - 1 to 2 Axles - Proportional
Replaces 58-8
Replacement Brake Control Plug-In Harness for Tekonsha and Draw-Tite Brake Controller 12" Long
part number: 20127
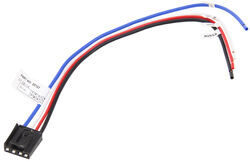
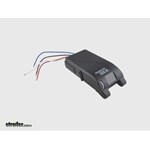
Tow Ready Replacement Plugin Harness for the Tekonsha P3, Voyager, Prodigy, and Primus Brake Controllers. Also works with Draw-Tite Intella-stop Xtreme, Intella-stop Ultra, Intella-stop Digital, and Activator III (5520) brake controllers.
- Wire lead length: 12"
- Wire functions:
- Blue: trailer brakes
- White: vehicle battery negative terminal
- Black: vehicle battery positive terminal
- Red: cold side of stoplight switch
8506920 Replacement Brake Control Plug-In Harness for Tekonsha and Draw-Tite Brake Controller 12" Long
Replaces 20127
California residents: click here
Customer Satisfaction Score:
94% were satisfied with this product
6% of customers were not satisfied
- Wrong item was ordered
- Defective
- Too difficult to install
Customer Reviews
Dexter Predator DX2 Trailer Brake Controller - 1 to 2 Axles - Proportional - 58-8
Replacement Brake Control Plug-In Harness for Tekonsha and Draw-Tite Brake Controller 12" Long - 20127
Average Customer Rating: 4.8 out of 5 stars (739 Customer Reviews)
This proportional brake controller keeps it simple with intuitive controls that are easy to use. Includes a large digital LED display, fingertip gain control, a slide-bar manual override, and built-in safety features.Purchased a Teckonsha Voyager brake controller and the ETBC7 install kit.
The instruction an video were very clear and easy to follow. Installed on a 2007 Ford Ranger Sport. Tech support was also very helpful on the one question I did have.
Exactly what I was looking for and needed ! It was delivered very quick . Actually I just ordered a complete wiring harness from you tonight . Your service and follow up is great
Michael

2/19/2024
After 1 yr and many trips this product has more than exceeded my expectations. Would definitely recommend it to anyone
The drawtite hitch and trailer wiring harness fit great. Instructions were clear and concise. Installation was a breeze. I am ready to tow my little trailer now. As soon as I get the brake controller installed, I will be ready for my big trailer.

Works as expected. Prompt service from etrailer!
If your truck comes with the tow haul package.... this item is literally plug and play. I had it wired up and all mounted inside of thirty minutes. It's literally 4 wires and the stock system wires are labeled along with the brake contoller. I haven't tested it yet but so far I am thoroughly impressed!
Perfectly wired directly to existing wiring that I had for the previous brake controller I replaced with the, Draw Tite I Command. This will make it a lot easier should I choose to upgrade the unit in the future.
Fantastic customer service from Joshua as well.
Class iii Draw Tite trailer hitch:
This part was quick and easy to order and I received it sooner than expected. My mechanic said the installation was easily accomplished and looks great on my car. I would not hesitate to order from etrailer again!

Griff M.

6/21/2023
The product has worked well. I have had no problems with it.
I installed the Curt gooseneck on my 1993 GMC 2 Wheel Dr. 2500 truck. All the components have tight tolerances. It took me eight hours. With a socket and the wrench. Laying on my back. I did have to cut the wheel well lip about 3/8 of an inch off because I could not get that front angle bar to slide in without hitting it, no way around it unless you lift the bed up and I wasn’t going to do that!!. You have to cut it.instructions do not state that. I’m very happy with the Hitch, it is definitely stout! I did have to make a notch on the outside brackets to go over my airbag bolt. I also had to remove the support bracket on the inside of the frame for the airbag and the crossmember for the spare tire to get the front angled bar in.

Purchased this as part of all parts required to convert 1996 Jayco over to electric brakes. Very happy with results. Surprised to see after winter in storage that the battery supply still shows full charge.

Worked Great.
As always, etrailer delivers. Part was on time and a perfect match for the brake controller. What you don't get from Amazon is the technical support on how to install or use the equipment purchased from etrailer. That's why I keep coming back!

My truck was stolen and wrecked. I was able to retrieve the Tekonsha Brake controller from under the Dash board before it was hauled to the salvage yard, but not the wire harness. I was ale to order a replacement harness from eTrailer and reinstall the controller in my new truck. I had no problems at all. Thank you eTrailer for the great support.

Don

3/9/2022
Still works perfectly after one year. Actually, I been using this Controller for well over a year. I just reinstalled it in my new truck a year ago.
These guys are great they had the installation kit it came with everything you need and even had a video for my specific vehicle to install the brake controller and wire in a 7 pin trailer plug
If you don’t have factory brake controller the etbc7 is an amazing kit they have comes with everything I mean everything
Tim

6/26/2021
Everything has been excellent e trail has the right products and they fit just like they say

Works as intended, but the plug on the back of the controller is a loose connection. Sometimes I would go to brake and find that I had no trailer brakes because the controller lost power. After a wiggle it would start to work again. I was able to shave the Molex plug a bit and now I don't have any problems with it.


Sierra K.
7/19/2021
Thank you for your review. I have not heard of that problem. I would have used some electrical tape.

Finally a brake controller that does what I set it to, not what it’s little computer brain, designed by someone who has never pulled a trailer thinks it needs to do.

The service you receive from etrailer is top notch. This brake controller has worked very well. I actually swap it between two of our vehicles. Just unplug it from one and plug it into the other.
Bill D.

8/15/2021
Very well. The service etrailer provides is the highest Ive ever experienced. They are just super to work with. Ive used them time & time again. I recommend them to everyone looking for anything they carry.
Wiring harness I used to connect into the trailer brake control circuit. Requires pulling some inside trim in the drivers footwell area to access my 2022 Chevy Colorado's wires. Follow the intructions or better yet go onto YouTube for video on what goes where.

Works great. FYI YOU HAVE TO RUN A BRAKE WIRE FROM THE CONTROLLER TO YOUR LIGHT PLUG . For it to work properly.
I installed this controller in my 1982 Chevy K20 pickup.
It works perfectly! Etrailer exceeded my expectations with their level of customer service from the time the order was placed to the products arrival at my home. Truly 5-star service!
The video tutorials are straight forward and very helpful.
The universal installation kit literally had everything needed to complete the job.
Side note:
I would have liked to see the (2) 10ga wires in the insulation to be black and blue, not black and white, no biggie, black on black and white on blue.
Thanks again!

I am very satisfied with the Dexter Axle Predator Electric Brake controller. I purchased the Dexter brake controller to be compatible with Dexter car trailer axles on a 16 foot car hauler. The braking unit is very useful when towing in very steep and winding mountain terrain. I feel that the braking is a necessary safety item when towing in a hilly or mountainous environment and the Dexter Predator brake controller provides the great control and driver peace of mind knowing that a heavy load can be managed. The unit installs very easily with the proper adapter.
Universal Installation Kit for Trailer Brake Controller - 7-Way RV and 4-Way Flat, Item # ETBC7
I installed this 7-pin plug kit on my 2008 Jeep JKU to add power and trailer brake control.
I also purchased :
Draw-Tite I-Command Trailer Brake Controller Item # 5535
and
Curt No-Drill Bracket Item # C57202
along with a little extra wire, just in case.
The kit quality was great. It shipped with everything I needed, sans the controller and bracket above. I used a cordless drill, a quarter inch drive socket set, screwdrivers, wire cutter/crimper, pliers, black electrical tape, half inch loom (plastic flexible conduit) and quite a few extra zip-ties I had laying around. I needed the Curt bracket to mount the 7-pin plug farther away from the muffler that runs parallel to the bumper in Wranglers.
I first ran the grey jacketed wire from the rear bumper all the way to the engine compartment. This was the hard part for me since I'm old and a little more round than I'd like. I didn't need to raise the jeep since it already has a 2 1/2 inch lift. I zip-tied the jacketed wire to the frame and brake lines until I found a spot in the frame I could run it through. I ran it out of the frame at the rear of the left front wheel well and up into the engine compartment. There is a (very handy) rubber plug in the firewall just to the left (outboard) side of the brake vacuum booster. I made a small slit in the rubber plug. I removed the outer jacket from the wire at that spot and fed the white (future brake controller wire) into the cabin of the jeep. I ran the black wire, in a wire loom/conduit across the top of the firewall to the battery. I had enough extra wire to run the brake controller power and ground wire from the battery, across the top of the firewall in the same conduit, and into the cabin through the same rubber plug/grommet. I drilled small pilot holes to mount the two circuit breakers. I then connected the wires at the 7-pin plug at the rear bumper. I again made a pilot hole and then mounted the ground wire with the self-tapping screw provided in the kit.
Here I'd like to mention, I would have been happier with heat-shrink connectors. I could have gone to town and bought some, or I could have soldered the connections. Instead, I just used the provided connectors and a LOT of black tape. If I have any corrosion issues later I will replace the connectors provided in the kit.
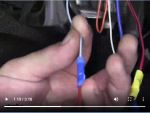
I wired and mounted the brake controller. This would have been super easy if I could fit under the dash. I dislike using the little blue inline wire connectors (self stripping connectors) but it was a godsend when working one-handed under the dash. I mounted the controller bracket and covered most of the exposed wiring with black tape for aesthetics.
If I was 20 or 30 years younger, I would have had this whole kit installed in about 1 1/2 hours. I am very happy with the quality of the materials. Many others have already noted the bracket is not quite perfect where it is designed for the four wire plug to slip in. The four wire plug had moved slightly on my 20 minute drive to work and would likely have fallen out if I went much further. I may put a wrap of electrical tape around the plug to tighten up the fit. Otherwise I will see if a zip-tie or a drop of superglue will hold the four wire plug in place. I was a wee bit skeptical about the sturdiness of the no-drill bracket as it's held in place by what looks like a hose clamp. I am happy to report, the clamp is heavy duty and well made. The no-drill bracket with the 7-pin and 4-pin receptacles are very sturdy and secure. The instructional videos on etrailer's website made the job easy to understand.
If I had this job to do over again, I would definitely use the same products from etrailer.
Great selection and servive

One year later I'm extremely pleased with this purchase. I often chuckle when I see stock hitches and the whole thing is visible while mine is neatly tucked under with everything hidden except for the 2" receiver. 10/10 have recommended etrailer on many occasions to friends and family for their service and know-how. Since installing my hitch I towed a pop up camper 1500+kms and do frequent trips to the dump or my local dirt and gravel yard for supplies. Love it!
Quality plug and what i needed for my F-53 chassis.
Both the 2017 & 2018 Winnebago Forza class A motorhomes DO have in place (under dash) connections for trailer brake controllers, unlike as depicted on your website as needing an additional part (wiring and 4 prong plug), although it is somewhat difficult to find. Attached to the connection socket is an unwired plug (with blue "lips" in somewhat blurry photo). One could either cut and splice the 12" plug-in harness (#20127) into the vehicle connections, or as I did, use solderless socket connections. To determine what wires go where, use an ohmmeter. You will find two b+ wires (use either one) a ground connection, a brake signal wire(use DC voltmeter and press on brake pedal (engine on in diesel pusher) to get reading, and a to trailer wire (bottom left corner when two b+ and ground wire are on right side of socket).
Ask the Experts about this Trailer Brake Controller
Do you have a question about this Trailer Brake Controller?
- Dexter Predator Brake Controller 58-8 Installation in 2005 Ford F150
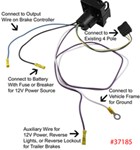
- If your 2005 Ford F-150 has only 4 wires at the bumper (or only a 4-pole connector) and you need to install a 7-way vehicle-side connector, you could use the Hopkins # 37185. If you already have the 7-way connector on your truck, you will need to make the additional wire connections for the brake controller. (The 4 wires you have carry the brake light, running light and turn light signals for your trailer, plus a ground: white = ground, brown = running/brake lights, green = right turn signal
view full answer... - How to Wire Dexter Predator Brake Controller on a 2013 Town and Country With a Tow Package
- In my research, the 2013 Chrysler Town and Country with a tow package does come with a wiring harness and should have a 7-way. To install the Dexter Predator # 58-8, you will need to run the wires from the brake controller to the 7-way connector on your vehicle.
You are also going to need Draw-Tite # 5506 which gives you the extra length you will need to hook up your brake controller to your 7-way connector.
I have attached a FAQ regarding trailer brake controller installation information,
view full answer... - Can the Dexter # 58-8 Predator DX2 Brake Controller Be Installed Vertically
- According to Dexter, the # 58-8 Predator DX2 needs to be mounted in the direction of travel, level on a side to side plane. If mounted on vertical plane as you mention, the brake controller would not function.
If the vehicle design somehow limits the installation options, and you have no other option than to mount a brake controller vertically, you can use a time delayed brake controller like the # 5504 Draw-Tite Activator IV. Because the controller is solid state, if can be mounted
view full answer... - Display of Dexter 58-8 DX 2 Predator Brake Controller Lights Up Without Trailer Connected
- According to Dexter Axle, it's perfectly normal for the display to light up and display .0 when a trailer isn't connected.
This will happen regardless of if the vehicle is running, as the controller has a constant 12V connection to the vehicle battery.
view full answer... - Installing a Brake Controller on a 2016 Chrysler Town and Country Van
- The 2016 Chrysler Town and Country did not come with a factory installed tow package and a 7-way trailer connector. You will have to hardwire in a 7-way and the all the wiring so you can install your controller. None of the wiring is pre-installed on this model vehicle.
The first thing you will need to do is wire in a 4-way flat trailer plug if you have not already done so. You will need a wiring harness, I recommend the Curt T-One harness, # C56331. This harness is custom-fit to your
view full answer... - Troubleshooting Electric Brakes with Dexter DX2 Controller
- The manual override lever does not move when you hit your brake pedal but the digital display will light up and give you a reading. The slide is only for the manual emergency braking or to apply additional braking pressure to your trailer as desired and should not move when you hit your brake pedal at all. The description you gave is that your manual override is sticking and not releasing the braking pressure some of the time which would definitely lead to burning up your brake shoes
view full answer... - Installing Dexter Predator Brake Controller on 2006 Ford F-150 with Factory 4-Way
- The reverse light wire on your 2006 Ford F-150 is likely purple or orange, though we have no way to know for sure (manufacturers have been known to change colors so a definitive answer is an impossibility). That said, you can find out pretty easily with Circuit Tester # PTW2979. When installing a brake controller you will need to use this to determine the functions of all wires on your 2006 Ford F-150 which has what I assume is the factory 4-way. I have added a link to a help article on
view full answer... - Troubleshooting Brake Controller with 1.5 on Display All of the Time
- Sometimes brake controllers need to be reset as they get a weird internal bug. Try unplugging yours for a minute or so and replugging in and see if that helps. Here's how to test the controller though:
Testing the brake controller is fairly easy. Sever the blue brake output wire near the brake controller leaving enough room to reconnect it and then apply the manual slide. Using a circuit tester like the Tester, part # PTW2993, you should get output to the controller side of the wire
view full answer... - Troubleshooting Predator DX2 Brake Controller that Only Works with Override Lever
- The controller shouldn't have been showing voltage without a trailer connected. Typically this is caused by corrosion on the 7-way which is putting a slight draw on the circuit and causing the controller to think a trailer is connected.
If the controller isn't applying the brakes with the brake pedal typically that's due to an issue with the red wire of the controller though. This wire needs to see 12 volts to know you are applying the brakes so that it can then start activating the
view full answer... - Mounting Bracket for a Dexter Predator DX2 Brake Controller
- You should be able to use bracket # 2178. I have included a picture showing the measurements for you. I was able to read the instructions for the controller from the Dexter site but I can send you a copy in a separate email.
view full answer... - Troubleshooting No Truck Brake Lights When Manual Override Used on Dexter Predator Brake Controller
- According to the Dexter Predator # 58-8 Brake Controller installation instructions, if your truck lights are not illuminating properly with the manual override is activated, then you will need to check the red stoplight wiring connection. The brake controller red wire should be connected to the non-powered stop lamp switch wire on your 2008 GMC Sierra.
On your specific truck there should be a wiring bundle that is below the steering column, and is to the left of the brake pedal. This
view full answer... - How to Wire Dexter DX2 Brake Controller on 2013 Chevrolet Silverado
- The red wire from your Dexter DX2 brake controller # 58-8 needs to be wired to the cold side of the stop light switch, which on your 2013 Chevy Silverado corresponds to a light blue wire with a white stripe. This wire should ONLY be hot when the brake pedal is applied.
The rest of the wires actually match up with the same color wires on your truck as follows:
Dark blue on brake controller - To dark blue on vehicle
White on brake controller - To white on vehicle
Black on brake controller
view full answer... - When to Use a 20 or 30 amp Circuit Breaker When Installing Brake Controller
- You'd want to use the 20 amp circuit breaker like # PK54220PL unless your trailer has more than two brake axles. If that's the case you'd want to use the 30 amp breaker # 38630.
view full answer... - Fuse and Circuit Breaker Installation Help For Dexter Predator Brake Controller in 2008 GMC Sierra
- When installing the Dexter Predator Brake Controller # 58-8 in your 2008 GMC Sierra you will want to follow the Dexter instructions and install the specified fuse and self-resetting circuit breaker as indicated.
The vehicle manufacturer installs fuses to protect the OEM electrical components in the vehicle so any aftermarket accessory that is added will need to be protected independently of the factory fuses and circuit breakers.
To correctly install the Dexter Predator you will
view full answer... - Troubleshooting 12V Power & Brake Output Circuits on 7-Way on 2008 Saab 9-7X
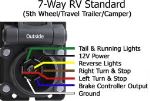
- It sounds like you have a 7-way trailer socket on your 2008 Saab 9-7X that has no signals on the 12V charging circuit nor on the brake controller output circuit. If you refer to the linked photo you'll see the usual pin/function assignments typically found on an RV-style 7-way. Often the 12V trailer power circuit is carried on the pin at the 1-o-clock position and the brake controller output is carried on the pin at the 5-o-clock position.
The most common causes for an issue like this
view full answer... - Where Do the 4 Wires of a Brake Controller Go for Installation in Vehicle
- The four wires and their functions are:
White: Ground wire, connected to negative side of battery.
Blue: Electric brake wire, ran to the brake output circuit of your 7-way with 10 gauge wire like # 10-1-1 sold by the foot.
Black: 12v power wire, connected to the vehicle positive battery terminal with a 40amp circuit breaker, part # 9510.
Red: Stoplight switch circuit. This will get run to the wire on your stoplight pedal assembly that sees voltage only when the brakes are applied.
view full answer... - 2017 Jeep Wrangler Unlimited Brake Controller Installation
- The Dexter Predator DX2 Trailer Brake Controller - 1 to 2 Axles - Proportional # 58-8 will have the red wire connect to the brown and white wire in your 2017 Jeep Wrangler Unlimited. I've attached a video of an installation of the Prodigy P3 # 90195 which will have that same red wire from the brake light switch. This installation uses heat shrink butt connectors # DW05745-5 along with wiring kit # 5506 to Factory 7-way.
view full answer... - Best Trailer Brake Controller for 2004 Chevy Blazer
- For a brake controller for your 2004 Chevy Blazer I recommend the Prodigy P3 Brake Controller part # 90195. This is our best selling brake controller because of how well it works and how easy it is to setup. This is a proportional brake controller that senses the amount of braking the tow vehicle is applying and applies a proportionate amount to the trailer brakes. This will be the last brake controller you buy as it is incredibly reliable, works, well and is easy to use. It can easily
view full answer... - Can Dexter Predator Brake Controller Fit 2019 Ford Explorer
- Yes the Dexter Predator brake controller part # 58-8 that you referenced does fit your 2019 Ford Explorer by using the install harness part # 3035-S and you'd be set.
view full answer... - Finding Stoplight Circuit on 2018 Mazda CX-9 for Brake Controller Install
- Hey Zach, so we haven't had the chance to install a brake controller in a 2018 Mazda CX-9 so we don't have the wire color for the stoplight circuit switch but we can still help. The easiest is to use a circuit tester like the part # PTW2993 to test all of the wires that lead to the brake pedal switch till you find the circuit that only has voltage when the brakes are applied. But when you connect to this you are simply attaching to the circuit and not cutting it and preventing it from going
view full answer... - What Brake Controller Will Work With My 2022 Chevrolet Suburban
- When it comes to your 2022 Chevrolet Suburban the Tekonsha Brake Controllers do not have the plug and play adapters for your vehicle. You will have to splice those 4 wires into your Prodigy P3 controller using the Replacement Brake Control Plug-In Harness # 20127, and this will activate your controller.
I linked an installation video below on a different vehicle but it is the same concept.
view full answer... - Installing a Trailer Brake Controller on a 2012 Dodge Caravan with Tow Package
- I spoke with a colleague who worked at Chrysler and he stated that they do not put the trailer hitch and 7-Way wiring on the Grand Caravan at the factory. That is something that the dealer installs. In any event here is what you will need to do. The brake controller will need to be hardwired into the vehicle.
The white wire on the brake controller will need to get connected directly to the negative terminal on the vehicle battery. The black wire will need to connect to a 30 amp circuit
view full answer... - Brake Controller Wiring Harness For 2024 BMW X5 Without Factory Tow Package
- We do have a brake controller wiring harness that works with your 2024 BMW X5 without the factory tow package, and I verified with the manufacturer for you the correct part number is the following:
- Tekonsha Brake Control Harness # 20127
view full answer... - Brake Controller Harness For Tekonsha Primus Brake Controller For 2013 Chevy Silverado
- There isn't a plug-and-play wiring harness for any brake controller for a 2013 Chevy Silverado, even with the tow package. So while we do have a harness for your Primus brake controller, it is a splice-in harness:
- Replacement Brake Control Harness # 20127
view full answer... - Hardwire Trailer Brake Controller Installation on a 2001 Dodge Van 1500
- Installing a brake controller on your 2001 Dodge 1500 Van is a hardwire installation. In addition to the brake controller and the wiring harness like # 20127, you may also need a 4 and 7 Way Installation kit, # ETBC7 depending on what type of trailer connector is on the van.
If the van already has a 7-Way trailer connector, you will need to add a brake controller installation kit, # 5506. On the back of the 7-Way connector, find the wire that is coming out of the 7:00 position. Cut the
view full answer... - Can Brake Controller be Installed in 2020 Subaru Outback & Recommended Basic Controller
- You can install a brake controller on your 2020 Subaru Outback, and there is indeed a stop light switch on the vehicle. I have added a photo from a video of a brake controller install we did on a '20 Outback that shows the location of the stop light switch, which will be up under the brake pedal. I have linked the video for you below, and it talks about the stop light switch at about the 16:05 mark.
In regards to a basic brake controller, I think the best option is a time-delayed controller
view full answer... - Can Wiring Harness from Tekonsha Voyager be Used with Prodigy P3 Brake Controller on 2007 GMC Sierra
- If you are using the pigtail wiring harness # 20127 to connect the Tekonsha Voyager Brake Controller # 39510 to the wiring in your 2007 GMC Sierra New Body, you can use this same harness to connect the Tekonsha Prodigy P3 # 90195. The harness is compatible with both brake controllers. You will be able to simply unplug the Voyager from the harness and replace it with the P3. You will not need to reconnect any of the bare wire connections that you already made with your vehicle wiring.
The
view full answer... - Economical Easy to Install Brake Controller for 2011 Chevy Silverado
- The easiest to install and setup brake controller we offer that's at a great price is the Tekonsha PowerTrac part # 39523 which requires harness part # 20127.
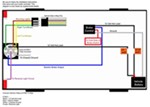
Connect the four wires on the brake controller adapter (20127) to the tow package wires. Follow the table below to connect the tow package wires and adapter wires using butt connectors. I also attached an install video as well.
view full answer... - Troubleshooting Brake Controller Only Functioning with Override Lever
- If you have a circuit tester like the part # PTW2993 test the red wire of the brake controller for voltage when the brakes are applied. If there is voltage when you press the brakes then the brake controller is bad but if not then the issue is that you aren't getting a stoplight signal for the controller to allow the controller to know you are applying the brakes. Sometimes this issue is as simple as a blown third brake light fuse or just a bad connection to the vehicle wiring.
view full answer... - Voyager Brake Controller Does Not Show Voltage with Manual Override Applied
- The way a brake controller works is sort of like you described. In many proportion controllers, you actually have to be moving to get voltage when applying the brake but will see voltage when applying the manual override. The controller actually senses how much the vehicle is decelerating using an internal sensor. It does not monitor how hard you press the pedal but it does sense when you are pressing the brake. Of course usually how hard you press the brake does effect the rate of deceleration.
If
view full answer... - Wiring Harness Plug-In To Brake Controller On 2008 Honda Ridgeline
- In the video that you linked, the part you are looking for is now the Replacement Brake Control Plug-In Harness Item # 20127. This part is specified to work with Tekonsha and Draw-Tite brake controllers. It will allow you to wire to the ETBC7 for safe towing.
I have added some review and installation videos below to further show the harness.
Tekonsha PowerTrac Electronic Brake Controller - 1 to 2 Axles - Time Delayed - Item # 39523 is the brake controller that was used with the
view full answer... - Recommended Value Brake Controller For 2017 Honda Ridgeline Without Tow Package
- We can for sure get your 2017 Honda Ridgeline set up with a brake controller, and there is one that I think meets your needs perfectly, which is from Tekonsha; it will also require a wiring adapter, which will depend on if your '17 Ridgeline has the factory tow package or not:
- Tekonsha BRAKE-EVN Trailer Brake Controller # TK63VR
- Brake Control Harness # 20127
The BRAKE-EVN is a really good value, as it gets the job done of giving you reliable braking without any unnecessary
view full answer... - Will Tekonsha Prodigy P3 Brake Controller Work on Triple Axle Trailers
- You can use the Tekonsha Prodigy P3 Trailer Brake Controller # 90195 on a triple axle trailer with no worries about the wiring getting fried; the P3 is actually able to work with up to four axles and eight brake assemblies.
If you are hardwiring the controller in you will need to make sure you use 30-amp circuit breaker # 38630 with your six brake assemblies. The low amperage on the red brake light switch is because it only needs enough amps to light the signals; it will not fry the
view full answer... - Harness Needed To Install Tekonsha Brake Controller on a 2002 Toyota Tundra
- In order to install a Tekonsha brake controller on a 2002 Toyota Tundra you'll need the Brake Control Plug-In Harness for Tekonsha and Draw-Tite Brake Controllers part # 20127. This harness plugs directly into the brake controller and then the other end splices into the circuits on the vehicle. Please note, there is no brake controller port on a 2002 Toyota Tundra so splicing is the only option.
view full answer... - Installing a Brake Controller on 2013 Mazda CX-5 with 7-Way Installed
- Since you have a 7-Way you will only need a few more components to complete a brake controller install on your vehicle.
For a wiring kit to install the brake controller and the 7-way adapter you would want the Wiring Kit for 2 and 4 Brake Electric Brake Controllers # 5506. This will provide the power source and ground for the wiring for the brake controller. You will need to test the wires from the brake pedal switch of your vehicle to find a circuit that has voltage when the brakes
view full answer... - Installing Tekonsha Brake Controller on 1992 Ford F-150
- To install a Tekonsha brake controller, such as the PowerTrac Time Delayed Brake Controller # 39523, you would want a wiring harness. The Tekonsha and Draw-Tite Brake Controller harness # 20127 is designed to work with Tekonsha brake controllers.
If you do not have a 4-way flat or a 7-way connector at the rear of your 1992 Ford F-150, you will want to install a wiring harness with a 4-way flat. I recommend the Tow Ready T-One Wiring Harness # 118316. This wiring harness will plug into
view full answer... - Finalizing Final Under Hood Wiring Connections for Brake Controller on 2009 GMC Sierra
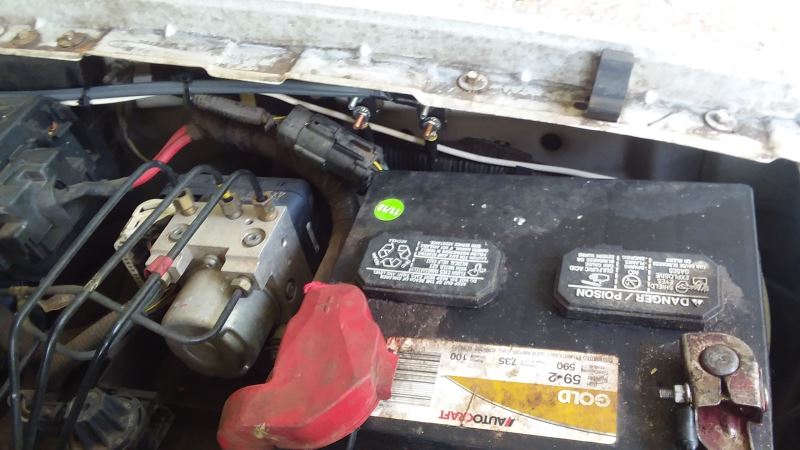
- It sounds as if the final power connection needs to be made under the hood. If you take a look at the Brake Controller Installation FAQ article I have linked you to, and scroll to the bottom of the page, you can see the procedure for finalizing the connections under the hood.
The wire that provides power to the brake controller is located to the right of the power distribution box, between the box and the fender. Cut the electrical tape and free the red wire with the ring terminal on
view full answer... - Tow Package Wiring Colors and Functions for a 2007 GMC Sierra 1500 New Body Style
- the wire bundle you are looking for looks like the one in the FAQ article I have linked for you. It is located under the left side of the instrument panel to the left of the steering column. The wiring colors should be as follows:
Red/black wire = 12 volt power
White = ground
Light blue/white = input from brake switch
Dark blue = output to trailer brakes
Orange = not used
There also may be some connections that you will need to make under the hood to make everything fully functional.
view full answer... - Installing Brake Controller on 2013 Dodge Grand Caravan with FactoryTow Package
- It sounds like your Grand Caravan is wired like the Jeep Grand Cherokee. I have confirmed this by speaking with my contact at Tekonsha. He tells me that the wire you located is indeed the brake control output circuit. This wire would be ran through the firewall and would connect to the blue wire on the brake controller.
To complete the installation, you will connect the white wire of the controller pigtail # 20127 to the negative battery terminal, the black controller wire to the positive
view full answer...





Info for these parts were:


At etrailer.com we provide the best information available about the products we sell. We take the quality of our information seriously so that you can get the right part the first time. Let us know if anything is missing or if you have any questions.








David
11/8/2020
I have been completely satisfied with this item. It has operated as advertised an has had no problems.