
Hidden Hitch by Draw-Tite Trailer Hitch Receiver - Custom Fit - 2"
(0 reviews)
Price: $480.09
In Stock
Hidden Hitch by Draw-Tite Trailer Hitch Receiver - Custom Fit - 2"
Item # DT34YR
Retail:$779.46
Our Price: $480.09
You Save: $299.37
Will this fit?
To see if this custom-fit item will work for you please tell us what vehicle you'll use it with.
In Stock


- All Info
- Q & A (0)
- Videos (1)
- Photos
Hidden Hitch Trailer Hitch - DT34YR
- Class III
- 2 Inch Hitch
- 3500 lbs GTW
- Completely Hidden
- Hidden Hitch
- 350 lbs TW
- Custom Fit Hitch
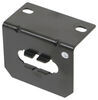
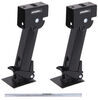
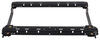
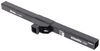
This hidden, custom-fit hitch installs behind your vehicle's rear bumper so that the cross tube is always out of sight. Fully welded, corrosion-resistant receiver easily removes when not in use.
Specs:
- Receiver opening: 2" x 2"
- Maximum gross trailer weight: 3,500 lbs
- Maximum tongue weight: 350 lbs
- Not rated for weight distribution systems
- Ball mount requirements:
- Minimum rise: 3/4"
- Maximum length: 10-1/2"
- Limited lifetime warranty
Features:
- Custom-fit trailer hitch lets you tow a trailer or carry a bike rack or cargo carrier with your vehicle
- Hidden design - hitch is completely out of sight for a clean, from-the-factory look
- Hitch cross tube is concealed behind rear bumper
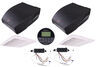
- Removable receiver unbolts from hitch when not in use
- Computer-aided, fully welded steel construction ensures strength and durability
- Tested Tough - safety and reliability criteria exceed industry standards
- Easy, bolt-on installation - no welding required
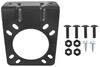
- Complete hardware kit and installation instructions included
- Black powder coat finish covers e-coat base for superior rust protection
- Sturdy, square-tube design
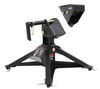
- Durable storage case and anti-theft lock included

Draw-Tite Tested Tough
Draw-Tite's Tested Tough program provides testing standards far superior to those outlined by the Society of Automotive Engineers (SAE), the go-to source for engineering professionals.
Each Draw-Tite trailer hitch receiver undergoes extensive fatigue testing and static testing with the ball mount that is either supplied or recommended for use with that particular hitch, thus ensuring results that are applicable to real life use. Fatigue testing is also conducted on hitches rated for use with weight-distribution systems.
In addition, Draw-Tite performs static testing on a simulated automobile, as opposed to the rigid fixture used for SAE testing, resulting in a more true-to-life scenario.
etrailer.com Technical Support
At etrailer.com we're committed to the products we sell, and to our customers. Our experienced and knowledgeable staff are available via both phone and email to address your questions and concerns for the lifetime of your hitch. The technicians at etrailer perform hitch installations on a daily basis, making them a valuable resource for do-it-yourselfers. The one-on-one, personal service you'll receive comes straight from an expert in the towing and automotive field. We've installed it, we've wired it and we've towed with it, so whatever your question, we can answer it.
76924 Hidden Hitch by Draw Tite Hitch Receiver - Custom - 2" Receiver
Installation Details
This Product Fits The Following Vehicles
- 2020 - 2024 Cadillac XT5
- 2017 - 2019 Cadillac XT5 excluding Platinum


Video of Hidden Hitch by Draw-Tite Trailer Hitch Receiver - Custom Fit - 2"

Videos are provided as a guide only. Refer to manufacturer installation instructions and specs for complete information.

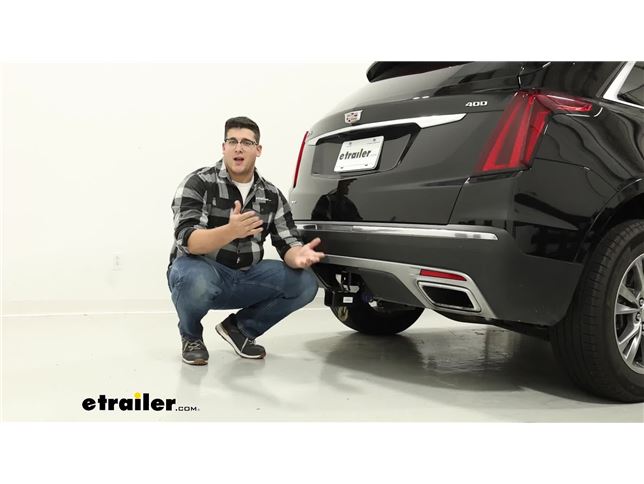
Video Transcript for Draw-Tite Hidden Hitch Class III Trailer Hitch Installation - 2023 Cadillac XT5
Hi, I'm Matt with etrailer. Today, we're gonna be talking about a Hidden Hitch two-inch hitch receiver on a 2023 Cadillac XT5. Now there's gonna be a great premium option for you if you're looking at either hauling or towing, or having accessories on your car part-time, but when you're not using it, you want that nice, finished, factory look to your car, then this is gonna be the one of the best options for you. What's really nice about this one in particular is that this receiver comes on and off. So if you wanna take it off, you just come over to this blue knob. And if you'll notice there's a locking core on it just for that extra security so no one can come by and take it off.
And once you unlock it, just push in on that knob and push away, and the receiver comes right out. And with that off, you can put this fascia panel back on if you want that nice, factory look. Now, I will say, it's not super quick and easy to put on and off because you're gonna have two Torx, big screws that go in underneath, so this is gonna take a little bit to get back on, not as quick as some other cars with their fascia panels on. And when you're putting your receiver back on, all you have to do is push on that blue tab again till it goes all the way back and clicks. And when you put it back in here, all you have to do is put it in at a kind of an angle till it hooks on at the top, and you push down for more pressure, and it'll click right into place.
And just make sure you lock it back up. And right above the receiver, you notice we have two safety chain tabs and you'll be able to put your S hooks in there just fine. Now they are a little bit small, so when you are putting your clevis hooks on here, this one will fit just barely, and you might have some issues if you have any larger ones. This is gonna be rated for 3,500 pounds of your towing weight and 350 for your tongue. Now also just make sure you check what your car is rated for, because you don't wanna overload that.
This is gonna come with a hitch pin and this will be pretty straightforward to put in. It's gonna come with that bolt on the other side along with some clips. And when you are putting it in, you're gonna have to line it up with this exact hole. And what I like about this one is it does have all these grooves that give you the ability to really grip onto the nut and onto the pin too. We're gonna get a few measurements now.
That first one is gonna be the rise we have here, and that's gonna be a little bit over 14 inches. So that's just something to know if you are putting your coupler on here so you know how high you need to adjust that for. And it's also something important to the note, if you plan on putting any accessories on the back of here, whether you have a bike rack or not, and how high off the ground that's gonna sit. And the second measurement we're gonna get is gonna be from the center of our hitch pin hole to the edge of our fascia, and that's gonna be about 3 1/2 inches. So that's gonna let you know if you have any accessories, how close you gonna sit to the bumper of your car. Overall, this is gonna be a great option for you if you find yourself not constantly using the hitch, and you want that nice, clean, factory look. And that's where the installation is pretty straightforward. We we're actually able to cut out a few steps, but if you need a hand with it, just stay tuned and we'll show you how to do it. To start off the installation, we're just gonna lay everything out. So the first thing we're gonna have our hitch itself and we're gonna have the receiver too. And then, after that we're gonna have all the hardware that's gonna come with it to put it on our XT5. The first step is just gonna be taking out this housing, and then you're gonna put these weather covers on it. You're just gonna line it up with the tabs it has already on it, just push 'em on. You might have to maneuver some things a little bit to get it on their flush. Line this bottom piece up like so, till it clicks into place. And now we can get ready to put this on our hitch. So we have our hitch crossmember laying down and we're gonna put our housing in just like this in this orientation we have right now, and lining it up with these holes we have on the side. Next up, we're gonna take one of these bolts, put a washer on it and put it through. Do the same thing for the other one too. You might have to move things just around a little bit so it lines up. And once they're popping through the other side, we can take these flange nuts and screw 'em on. And with those in place, we're gonna take a 3/4-inch wrench and socket and bolt 'em down the rest of the way. (wrench clicking) Now when you have these all the way down, you're gonna reference your instructions for that torque spec so you have 'em all the way down. We're not gonna do that today since we're just doing this for demonstration purposes. We wanna come over to our car now and remove this fascia door. It's gonna be held in place with two bolts on the bottom. And to take those off, you're gonna need a T-10 torque bit wrench. We're gonna gonna have a socket over here for removing that off. You're just gonna come over here and take 'em both off. (wrench clicking) And when you remove both of them, you can just pull on it a little bit and it'll detach from the top, just like that. Now if you're also following along in the instructions, the next steps will be to unplug some wiring and to do some trimming. We found out that you actually don't have to do that for this particular car and model today. So you can skip those steps and start installing your hitch. But to do that, you're gonna need some of your hardware, you're gonna need your spacers, your carriage bolts, and your nuts. So we're gonna grab our fish wire. I'm gonna come over to the frame and we're gonna have four holes over here. And to start off with, we're gonna put this wire through this hole that's furthest away. And what we wanna do is get this coil piece through that hole and push it all the way through until it comes out that large hole, just like that. That might take a few attempts, you might have to bend your wire a little bit. But since this has this natural curvature to it, it's gonna be naturally wanting to bend. Then we wanna take this spacer, push it through that coiled section, and then push it through that hole. And now when putting them up through, this is gonna be a pretty tight fit. And in the instructions it says you might have to use your die grinder to expand this hole a little bit. In our case, we didn't, but that's just something to keep in mind. And now I'm just gonna grab one of our carriage bolts and thread it through this coiled section. And once it's coiled on there, you can push that through as well. And when it's pushed through, you can pull this wire and pull that bolt through on the other side. Once you've done that, you repeat that process for the rest of them. Now for this next step, I recommend grabbing an extra set of hands to help you put this hitch on. We're gonna be putting our fish wire through each one of these holes and we're gonna bolt on the furthest one first, this one at this point. So you're just gonna get underneath the car now with the hitch. You wanna make sure when you're putting these through, you wanna make sure you're getting the right fish wire through the correct holes. And with each one of those through, we're gonna lift up on the hitch. (metal clinking) You might have to put this in at an angle to get around everything. (metal clinking) There we go. (metal clinking) And when it's up at the top, we're just gonna align each one of those bolts through. Go through that. Now we're gonna come over to our fish wire and unthread it off. Now we're gonna grab our conical tooth washer and push it up with the teeth facing our hitch. And we wanna put this on and have it apply pressure to the top so it holds in place. And with it being held up there, we're gonna take one of these nuts and bolt it on the rest of the way. And then, we'll repeat the same process for the rest of our hardware. We will come back through here and tighten everything down with a 3/4-inch socket wrench until everything's tightened. And then, after that, you'll torque everything down, and that'll be specified in your instructions. (torque wrench beeps) So when you have this installed, we can put in our receiver. And when you put in your receiver, you actually are gonna have to press this button down and twist it until it's seated just like this. You know you're on the right track if this metal bar at the top has retracted. And now we can just put this into our housing, push up until it clicks into place just like that. Now you can put whatever accessories you have on it. And that's just a look at our Hidden Hitch two-inch receiver on the back of our 2023 Cadillac XT5.
0
0
See what our Experts say about this Hidden Hitch Trailer Hitch
- Completely Hidden Trailer Hitch For 2023 Cadillac XT5There is indeed a trailer hitch for your 2023 Cadillac XT5 that is completely hidden after the install. The hitch is made by Draw-Tite and is the following part number: - Hidden Hitch by Draw-Tite Trailer Hitch Receiver # DT34YR Not only is the crosstube of the # DT34YR totally concealed after install, but the receiver is also removable when you aren't using it so your Cadillac will completely retain its factory appearance.
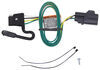
view full answer... - Does the Hidden Hitch DT34YR Fit a 2024 Cadillac XT5?Yes, it does! The Hidden Hitch item # DT34YR has been confirmed to fit the 2024 Cadillac XT5. This hitch is custom fit and bolts to your Cadillac with included hardware. This is a class III hitch with a 2" receiver that has a 3,500 lbs towing capacity and a 350 lbs maximum tongue weight. I have linked an installation video below to help you get this hitch set up. If you are planning on towing you will also need a wiring harness item # C56325 and a ball mount kit item # C45534.
view full answer...
Do you have a question about this Trailer Hitch?
Info for this part was:

Edited by:
Lindsey S

Video Edited:
Joshua S

Video Edited:
Dustin K

Video by:
Thomas T

Updated by:
Carrie F

Written by:
Justice A

Test Fit:
Matthew B
At etrailer.com we provide the best information available about the products we sell. We take the quality of our information seriously so that you can get the right part the first time. Let us know if anything is missing or if you have any questions.
Thank you! Your comment has been submitted successfully. You should be able to view your question/comment here within a few days.
Error submitting comment. Please try again momentarily.