
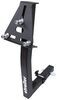
Draw-Tite Max-Frame Trailer Hitch Receiver - Custom Fit - Class III - 2"
(35 reviews)
Price: $271.33
Draw-Tite Max-Frame Trailer Hitch Receiver - Custom Fit - Class III - 2"
Item # DT48GR
Retail:$418.84
Our Price: $271.33
You Save: $147.51
Will this fit?
To see if this custom-fit item will work for you please tell us what vehicle you'll use it with.


- All Info
- Reviews (35)
- Q & A (0)
- Videos (1)
- Photos
Draw-Tite Trailer Hitch - DT48GR
- Class III
- 2 Inch Hitch
- 5000 lbs GTW
- Concealed Cross Tube
- Draw-Tite
- 750 lbs TW
- Custom Fit Hitch
Fully welded vehicle trailer hitch is strong and durable. Draw-Tite's Tested Tough guarantee ensures that this hitch exceeds industry standards. The combination of an e-coat base and a powder coat finish provides excellent rust protection.
Features:
- Custom-fit trailer hitch lets you tow a trailer or carry a bike rack or cargo carrier with your vehicle
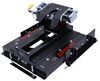
- Computer-aided, fully welded steel construction ensures strength and durability
- Tested Tough - safety and reliability criteria exceed industry standards
- Easy, bolt-on installation - no welding required
- Complete hardware kit and installation instructions included
- Lifetime technical support from the experts at etrailer.com
- Black powder coat finish covers e-coat base for superior rust protection
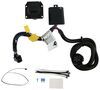
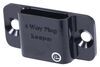
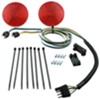
- Integrated mounting point lets you attach a bracket for a 4-way or 7-way plug (sold separately)
- Sturdy, square-tube design
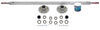
- Ball mount, pin and clip sold separately
Specs:
- Receiver opening: 2" x 2"
- Rating: Class III
- Maximum gross trailer weight: 5,000 lbs
- Maximum tongue weight: 750 lbs
- Not rated for use with weight distribution systems
- Limited lifetime warranty

Draw-Tite Tested Tough
Draw-Tite's Tested Tough program provides testing standards far superior to those outlined by the Society of Automotive Engineers (SAE), the go-to source for engineering professionals.
Each Draw-Tite trailer hitch receiver undergoes extensive fatigue testing and static testing with the ball mount that is either supplied or recommended for use with that particular hitch, thus ensuring results that are applicable to real life use. Fatigue testing is also conducted on hitches rated for use with weight-distribution systems.
In addition, Draw-Tite performs static testing on a simulated automobile, as opposed to the rigid fixture used for SAE testing, resulting in a more true-to-life scenario.
etrailer.com Technical Support
At etrailer.com we're committed to the products we sell, and to our customers. Our experienced and knowledgeable staff are available via both phone and email to address your questions and concerns for the lifetime of your hitch. The technicians at etrailer perform hitch installations on a daily basis, making them a valuable resource for do-it-yourselfers. The one-on-one, personal service you'll receive comes straight from an expert in the towing and automotive field. We've installed it, we've wired it and we've towed with it, so whatever your question, we can answer it.
76555 Draw-Tite Class 3 Trailer Hitch Receiver - Max-Frame
Installation Details
This Product Fits The Following Vehicles
- 2022 - 2024 Hyundai Santa Cruz


Video of Draw-Tite Max-Frame Trailer Hitch Receiver - Custom Fit - Class III - 2"


Videos are provided as a guide only. Refer to manufacturer installation instructions and specs for complete information.

Video Transcript for Draw-Tite Max-Frame Trailer Hitch Installation - 2022 Hyundai Santa Cruz
Hello neighbors it's Brad here at etrailer and today we're taking a look and installing the Draw-Tite class three trailer hitch on a 2022 Hyundai Santa Cruz. So here we have our trailer hitch actually installed on the vehicle and you can see what it looks like. Now it does have an exposed cross tube, so you can see the hitch underneath it but the Santa Cruz does kind of find itself in it, kind of a niche market and the fact that it's not exactly on a truck frame but it is still a truck, so it pulls this exposed cross tube off pretty well. Now taking a closer look here, you can see it is a two inch by two inch receiver tube opening with a reinforced collar. So that's gonna be really good for a lot of your different accessories whether be a bike rack, a cargo carrier, maybe even a ball mount for a small trailer. Now you're also going to see that this is a nice black powder coat finish, so it gives it a really good look to it and also long term, this is gonna stay looking nice rather than corroded and rusted just while driving on the road and getting that road grime on there.
Now looking a little bit closer as well. You're also going to see a five, its five eighth standard hitchpin hole and that's gonna allow you to put your accessories in place and keep them in place by putting this through here. Now the hitch itself does not actually come with the hitchpin and clip but there's plenty of options available here at etrailer including locking ones now. And when you put your accessories in they're not gonna walk in the hands of someone else. Now a lot of your accessories will actually come with a hitchpin and clip.
So that's something to keep an eye on. When you are purchasing accessories for your hitch you also have a rolled style safety chain loop. So that's gonna be great for when you're pulling your trailer so you can put your standard size hooks or even a larger clevis hook, no problem on here. And it's gonna be hooking up is gonna be a breeze on this. Now let's do some quick measurements on here.
We're gonna measure from the center of the hitchpin hole to the furthest point of the rear bumper. And that's gonna tell us roughly about how far we can put our accessories in as far as our tilting ones, your bike racks or cargo carriers without making contact with the bumper. And that's gonna put us at three inches. So something to keep in mind when choosing your accessories. Something else that's gonna be important is gonna be our ground clearance.
So measuring from the inside of the receiver tube opening to the ground here, we have about 13 inches. So a decent amount of ground clearance for the hitch itself. But when you load your accessories sometimes they can actually hang out quite a bit. And as you go up inclines, those can actually tilt down so something to keep in mind when you have your accessories loaded up and you're driving on inclines or rough terrain. Now as far as specs on the hitch it's actually rated pretty high as far as what it can handle. It has a gross trailer weight rating of 5,000 pounds which is the weight of the trailer plus the accessories loaded up and that's a decent amount. You also have a ton weight rating which is the downward pressure on the inside of the receiver tube opening of 750 pounds. So that's gonna be the weight of the ton weight pushing down on here as well as your accessories that are actually suspended like your cargo carriers or bike racks. So that's a decent amount of weight. Now this is cannot be used with weight distribution. So unfortunately you're not gonna be able to do that to help you out pulling some heavier trailers. And you do wanna make sure that you are checking the owner manual to see what the vehicle's capable of and compare that with the numbers of what the hit capable of and take the lower of the two just to keep you safe. Now while we're talking about trailer weight ratings it's also kind of nice that the draw-tite here actually has a tab welded on, and you can just pick up a small bracket here at etrailer to allow you to put your four pole on here permanently. And that way you'll have access to it whenever you need to actually hook up and go. Now the hitch is gonna give you a lot more accessibility to put your hitches on and really take you to whatever adventure you need to do and give you a little bit more real estate if you're adding a cargo carrier. But a lot of times people are worried about the installation process. Well I'm here to tell you it's a pretty easy installation and I'm gonna walk you through every single step. So let's get your hitch installed. We're gonna be begin our installation by lowering down our spare tire. And that's gonna gain us access to actually put the hitch in place. And in order to do that if you've never lowered your spare tire on your truck what you're gonna do is there is this cap here that says spare tire. We're gonna just take a flat head screwdriver counterclockwise turn this and this should pop out. Now in here is going to be a hex and we're gonna need to rotate that. So you can actually use a 12 millimeter socket or we can use the factory tools that are in our toolkit to do it, and I'll show you where to find those. So on the passenger side, in the rear seats there's this loop on the side here that I'm gonna just pull allowing this seat to raise up. And that's gonna reveal where we have our Jack and our tools for our spare tire. So we'll go ahead and get our wrench. And we're also gonna grab this tube here and that's gonna have that hex that we need. So now we'll take this smaller hex side and we're just gonna slide this in straight shot and you should be able to kind of wiggle it around until we get that seated it on that actual hex. Just make sure that you are properly on there. And if you need to you can actually look underneath and see that pretty easily but just make sure that you have that on there. Once you have that on, you can go ahead and take your wrench, put it on the other side and we're just gonna rotate this counterclockwise and lower it down enough to get our spare tire off and out of the way. Once you have it low enough you can actually just pick this up. And you're just gonna kind of put this in that slight angle that should slide out. And now we get our spare tire moved and out of the way. So next we need to lower down our muffler here. As our hitch is gonna kind of live up in this area and to gain access, we will have to drop this down but it is important that we actually support this because once you pull these isolators off, the exhaust is gonna hang and down the way it can actually cause damage to it. So what we're gonna do is just take a cam buckle strap and we're gonna just, I'm gonna put this on the endlinks here and we'll gonna tighten that up and that's just gonna cradle that exhaust once we lower it down. Now if you're doing this in your garage or on your driveway some blocks or some wood underneath, it should do just fine. You just wanna make sure that this isn't using all of its weight and kind of causing strain down the way. So once we have this supported, we're gonna go ahead and go to our isolator and we're gonna pry this off. You can use a long plant head screwdriver or a pry bar and a little tip if you're struggling with them or even if you aren't struggling with them something that makes it a little bit easy is a little bit of penetrating oil. Just spraying this on here. It's gonna allow these to kind of slip through there a little bit easier and then you should be able to just put your pry bar or your flat head under here and just push out. And that's one of 'em down. Now there is another one on the center cross member here. So we're gonna do the same thing And you can actually use the exhaust a little bit as leverage to kind of just pry this back. And with that pop down you're gonna see that's gonna gain us a little bit more room here. Now there is gonna be one more and that's gonna be kind of tucked on this backside too. So we'll go ahead and get this one dropped as well. So this is sitting right behind muffler there. I'm just using a muffler here year as leveraged to kind of just pry this out but any place that you find necessary it can kind of get this out. It's gonna help work. And I'm actually gonna use our exhaust hangers that are on the muffler as leverage I was able to just kind of pry that and you can see this is doing its job of actually supporting our exhaust. So now that we have this dropped out of the way we'll continue on. Now we're gonna come over to our driver's side frame rail and we can see this harness clip. It is actually snapped into the frame rail here and our hitch is gonna live in this area. So we're gonna want to move this. Now I'm using a panel removal tool here, and this kind of makes it a little bit easier. If you don't have one of these, we actually sell 'em here at etrailer. They're really handy for things like this, as well as your plastic push pins. But we're gonna go ahead and I'm gonna lower both of these just to give us a little bit more space. So just pop these out. The flathead will also work just take your time here you don't wanna break those clips. And that should get this out of the way. So we're gonna be threading in our bolts that come with the hitch into these three holes as well as the other three on the other side they're gonna be identical or close to it. And what you're gonna want to do if your vehicle has been on the road for a bit sometimes these can actually get caked up with road grime and dust, dirt debris and whatever it may be, but that can actually cause issues on the threads as the bolts go in, making it very hard to do. So just for preventative maintenance and to make it a little bit easier for us I'm gonna spray this with a little bit of penetrating oil and with a tube brush I'm gonna just kind to bring these out make sure that they're nice and clean for us. If you need a toothbrush we actually have these here at etrailer as well. So now with an extra set of hands, or if you're working on the ground, you can actually use a jack stand and kind of just balance it and raise it up in position. But you're gonna wanna raise the passenger side up over the exhaust first and have hardware ready. So here we have our supplied bolt and a conical tooth washer. Now this conical tooth washer does have different shapes on each side. So you can see it's actually kind of curved. You want the teeth to actually bite into the hitch. So when putting it on the bolt have those teeth facing away from the head. So once we raise this in place you can pick any of the holes. There's gonna be one on the bottom or two on the side and you're just gonna want to hand tighten those in there. And that's just gonna allow this to kind of hold in place so we can get the rest of our hardware in. Now once you have a few threads started on both sides you'll be to actually have the hitch supported by itself. And then from there you can put the rest of the hardware in those two side holes or the bottom. So there should be a total of three on each side. So get those all hand tightened in. Now you may need to actually kind of lift the hitch up a little bit to get these holes aligned. But again, once you kind of get one started there that's gonna help with the next ones on the other side. So we'll go ahead and get that one in. And if you're having trouble getting it to a line you might just kind of move the hitch around and then you should have it able to start pretty easily. So I have all of my hardware just hand tightened in. Now I'm gonna go back with a 19 millimeter socket and I'm gonna do the bottom ones first. That's gonna kind of hinch it up and take some of the stress off those threads resting on the hitch. So let's go ahead and we'll tighten these down. Now we don't have to get too crazy here because we're gonna go back with a torque wrench and make sure they're toed properly. So just make sure that they're set, snugged they don't have to be really cranked down. Go ahead and do the same for the size here. And then repeat on the other side. So now we have it snugged up. We're gonna go back with our torque wrench and we're gonna use the torque settings in the manufacturers recommendations and the instructions. Now you will want to pick up at torque wrench either from here or you can rent one from an auto parts store. And this is important because it makes sure that it's at the proper setting of torque in that way it's not too tight on the actual threads but it's also not too loose to where it'll back out over time. So once you get your torque wrench set you can go ahead with that 19 again and just make sure these are torque down properly. Now you will probably need to use an extension to get to these vertical ones. And especially once you're working over the exhaust on the passenger side but extension's really gonna come than handy. So if you need to put one on now is a great time to do that. So now we can go back and make sure that they're all toed on properly. So now we have our hitch installed really all that's left to do. We're gonna get our wiring put back in place here And we can pop this one in as well. And then we can put our exhaust hangers back on raise our spare tire up and then we're ready to use our hitch. And that was a look and installation of the Draw-Tite class three trailer hitch on a 2022 Hyundai Santa Cruz..
Customer Satisfaction Score:
98% were satisfied with this product
2% of customers were not satisfied
- Arrived Damaged
- Product did not meet expectations
- Wrong item was ordered
Customer Reviews
Draw-Tite Max-Frame Trailer Hitch Receiver - Custom Fit - Class III - 2" - DT48GR
Average Customer Rating: 4.9 out of 5 stars (35 Customer Reviews)
Fully welded vehicle trailer hitch is strong and durable. Draw-Tite's Tested Tough guarantee ensures that this hitch exceeds industry standards. The combination of an e-coat base and a powder coat finish provides excellent rust protection.by: James 04/23/2024
Absolutely perfect but I screwed up by not unwrapping the tape around the receiver hole and went out to Lowe’s and bought new bolts not thinking they were packed in that 2 inch sguare hole. Should be a 30 minute job on a lift once the proper tools are selected. Video was most helpful.
by: Albert 04/17/2024
Arrived in a timely fashion and in good condition, as for the product itself haven't tried to install it yet but I am sure all will go well.
by: Charles 04/19/2024
Easy to use and reasonably priced. Part fit perfectly.
by: Dan06/21/2023
2023 Hyundai Santa Cruz
Hitch was a bear to install alone and without a jack, used muffler to support hitch while installing driver side then moved to passenger side got her done. Couldn't get torque wrench in due to exhaust, smaller torque wrench then what I have may of fit better all in all easy to do easier with 2 people and right tools. Still a good deal.
by: Blaine 04/24/2024
2024 Hyundai Santa Cruz
Fits like a glove
by: James 06/17/2023
Easy installation. Good instructions. Paint quality good. No peeling. Welds good. Fit perfectly.
by: Bradford 09/13/2022
Great trailer hitch receiver! No issues whatsoever.
by: Thomas03/04/2022
Installation technician had no trouble installing the trailer hitch as it and the wiring harness fit perfectly.
by: Steve06/05/2022
first of all the hitch is great, exactly as described,and i am 68 and put this on by myself , with the wire harness kit also.
by: Andy08/18/2022
The product was good just the information they show you on the Internet does not come with everything it shows Pay attention to all the details when you purchase one
by: Douglas 12/17/2022
Good product and instructions. Easy install.
by: Audy02/08/2023
Well constructed and money saving over OEM.
by: Richard03/26/2022
Best to install with 2 people and the car lifted. Either on a lift or Jack stands. Perfect fit.
by: Kenny06/08/2022
I have not installed it yet but the receiver looks to be of great quality and I hope to put it on this weekend< I'll add to the review after I get it installed.
by: Jeff P12/24/2022
Arrived quickly and was an exact fit!
by: Peter 09/03/2022
Fit like a glove. Very easy to install.
by: Erby08/10/2022
2022 Hyundai Santa Cruz
Well made and easy to install as well as very fast shipping, thanks!
by: Howard 08/27/2022
30-45 install on lift.
by: Robert02/21/2022
Fit perfect and was easy to install. Quality is excellent!
by: Gregory10/11/2023
by: Barney 04/24/2024
by: James03/09/2023
by: Dave 04/24/2024
by: Walter 01/13/2023
by: Dustin06/22/2023
25
35
Show More Reviews
See what our Experts say about this Draw-Tite Trailer Hitch
- Recommended Hitch And Wiring For A 2022 Hyundai Santa CruzWe do indeed have what you need to set up your 2022 Hyundai Santa Cruz for towing a trailer. I do need to mention that the correct wiring harness to start with will depend on if your Santa Cruz came equipped with the factory to package or not, but I do have both options listed below. -Hitch: Draw-Tite Max-Frame Trailer Hitch Receiver - Custom Fit - Class III - 2" # DT48GR -4 Flat Wiring Without Towing Package: Curt Wiring Harness # C59236 OR -4 Flat Wiring With Towing Package: Curt T-Connector...
view full answer... - Is Curt or Draw-Tite Hitch For 2023 Hyundai Santa Cruz Least VisibleHey Gene, first of all, thanks very much for the kind words it is absolutely appreciated. And between the two hitches for your 2023 Hyundai Santa Cruz, the one that is least visible is the Curt Trailer Hitch Receiver # C23WR. When we test fit these, we found the # C23WR is tucked up about an inch more than the Draw-Tite # DT48GR. I have added a photo showing the Curt hitch on a Santa Cruz, and as you can see most of the tube is hidden behind the step portion of the bumper. Some of it...
view full answer... - Does the Draw-Tite 76555 Trailer Hitch Fit a 2023 Hyundai Santa Cruz?Yes, the Draw-Tite Trailer Hitch item # DT48GR does fit the 2023 Hyundai Santa Cruz. We have a different part number but it is the exact same hitch. This hitch is custom fit and bolts to your Hyundai with included hardware. The Draw-Tite Trailer Hitch item # DT48GR is a class III hitch, with a 2" receiver, that weighs 40 lbs. It has a 5,000 lbs towing capacity, and a 750 lbs maximum tongue weight. It can not be used with a weight distribution system. This hitch is made in the USA. I really...
view full answer...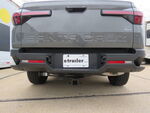

- Best Hitch Curt or Draw-Tite for a 2023 Hyundai Santa CruzThe Curt Trailer Hitch item # C23WR and the Draw-Tite Hitch item # DT48GR are almost identical and are both confirmed to fit the 2023 Hyundai Santa Cruz. The main differences between the two hitches are that the Curt is made in the USA and the Draw-Tite has a built in tab to mount a 4-way or 7-way wiring bracket. Both hitches are a class III, with a 2" receiver, that weigh right at 40 lbs. They have a 5,000 lbs towing capacity, and a 750 lbs maximum tongue weight. Neither one of them...
view full answer...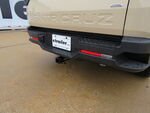

- Hitch and Trailer Wiring that Fits 2024 Hyundai Santa CruzFor a trailer hitch for your 2024 Hyundai Santa Cruz we have the Curt hitch part # C23WR that fits which is a really great option that is mostly hidden and has great towing capacities. Then for trailer wiring we only have hardwire options at this time like the Curt # C59236 which will require splicing into the vehicle wiring. We don't have a plug in style option at this time but hopefully at some point.
view full answer...
Do you have a question about this Trailer Hitch?
Info for this part was:

Written by:
Lindsey S

Expert Research:
Jameson C

Video Edited:
Jacob T

Updated by:
Wilson B

Updated by:
Carrie F

Video by:
Jonathan Y

Test Fit:
Bradley B
At etrailer.com we provide the best information available about the products we sell. We take the quality of our information seriously so that you can get the right part the first time. Let us know if anything is missing or if you have any questions.
Product Experts Available Now!
Call 1-800-940-8924
Thank you! Your comment has been submitted successfully. You should be able to view your question/comment here within a few days.
Error submitting comment. Please try again momentarily.