
To see if this custom-fit item will work for you please tell us what vehicle you'll use it with.
Thank you! Your comment has been submitted successfully. You should be able to view your question/comment here within a few days.
Error submitting comment. Please try again momentarily.
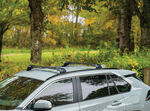
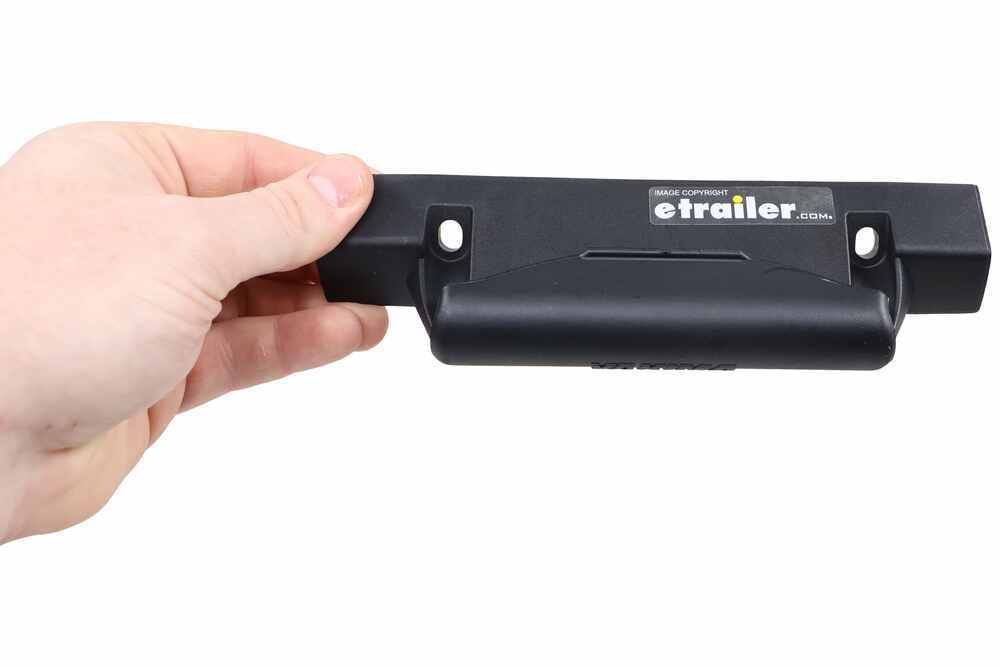
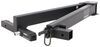
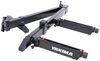
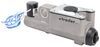
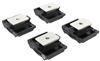
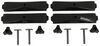
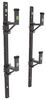
Custom-fit Landing Pads attach to the fixed mounting points in your vehicle's flush, factory side rails. The pads create mounting points for Yakima Skyline towers.
Features:
Specs:
Videos are provided as a guide only. Refer to manufacturer installation instructions and specs for complete information.
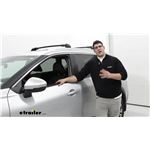
I'm Matt with etrailer, and today we're gonna talk about the Yakima Skyline FX Roof Rack System on top of our 2022 Nissan Rogue. It's gonna be a great option for you if you're looking for a roof rack system that's gonna be really easy to take on and off, and isn't gonna have a lot of parts that you can lose. So it's gonna be a great if you're running out of back room in the back of your car, and since we don't have a lot of storage anyways, you're gonna be able to put a lot more items on top of your roof. So let's take a close look at it. Now the system's gonna be comprised of two parts. It's gonna be comprised of our Skyline FX bars, that will attach to our fit kit tube.
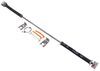
So take a closer look at the crossbar. We're gonna have this arrow shape to it, which is gonna help reduce wind drag, which will prevent that wind noise. Another thing that's gonna help reduce wind noise is gonna be this rubber weather strip that's in our T channel. That T channel's gonna be used for T channel accessories, and I do like that that is built-in because you don't have to worry about cutting it down the size. Now you might be wondering how you put that on since we have these built-on towers.
The way you'll be able to put on those accessories is by the center right here will have this notch that's cut out, which is just put your items on right here, and slide 'em into place. Taking a look at the end of our crossbar, we'll have these end caps you can just take right off. And then these locking doors, you can just unlock those with your screwdriver, a flathead. And the cool thing about this is, this is what allows you to take on and off your crossbar just by opening up that door and lifting up on them. And I'm just gonna take these off completely so we can take a closer look at those fit kits, and you'll notice we have this cutout of where our crossbar is sit.
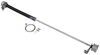
And in front of that, we're gonna have these two bolts, and that's what attaches our fit kit to our flush rails giving us a very secure fit. And since these are bolted down, they're gonna have fixed mounting points. So we can actually get our crossbar spread measurement from right here, just going from the front of our front base to the front of our rear base. And that's gonna give us 29 inches, which is important to know. So you know what accessories can accommodate that crossbar spread.
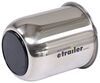
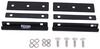
And since these are designed to have crossbars that come on and off, they also come with some end caps to protect them from the elements. Next we can get some measurements on how this is gonna sit up here. So going from the top of our roof to the bottom of the crossbar, that's gonna be two and a quarter inches, which is important from the node to see if you have on a clamp on accessories that can fit onto that and not scratch up your roof. And then we're gonna get the total height of the system itself, which is actually gonna be our towers, and that's gonna sit at three and a half inches. So what I'd recommend doing is taking the total height of your vehicle plus your cross bars, and then if you get on any accessories on there too, and add that height to it so you know what areas you can fit under. As far as what you're gonna be able to put up here. Like I said earlier, you're gonna be able to put on the T channel accessories, and clamp on accessories and you're gonna have a weight capacity of up to 165 pounds. But what I recommend doing is checking what your roof is rated for, and going from the lowest component. Overall, this is be a great option for you if you are looking for something that's gonna be really easy to take on and off, if maybe you're going on only a few trips, once a year or you're constantly getting your car cleaned, and you don't wanna damage your roof rack. Now as for the installation, it's pretty straightforward. I will say the fit kits did take a little bit of time that get put on there just because they do have that blue lock tight on the bolts. But if you need a hand with it, just stay tuned and we'll walk you through it. To start off the installation, we're just gonna lay everything out. So we're gonna have our X-bar up front, and next to that we're gonna have the fit kit that goes along with it along with the end caps. Then we're gonna have two included tools. We're gonna have this Allen key, and then we're gonna have this other Allen key with this torque built onto it. And then we're gonna have the hardware as well. I recommend grabbing a few tools to make this a little bit easier. A tape measure, a trim tool. You can find that on our website, and a flat head screwdriver. The first step is, when we're putting on these fit kits. And to do that, we gotta get on top of our roof, and remove the caps. Now you probably noticed we already have the front crossbars installed. It's gonna be a very similar process between the rear and front. To remove this cap, all I have to do is take my trim tool, get underneath this tab on the front, and apply pressure and take it off. You can do this with a flathead screwdriver. It's just a little bit easier with a trim tool. Just like that. You repeat that process on the other side. With that cap removed, you'll see we have two bolts here, and the only way to remove those is with this include an Allen key. Now I do find this is a little bit difficult to try to take these off because I'm just, I don't have enough leverage to take 'em off. So I found it easier grabbing this torque bit wrench. And this is gonna be a size T30. Now we're gonna get that additional leverage out of this, and you just match it up, and take each one of these off. And with those bolts removed, we're gonna take this trim tool again, and get underneath the two tabs on these caps that we inchesre held in place with our bolts, and remove these. It will click outta place. You just do that on the other portion too. And we'll just repeat this process on the other side. We put on our fit kit. We're gonna start by removing this end gap just by pulling it off. If we look inside, we'll see this image, and that's gonna let you know where this is gonna go on your vehicle. So this one in particular is gonna go on our rear passenger side. Now you just have to check each one to make sure they go to their relative spots. We're gonna grab it, we'll line it up with this indention on the rails, and fit it onto place. Next, you're gonna grab your two bolts, and run it through this hole at an angle, and just hand tighten it to begin with. You do the same thing on both sides. Now one of the things I will say about that process is it can take a little bit because that lock tight can be a little bit to fight through, but if you're patient with it, you can get 'em on, and then you can move on to the next step, which is getting your crossbar ready. You're just gonna remove this end cap at the very end just by squeezing on either side of this and pulling off. Then you're gonna take your Allen key with that torque tool on it, slide it through this hole, and loosen this bolt up some. After when you've loosened it up some, we can get these end caps out of the way or these locking caps out of the way. The way you're gonna do that is by grabbing a flat hit screwdriver, putting it in and turning it until it the unlocked position. With that unlocked and this bolt loosened, if we open up that locking door, you'll notice this is gonna retract, and expend when you open and close it. So when that's ready, you'll also notice you have the ability to pull out these towers to adjust for the fit on top of your car. So now we're gonna put it on top of our car. With both of the towers expanded, and these doors opened up, we can put it up here. Now when you are putting it up here, you wanna make sure you're putting it in the right orientation, making sure that this thicker side is facing forward. At this point, you just wanna line the bottom of these towers up with these channels and just rest it there. You'll notice that this isn't going into this channel quite yet. So what I have to do is just lift on this a little bit, push this tower in, and apply pressure from the other side too. So this will match up with that channel, and push down until everything is lined up. Once everything's lined up, you can shut this locking door. If it won't shut, that's probably because things aren't completely lined up yet. It'll just apply pressure, and lock it down into place. And now we're gonna come back over here with that Allen key with the torque device on it, put it through that hole again. And this time we're gonna tighten it up. And from this point, once everything's tightened up on both sides, we're gonna actually take this back off, get the measurement for how long it is between the two towers, and make sure everything is even on both sides. Now the process to make everything even on both sides is gonna be starting with measuring from each tower, and it's gonna be about 30 inches. So what we want to do is find the center of this bar, which is gonna be marked with an arrow, and then go from that arrow to one of our towers. And if it's matching, we know we're good. When everything's even, and you have these back up here, you wanna make sure you keep these locking doors open. because now we're gonna adjust the pitch. Adjust the pitch. You're gonna find a bolt at the very top, and you're gonna loosen it some. You do that on both sides. When both sides are adjusted, you'll be able to apply pressure to the bar itself to where it's gonna be pretty much flat with your roof, making sure everything's even. Right now everything is looking pretty level. So if it's looking level, that means we can start tightening everything back down. One of our last steps is gonna be locking this back up just with your screwdriver. Once it says locked, you're gonna take that end cap, put it on from the back, just pushing on until it clicks into place. And with that done, I just recommend giving it a good shake test. Make sure nothing is moving, and if it feels pretty solid, then you'll be able to put whatever accessories you have on top of it. And if you liked everything you saw today, that's just a look at the Yakima Skyline FX Roof Rack System on top of our 2022 Nissan Rogue.
Average Customer Rating: 4.8 out of 5 stars (715 Customer Reviews)
Custom-fit Landing Pads attach to the fixed mounting points in your vehicle's flush, factory side rails. The pads create mounting points for Yakima Skyline towers.

with so many variables having someone that could sort through all them was very helpful Thanks etrailer
It was what it was advertised and fit perfectly on my 2023 Ford Maverick
Honestly, I love etrailer. I love the expert help that you all provide. It's clear by the 1 year follow-ups that you care more about the relationships with your customers then just making a sale. Your service is friendly, informative and fast. I always come here first to look for my next purchase. Thanks again-Rob.
I have these installed on a 2022 Honda Pilot. I could not get them to fit on my raised roof rails with the included rubber gaskets. I have mounted them without the gasket but this leaves a gap between the rail and the landing pad. This seems secure but does not have a finished look. I will be trying to see how to get the gaskets to fit.
First trip with the new rail system and it looks like it worked out just fine. Thanks to both of you and Kimberly for all of your help and follow up I do appreciate it.
In the confusing world of roof racks, the etrailor site had a locator tool that made it easy to identify the correct landing pads and towers for my vehicle.
I had cross bars and landing pads on my Jeep Grand Cherokee. I bought these to put on my wife’s new Grand Cherokee L. They were extremely easy to install and now I can easily move the roof rails between the two vehicles. They are a great product as is most of Yakima’s products. I highly recommend them.
Very nice and heavy duty. They don’t look too fragile on a lifted truck with oversized tires.
My experience with etrailer has been excellent. There was going to be a potential delay in one of the products, but their customer service promptly informed me, half the price of some of their competitors so can't really complain. In the end they got the part ahead of schedule and was able to ship in a timely manner. I will definitely keep them in mind for future purchases.
Fit good with the OE track on roof. I like the new covers they supplied with the mounts.
Very easy to replace. Fit perfectly. I had a slight disaster with roof rack and Yakima showdown but fortunately replacing the landing pads was all that was needed. Very happy about the ease of finding, installing and using.
Wanted to salvage my round bars and all other Yakima products I had previously on my Tacoma. These worked great. Easy to install. The directions are very clear. I only recommend taking your time with the install to make sure you've got it all aligned and waterproofed correctly.
Amazing quality easy set up fast shipping buy the locks the 4 pack With this fast shipping super impressed
All I can say is wow!! Outstanding customer service from shipping overnight, to follow up the next day to make sure the package arrived safely and was the appropriate part!! Customer service all stars!!! Thank you so very much!!
I recently purchased a rack system for my 1979 Ford Bronco to haul our new Kayaks. And believe me it was not easy to "fit" a vehicle as old as this.
I had some interesting challenges - my truck has a 3" lift and only clears my garage entrance by about 1.5 inches, so whatever I got had to be easily removable (at least in the front). I also wanted it to be multi functional so that I could carry other stuff as well, and the Yakima/Thule systems are great for that. Lastly, I wanted whatever I put on the truck to look good as I have put a lot of time and $ into fixing up this old truck and I didn't want it to look cheezey.....
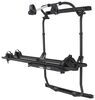
Thanks to the good folks at etrailer I ended up with somewhat of a hybrid approach (my choice) but it worked out exactly as I envisioned it. I purchased the Thule Xsporter Pro system for the rear which works well with only minor modifications to the truck. I can lower it easily so I can get the truck into the garage without removing the system altogether. I really like that the tailgate is still functional with the system installed as some others I had in mind were bumper or hitch attached and would not allow use of the tailgate.... And, lastly it looks nice enough to just leave it on all the time.
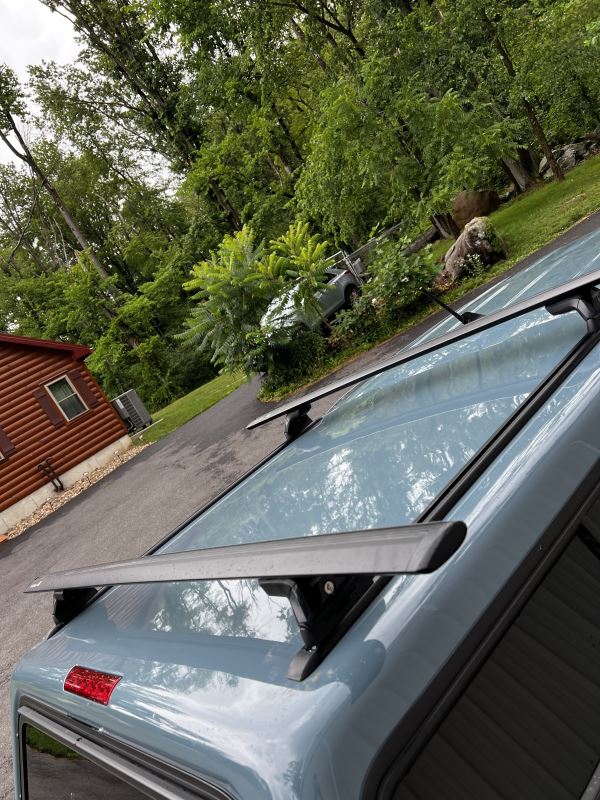
On the front I chose the Yakima JetStream cross bar held up by a pair of Yakima SkyLine Towers and Landing Pads which I chose because I can easily remove the crossbar/towers to get the truck into my garage. The Landing Pads have covers for when not in use and are small enough to not be too noticeable.
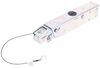
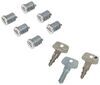
I also added the security locks for peace of mind.
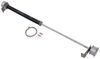
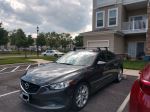
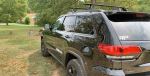
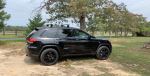
I have added 3 pictures, the first shows the Landing Pads without the towers & crossbar. You can also see the Xsporter Pro on the rear in its lowered position. The 2nd shot is a closeup of the Skyline Tower. The 3rd picture shows the entire system installed ready for my kayaks (or whatever).
Thanks again to the folks at etrailer for their expert advice and customer service.
Parts arrived as advertised for the model
Car so happy to find the right fit
But super pricy for some plastic.
At first, a little tricky to install, as the kit comes with hardware for a variety of applications (different length/size bolts, etc). But after a quick look at the directions and identifying which bolt to use for my car, install was a breeze. I love this Yakima setup because I can remove the bars/towers and leave the landing pads with a cap. Makes it great for taking the canoe out on weekend trips, but not taking the fuel-economy hit during the weekday commute to work.
I was seriously disappointed ?? the landing pads are not made for the Tacoma and sit on the roof with a gap that looks bad and will let water and trash into the bolt parts of the rack to roof juncture. For the amount of money it should be made correctly. I was also shocked to find that the landing pads upper parts were plastic… I have used Yakima for over 30 years and never expected a “cheap out “ like that! I was so disappointed I have never used the racks! They also only have provisions for one of the two bolts at each landing pad roof juncture. Disappointed ??!
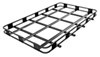
Very good product. The Yakama towers and cross bars feel very solid and appears to be high quality. Very easy install. Others have complained about the instructions, but guess I'm a visual person because the pictures all seemed very clear to me and the install was very easy. They do sit higher than I expected. After adding a Rhino Rack cargo basket, we only have about 4-5" clearance below the garage door.
I love the ease of removing my crossbars at the end of the season with these landing pads. Highly recommend these.
Do you have a question about this Roof Rack?
Info for this part was:
At etrailer.com we provide the best information available about the products we sell. We take the quality of our information seriously so that you can get the right part the first time. Let us know if anything is missing or if you have any questions.


Brooke M.
2/16/2023
It looks like your experience with the product or with shopping at etrailer could have gone better. If you would like to add any comments to your review, please let us know!