
To see if this custom-fit item will work for you please tell us what vehicle you'll use it with.
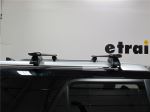
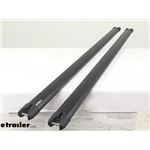
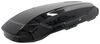
Heavy-duty crossbars mount to Yakima towers to create an aftermarket roof rack. Top and bottom channels let you add channel-mount accessories. Tie-down points in endcaps let you easily secure cargo.
Features:
Yakima HD Crossbars - 55" Long - Black - Qty 2:Videos are provided as a guide only. Refer to manufacturer installation instructions and specs for complete information.
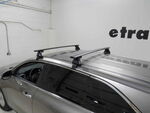
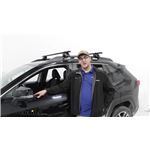
Hi, Matt with etrailer, and today we're gonna talk about the Yakima CoreBar roof rack system on top of our 2021 Toyota RAV4. Now this will be a great system for you if you're looking for something that's really easy to take on and off and you need to get some extra storage out of the back of your car, especially if you have any longer items like a kayak. So let's take a closer look at it. Now the RAV4 that we have today actually has raised rails. So if you want this system, you have to make sure you also have raised rails. The way to check is to come by your rails and just check if you can get your hand underneath them.
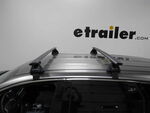
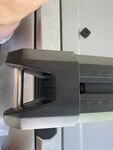
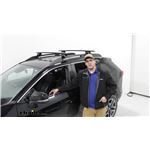
If you can, then you'll be good. Also, just recommend going onto our website, plugging in your vehicle's information into our fit guide and find out what's gonna be the best fit for you. Our system today is gonna be comprised of two parts. That first part is gonna be a 50 inch Yakima CoreBars up top and beneath we're gonna have the Yakima towers. So taking a closer look at the crossbar you notice we have this arrow shape to it that's gonna help it be more aerodynamic, helping to reduce wind noise.
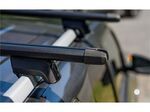
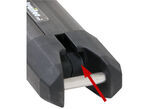
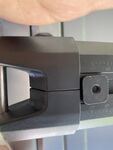
We're also gonna have this bracket that goes around it and that's what's gonna attach to your towers. Now taking a closer look at the towers, this is gonna be a pretty good fit. What I really like about these ones in particular is we have this rubber strap that goes all the way around and connects inside. So you're gonna get that full coverage, giving you a very secure fit. Now this does have a point where you can put a lock core in.
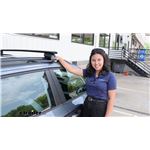
Right now we just have this plastic piece in place, but you can get this replaced and get metal lock cores that's gonna be keyed alike to any of your other Yakima gear. And now I can get some measurements. The first one I'm gonna get is the overall height it's gonna add to your car today and that's gonna be just under three inches, which isn't too bad. What I recommend doing is taking the total height of the vehicle plus your crossbars, and then if you get any accessories on here too, make sure to include that so you know what areas you can make it under. And then for an overhang, that's going to be not very far.
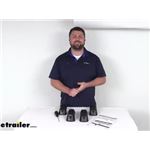
It's gonna be two inches on this front one. Now that's not gonna be very much so you won't be likely of hitting your head on this, but you really won't be able to put anything on here either. Now because of the shape of a roof we have today, we are gonna have a little more overhang on the rear crossbar and that's gonna be just about three and a half inches, which isn't gonna be a lot either. You're not gonna be likely hitting your head too, but you will be able to put some smaller accessories on the very edge of here. As far as what you can put on here, you're gonna be able to put on clamp on accessories and load this up to 165 pounds. What I recommend though is just checking what your roof is rated for and then going from the lowest rated component. Overall this will be a great way to get a lot more storage out of the RAV4. Now it's also gonna be great if you're looking for a rack that's gonna be able to get keyed to like to any of your other Yakima accessories. And you only have the clamp on accessories too. Now if you have any items that use T channels, then what I'd recommend doing is just getting the Yakima system with the JetStream bars. But if you don't have any items that use that, then this one will do you just fine. As far as the installation, it was pretty straightforward, but if you need a hand with it, we'll walk you through it. To start off the installation, we're just gonna lay everything out. So up front we're gonna have our crossbars, and next to those we're gonna have the towers and the end caps. And then we're gonna have these brackets that attach your towers to your crossbars. You'll have this included tool with this built-in torque device and I recommend grabbing a tape measure to make this a lot easier. We're gonna start off with our towers first. So this is what it is gonna look like if you have the adapter already in there. If it's not, it's a pretty simple process getting in. You wanna make sure that the side with the ridges is facing up and all you're gonna do is place it in at an angle, then apply pressure until it clicks into place. We're gonna move over to our crossbars now and just remove this end cap. Then we're gonna flip this over so the underside is facing up and wanna grab our brackets, line them up with the shape of our crossbar. We might have to flip it around. That's how you know it's gonna fit on there correctly. You're gonna slide that bracket all the way to the other side. And then we're just gonna repeat that process with the second one, keeping it on the side that you are. And just make sure to put your end caps back in place. Now we're gonna attach our towers and what I like to do is when I grab this, I like to push this rubber strap all the way over so you can see that bolt that's inside of there. I'm gonna grab my Allen key and line it up with the bolt applying pressure from the backside. And then I'm gonna run this bolt in on top of that bracket, winding everything into place. Then I'm gonna tighten this down all the way down until this torque device clicks into place. Now I'll just repeat that same process on the other side. You notice we do have a bolt at the bottom in here and what that does is tighten your tower to the bracket, preventing your tower from sliding around on your crossbar. If this is already tightened, you wanna make sure you loosen that up so you have the ability to adjust this to fit on top of your roof. When you're placing this on top of your roof, you wanna make sure it's in the right orientation. So you wanna make sure that this thicker side is facing forward and the thinner side is facing behind you. And now we're gonna lift up and just roughly place it where we think it needs to go. And then we can make our adjustments afterwards. You probably already noticed that we already have our front crossbar on here. This is gonna be the same process for either one of 'em, at this point I like to get my crossbar spread. We'll try and get the furthest one that we can. So right now we're gonna get just about 28 and a half inches. And what you wanna do is make sure both sides are even. After that, I'd like to get my overhang measurement. And what I do is just go from the tower to the end of the crossbar and once I get that measurement, I just make sure it's even on both sides. That way you can adjust that. It's just by grabbing onto your tower and pushing on the crossbar itself. Once you've made all your adjustments, you can start putting this rubber strap on. A thing that I like to do is push this bolt in. It'll extend this out just a little bit. If this isn't long enough, you just have to loosen this bolt some. Then you're gonna grab this and line up this metal bar with these metal hooks until it cinches on there. You do that on both sides and come over here and tighten this bolt down the rest of the way. Now I'd recommend just tightening each side a little, going back and forth until this is all the way on here 'cause if you tighten one side too much before the other one, it can pull the crossbars more on one side. You don't wanna forget tightening this other bolt too. That one at the very top, that tightens down your bracket to your crossbar. Once that's tightened all the way down, then we can grab this end cap and put it on the back of here. Sometimes this can take a little bit until this clicks into place just like that. And that end cap's just gonna line up with the back this tower. And you wanna just do a shake test, make sure everything's fitting well, and if it is, then you can load it up with whatever accessories you have. But if you liked everything you saw today, that's just a look at the installation and some of the features of the Yakima CoreBar roof rack system on top of our 2021 Toyota RAV4.
Average Customer Rating: 4.8 out of 5 stars (142 Customer Reviews)
Heavy-duty crossbars mount to Yakima towers to create an aftermarket roof rack. Top and bottom channels let you add channel-mount accessories. Tie-down points in endcaps let you easily secure cargo.
Works perfect for our SUP with the tie down loops. Great for building materials as well. Looks great as well.
I ordered the Yakima roof rack for a 2019 Hyundai Ioniq. I went with the heavy duty one for extra strength but it is quite a bit thicker, likely increasing wind noise. So I might have chosen the aerodynamic lighter weight one if I was to do it again. Also, I needed to get larger bolts for my kayak holder to get around the crossbar. The instructions and video on website were very helpful but they did not explain well how to adjust the toe and pitch. For the toe adjustment, you have to push the metal post with the tool before tightening. That was not obvious. For the pitch, it helped to do that once the towers are attached to crossbar. Then you can tilt tower while cross bar is laying flat (upside down). I ended up having to add tilt on both front and back crossbars for them to be flat when installed. Website said only front one would need to be pitched. I am very pleased with the look and sturdiness of the product. My Hyundai Dealer had zero options for this car.
etrailer was a great place to order, quick and easy. Yakima products however are over priced and overly complicated.
You sold me used equipment at new prices. What a rip off. Your company is a joke! No worries, you’ll not have to worry about screwing up another order for me in the future. I’ve learned my lesson not to deal with your customer service.
Really Easy to Install! Solid and Strong amount to Roof Rack.
These adapters were easy to install and made my system fit together nicely.
The customer service in ordering theses par tea was amazing!! I spoke with a wonderful specialist named Kate F, and she was super helpful and patient answering all my questions and helping me make sure I had the correct parts I needed for my type of car. The bars are very sturdy and have proven very worth the money!!
I had a difficult time identifying whether these were the correct adapters for the rack towers that I was purchasing to fit my tracks but that has more to do with yakima doing everything a-la-cart instead of having kits that include everything you need if I hadn't already had the HD bars on my other rack and wanted to be able to transfer them to this rack I probably wouldn't have went to this expense because I think they are overpriced.AS far as etrailer is concerned I always receive great service and products and they are always well packaged and never damaged by poor delivery care and always fast delivery speed.
Your service is nothing short of excellent! Thank you
Great product and even better was the service with etrailer! These guys make it happen and delivery was super fast. Thanks for a fantastic experience, will be a return customer.
Yakima HD bars 60”
2018 Ford Expedition
The Yakima products are doing great. Just got home yesterday from a 18 day trip using them in Michigan's upper peninsula. Love them. Great products. Thanks again.
Easily supports the RoofNest! The Customer Service with Roger was Excellent!
Required for Yakima HD crossbars using timberland tower system.
Great company. Fast delivery.
They fit perfectlly and solidly on my 2021 Toyota Highlander. The instructions are clear and entirely accurate.
Great product. Great service.
The roof rack works well. The only problem I have is noise and while I'm carrying a ladder there is none. I figured if I take the ladder off I'll split a piece of pvc pipe and mount that on the front of it. But they work well for what I needed for work. The service from etrailer was excellant. I dealt with Carol and she did a very good job in helping me.
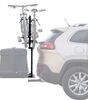
I choose etrailer simply because they mailed to APO. I’m a AD SM, and a lot of companies don’t shop to APO. As soon as I ordered my product, I received an email as a courtesy from etrailer letting me know I had an individual that would be tracking my product every step of the way, reassuring a smooth process. Their site functionality was easy, their customer service was great. I wanted to know if they had bike racks that would fit my cross bars, I got a email right away with a suggestion and a link that would fit my needs. I’ll definitely order from etrailer if I ever need to again.
The fit is good on the 22 Wilderness but there is definitely wind noise and I will add a diverter soon.
This part adapted like no other adapter
These Yakima crossbars are very HD, just what I was looking for. The Small size was hard to locate but etrailer had them in stock and delivered in short order. Instillation was quick and straight forward.
SIMPLE & EASY!
Have worked quite well for what we need. Very happy.
Everything was perfect and relatively easy to setup. Ì bought from etrailer due to the actual manufacturer being out of stock, I was skeptical when I ordered but very glad I did. Would 100% recommend etrailer.
The rep from etrailer (Noah conformed my online order, made certain my order was correct for the vehicle I was outfitting and made certain I received my order items on time before my trip. This company is great!


Do you have a question about this Roof Rack?
Info for this part was:
At etrailer.com we provide the best information available about the products we sell. We take the quality of our information seriously so that you can get the right part the first time. Let us know if anything is missing or if you have any questions.


Thank you! Your comment has been submitted successfully. You should be able to view your question/comment here within a few days.
Error submitting comment. Please try again momentarily.