
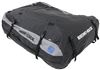
Custom RCP Fit Kit for 4 Rhino-Rack RC and RV Series Roof Rack Legs - Fixed Mounting Points
(179 reviews)
Price: $119.99
In Stock
Custom RCP Fit Kit for 4 Rhino-Rack RC and RV Series Roof Rack Legs - Fixed Mounting Points
Item # RRRCP33-BK
Our Price: $119.99
Will this fit?
To see if this custom-fit item will work for you please tell us what vehicle you'll use it with.
In Stock


Need help with installation?
Locate installers near me- All Info
- Reviews (179)
- Q & A (0)
- Videos (1)
- Photos
Rhino Rack Roof Rack - RRRCP33-BK
- Fit Kits
- 4 Pack
- Rhino Rack
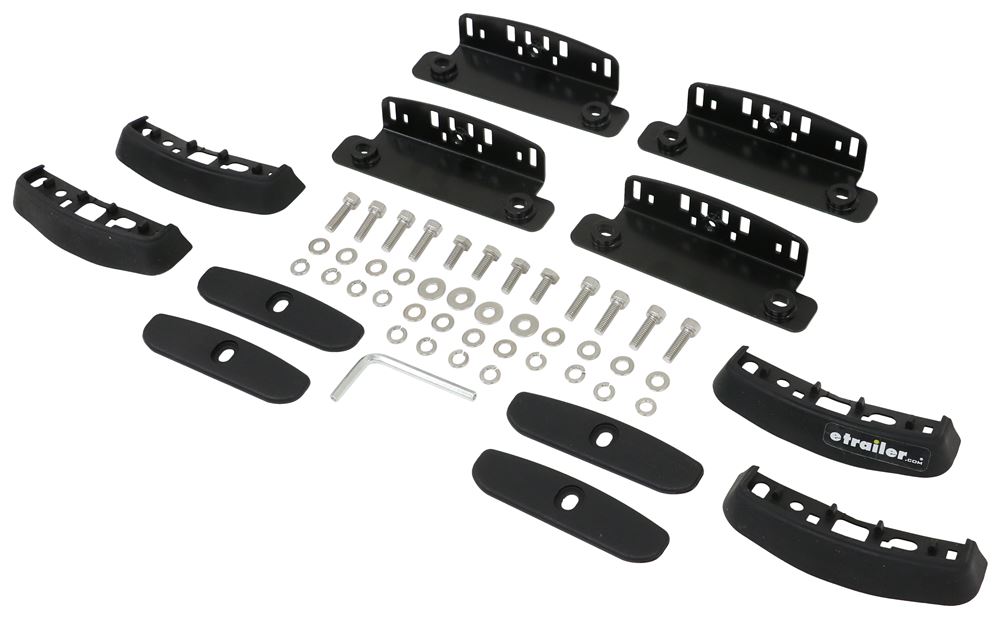
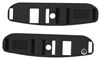
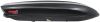
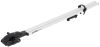
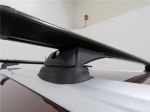
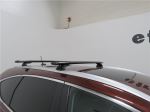
Custom fit kit lets you mount Rhino-Rack RC or RV series legs to a vehicle with fixed mounting points. Legs mount to vehicle with attachment studs. Molded inserts cover bases when the legs are removed. Includes 4 pads, covers, and mounting hardware.
Features:
- Custom fit kit allows you to mount 4 Rhino-Rack RC or RV series legs (sold separately) on your vehicle with fixed mounting points
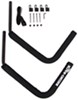
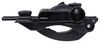
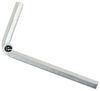
- Threaded studs screw into fixed mounting points to provide attachment point for legs
- Legs slide onto studs and secure with hex bolts
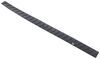
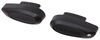
- Molded-rubber pads are designed to fit the contours of your roof
- Protect your roof from scratches and abrasions
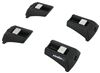
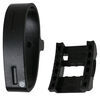
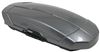
- Precision-molded inserts cover bases when the legs are removed
Specs:
- Application: Rhino-Rack RCH, RCL, RVH, and RVL roof rack legs
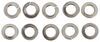
- Quantity: 4 pads, 4 covers, and mounting hardware
- 5-Year limited warranty
RCP33-BK Custom RCP Fit Kit for Rhino Rack RCH, RCL, RVH, and RVL Series Roof Rack Legs - FMP
Replaces Rhino-Rack RRRCLP33
Installation Details


Video of Custom RCP Fit Kit for 4 Rhino-Rack RC and RV Series Roof Rack Legs - Fixed Mounting Points


Videos are provided as a guide only. Refer to manufacturer installation instructions and specs for complete information.

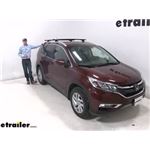
Video Transcript for Rhino Rack Roof Rack Review - 2016 Honda CR-V
Today, in our 2016 Honda CR-V. We're going to be doing a test fit on the Rhino-Rack Vortex Aero Crossbars Roof Rack system. This system is specifically designed to fit your flush-mounted rails on your CR-V.With it in place, you're gonna be able to carry roof mount accessories, things like bike racks, kayak carriers, cargo boxes, and much more.Now, the aerobars are 49 inches long. You can see how they span across the roof of our CR-V. This is gonna allow us to carry multiple accessories on our roof. So maybe we'd like to carry two to three bike racks up there, or maybe even two kayaks.Now, the crossbars are made out of aluminum, so we don't have to worry about any rust or corrosion.
I've got the black installed, but they're also available in silver. So if the silver is something you're interested in, see etrailer.com.Now, you'll notice that they're aerodynamic. These are gonna be a lot quieter than your traditional round or square bars. They're gonna work with your standard clamp-on accessories as well as your T-slot accessories. You'll simply remove that end cap and we can trim that rubber strip, slide that T-bolt in to our desired location, and replace it, and it's gonna give us that nice, clean look.
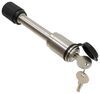
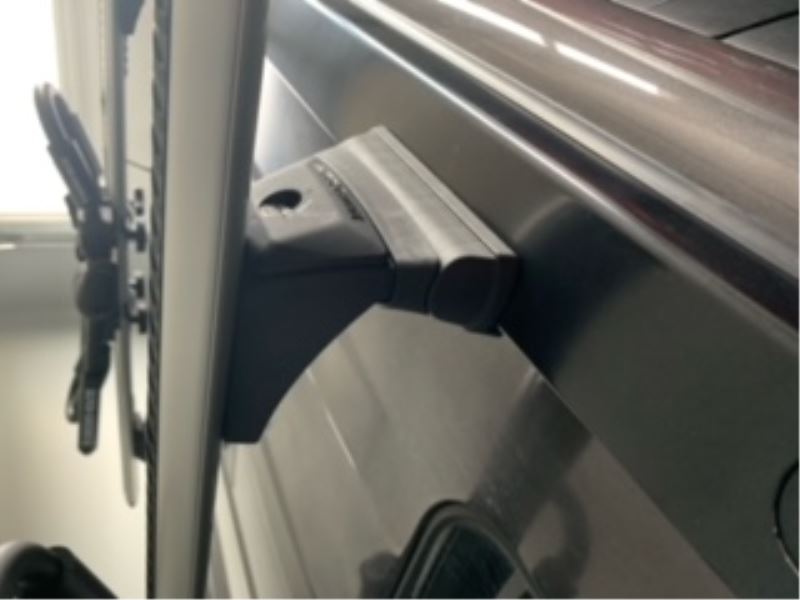
When it's all said and done, we can put on our end cap and we're all set.Now, the crossbars are held in place by four Rhino Rack RCL legs. These attach to the fit kit that are attached to our flush-mounted rails. With everything in place, it's a nice, tight fit. You can rest assured your accessories and your roof rack system are gonna remain in place.Now, if we remove the cover. As you can see, it's lockable.
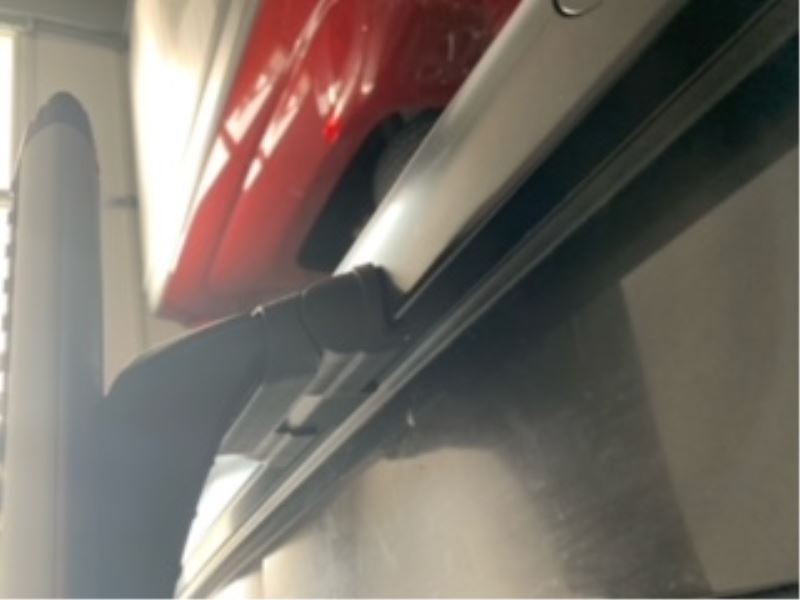
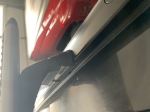
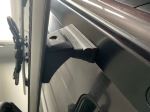
That way no one can access it.You can see how it protects our hardware so it can't be tampered with. It's also gonna protect it from the elements. It is stainless steel hardware, so we don't need to worry about it rusting or corroding.If you'd like to take the roof rack off sometime, you have that option. You'll simply undo the bolt on the inside, replace it with the cap, put the bolt back on, and then you've got the fit kit remaining in place for when you'd like to put it back in use.Now, I mentioned the fit kit. What's unique about it is they're specifically designed to fit the flush-mounted rails on our CR-V.
You can see here how the pad is gonna contour that rail. Two bolts hold that bracket in place on the inside and it's a nice, tight fit.Here on the opposite side, you can see the two bolts. Again, it is stainless steel hardware. And since they're bolted on, it is a fixed-mounted roof rack system. We cannot adjust along our rails.With the roof rack system in place, it gives us a crossbar spread center on center of about 31 3/4 of an inch. So, when choosing accessories, you'll wanna be sure that they will work with that crossbar spread.Now, this roof rack system has a weight capacity of 165 pounds. You do, however, want to check with your CR-V's owner's manual to see if the roof can support that much weight. You'll wanna go with whatever number is lowest.Now I'll give you some clearance measurements. This is gonna be an idea of how much you've added to the roof of your CR-V and it may also help you when mounting those clamp-on accessories.Now, from the top of the roof to the underside of the bar is about 2 1/4 of an inch. From the top of the bar, excuse me, from the top of the room to the top of the bar is about 3 3/4 of an inch.Now that we've got all the features, I'll go ahead and show you how to get it set up. I've already got my front crossbar in place, mounted to my flush-mounted rails on my CR-V, as you can see. The rear one installs pretty much the same way. In fact, I've got one side of my fit kit installed. Let's do the other side together.We'll need the pad. We'll need the bracket. We'll need two allen bolts and we'll need two flat washers and two lock washers.Since we're at the table here, we can go ahead and put the pad in place. It just connects to the bracket underneath, like this. And what I like to do is I like to push it all the way on first. That way that lip ends up on top, which is what we want.And then we'll push the tabs through, just like that.So we'll be mounting the bracket right here. First, we'll need to remove the rubber covers. You can use a flathead screwdriver or your fingers, whatever works best for you.And we can either put these in our glove box or throw them away.Then we'll take the bracket and we'll set it in place.From there, we can take our allen bolt. We can put on our lock washer, and then our flat washer, and start threading that through.It's a good idea to get them both started before you tighten them down. We'll take our included tool and get those tight.Now, there's no reason to over tighten here. Just tighten them up to where that lock washer flattens out.Now, back here at the table, we need to install the RCL leg onto our crossbar. First, let's remove the end cap. We'll set that aside. And we'll need to make sure that this T-bolt is loose. So, you can loosen that up with the allen bolt on the bottom. I think we've got it pretty loose here.We'll also need to rotate it to where the long side is horizontal with the leg.From there, we're ready to slide it onto our crossbar. I'll turn it over, just so we can easily see what we're working with.Now, if you haven't removed the end cap, just go ahead and do that. Take our included key. Then we'll take that leg, and we're gonna slide it on. So, I like to put pressure on the bolt on bottom to push it out, and we'll slide it into that channel.Just like that. From here, we'll take our included tool. We don't wanna tighten this down all the way just yet, but I'm taking out all that slack. That way we've got a little bit of resistance when we push it. This is gonna help us set it up on the roof of our CR-V. So, don't tighten it all the way. Just get it loosely installed.Then we can replace our end cap and lock that up.From here, we'll wanna test fit it to our roof. That way we can get our bar overhand set.Now, when you rest it in place, you want the legs to sit directly on top of the brackets. So we want it to fit down into the slots on each side.And then, before we tighten anything down, we wanna adjust our bar overhang. So we want the same difference from the underside here to the outside of the crossbar. Now, you can either use a tape measure or you can eye it up, whichever'd be easiest.And since we left those legs loose on our crossbar, we can slide that to the left or to the right and make sure it's right.Once we've got it set, then we can take it back off and tighten them up. So we'll take our included tool and just tighten these up, being careful not to move them, since they're already set.Again, no reason to over tighten. Just flatten out that lock washer. Now we'll set it back in place on the roof of our CR-V, make sure it's right, and then we'll fasten everything down.Looks like it fits good. With everything set, we can then take our bolt, take a lock washer, and then a flat washer, and we're going to hand tighten into the hole on top of the leg here.Now we'll leave it loosely installed. Let's get both side set up first.Then we can take a 10 millimeter wrench and tighten up the bolt. Now this you'll have to provide yourself.Again, no reason to over tighten. Just tighten it up to where that lock washer flattens out. And we'll do this for both sides.Last thing to do is to put on our covers.Once everything's assembled and installed correctly, we're ready to load up our favorite roof mount accessory and hit the road. But that's gonna complete our test fit of the Rhino-Rack Vortex Aero Crossbar Roof Rack system on our 2016 Honda CR-V.
Customer Satisfaction Score:
91% were satisfied with this product
9% of customers were not satisfied
- Product did not meet expectations
- etrailer mistake
- Did not fit
Customer Reviews
Custom RCP Fit Kit for 4 Rhino-Rack RC and RV Series Roof Rack Legs - Fixed Mounting Points - RRRCP33-BK
Average Customer Rating: 4.7 out of 5 stars (179 Customer Reviews)
Custom fit kit lets you mount Rhino-Rack RC or RV series legs to a vehicle with fixed mounting points. Legs mount to vehicle with attachment studs. Molded inserts cover bases when the legs are removed. Includes 4 pads, covers, and mounting hardware.by: Elizabeth09/29/2023
Update to my review: etrailer sent additional strips to set into the gaps on the bottom side of the rails and there is no longer any whistling, so I've rerated my purchase to Excellent. I'm not sure if the strips for the bottom side (the side that faces the roof of the car) should have come with my rails to begin with or if they need to be purchased separately (etrailer sent them to me at no charge after my initial review). Covering those gaps with duct tape will also do the trick.
by: Beach Dad09/27/2022
I am glad that etrailer puts the bundles together so you get all the parts you need for your vehicle. This is one part of three needed for my Honda CRV. Other sites make you figure all the components on your own with suggestions and it gets super confusing. etrailer all the way for me!
by: Barbara07/24/2022
Honda
I like the racks. They were extremely difficult for Me to install. I had trouble getting them to line up from left to right with the factory holes on my Honda Crv Touring. Also, I am getting a great deal of road noise but I am afraid to remove them for the summer in case they are difficult to reinstall for ski season.
by: Jamie D05/03/2019
Everything was there as it should be. Added bonus though was the youtube video on how to install the entire roof rack on my specific car. While the assembly is fairly straight forward, I was very grateful to watch and learn. And the product arrived pretty much when they said it would. Overall, very happy.
by: Michael03/24/2021
Easy install
by: Henry 03/04/2024
by: Michael 11/02/2020
Fit well and great customer service
by: Will 10/04/2022
by: Shannon 06/26/2021
by: John 08/05/2021
by: Neil12/25/2023
These were the only mounts I could find to fit a 2019 Toyota Highlander LE factory roof bolts. Have never used Rhino Racks before but was very happy to find their sturdy mounts for aero bar legs.
by: Danny10/05/2021
These Rhino-Rack products are solid. Installation was quite simple. It took me no more than 2 hours from taking off the OEM rails to getting the crossbars to tighten down.
Keep in mind that these legs were designed for the Toyota Prado (it even says so on the installation guide). Once you remove the Lexus OEM rails, you will notice a groove, about 3/4" deep and 1-1/8" wide, alongside the roof. If your GX does not come with the OEM rails, the grooves might already be covered up by the factory drip trim pieces (Toyota PN 75557-60050, 75555-60030). This Rhino rack kit does not come with any hardware to cover up the grooves. I was told they would not cause any leaks because the mounting points are tightly sealed.
But if you have severe OCD like me, those grooves will be bothering you (even though you can't see them). Instead of paying over $xxx for the OEM trims pieces. Fill them up with some 3/4"wide 3/8 inch thick insulation tape, then tape a strip of 1" wide, 1/8" thick neoprene rubber strip on top. The end product looks just like OEM. I hope my simple idea will help other fellow OCD survivors.


by: MissChiVus109/10/2023
The Rhino Rack BLOCKS my SUNROOF. It was recommended for my 2018 Highlander on the etrailer website. A 2018 Highlander with a sunroof is shown on etrailer in the install video. However, I can not open my sunroof. etrailer refuses to refund or exchange it and have no options for fixing this issue!
by: Brice10/02/2023
Rock solid attachment, the install didn’t go as smooth as hoped, but got it to work. Customer service was very available, though I do t think anything they could have done to make the install easier - chalked up to slight car model variations.
by: Phil03/25/2021
I searched a lot of websites before finding what I needed on etrailer.com for my 2012 Suzuki GV. I was looking for the proper mounts to install a Kayak rack system. Because my vehicle has a built in rail system it was very confusing what was needed. Thank you etrailer for hooking me up with the appropriate parts for the Rhino system, it worked great!
by: Nathaniel 04/26/2024
Proper fit on our 2023 CX-5.
by: Daniel06/20/2023
This fit perfectly on my 2019 Toyota Highlander! The instructions were very clear, and installation went quickly. And it looks great on the vehicle! The only reason this did not get a 5-star rating is because the design of the mounting points don't allow for a quick install or removal of the corresponding mounting platforms (which I rated also with 4 stars for the same reason.) Between the 2 different parts, it seems as though this could be engineered in such a way that would allow for quick removal/install and storage within the rack system itself, as is done on many other makes of vehicles and their OEM roof racks.
by: Sam07/12/2019
Great item, pretty easy to install. I posted a longer review for the full setup on our 2019 Highlander with 2 biggish kayaks under reviews for the rack pillars, Item: RRRCL4. When fully tied down, we used hood loops front and rear for both boats.
Great service from Carol C.


by: Charles02/28/2022
Two stars because the provided hardware interferes with the factory rails when using the provided cover plates (to be installed when you remove the cross bars & towers). Had to source my own 12mm long cap screws because provided 16mm were too long. Otherwise works as advertised.
by: Greg04/14/2022
Price, Quality, communication, Shipping Speed. Everything about this is excellent!


by: James 06/05/2023
We have had these on our 2016 Toyota Highlander for 1 year and we have not had any issues.
by: J05/19/2020
We bought the Rhino Rack after realizing that neither of the other brands would fit right onto our Highlander. I ended up having to purchase both of the other major brands to figure that out. In the end, I found out that the Rhino rack fit exactly to the stock configuration of our car. It also held much more weight than the comparable brands. We could not be happier with this rack. I would recommend just skipping the other brands and getting the Rhino Rack regardless of your vehicle model. I found it to be a very well-designed rack system. All of the accessories fit perfectly. It even looks great on our car.
by: Craig 08/23/2022
Worked as expected with my RCL legs and vortex crossbars. Great customer service.


by: Kyle05/27/2022
All parts arrived on time and undamaged, and installation was pretty straightforward and easy.


25
179
Show More Reviews
See what our Experts say about this Rhino Rack Roof Rack
- Recommended Roof Rack For 2016 Honda CR-V With Factory Flush Mount RailsIt sounds like you have the flush mount rails or fixed mounting points in the 2016 Honda CR-V so for that you would want Rhino Rack bars part # RRVA126B-2, fit kit part # RRRCP33-BK and RCL Legs part # RRRCL4 to fit the fixed mounting points. I have attached a photo of what the fixed mounting points look like on a Honda CR-V please let me know if that is not what you have and I can recommend another roof rack for you. I have also attached an installation video for your reference.
view full answer...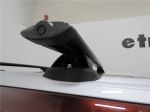
- Roof Rack Recommendation for Installing Roof Mounted Cargo Basket on 2012 Honda CR-VIn order to use the Thule # TH859XT Roof Mounted Cargo Basket, you will indeed need a roof rack to provide an attachment point to the vehicle roof, as the basket can't attach directly. If your CR-V has the roof rails that run front to back along the sides of the roof, Rhino-Rack offers a roof rack that would work great for you. You'd assemble the rack using these parts: • 49 Inch Vortex Aero Crossbars # RRVA126B-2 • RCL Leg kit, part # RRRCL4 • Fit Kit for existing holes in the rails...
view full answer... - Recommendation for a Kayak Carrier to Carry 2 Kayaks on a 2014 Honda CRVFor a kayak carrier, I recommend the Yakima JayLow Carrier, # Y04073, for your CR-V. The Yakima JayLow carrier can carrier up to two kayaks and includes tie-downs for secure the kayaks to the roof rack and to your vehicle. The rack has a capacity of 110 lbs for two kayaks and your crossbar spread must be a minimum of 24 inches. Before you can mount a kayak carrier on your 2014 Honda CR-V you will need to make sure you have a roof rack with crossbars installed on the vehicle. If you have...
view full answer... - Roof Rack With Crossbars Extending Past Feet For 2014 Honda CR-VThe # RRRVP33 is not the only option for your 2014 Honda CR-V with flush mounted rails. For longer crossbars that extend out further you can use the Rhino Rack Vortex Aero Bar roof rack. You will need the following: -Rhino-Rack Vortex Aero Crossbars - Aluminum - Black - 49" Long - Qty 2 # RRVA126B-2 -RCL Legs for Rhino-Rack Crossbars and Pioneer Platforms # RRRCL4 -Custom RCP Fit Kit for 4 Rhino-Rack RC and RV Series Roof Rack Legs # RRRCP33-BK This Vortex Aero is a low-profile crossbar...
view full answer... - Easily Removable Roof Rack Options for 2014 Honda CRV w/ Flush Mounted Roof RailsThe flush roof rails on your CRV will have a total of 8 roof rack mounting holes located on the inboard side of the flush rails. Once the protective cover is removed from each hole, the rack can be installed. The Thule AeroBlade Edge roof rack you referenced, part # TH7602-TH7603 can be removed between uses by removing a total of 8 Allen screws. The process should take about 10 or 15 minutes after the initial set up. The AeroBlade Edge provides a great looking roof rack, and the aerodynamic...
view full answer...
- Middle-of-the-Road Roof Rack Recommendation for Roof Box on a 2012 Honda CR-V EX-LYou are correct that there is a break-point in roof rack quality. A middle-of-the-road option that I recommend using for your 2012 Honda CR-V EX-L is the Rhino-Rack Vortex Aero Crossbar system which includes the following for your flush mount rails: Rhino-Rack Vortex Crossbars # RRVA126B-2 RCL Legs - # RRRCL4 RCP Fit Kit - # RRRCP33-BK The biggest differences between the Rhino-Rack setup vs a Thule setup for example is that the Thule pieces tend to fit together a little easier and the...
view full answer... - Will the Thule Hullavator Work On a 2012 Honda CR-V With Factory CrossbarsI do have options for you but the Thule Hullavator Pro Kayak Carrier part # TH898 will not work with factory crossbars because there is no overhang in which the crossbars stick out past the mounting feet. This is needed so that the carrier does not come into contact with the vehicle while tilted down. In order to use the Thule Hullavator you will have to replace the factory roof rack for which I recommend using the Rhino-Rack Vortex Aero Crossbar System part # RRVA126B-2, part # RRRCL4,...
view full answer... - Easily-Removed Roof Rack System for a 2014 Honda CR-VIt sounds like you're referencing the Rhino-Rack system made for the 2014 Honda CR-V with flush rails. This system includes: Vortex Aero Crossbars, part # RRVA126B-2 RCL Legs, part # RRRCL4 Custom RCP Fit Kit, part # RRRCP33-BK The fit kit allows you to detach the legs and crossbars without having to remove the fit kit as well. It will stay on the rails and keeps a nice look. I've linked to a video review of this system where you can see how that works.
view full answer... - Rhino-Rack Roof Rack Kit for a 2014 Honda CR-V with Flush Mounted RailsThe Rhino-Rack RLCP Leg Kit RRRLCP33 that you referenced has been discontinued but you can use the RCL Legs # RRRCL4 paired with the RCP Fit Kit # RRRCP33-BK to mount the 49" Rhino-Rack Vortex Aero Crossbars # RRVA126B-2 on your 2014 Honda CV-R. The current pricing of each product/kit can be found on their respective pages. I have attached an installation video of this kit on a 2016 Honda CR-V for you to reference.
view full answer...
- Will Roof Rack for 2015 Honda CR-V with Flush Rails Interfere with SunroofSince your 2015 Honda CR-V has flush-mounted rails the roof racks that fit the car will each install into fixed mounting points so there is not a way to add a larger spread. For a roof rack that will carry your canoe a great option is from Rhino-Rack because of their usable 49 inches of crossbar space and strong 165 lb capacity. This rack is made up of: - Rhino-Rack Vortex Aero Crossbars # RRVA126B-2 - RCL Legs for Rhino-Rack Crossbars # RRRCL4 - Custom RCP Fit Kit # RRRCP33-BK When...
view full answer...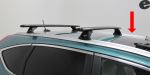
- Roof Rack for 2014 Honda CR-V with Flush Roof Side RailsWe do have roof racks for your 2014 Honda CR-V that has flush (not raised) side rails on its roof. Some of these racks, like the Rhino-Rack Vortex do install using the vehicle's fixed mounting points, while others from SeaSucker like their Monkey Bar system # 298-SX6000B use their specialized vacuum cups to make their racks easily removable in only seconds if that is a feature you prefer. For a quiet aero-style rack that does not cost a fortune I recommend the Rhino Vortex system made...
view full answer... - Roof Rack For 2016 Honda CR-V With Flush Rails For Thule HullavatorWhile there is a roof rack that fits your 2016 Honda CR-V that will allow you to use mount the Hullavator, it is too large to mount two of them, so to carry a pair of kayaks you could use one Hullavator but you'd need a J-style carrier for your second kayak. Let's go ahead and start with the roof rack for your 2016 Honda CR-V with flush-mounted rails, and the roof rack I highly recommend for your CR-V is from Rhino-Rack because it has the longest crossbars available for your vehicle to...
view full answer... - Replacing the Factory Roof Rack on a 2014 Honda CR-VAll of the roof racks for your 2014 CRV will have the fixed mounting points you referenced that are 31-3/4 inch spread. To give you a better quality system than the factory system you referenced, I recommend the Rhino-Rack system. This kit consists of: Rhino-Rack Vortex Aero Crossbars - 49" Long - Qty 2 # RRVA126B-2 RCL Legs # RRRCL4 Custom RCP Fit Kit # RRRCP33-BK The biggest limitation of this system is its mounting location. The weight capacity is 165 pounds on the 2014 Honda CR-V,...
view full answer...
Do you have a question about this Roof Rack?
Info for this part was:

Video by:
Andrew K

Video Edited:
Jacob T

Test Fit:
Hayden R

Updated by:
Wilson B

Updated by:
Alex H

Written by:
Daron K
At etrailer.com we provide the best information available about the products we sell. We take the quality of our information seriously so that you can get the right part the first time. Let us know if anything is missing or if you have any questions.
Product Experts Available Now!
Call 1-800-940-8924
Thank you! Your comment has been submitted successfully. You should be able to view your question/comment here within a few days.
Error submitting comment. Please try again momentarily.